Decoupage a Set of Nesting Birds
THIS POST MAY CONTAIN AFFILIATE LINKS. PLEASE SEE OUR FULL DISCLOSURE POLICY FOR DETAILS.
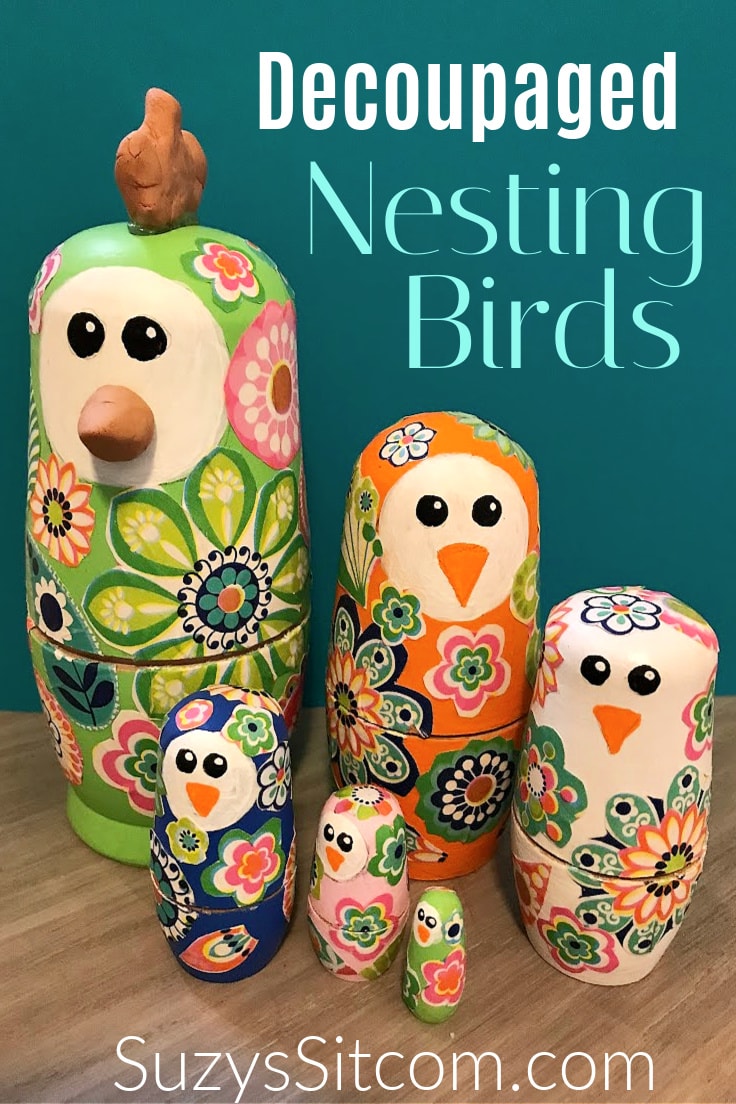
Create a whimsical set of Nesting Birds with the art of decoupage! This beautiful nesting bird set is simple to create using pretty wrapping paper and Mod Podge. Create something beautiful for your home!
Decoupage is the art of decorating objects with clips of pretty paper and glue. It is a simple process with very satisfying results. I love the fact that you can make a plain object amazing with just paper and glue! Create a beautiful set of nesting birds with the easy art of decoupage!
This is Suzy from Suzys Sitcom, and I would love to share with you my latest project. I had a set of unfinished wooden nesting dolls that have been sitting around waiting on inspiration. While perusing the local hobby store, I happened upon some beautiful wrapping paper that included lots of colorful flowers and paisley. And inspiration hit!
How to Make Decoupaged Nesting birds
Begin with a set of unfinished wooden nesting dolls and then let your imagination take over. I am partial to birds and paisley, oh and lots of colors too. You can use wrapping paper for the decoupage, tissue paper, colorful napkins, or most any type of thin paper for a great decoupage technique.
The entire tutorial is in a printable card at the bottom of this post. But first, here is a little bit of info about the tools and supplies you’ll need.
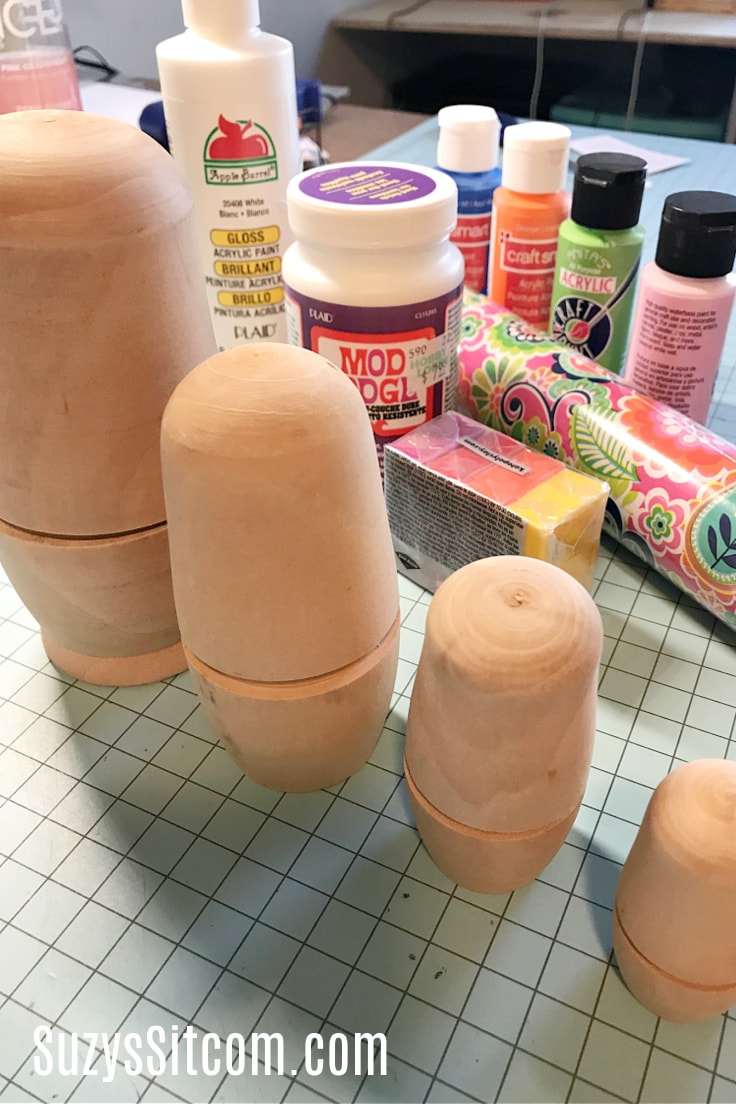
What you need:
Want more ideas like this? Subscribe today to get our weekly Ideas in Your Inbox newsletter plus other exclusive gifts and offers — all for FREE!
- Unfinished Wooden Nesting Dolls
- Colorful wrapping paper, tissue paper, or napkins
- Acrylic Paint
- Mod Podge
- Air Dry Clay
- Hot glue
Decoupaged Nesting Bird Tips:
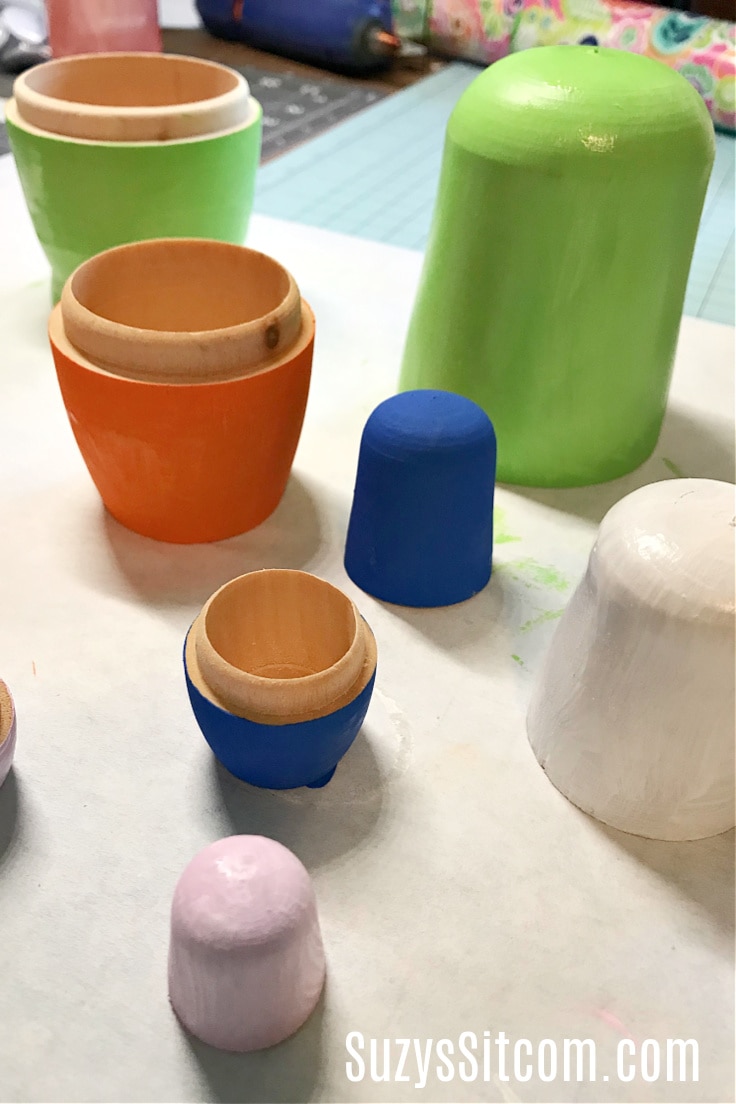
Paint the nesting birds
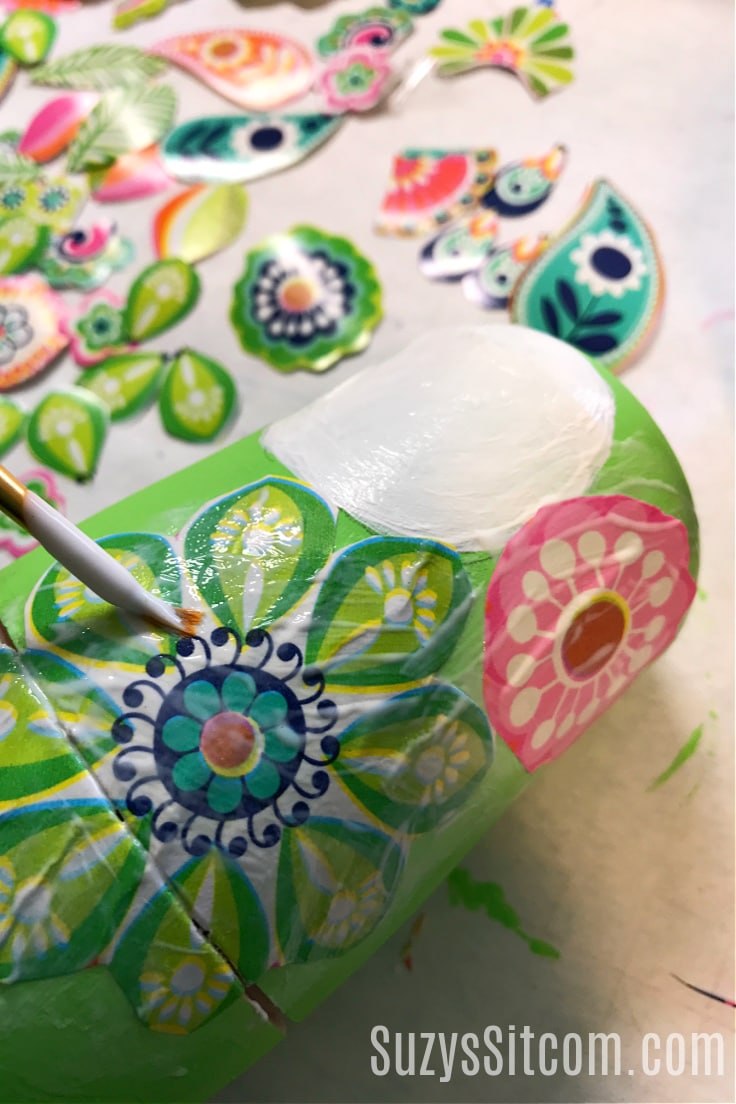
Use acrylic paints based on the colors in your decoupage paper. For mine, I chose lime green, orange, white, blue, and pink to match the design in the colorful wrapping paper that I chose. Paint each piece several coats and allow to dry. Be sure to not get paint on the internal sections, to allow easy assembly of pieces.

Cut out decoupage pieces
Using a sharp pair of scissors, cut out the designs that you would like to decoupage. I chose assorted flowers and paisleys from the wrapping paper. You will need to cut quite a few pieces in larger and smaller sizes to fit the different size nesting birds.
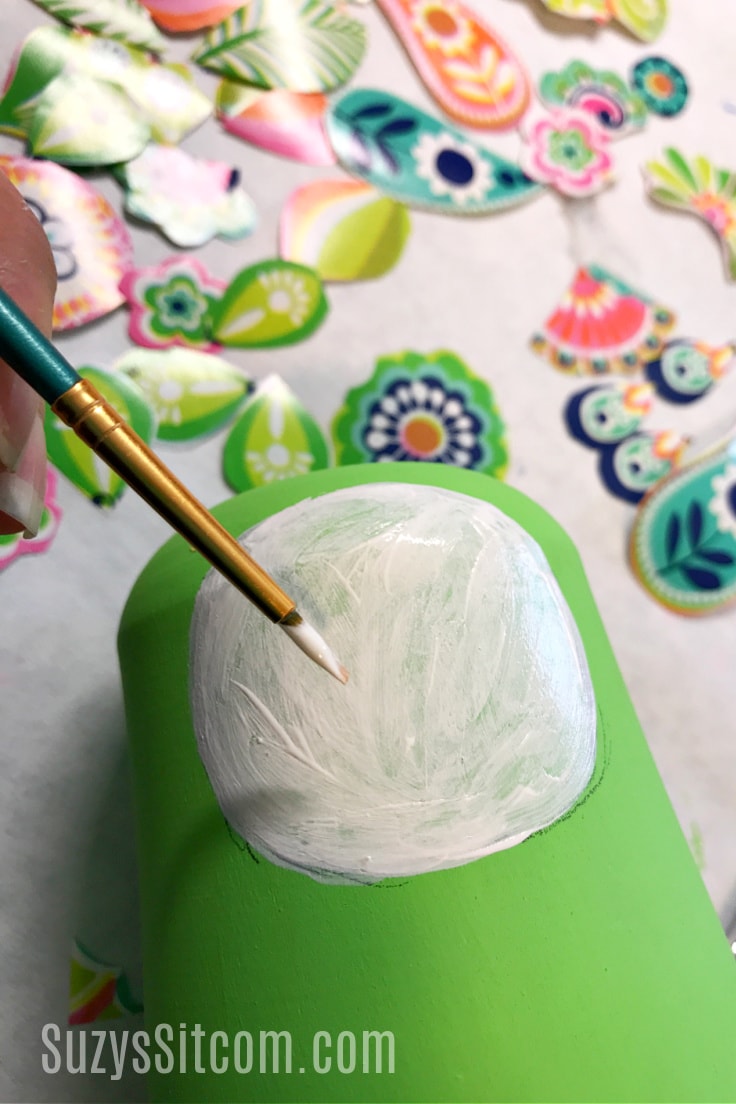
Paint the faces
Draw a circle with a pencil on the top section of each nesting doll and paint it white for the face. It may take several coats. (On the white nesting doll, you can skip this step).
Decoupage the Nesting dolls
Paint an area of the nesting bird with Mod Podge, then place a cut design over top, pressing it down with your fingers. Paint a thick layer of Mod Podge over top, smoothing it down with your paintbrush. Continue around the entire nesting bird, placing the pieces as desired.
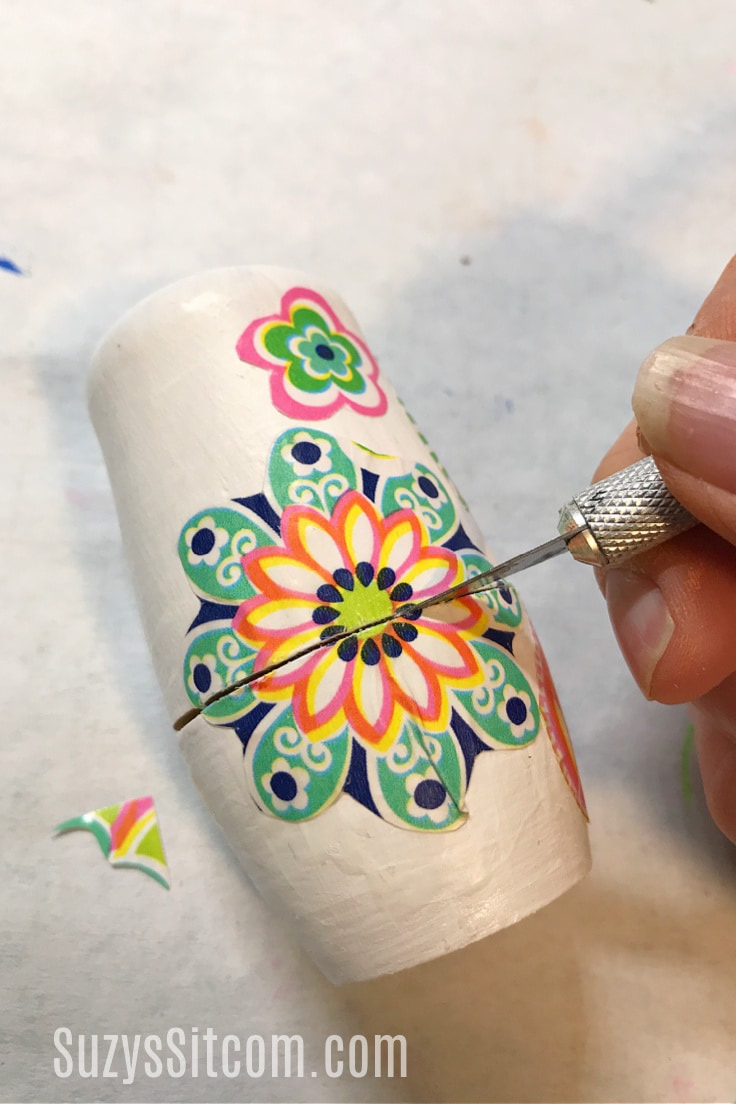
Allow the Mod Podge to fully dry and then use a sharp craft knife to cut along the seams so that each nesting bird can be opened.
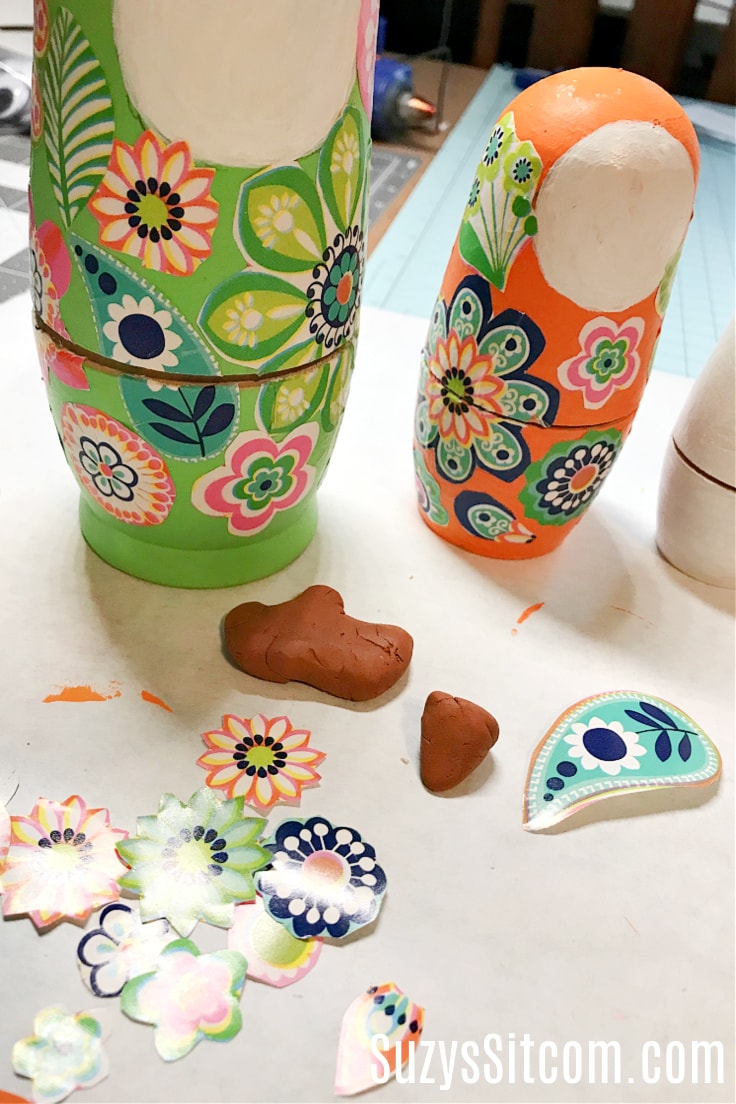
Create a Beak and Comb
The largest bird can be embellished with a clay beak and comb. Simply create them with air-dry clay and allow them to dry while you finish the details on the nesting birds.
Decoupage all of the nesting birds
Work from largest to smallest, adding details as you go with Mod Podge and paper designs. Continue decoupaging until the pieces make you happy.
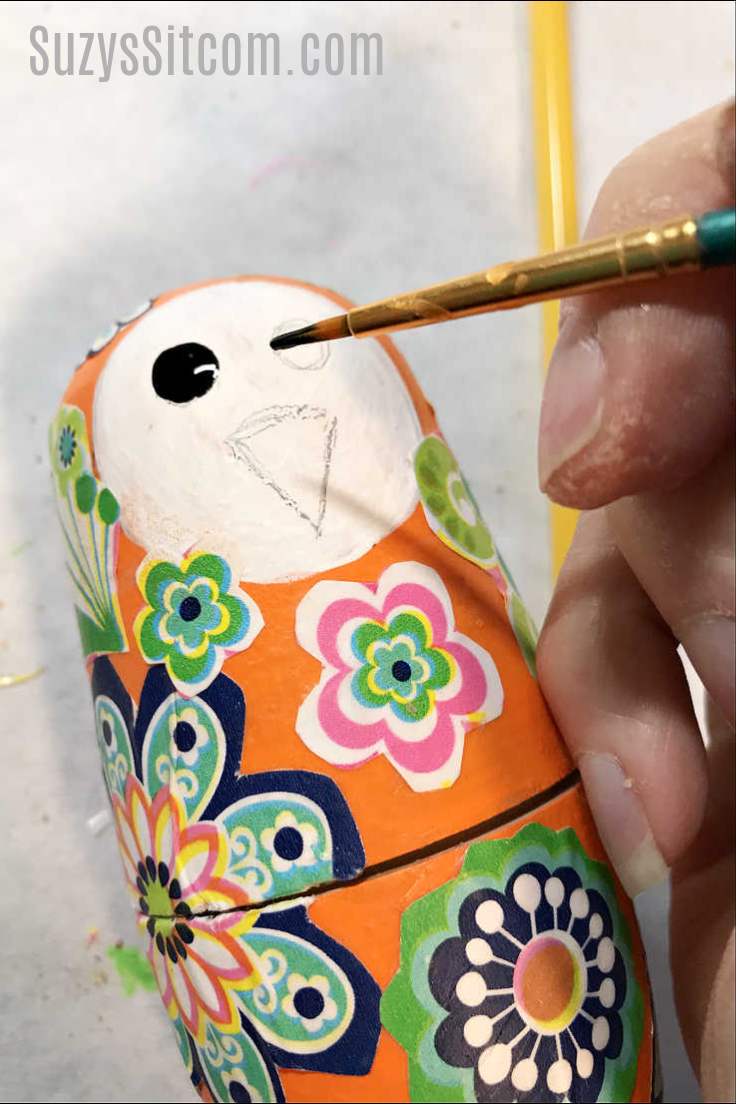
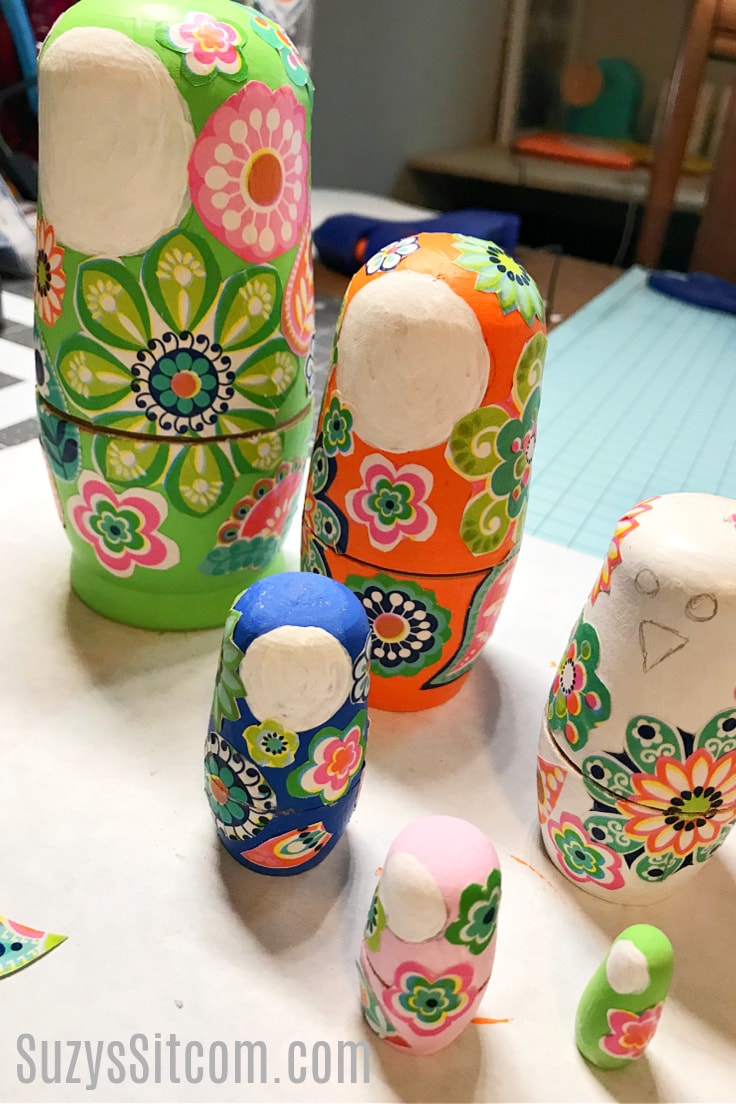
Add details to the faces
Using acrylic paint, add eyes and beaks to the smaller birds.
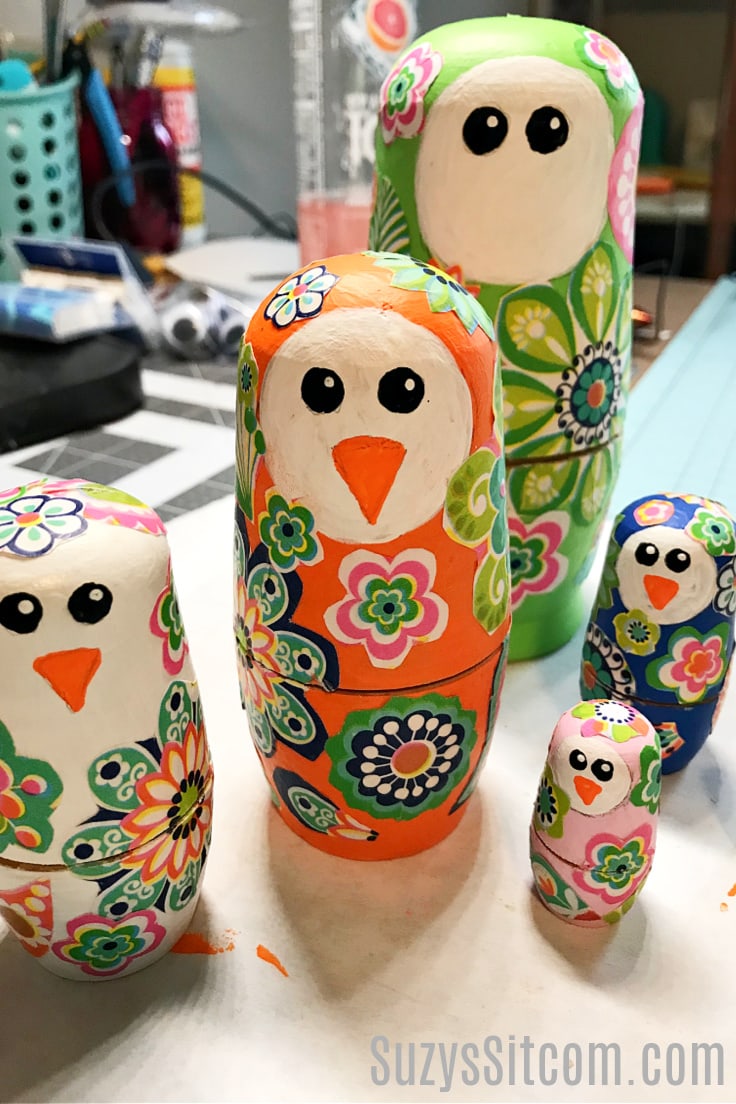
Add just eyes to the largest bird. The final step is to hot glue the air-dried beak and comb.
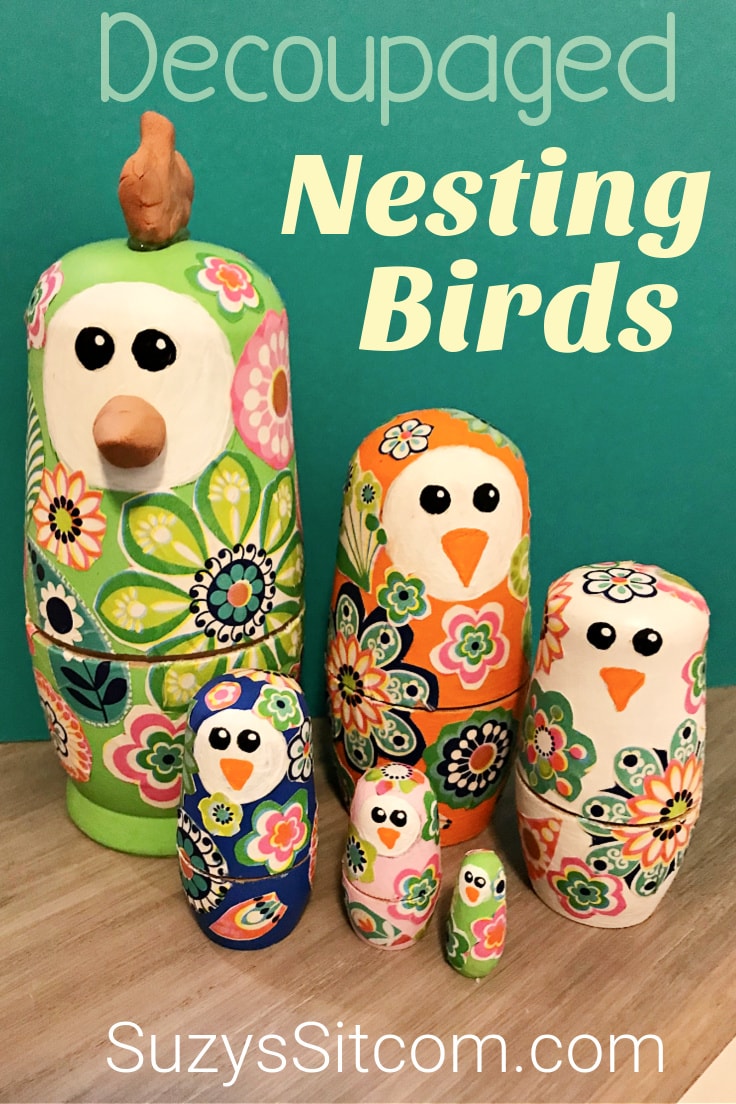
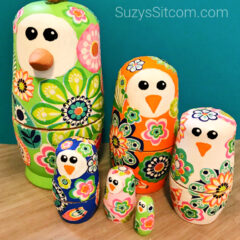
And there you have it! A beautiful set of nesting birds! I have to tell you that my granddaughter instantly claimed this set. I may have to make another one for myself!
Here’s the printable card with everything you need to know about how to make Decoupaged Nesting Birds!
Decoupaged Nesting Birds
Equipment
- Hot Glue Gun
- Crafting Knife
- scissors
- paint brushes
Supplies
- 1 set Unfinished Wood Nesting Dolls
- 1 ea Printed wrapping paper tissue paper, or napkins will work also
- 1 ea Mod Podge
- 1 oz Air Dry Clay
- 1 set Acrylic Paints In colors of your choice
- 1 ea Hot glue
Instructions
- Paint the Nesting Birds
- Cut out decoupage pieces from wrapping paper
- Paint a white circle for faces
- Use Mod Podge to decoupage paper pieces onto the wooden birds.
- Allow Mod Podge to fully dry and use a craft knife to cut where the pieces join.
- Create a beak and comb for the largest bird with air dry clay. Allow to dry over night.
- Use acrylic paint to paint the faces on the birds.
- Hot glue the beak and comb onto the largest bird.
Love the ideas you see here on Ideas for the Home by Kenarry®? Subscribe today to get our FREE DIY & Craft Planning Calendar, plus our weekly Ideas in Your Inbox newsletter filled with creative tips and exclusive offers!
Do you love Decoupage?
Here are three fun decoupage projects exclusively from SuzysSitcom!
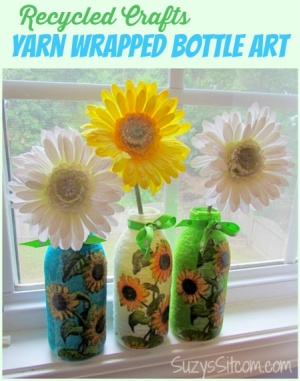
Decoupaged Yarn Wrapped Bottle Art
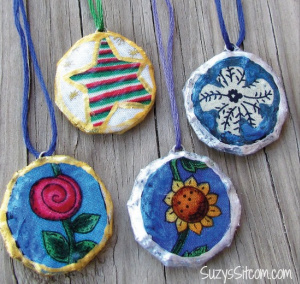
Decoupage Pendants made with Cardboard
You may also enjoy these 3 decoupage ideas on Ideas for the Home by Kenarry® –