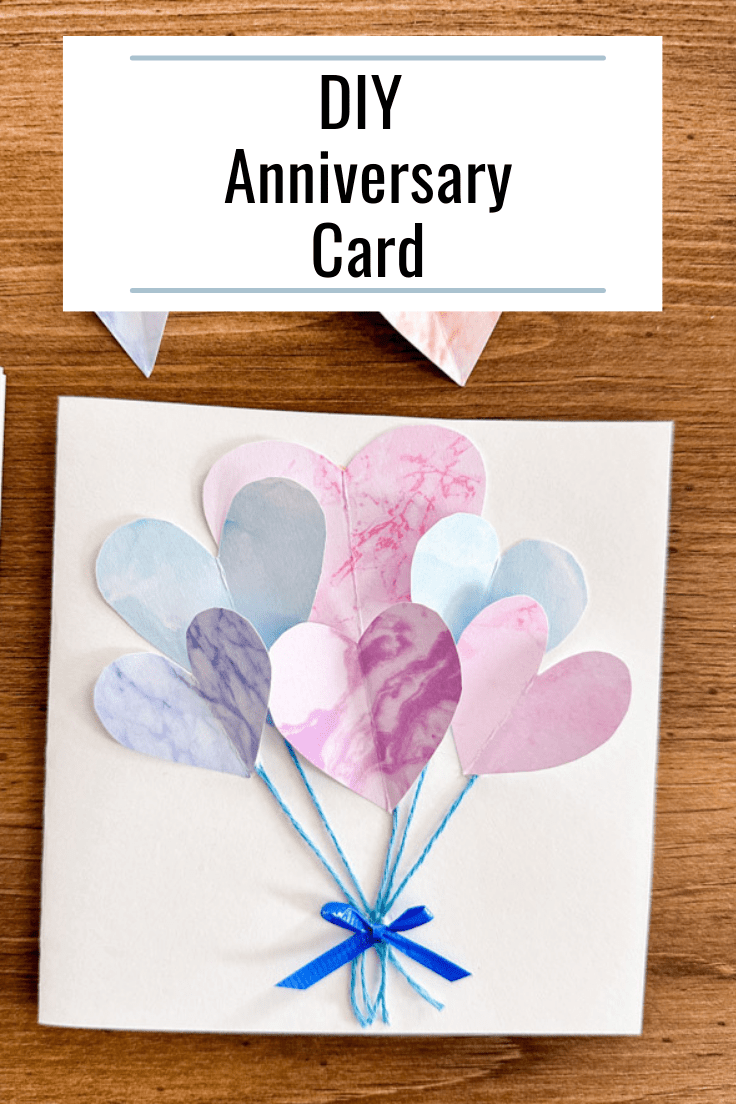
DIY Anniversary Card
THIS POST MAY CONTAIN AFFILIATE LINKS. PLEASE SEE OUR FULL DISCLOSURE POLICY FOR DETAILS.
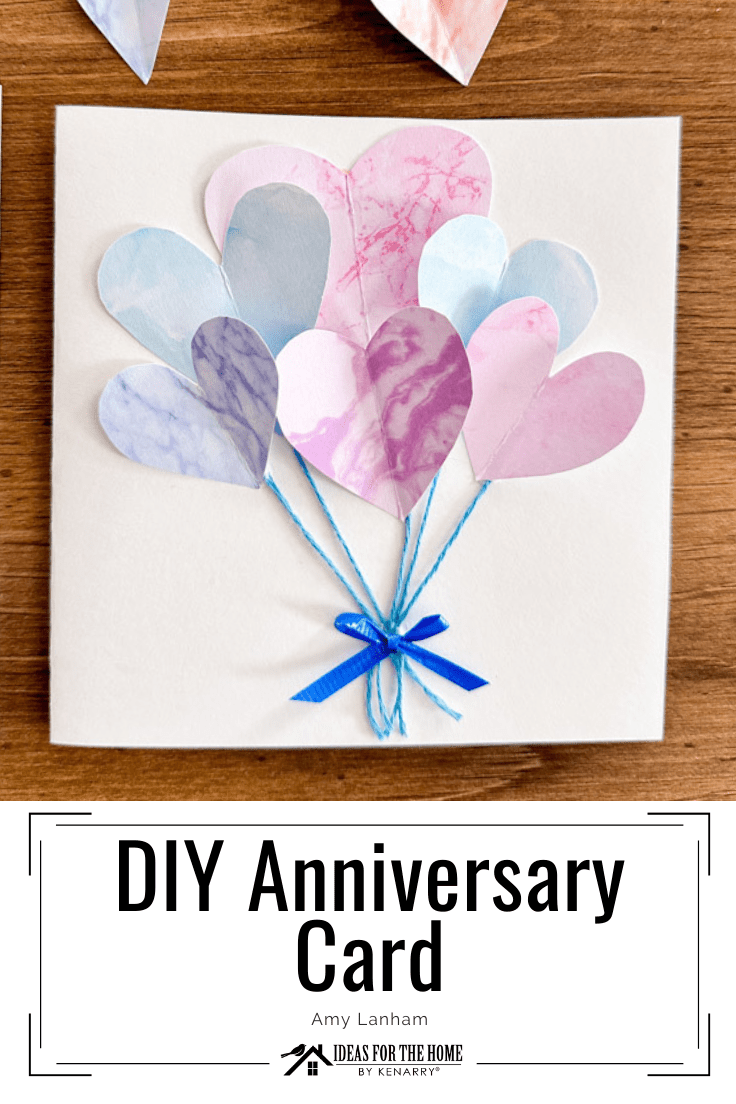
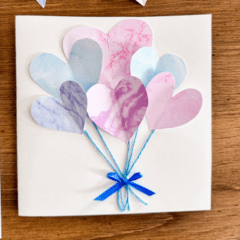
This simple balloon heart DIY anniversary card is the perfect way to tell your significant other that you love having them in your life.
I love celebrations of any kind! And I love a good reason to shower my partner with love. Handmade cards are like gifts to me. I would personally much rather receive a heartfelt handmade card than just about any other gift.
The perfect time to give your spouse or partner this card is on your next date night. Surprise them with this thoughtful gift, they will love it!
But let’s face it, with kids and work and life I just don’t always have the time to make something super elaborate. And while I love my Cricut, I also love a super easy, quick, cute project that doesn’t make me get out all of my craft supplies.
How to Make this DIY Anniversary Card
This card is so simple and the end product is adorable! It’s also very easy to create this same card for other occasions.
What you need:
Want more ideas like this? Subscribe today to get our weekly Ideas in Your Inbox newsletter plus other exclusive gifts and offers — all for FREE!
Craft Tools Needed:
Supplies:
- Cardstock
- Patterned Paper
- Glue
- Ribbon
- Baker’s Twine (optional)
- Pen (optional)
DIY Anniversary Card Tips:
How to make the hearts
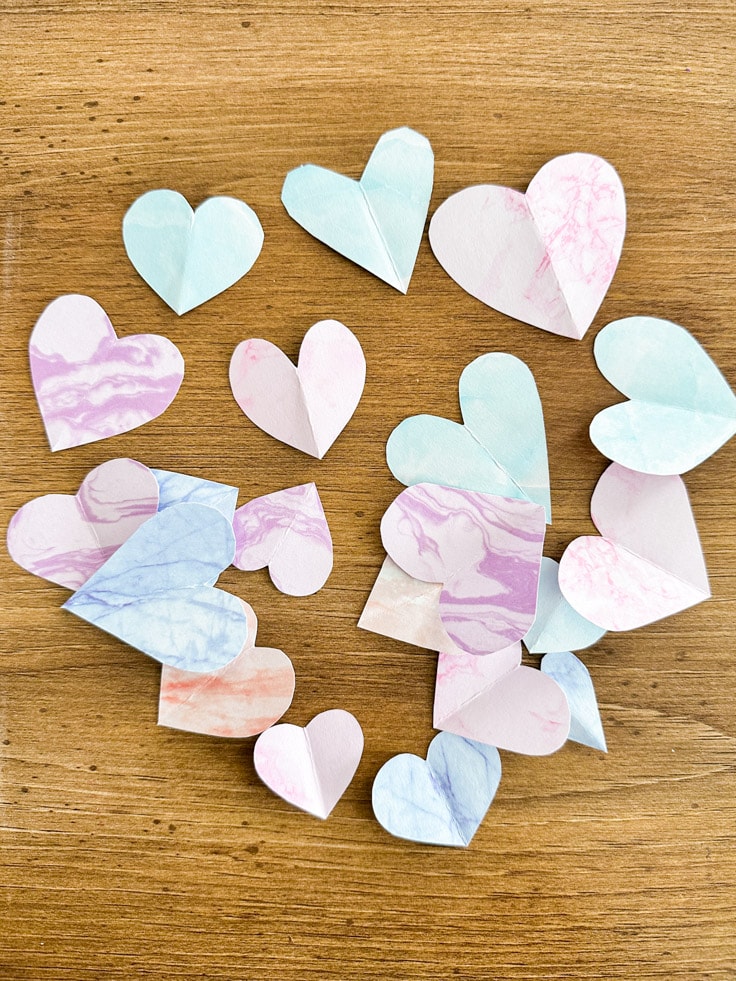
If you wanted to, you could definitely break out your favorite paper cutter and create perfectly shaped hearts. But this DIY anniversary card can be made with just a pair of scissors.
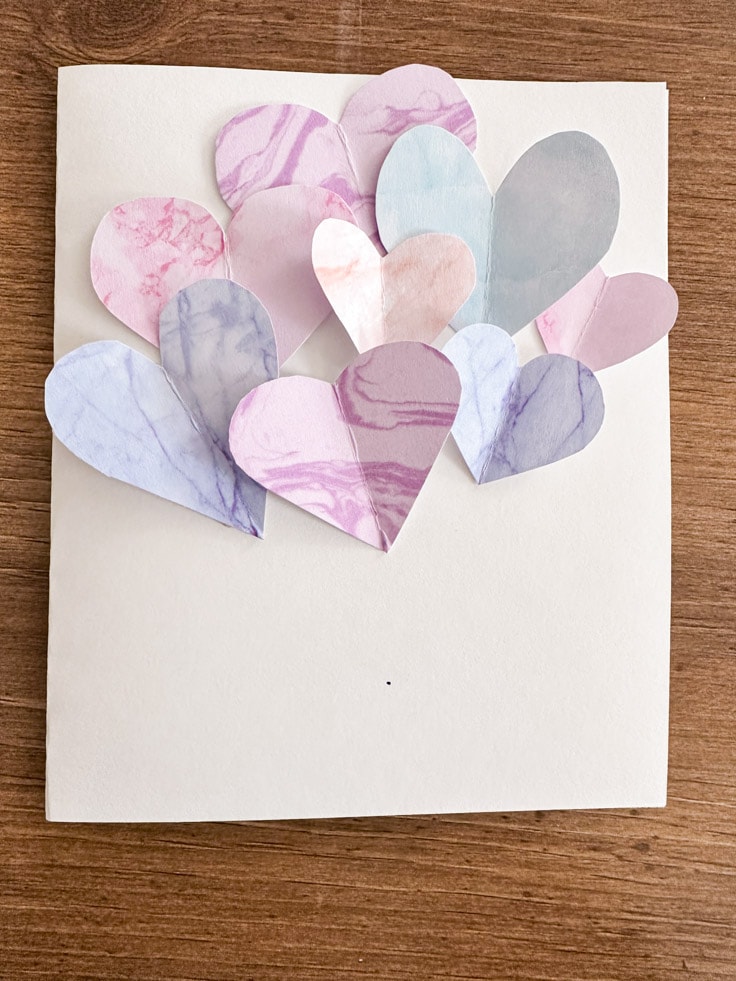
I think part of the charm of the card is that not all the hearts are the same size. But, we still want symmetrical hearts.
The easiest way to get symmetrical hearts is to fold the craft paper in half. Then using a pen, draw on a half heart shape. Or just cut out half a heart.
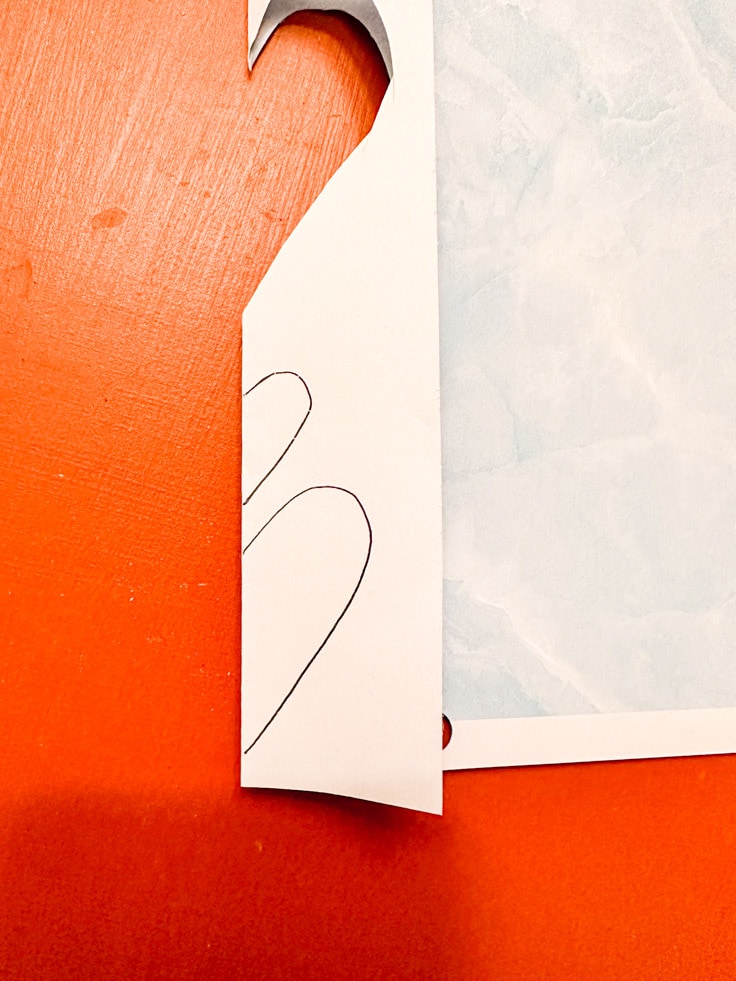
When the paper is opened up, it’s a perfectly symmetrical heart!
How to get perfect placement on the card
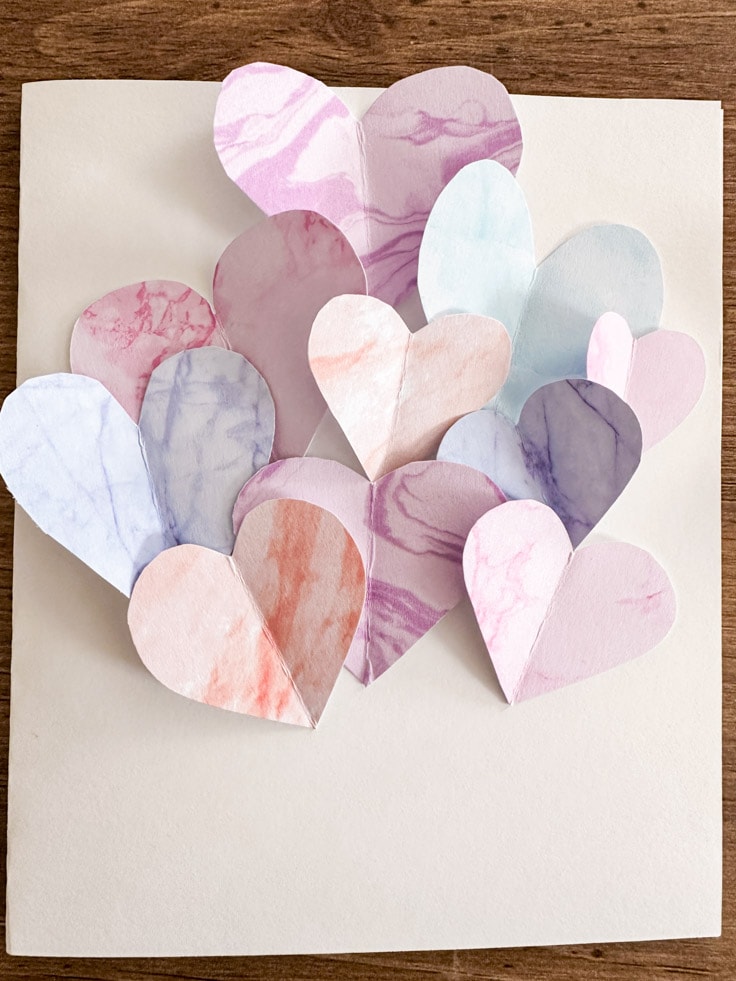
The most difficult part of this project is getting perfect placement of all the hearts. They’re supposed to look like balloons, so they need to overlap a little. But I still want them to be hearts too.
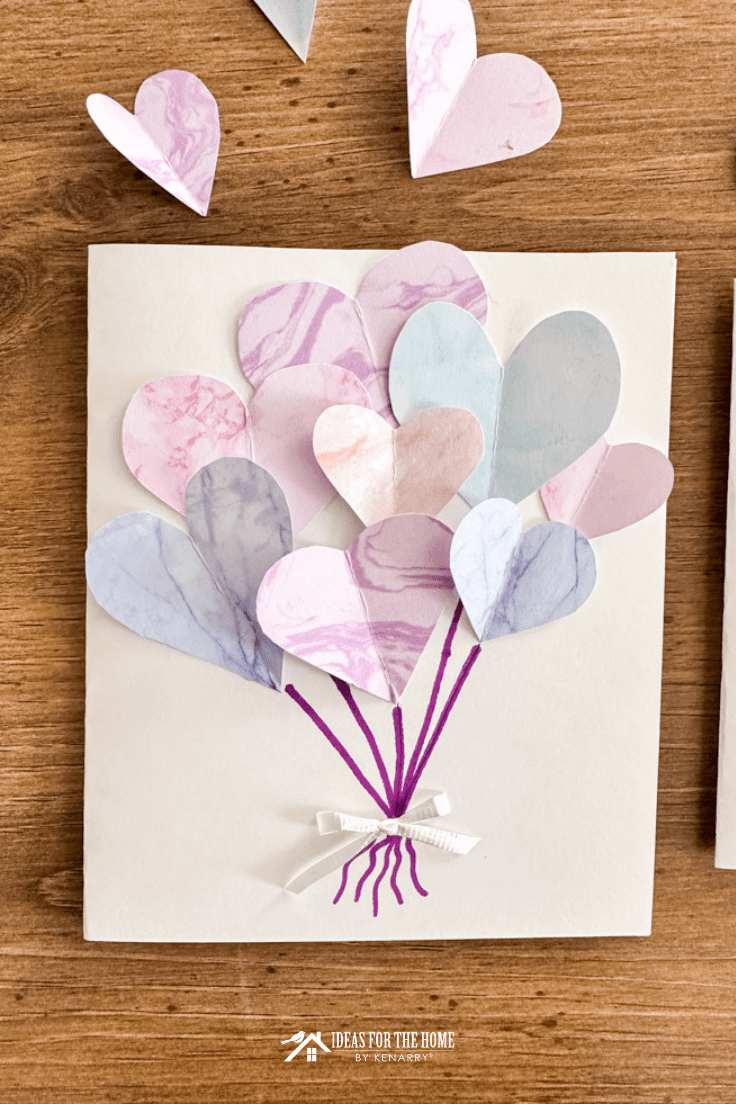
First, I cut out way more hearts than I needed. This allowed me to play around with the placement.
Then, I laid out all the hears on the cards first. Moved them all around and decided where each should go. Then I snapped a picture to help me remember the placement.
Starting with the heart that was under all the hearts, I gently picked it up and then glued down the center.
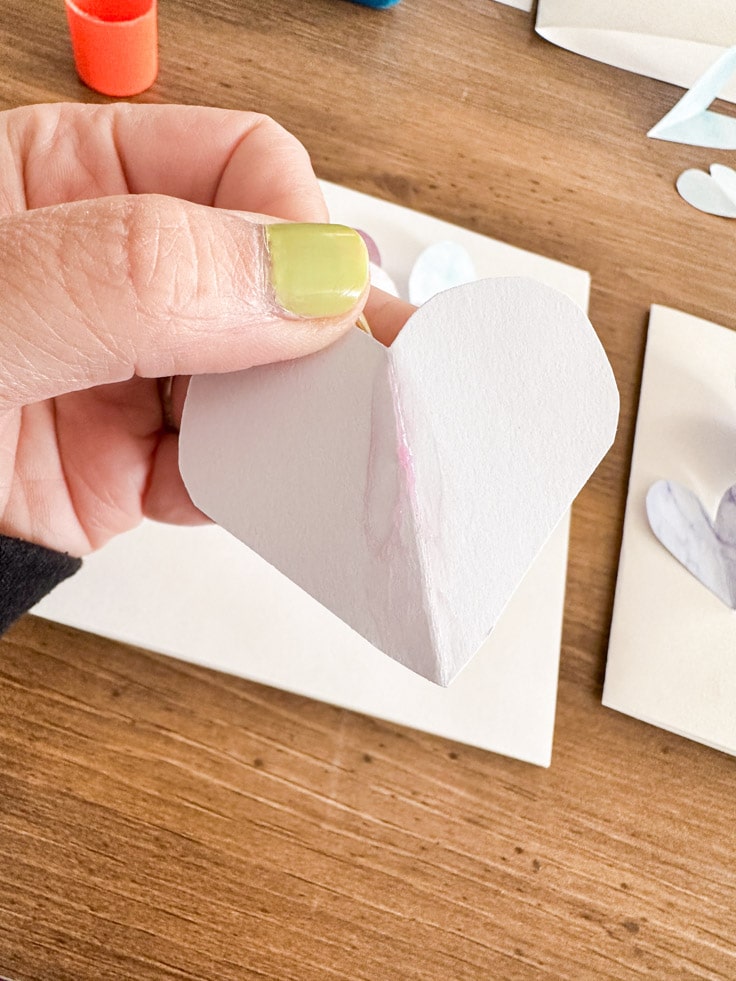
Then gently tucked it back into its place at the back of all the other hearts.
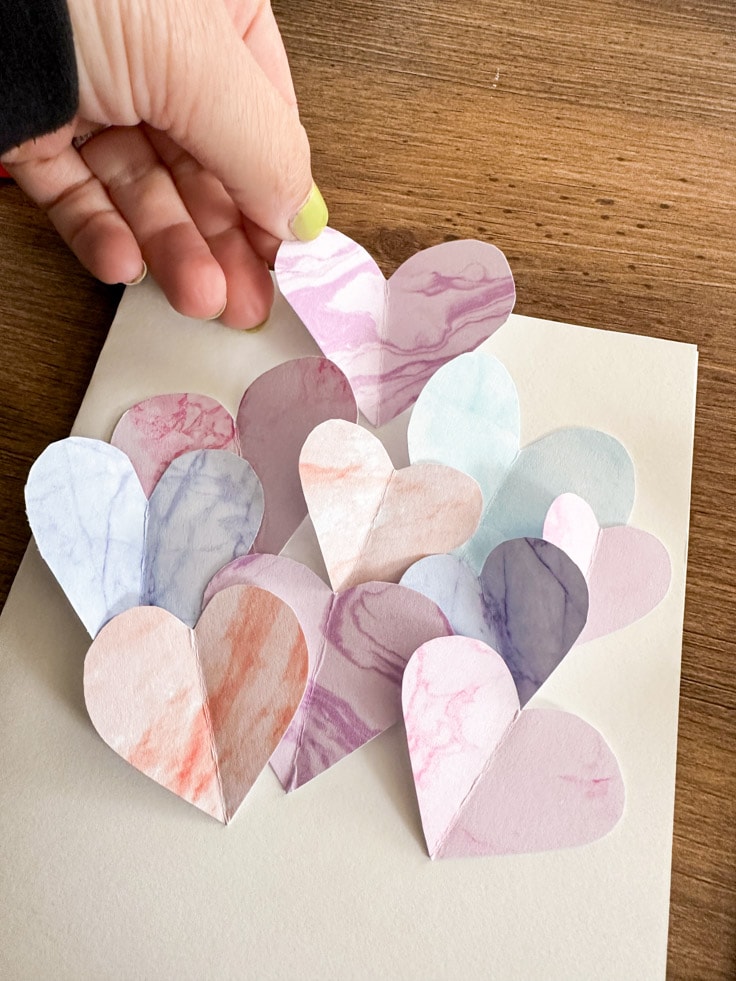
I continued this until each heart had been glued down. Doing it this way allows the hearts to be overlapped and keeps the original layout pretty well!
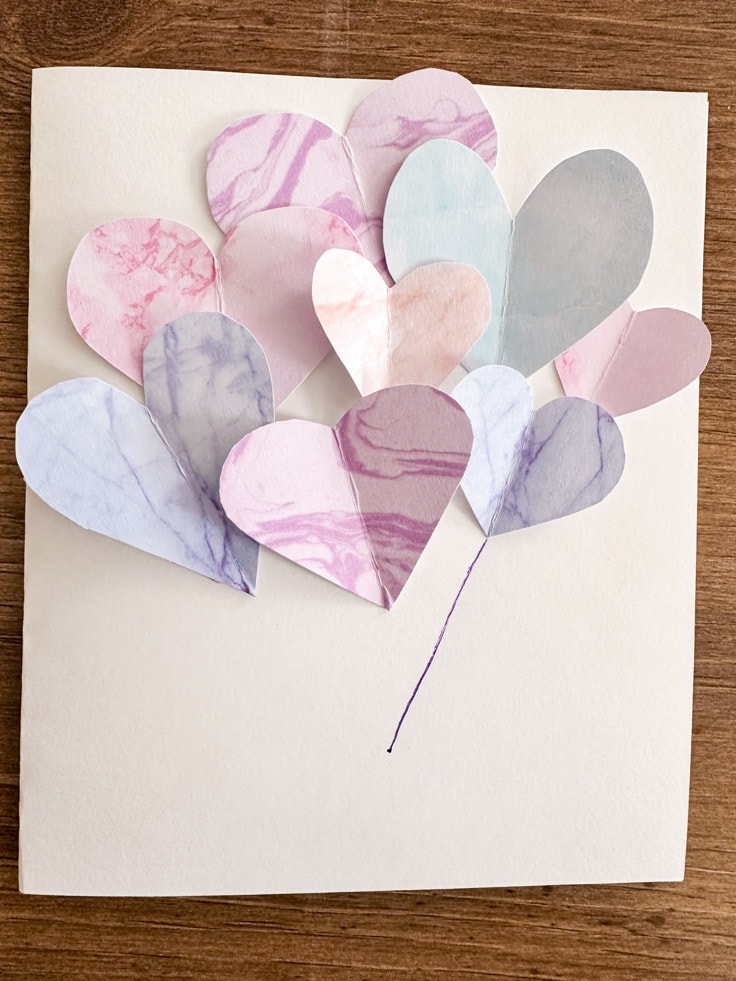
How to get the strings on
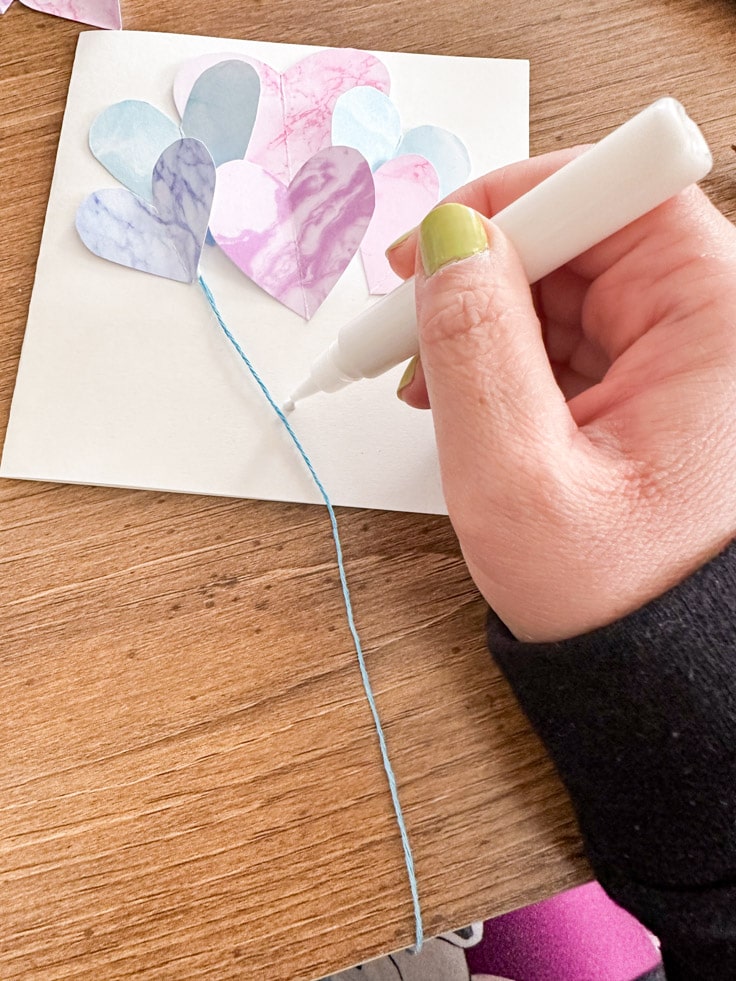
For the string on the balloons, there are two options. Draw them on with a pen or marker, or glue twine. Each option is adorable, so use whatever you have!
For the pen, I started by making a dot where I wanted all the strings to meet.
Then, I drew a line from the dot to the heart. I thought it was easiest to go from the dot, since the dot is tiny and the line can be drawn to any place on the heart.
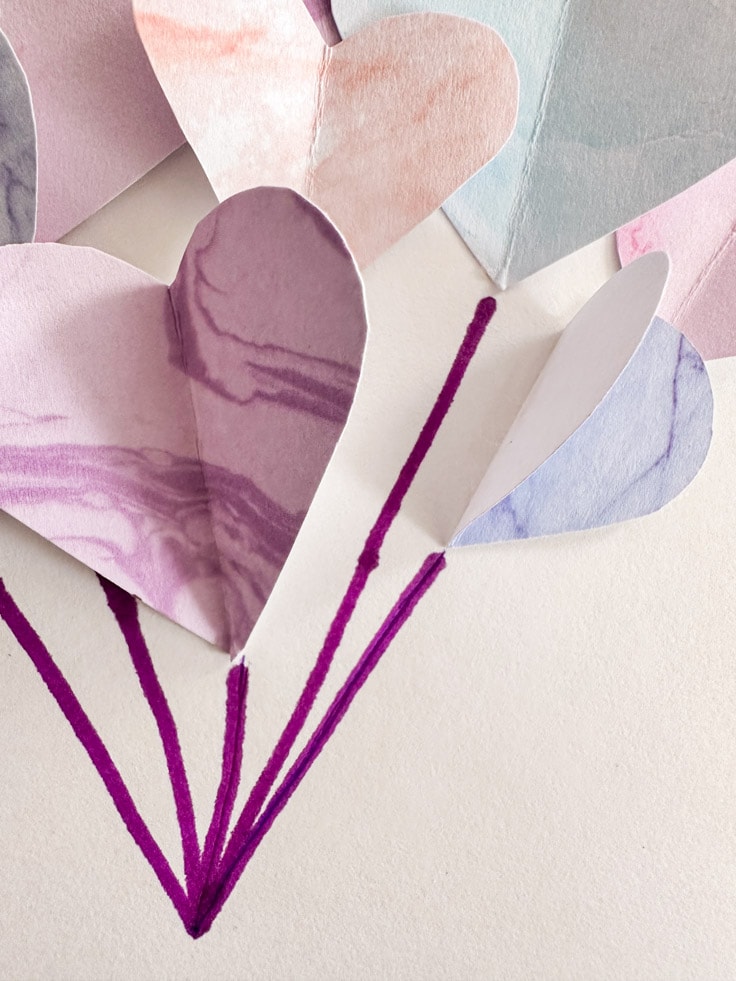
To make the lines look extra realistic, lift up the individual hearts and draw underneath them to get to some of the ones above. Then gently put them back down.
Once all the hearts had a line drawn from the dot to the heart, I added some squiggly lines at the bottom of the line to look like string hanging.

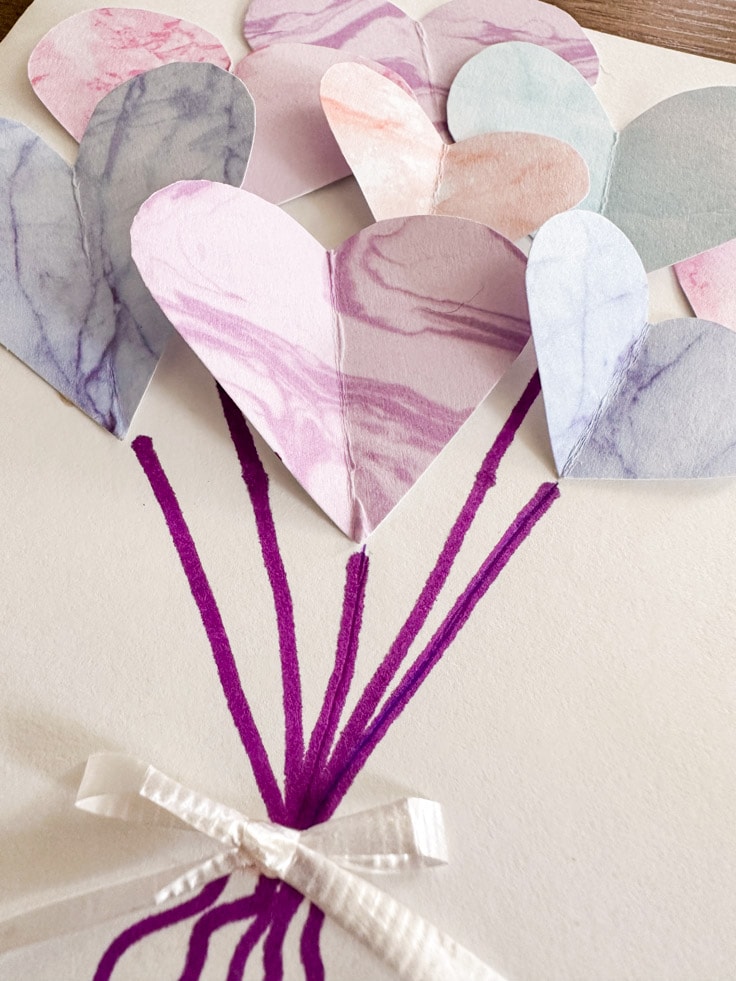
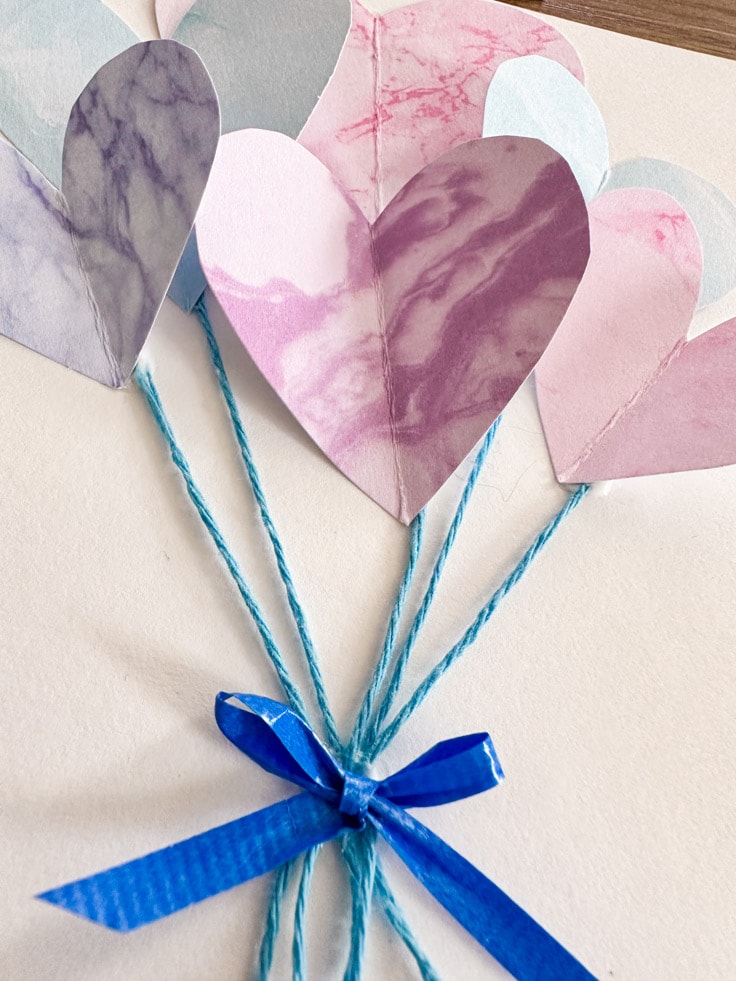
And then finished it off with a bow!
Perfect String Placement
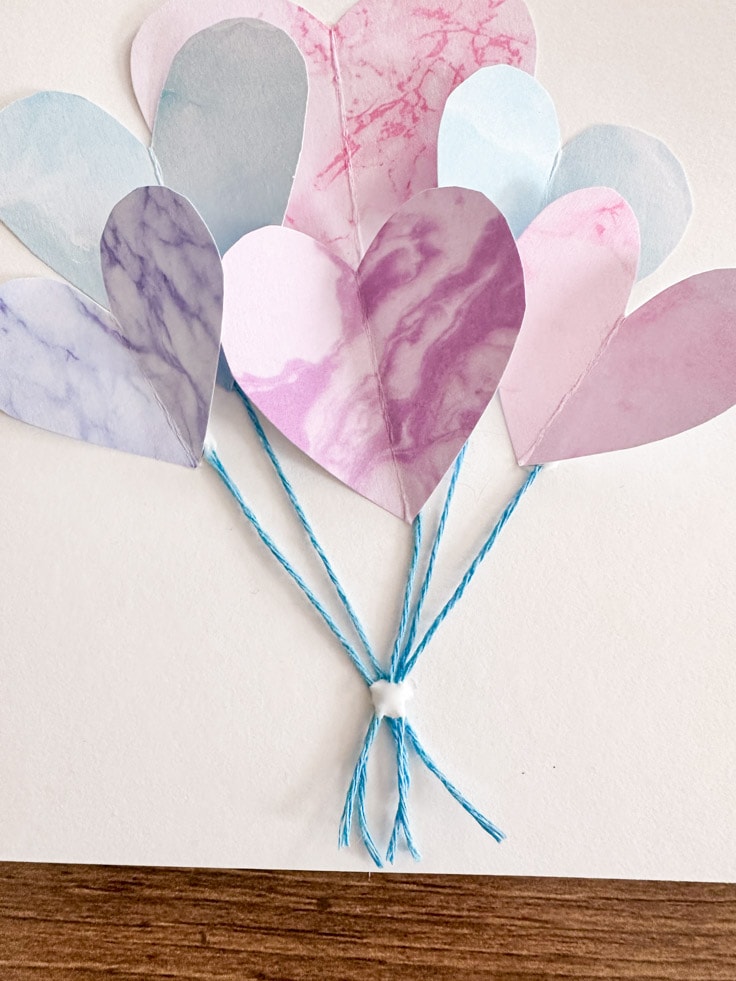
For the twine, I used white glue and started by applying it under one of the hearts and using the tip of the glue applicator to gently push the string in place.

Then I put a dot of white glue where I wanted all the strings to meet. I did not add any glue to the length of the string. Just under the heart and the one spot where they all meet.
I continued to do this until each balloon had a string that went to it. Gently lifting up the edges of the hearts to get to the bottom of the balloons underneath. Then cut off the strings at the bottom of the card.
I used a ribbon bow to cover up the spot where all the strings meet.
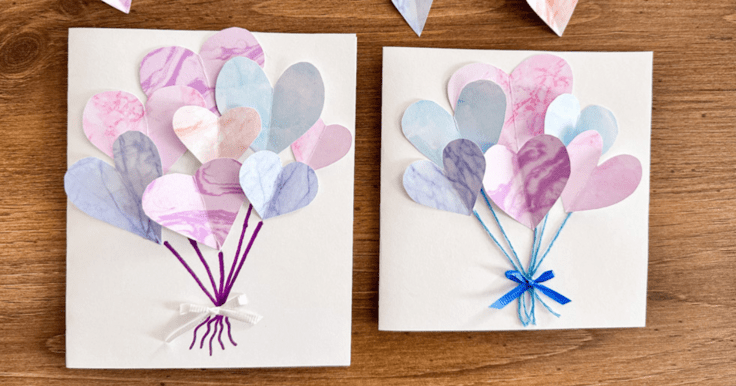
Both of these cards came out so cute and I’m not sure which one is my favorite! Which one will you make? I’ll be giving both to my partner for our anniversary. You can never say I love you enough!
DIY Anniversary Card
Equipment
- 1 Pair of scissors
Supplies
- 1 piece cardstock
- coordinating patterned cardstock any colors
- 1 stick glue
- 1 white liquid glue optional
- Baker's Twine optional – any color
- Pen optional – any color
- Ribbon any color
Instructions
- Start by cutting out 5-10 hearts in various sizes. Fold the hearts in half putting the patterned sides together to create a 3D effect once glued.
- Fold an 8.5×11 cardstock sheet in half, and cut to the desired card size.
- Arrange hearts on the front of the cardstock card.
- Use a glue stick to apply a small amount of glue onto the folded edge of the hearts. Working from the back, forward, glue the hearts on to the cardstock card.
- Using a pen or string, create a line from each heart, connecting all the hearts with lines in the center of the card.
- Glue on a bow to the point where all the lines meet.
Love the ideas you see here on Ideas for the Home by Kenarry®? Subscribe today to get our FREE DIY & Craft Planning Calendar, plus our weekly Ideas in Your Inbox newsletter filled with creative tips and exclusive offers!
What’s Next?
If you enjoyed this DIY anniversary card, here are some other anniversary ideas.
You may also enjoy these card ideas on Ideas for the Home by Kenarry® –