How to Make DIY Christmas Garland with Vintage Ornaments
THIS POST MAY CONTAIN AFFILIATE LINKS. PLEASE SEE OUR FULL DISCLOSURE POLICY FOR DETAILS.
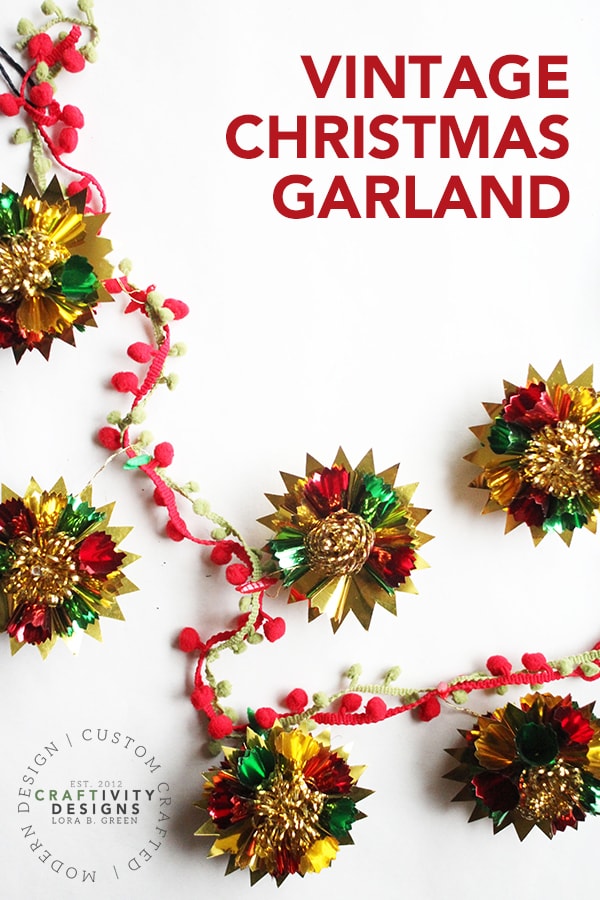
Learn how to make a DIY Christmas Garland with vintage ornaments. This festive project lets you display your favorite nostalgic ornaments in a modern way!
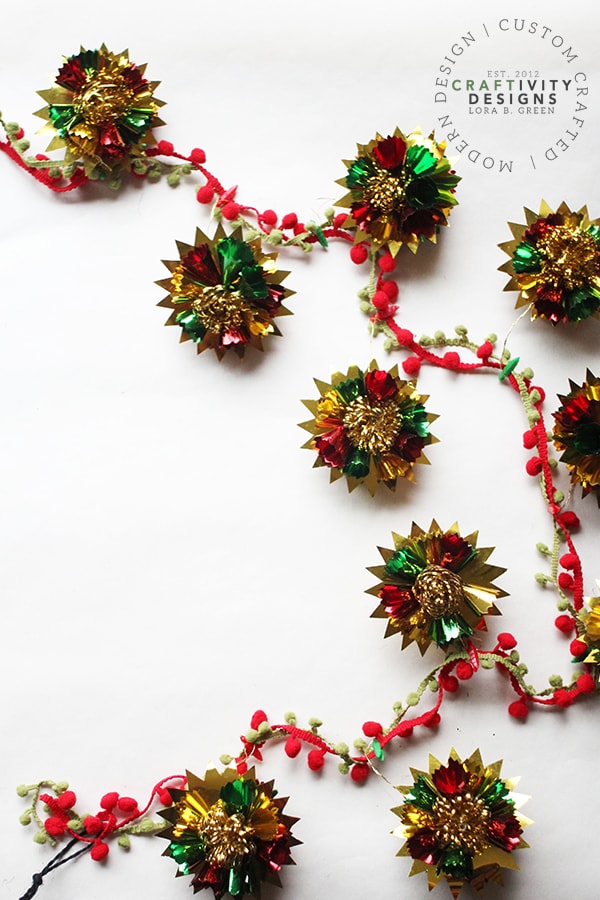
Last year, my mother-in-law gave me a set of vintage foil ornaments. With a soft spot for kitschy Christmas decor and nostalgia, I immediately knew the set would make a festive garland. If you’ve got a collection of vintage ornaments, you can easily make this DIY Christmas Garland, too!

My name is Lora Green, of Craftivity Designs, and this isn’t my first project using vintage Christmas decorations (as I said… I’ve got a soft spot for nostalgia!). Our Vintage Christmas Light Wreath and Christmas Light Napkin Rings are a couple of my favorite ideas.
How to Make DIY CHRISTMAS GARLAND (USING VINTAGE ORNAMENTS)
While my ornaments are foil, any type will do! Try vintage crochet, felt, or glass ornaments – whatever you’ve got stuck in storage. Similarly, I felt pom-pom paired perfectly with vintage kitsch, but feel free to pick the ribbon which matches your style.
What you need:
Want more ideas like this? Subscribe today to get our weekly Ideas in Your Inbox newsletter plus other exclusive gifts and offers — all for FREE!

Craft Tools Needed:
Supplies Needed:
- Vintage Ornaments
- Green Pom Pom Fringe
- Red Pom Pom Fringe
- Twine
- Green Mini Clothespins
- Red Mini Clothespins
Instructions:
1. Determine the DIY CHRISTMAS garland lenGth
First, determine the length of the garland.
If you aren’t sure what length it should be, layout the vintage ornaments with the spacing you’d like between each ornament. Then, hold the pom-pom fringe over it to measure, adding several inches extra on each end for creating a hanging loop.
2. Cut the POM-POM FRINGE
After you’ve determined the correct length, cut the green and red pom-pom fringe to size. You want the pom-pom fringe to be the same length as your twine.
3. Tie the pom-pom fringe
Once cut, tie the pom-pom fringe together with twine at one end. Tie it near the end of the fringe.

In order to tie the opposite end, hold the fringe up at the knot. This allows the red and green fringe to dangle evenly so that you can grab the opposite end and tie another knot with twine. If you don’t let the fringe dangle, you’ll likely end up with more red than green (or vice versa) between the knots.
Once each end of the DIY Christmas garland is tied, snip the loose twine strands near the knot to hide the appearance of the twine.
4. CLIP ORNAMENTS TO THE CHRISTMAS GARLAND
Now that the pom-pom fringe is strung, attach each vintage ornament using mini-clothespins.
I like clothespins because they are quick and simple (plus, clothespins aren’t permanent, in case I ever want to use the ornaments as ornaments, again!). However, the ornaments could also be attached with hot glue or tied with twine.

DIY Christmas Garland and VINTAGE CHRISTMAS DECORATIONS
What are you waiting for?! Go dig out those old Christmas lights, vintage Christmas cards, and shiny antique ornaments. Then, place them on display with creative modern projects like a DIY Christmas Garland… and celebrate a nostalgic Christmas, this year!
What’s Next?
If you enjoyed this DIY Christmas Garland, then you’ll enjoy these Christmas craft projects, too.
How to Celebrate Christmas with an Advent Wreath
Make a Wood Christmas Sign (free U-Cut Tree Farm printable!)
How to Make a Christmas Tree Wreath for the Front Door

You may also enjoy these Christmas ideas on Ideas for the Home by Kenarry® –