How to Make a Christmas Garland with Felt
THIS POST MAY CONTAIN AFFILIATE LINKS. PLEASE SEE OUR FULL DISCLOSURE POLICY FOR DETAILS.
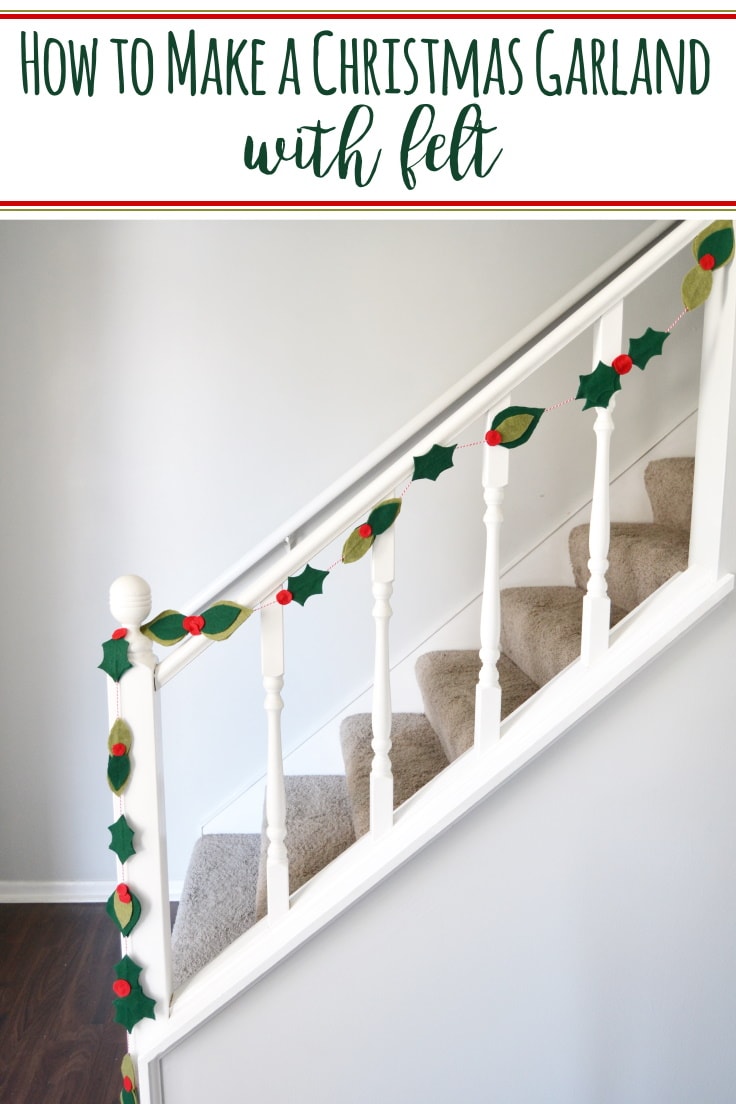
Felt leaf garlands add a festive touch to your holiday decor. Follow this tutorial to learn how to make a Christmas garland from felt and baker’s twine.
Hey y’all, it’s Cat from Mary Martha Mama. I’m back today with a festive and fun holiday decor project. You can learn how to make a Christmas garland from felt and baker’s twine in just a few minutes and it’s a project that won’t break the bank either.

The awesome thing about making your own decor items like this is that you can completely customize it. You can make a garland of any length you choose and you can choose the exact colors that you want for a completely custom piece.
How to Make a Christmas Garland with Felt
This tutorial involves some mindless cutting work but it’s definitely something that you can do while watching a movie or sitting in front of a fire.
What you need:
Want more ideas like this? Subscribe today to get our weekly Ideas in Your Inbox newsletter plus other exclusive gifts and offers — all for FREE!
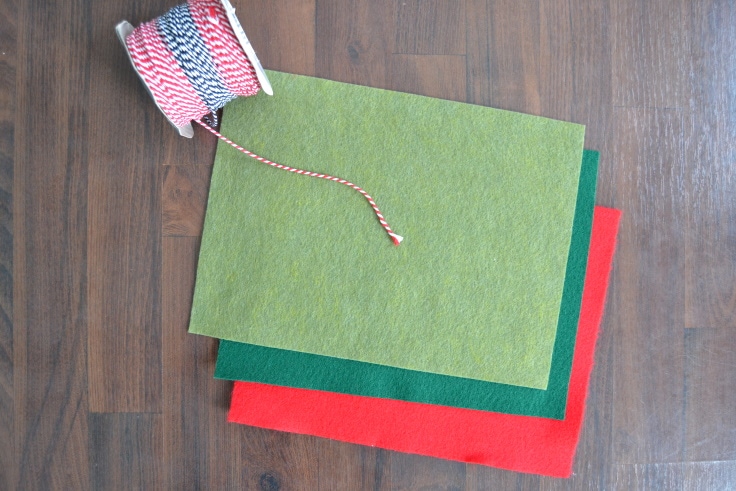
Craft Tools Needed:
Supplies Needed:
- felt sheets (I used 3 dark green, 2 olive green, and 1 red)
- red and white baker’s twine
Instructions:
1. Cut Out Your Felt Shapes.
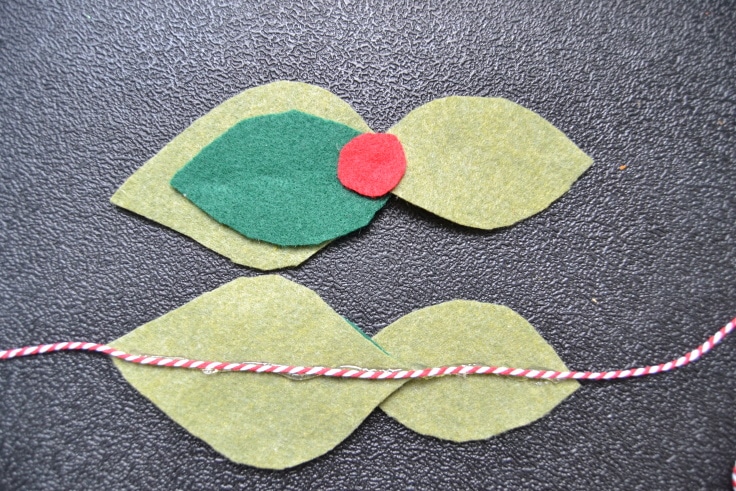
Cut out some leaf shapes in various sizes from your green felt sheets. I opted to use two shades of green and cut out a few different sizes and shapes but if you prefer to keep it more simple then go ahead.
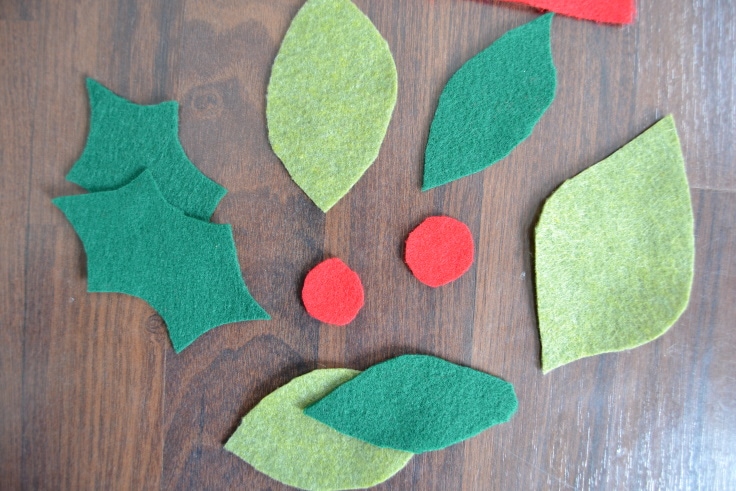
For each shape that you cut you should actually cut out two that are mirror of each other. What I mean is cut out one leaf. Then flip it over and trace it to get the mirror image of it and cut it out. This is because the garland will have felt leaves on both sides of the twine and we want them to match up.
Also cut out some circles for berries if you want to add those pops of color into your garland.
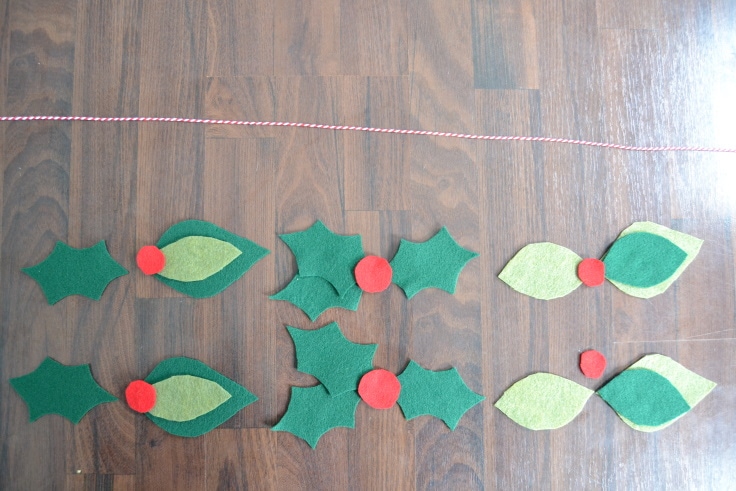
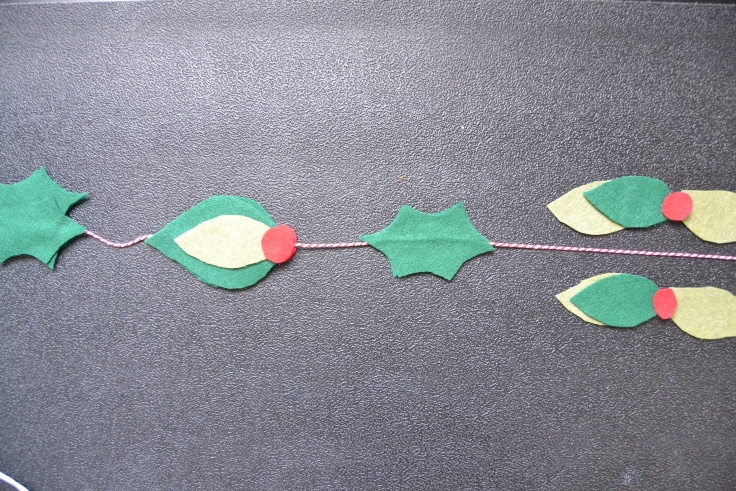
2. Make a Mock-Up.
Take your leaves and berries and make some groupings. You might want a more regular pattern or you might want it to be a little more irregular like mine. Move them around until you find an arrangement that you like.
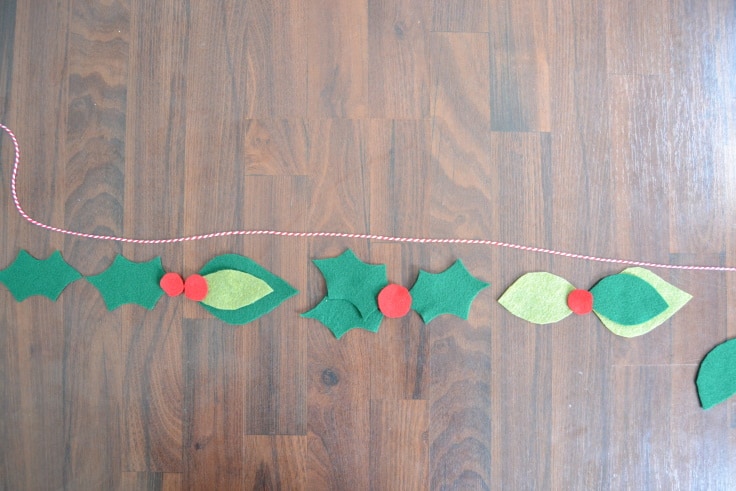
3. Glue It All Together.
Line up your groupings of leaves and berries along with their mirror images.
Glue the leaves and berries in each group together. Then take one group and lay it down with the right side down. Glue the baker’s twine down to the back of the leaf group. Then add some more hot glue to the back of the leaves and place the twin of the leaf group on top.
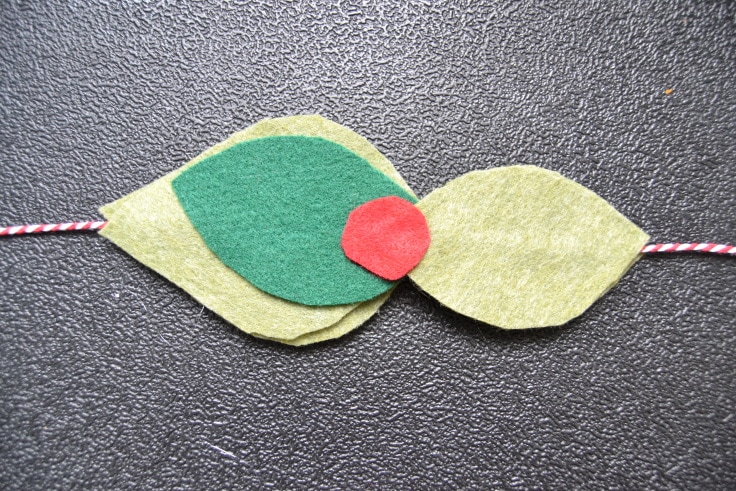
Now it will look the same from both sides. Don’t worry about lining things up too perfectly. I think it just adds a little more of a layered look to the garland if a little of the other side is peeking out.
Keep adding leaf groupings in the same way until you have a garland that’s the length you want.
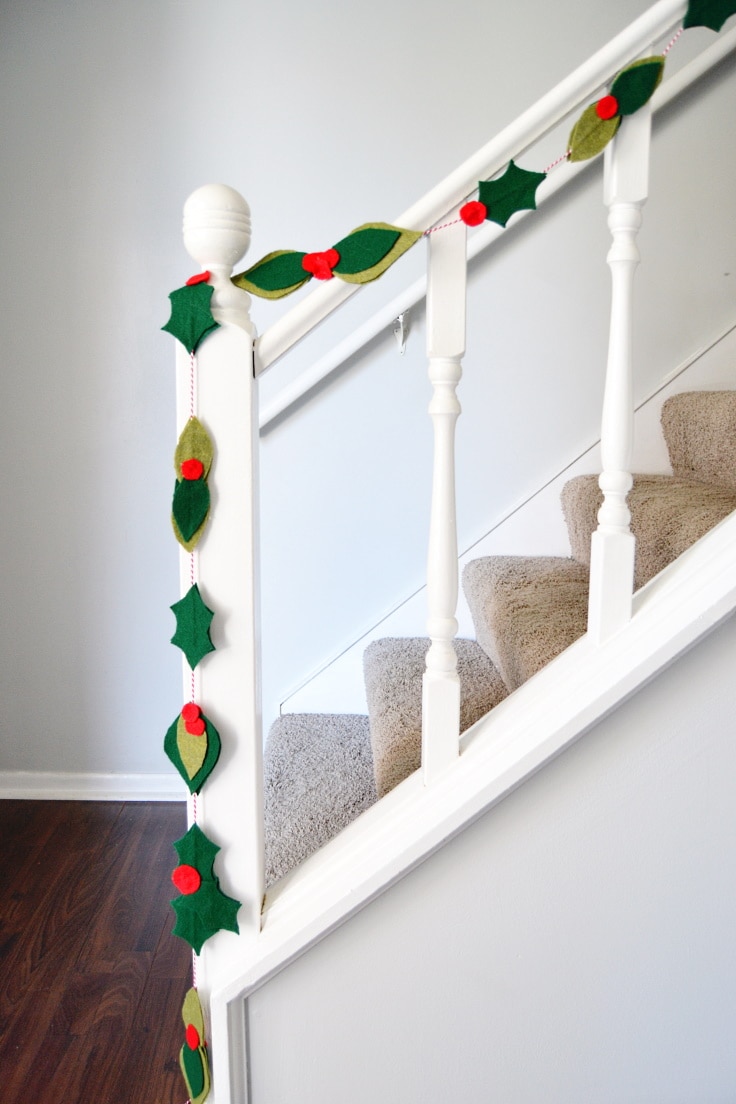
Now that you know how to make a Christmas garland with felt you can add a festive touch to your mantle, Christmas tree, banister, stair railings, and more.

What’s Next?
If you enjoyed this tutorial for how to make a Christmas garland from felt then you’ll enjoy these Christmas projects too.
Making Christmas Ornaments with Cricut


You may also enjoy these Christmas ideas on Ideas for the Home by Kenarry® –