DIY Fabric Photo Frame
THIS POST MAY CONTAIN AFFILIATE LINKS. PLEASE SEE OUR FULL DISCLOSURE POLICY FOR DETAILS.
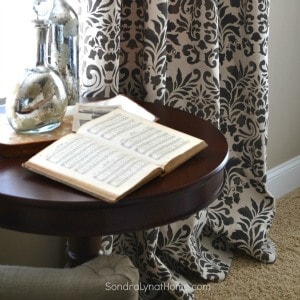
Want to add a soft touch to a nursery, or maybe a bedroom? This DIY fabric photo frame is perfect! It would also make a great handmade gift for Christmas!
Hey there, Kenarry friends! I’m Sondra Lyn from Sondra Lyn at Home here with my Creative Team post for November.
The holidays are upon us and it’s time to think about some gift ideas. Here’s one of my favorites, that combines the gift of a family photo with a handmade frame!
Want to add a soft touch to a nursery, or maybe a bedroom? This DIY fabric photo frame is perfect! It would also make a great handmade gift for Christmas, Mother’s Day, or any occasion when a family picture is appropriate. (And yes – that’s one of my precious grandbabies in that photo!)
 DIY Fabric Photo Frame
Here’s what you’ll need:
- 1/2 yard or fat quarter of fabric
- 1/2 yard quilt batting
- unfinished wooden photo frame
- scissors
- stapler
- ruler

Honestly, this project is so quick and easy: it belies how pretty it is! Best of all? There’s no sewing involved!
Begin by cutting a square of quilt batting about 1-1/2 inch larger than your frame, all the way around. Then place the batting over the fabric, centering however you want your fabric to show on the frame, and cut fabric 1-1/2 inch larger than the batting, all the way around.

Next, find the center of both the batting piece and the fabric. center the frame over each and mark an X through the center to the inside corners of the frame, stopping just short of the very edge (you don’t want frayed edges to show if you can help it). Cut along your X lines, again stopping just short of reaching the inside corner of your frame size.

Next you want to staple the inside flaps around to the backside of the frame, pulling slightly as you bring to back, then you will start to bring the outside edges around and staple them as well:

You will clip the corners, mitering them, in a way, as you bring the remaining 2 sides toward the back, just to avoid extra bulk:

Then I just kind of gathered the corners as I went and made the corners of the fabric follow the rounded corners of the wooden frame:

I added my photo, and with another square of fabric, I tucked in the edges all the way around and stapled onto the back to finish it off!

And here it is… my DIY Fabric Photo Frame! This will look great in my new granddaughter’s nursery. And with limitless possibilities for any use or any fabric, this is a great gift idea!

And here’s a pic for your Pinterest Page. Be sure to follow me on Pinterest, if you don’t already!

My thanks to Little House on the Prairie Fabrics for sending me some samples of fabric to try! (No other compensation was made for this post). To find this fabric or locate a store that carries Little House on the Prairie Fabrics, click HERE.
Here are some other no-sew projects you might like to try!
Stenciled Drop Cloth Curtains
Make a Burlap Pumpkin

I truly wish you and your family the most wonderful Thanksgiving celebration! Take time to enjoy those you love and count all the ways you are blessed!
See you next month,

What’s Next?
Need more DIY decor ideas? Check out these beautiful projects on Ideas for the Home by Kenarry® –
Sondra & Carrie,
I love the fabric frame and wanted to wish you both Happy Thanksgiving.
Happy Creatin,
Karen Marie
Happy Thanksgiving to you too, my friend! Thanks for stopping by to check out Sondra’s beautiful frame idea.