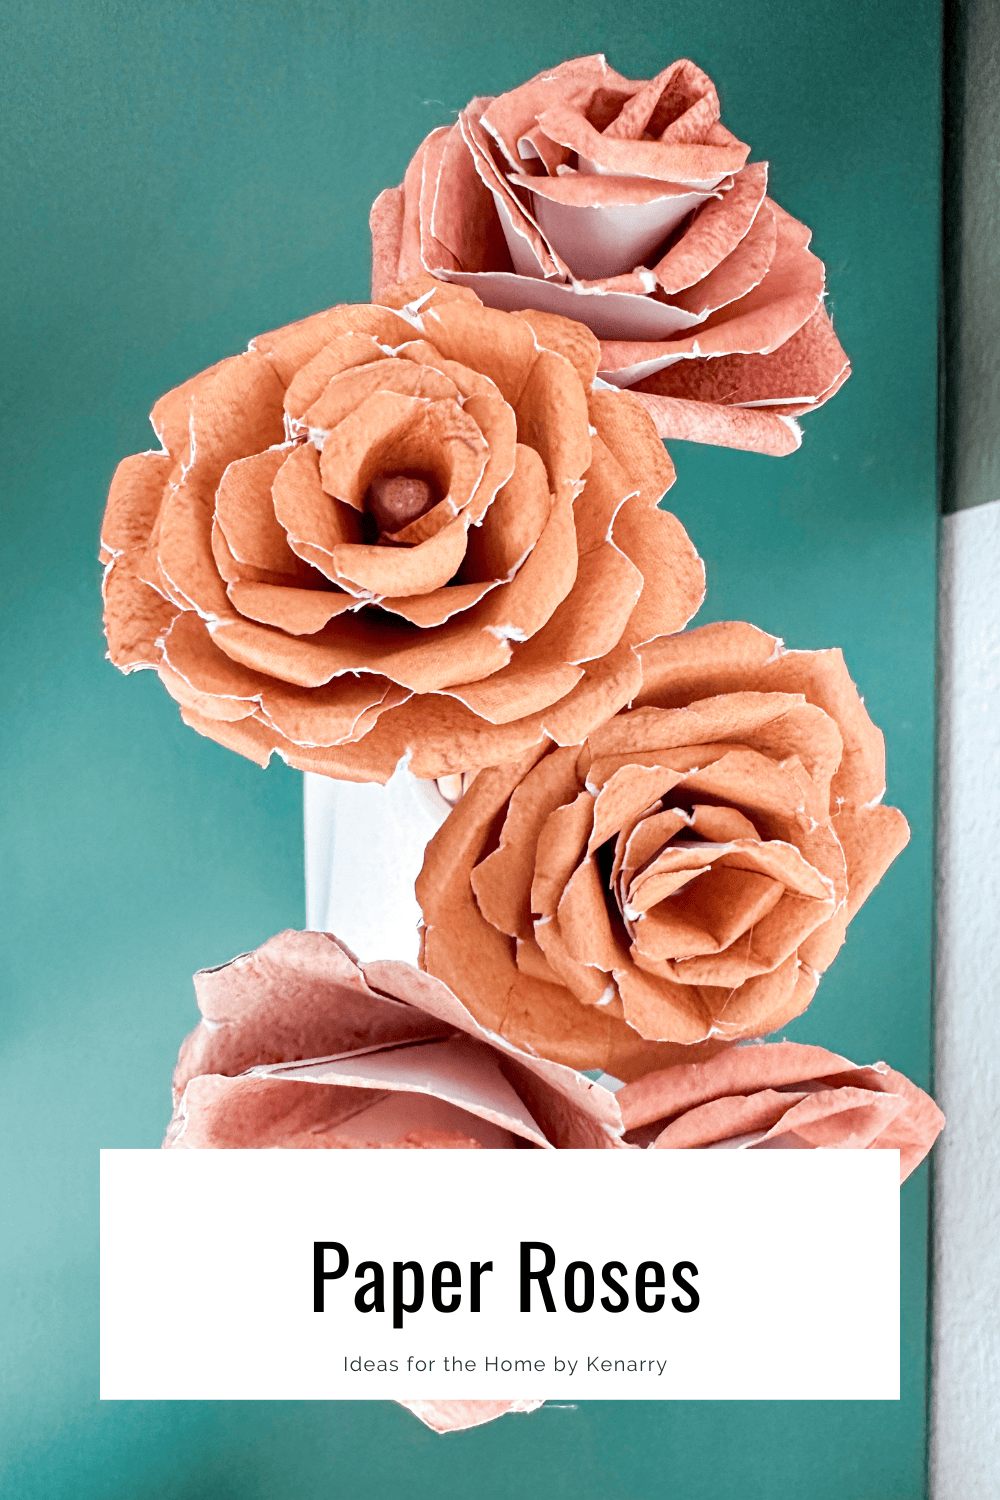
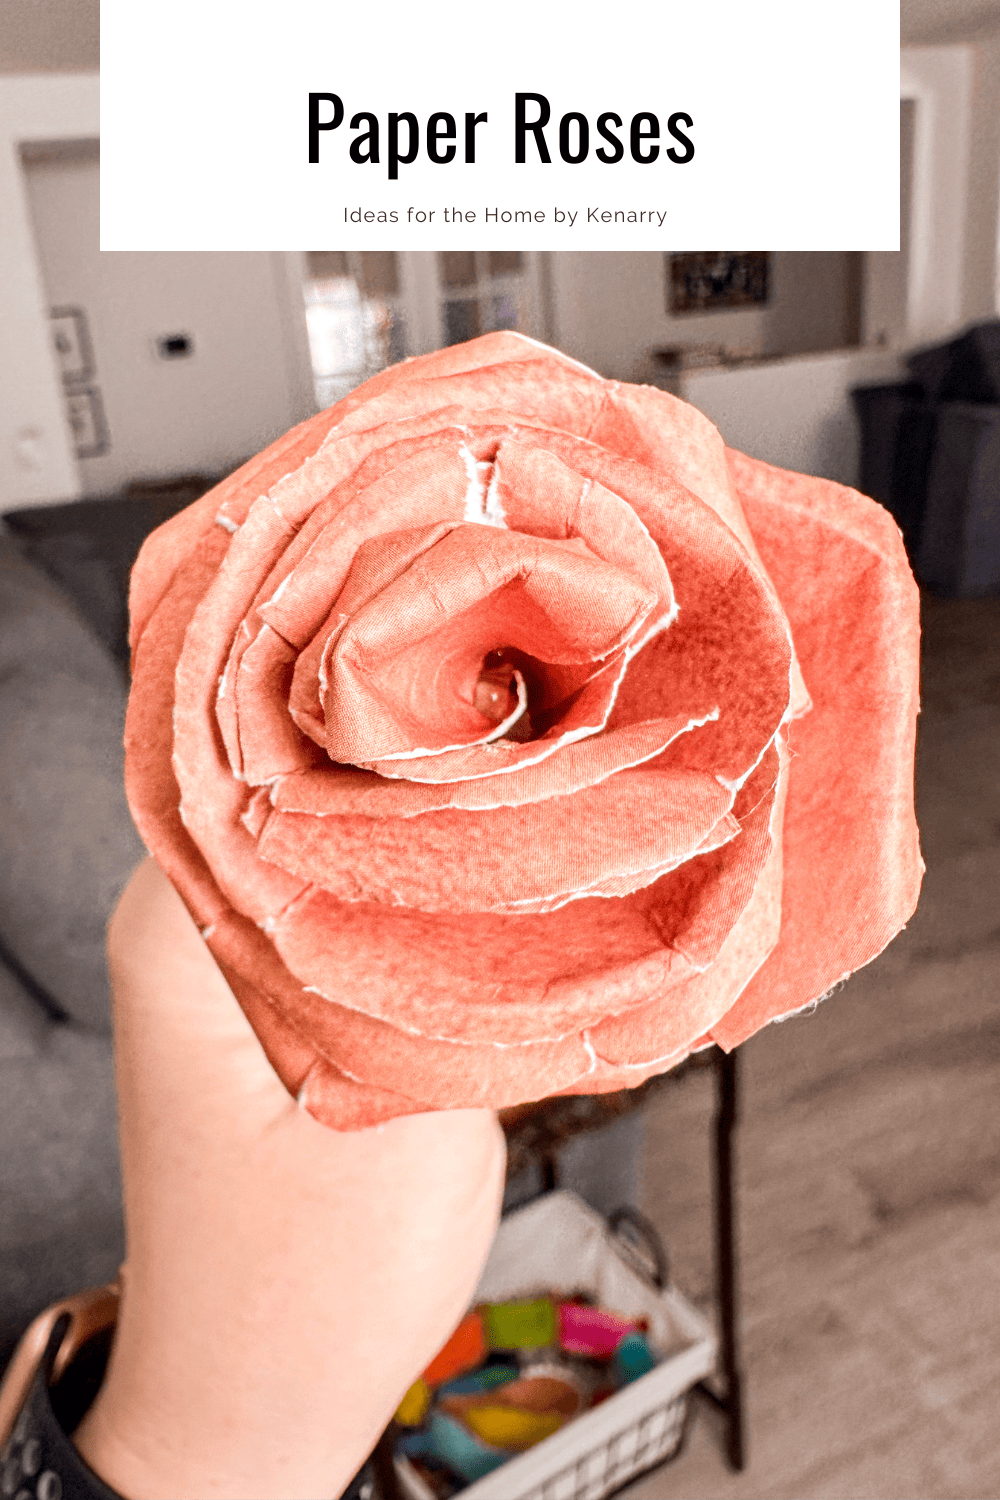
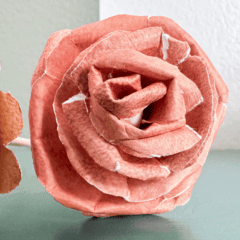
Paper Roses
THIS POST MAY CONTAIN AFFILIATE LINKS. PLEASE SEE OUR FULL DISCLOSURE POLICY FOR DETAILS.
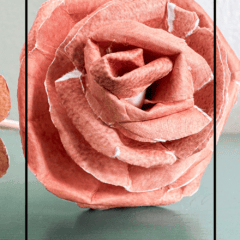
These paper roses are simple to make and are great to use as decor or gifts.
Hello, I’m Amy and I blog at amylanham.com about DIY and crafts. My sister is getting married later this year, and her and her fiance are really into books and games. She would like me to make her bouquets and some boutonniere from book pages.
I figured I should probably practice before starting on the final ones. So I decided to make some paper roses. There are so many different types of paper flowers to fold too. I’m not entirely sure what she wants, but paper roses seemed like a safe place to start.
How to Make Paper Roses
These paper roses are not technically difficult to make, but they do take some time.
What you need:
Want more ideas like this? Subscribe today to get our weekly Ideas in Your Inbox newsletter plus other exclusive gifts and offers — all for FREE!
Craft Tools Needed:
Supplies Needed:
These are the ingredients you’ll need. All the exact amounts are in the printable card at the bottom of this post.
- 12×12 cardstock – double sided color is best, but not necessary
- Toothpick
- Skewers or Floral Wire
Paper Roses Tips:
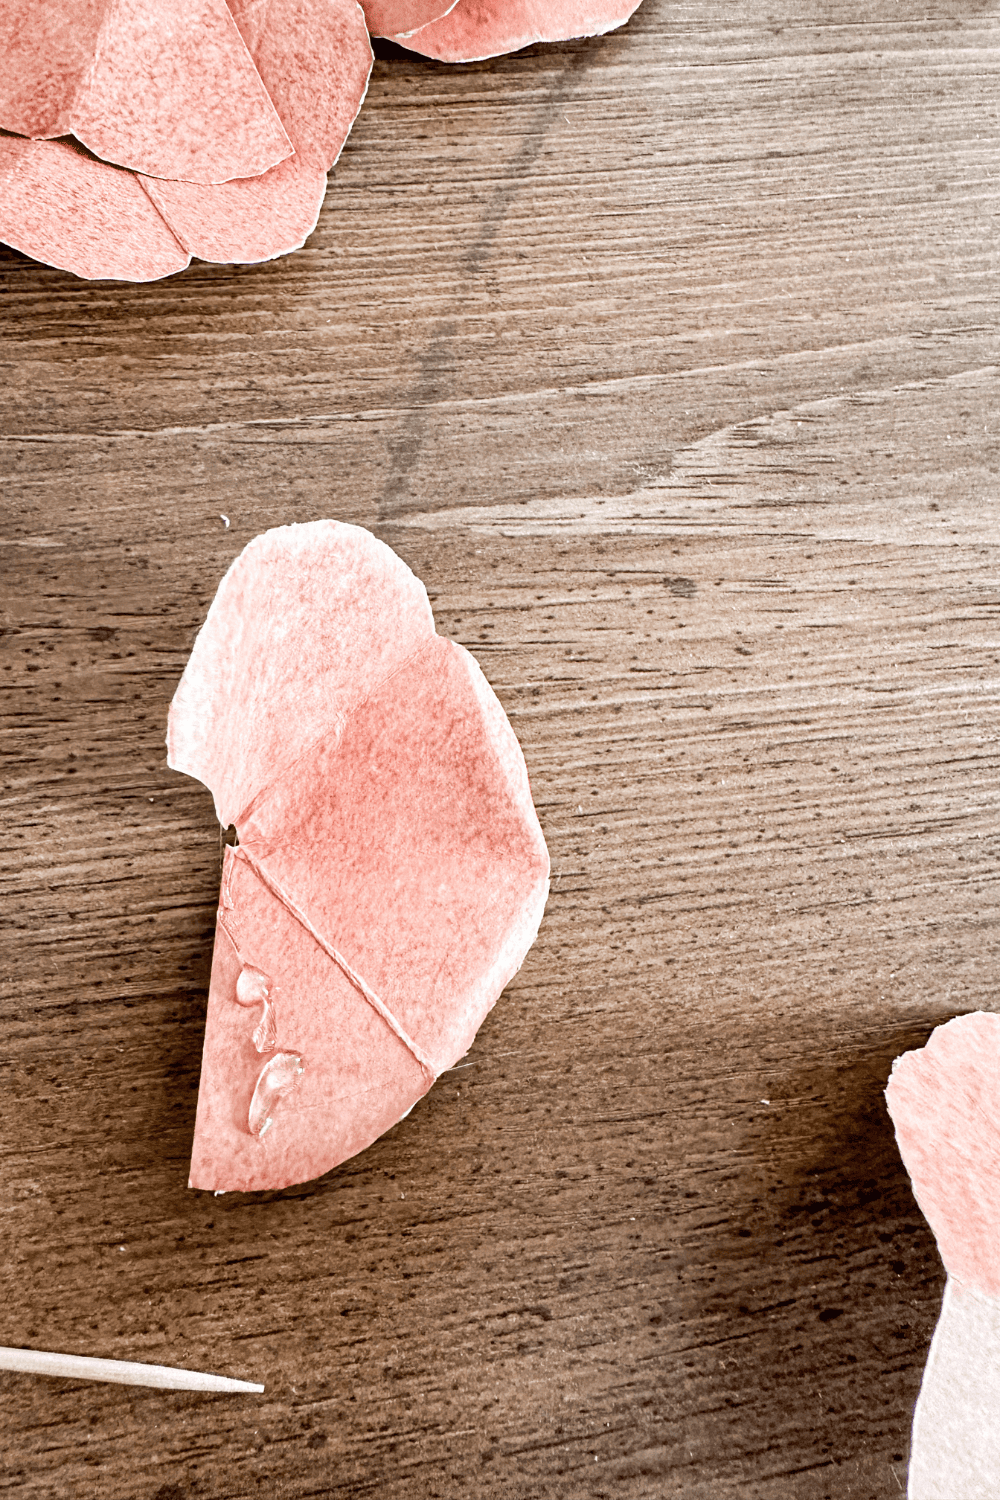
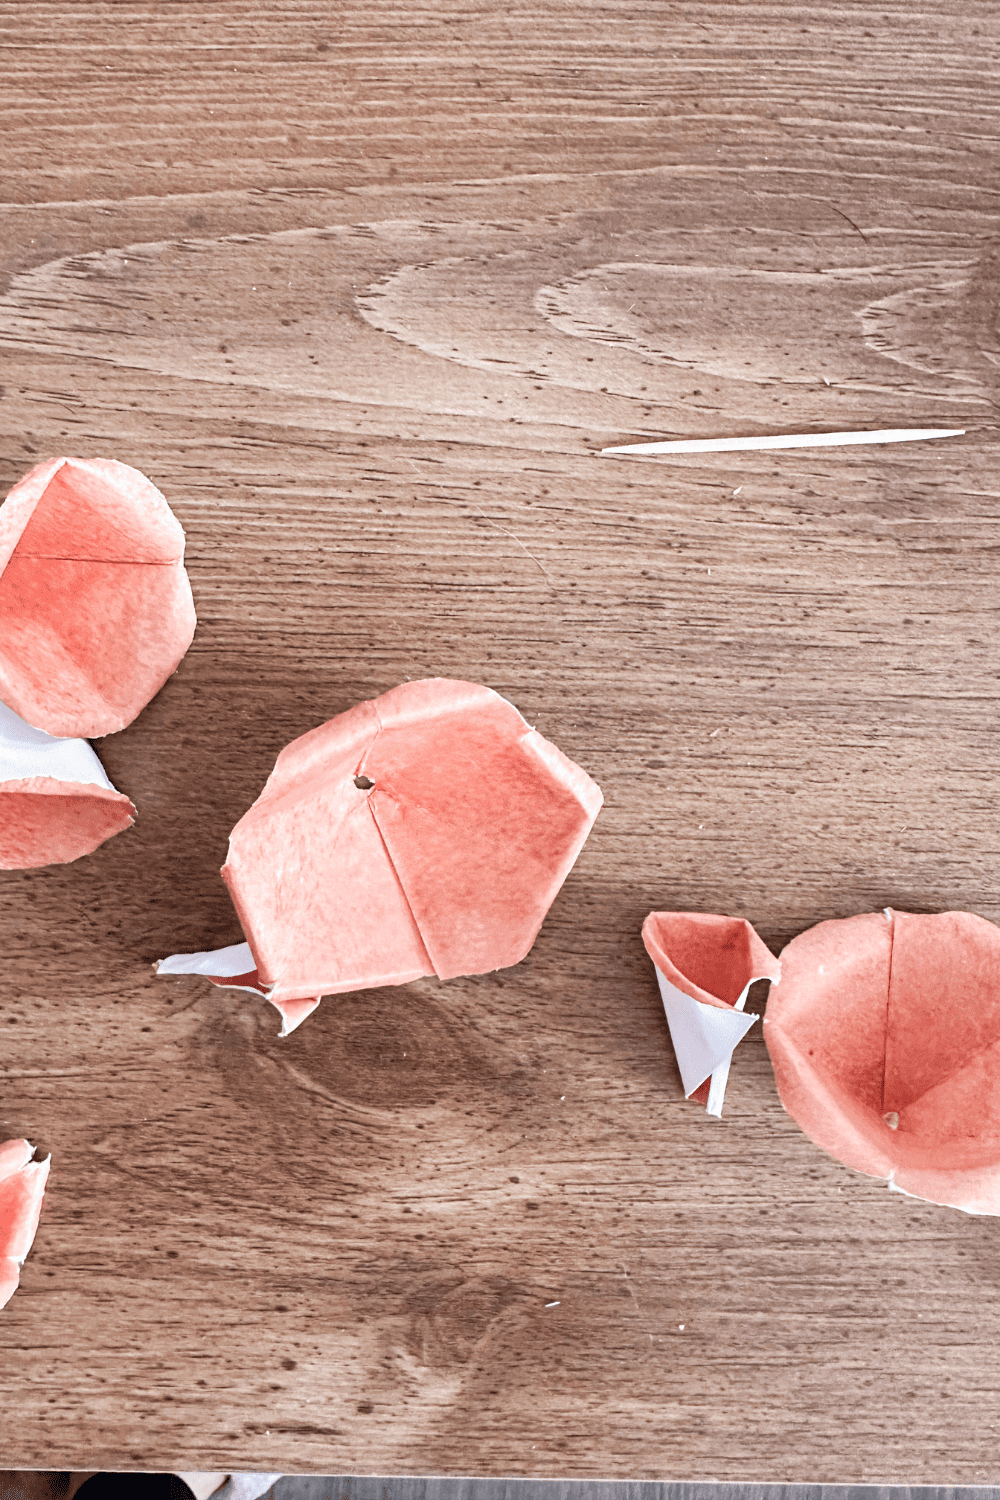
How to Cut the petals
There are multiple ways to cut the petals. I tried three different ways and each flower is so unique.
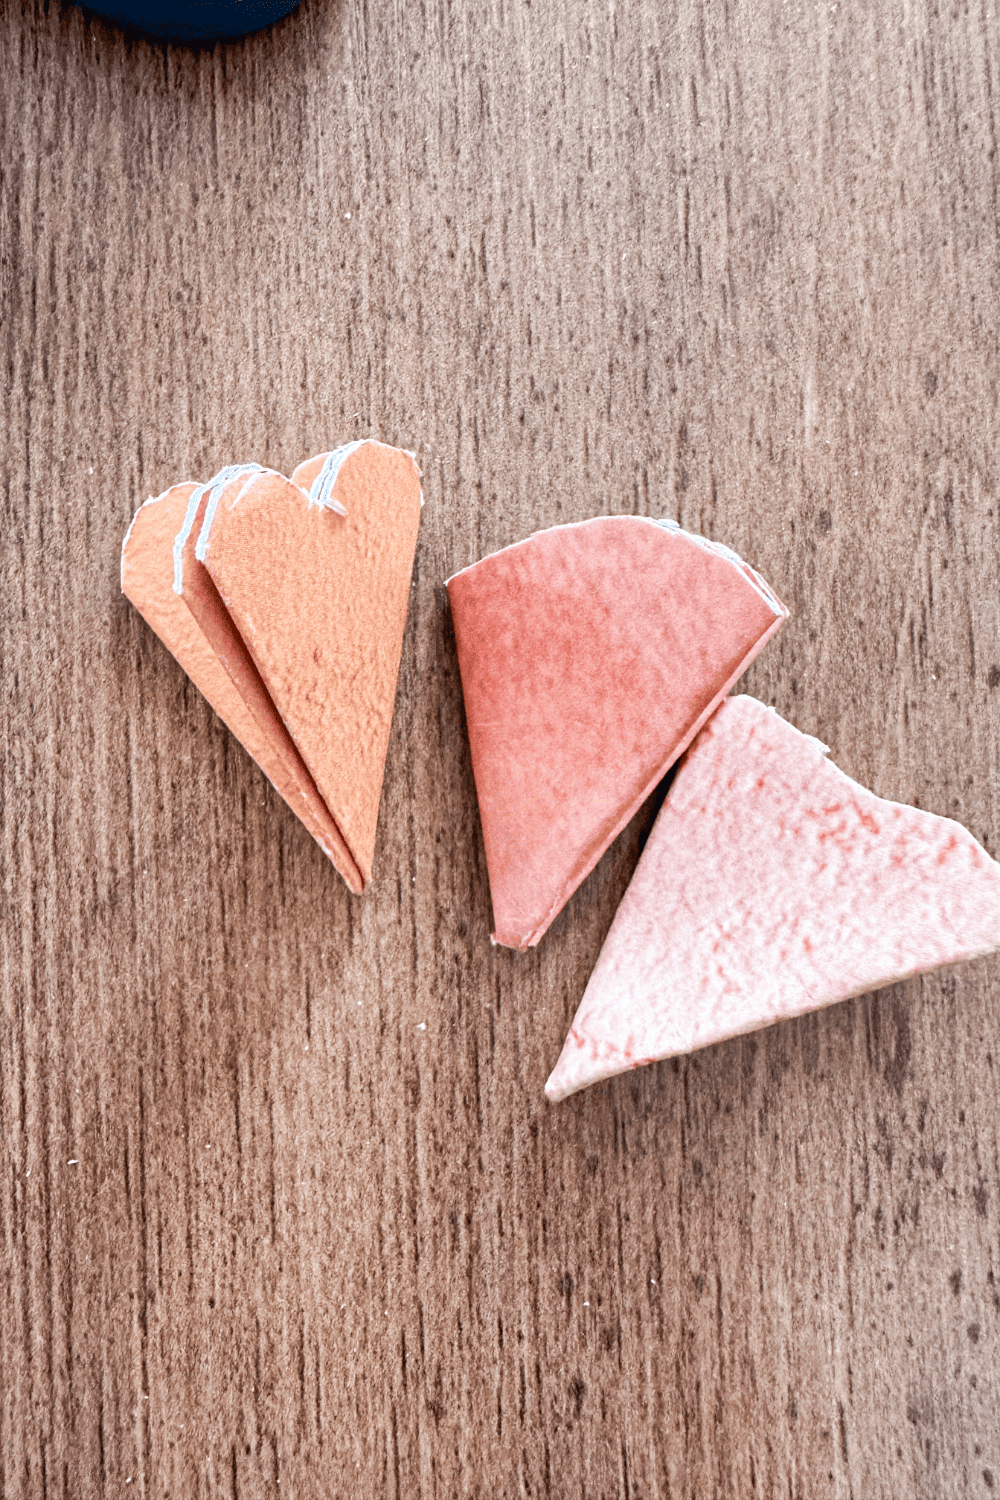
I did each cut in a different color to really show the difference and be able to track which cut was which.
The red is a simple arch cut. This one I think looks most like a rose when finished.
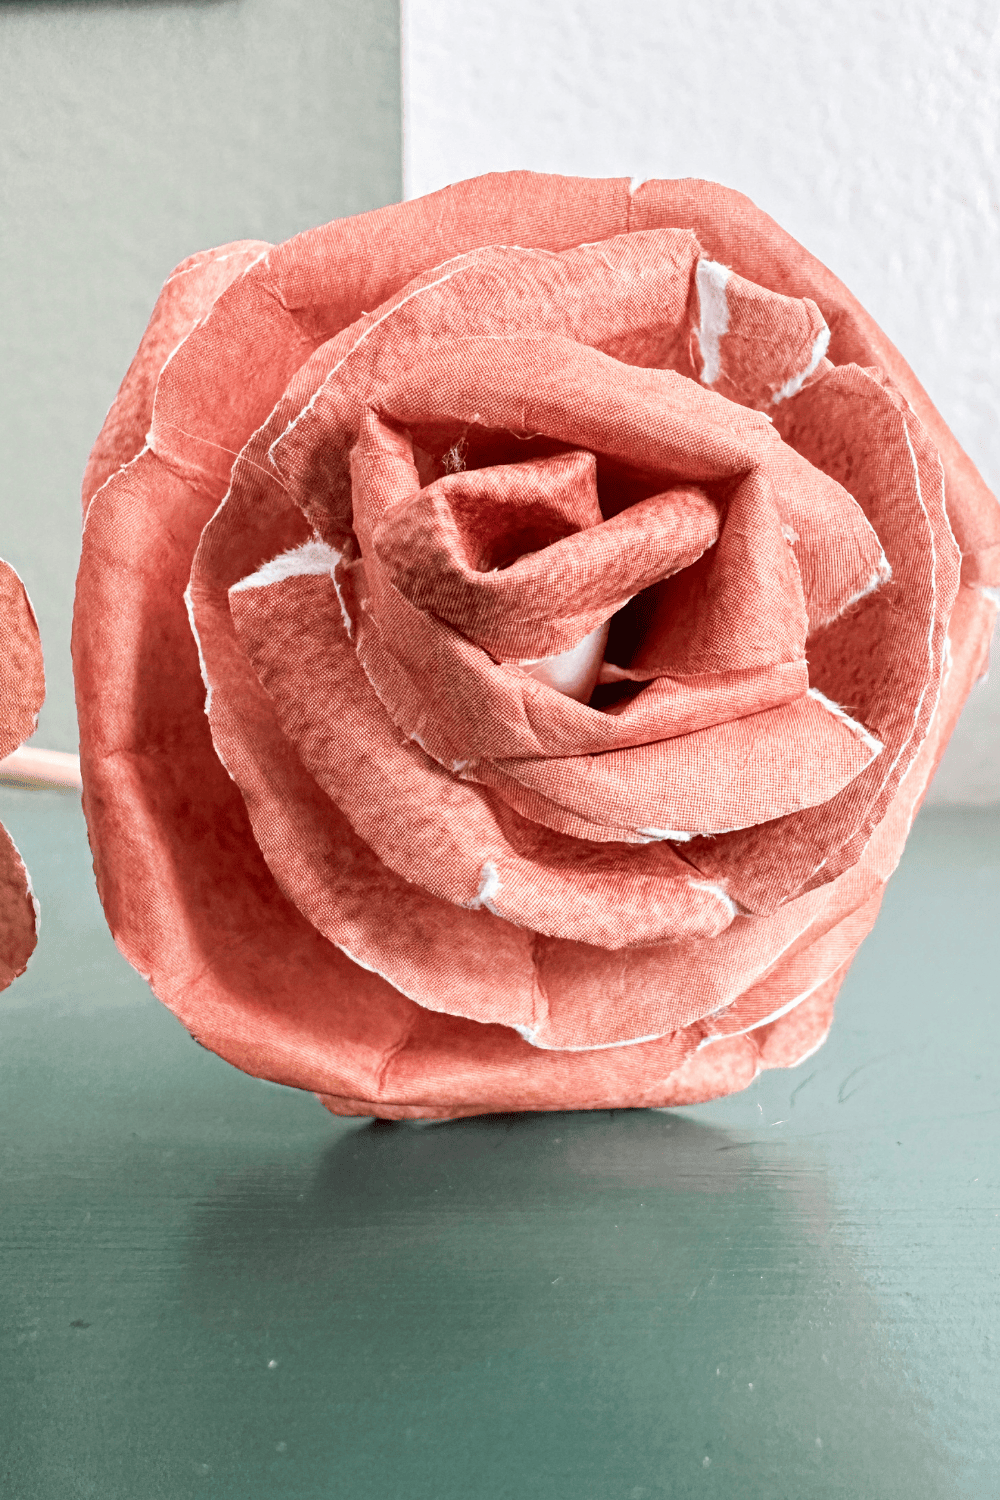
The orange is a heart cut. This one is the most difficult to cut, and is my least favorite of the three. The card stock is pretty thick when folded and it takes a lot of effort to cut the deep v of the heart.
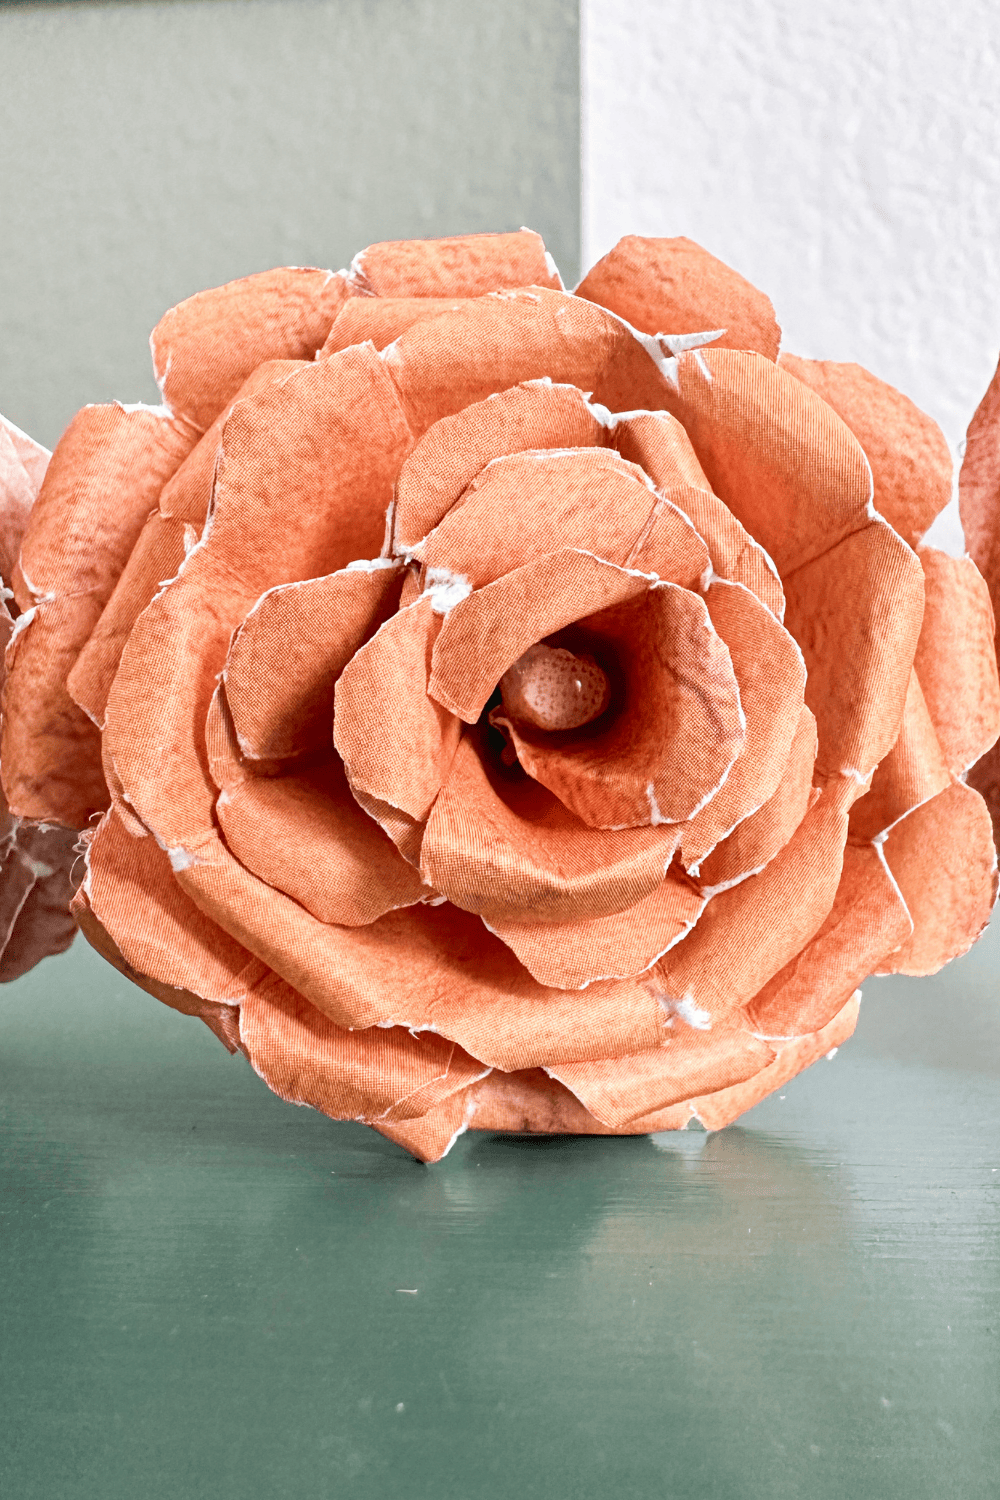
The pink is a wave cut. While the heart was difficult to cut, a more simple wave was not as difficult. And I think this one also looks like a rose.

I’m sure there are other ways that the petals could be cut too. I’ll definitely be doing some more experimenting as I try to figure out which ones will look best for a bouquet.
The Paper Keeps Ripping as I roll the petals
Don’t worry about it. The cardstock is thick and so it doesn’t roll down as easily.
If you look at actual flower petals, they’re almost never perfect. They get tousled by the wind and sometimes have rips, tears, or missing petals. I think the tears in the paper roses actually make them look more realistic.
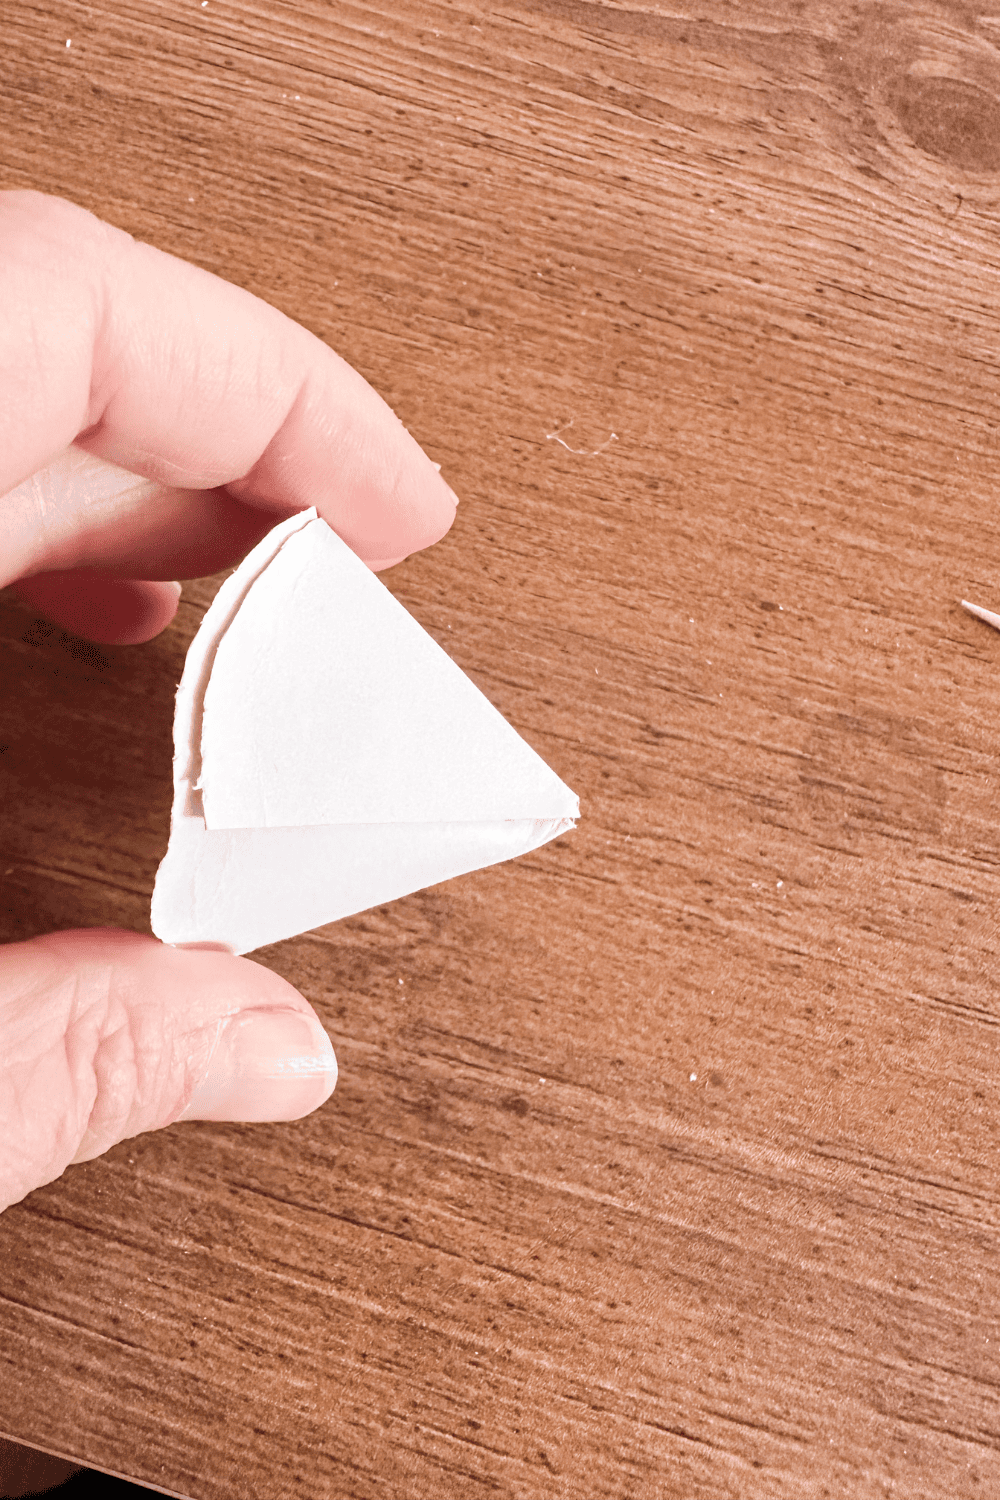
If it’s really bothering you though, just don’t roll them as much. If the tears are going to both you, definitely use a card stock that has the same pattern on both sides. Then it won’t be necessary to roll as much because it won’t matter if the underneath shows.
Assembling the Paper roses
There are two ways to assemble the paper roses. Either on the skewer or off.
I found it easier to assemble off of the skewer and gently push each section through the hole of the one below. Once the paper rose was assembled I added hot glue and then slid the whole paper rose onto the skewer.
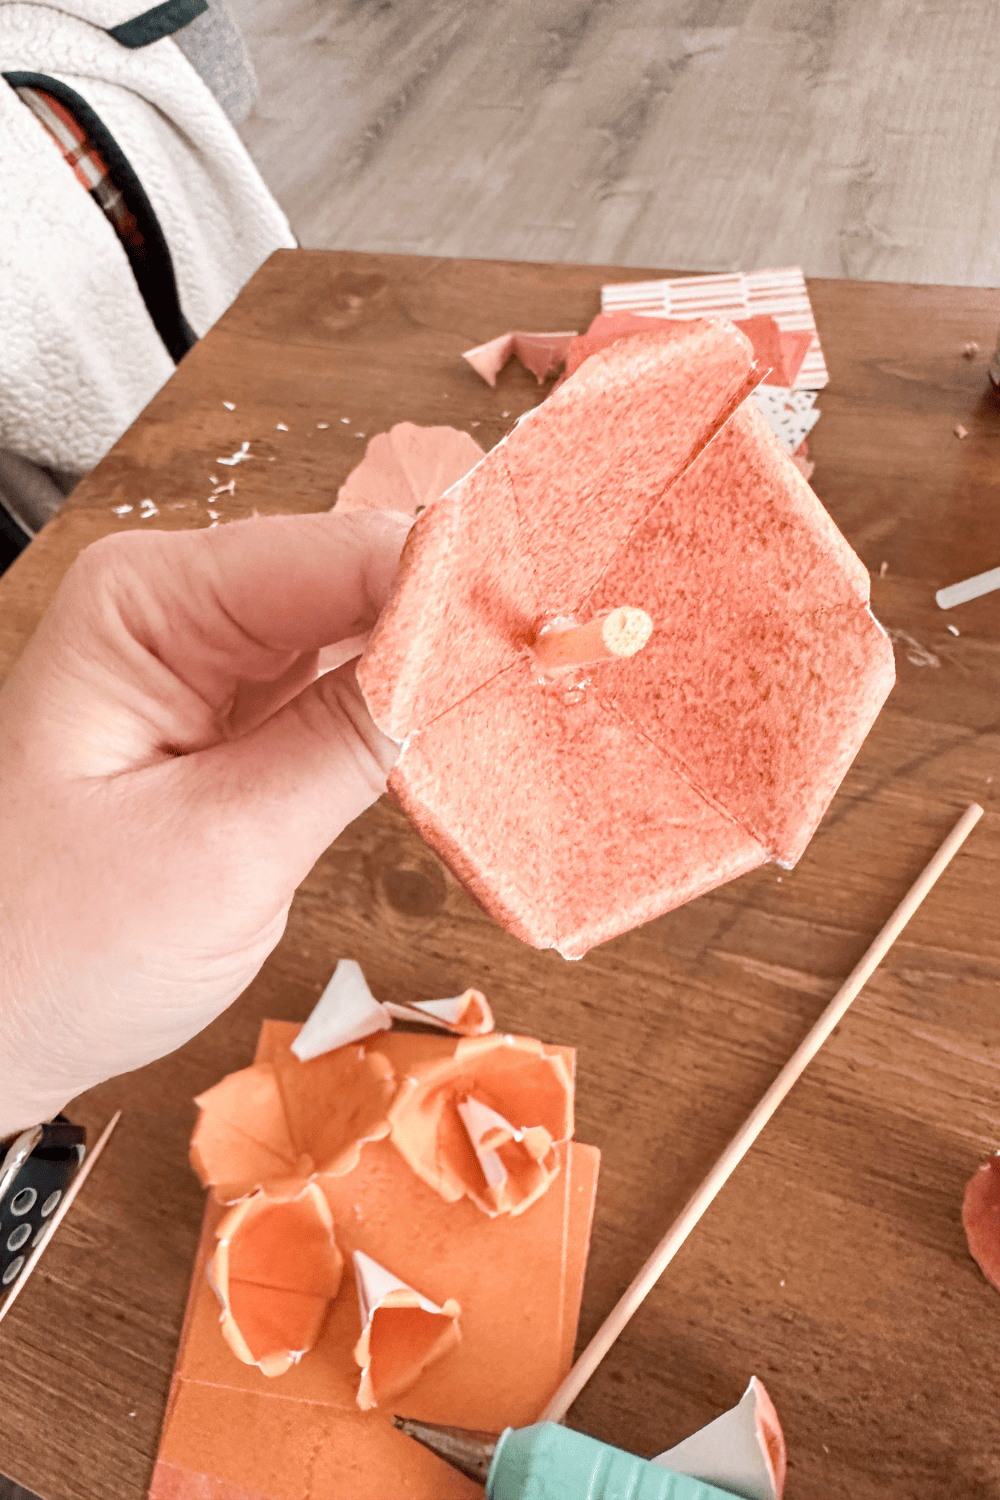
Doing it this way, I was able to limit the amount of the skewer that showed from the top. When attaching the sections onto the skewer it’s harder to know how far down to start at first.
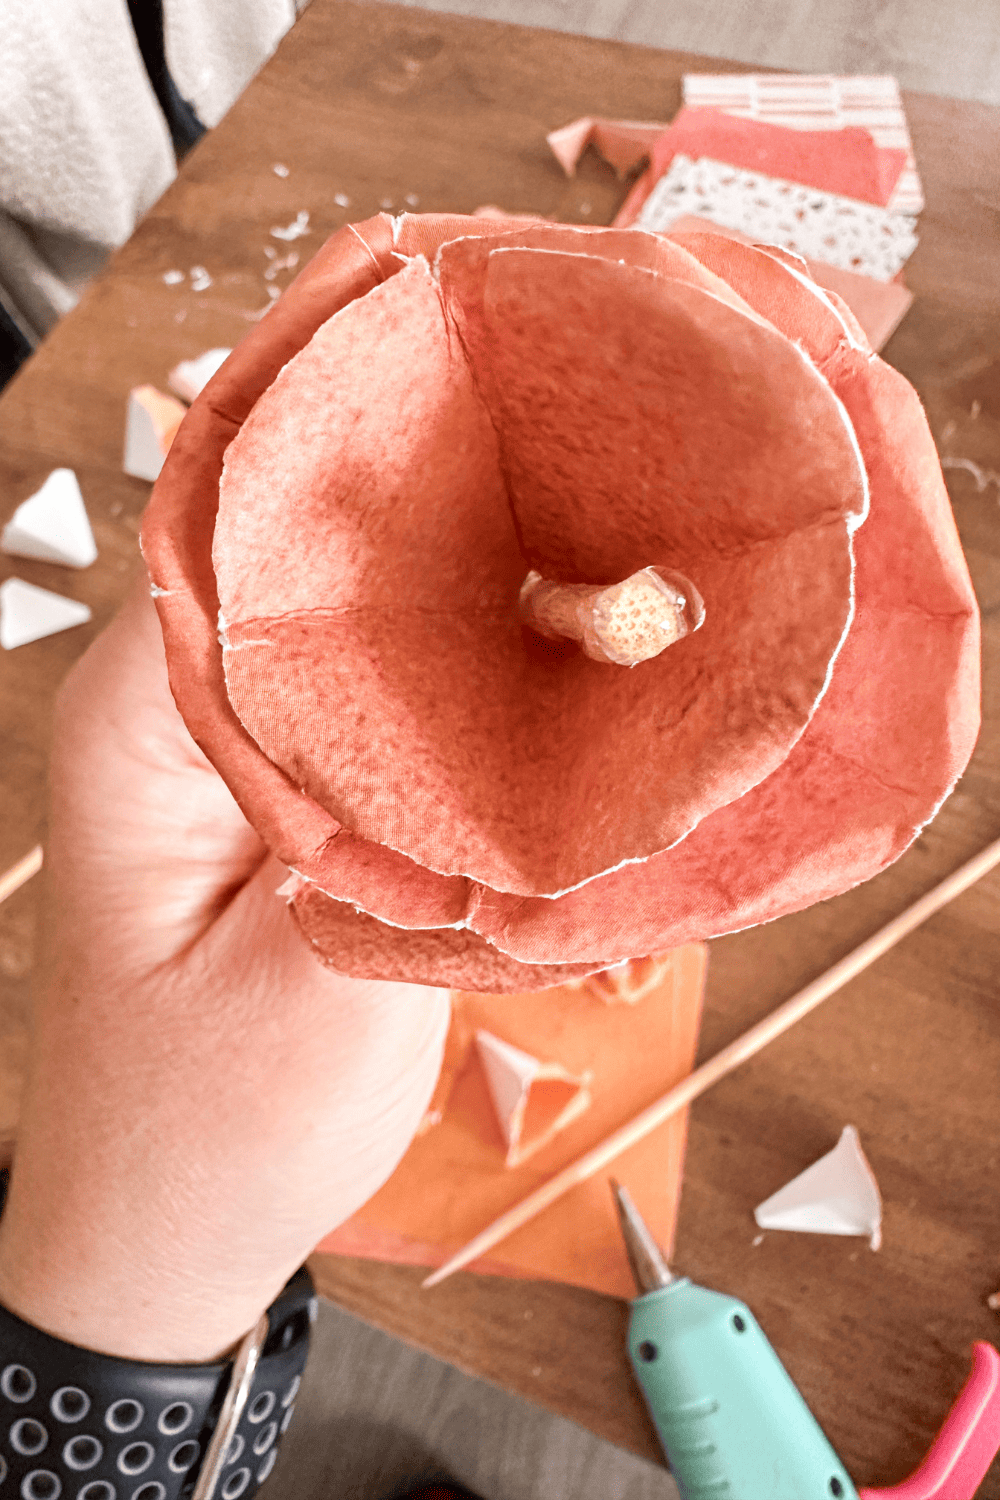
The other way is to glue each piece onto the skewer. When doing it this way, I found it helpful to cut off more of the base to allow the sections to sit closer together.
Paper Roses
Equipment
- 1 Paper Cutter
- 1 Pair of scissors
- 1 glue gun
Supplies
- 1 piece 12×12 card stock
- 1 skewer
- 1 toothpick
Instructions
- Use a paper cutter to cut the card stock into 4 inch by 4 inch squares. Each flower needs 4 pieces.
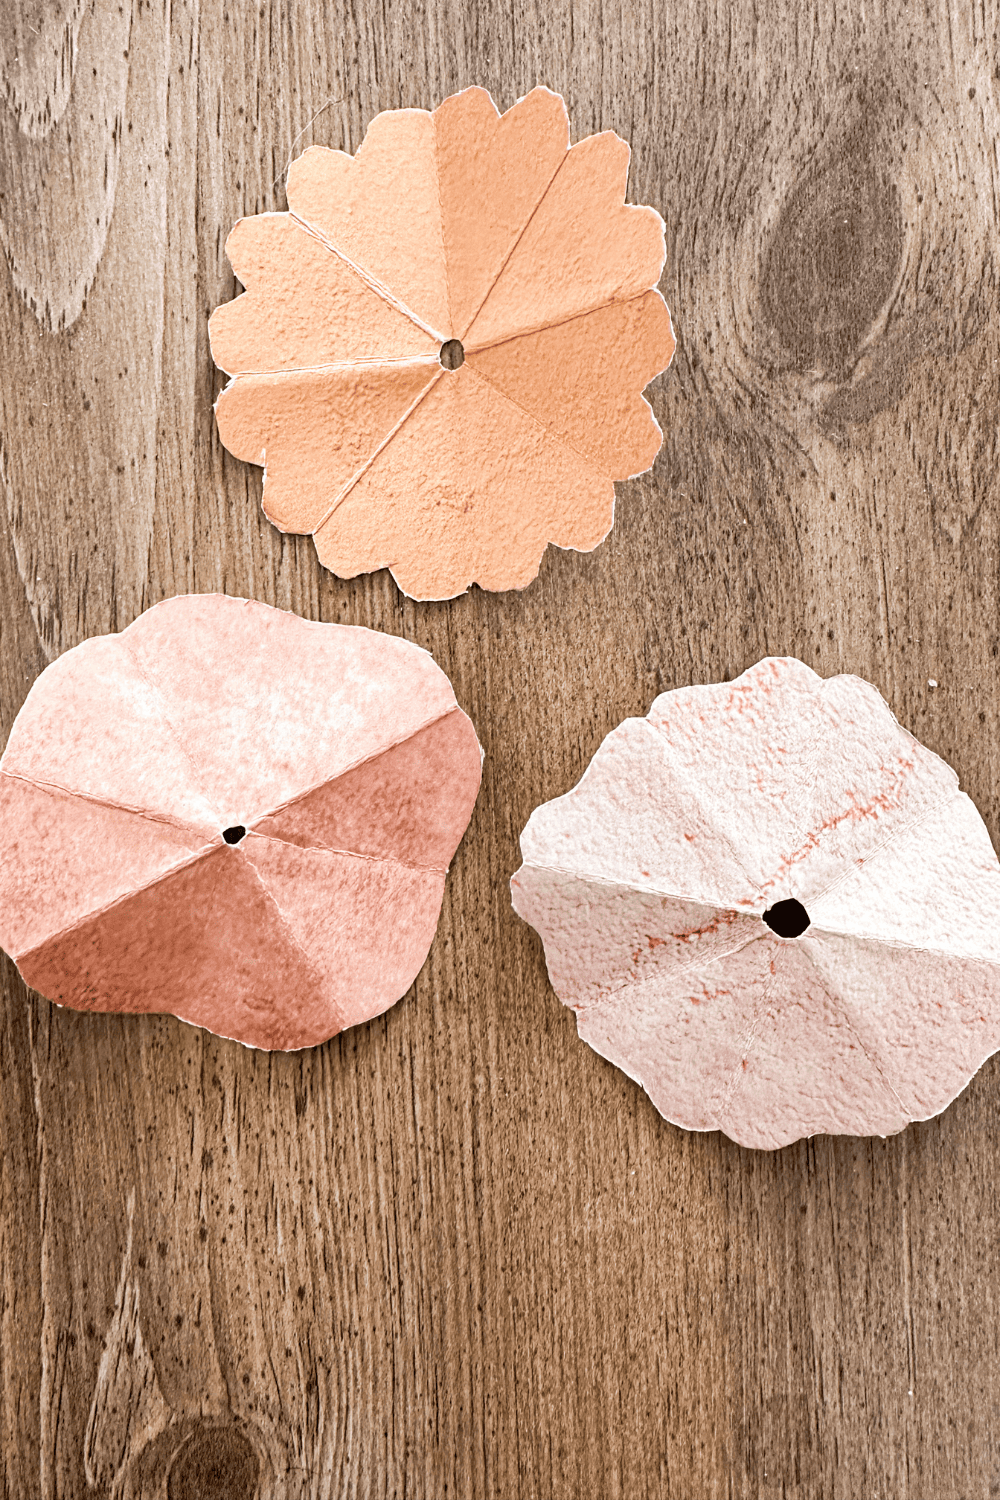
- Fold the square paper in half diagonally 3 times. The cut the side opposite the folded point into a heart, a arch, or a wave. Do the same thing on all 4 pieces of paper. Also cut off the tip of the paper to create a hole in the middle.
- Unfold. You will have a paper with 8 petals and a hole in the middle.
- Cut one petal out of the first paper. Two out of the second, three out of the third, and four out of the fourth. There should now be 8 papers. 1 petal and 7 petals, 2 petals and 6 petals, 3 petals and 5 petals, 4 petals twice. Set aside one of the 4 petals, you only need one.
- Now hot glue the petals back into a circle overlapping the end petals. Do not hot glue the 1 or 2 petals.
- Gently curl the edges of all the petals downward with a toothpick. Then curl the one and two petals onto themselves.
- Assemble the rose: Start with the skewer. Add hot glue and work your way from the biggest to the smallest petals. Slide the petals down the skewer and secure with hot glue. Try to get the petals as close as possible.
- Option 2: stack the petals from biggest to smallest without the skewer. Just press them into each other. Feeding the smaller petals through the hole of the bigger petal until the rose is assemble. Then hot glue and stick the skewer through.
Love the ideas you see here on Ideas for the Home by Kenarry®? Subscribe today to get our FREE DIY & Craft Planning Calendar, plus our weekly Ideas in Your Inbox newsletter filled with creative tips and exclusive offers!
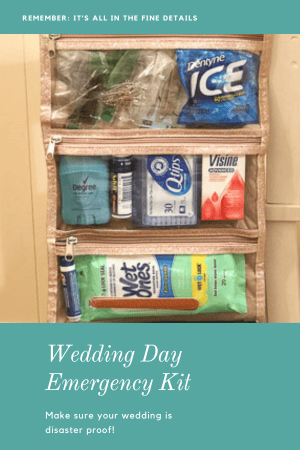
What’s Next?
If you enjoyed paper roses then you’ll enjoy these other wedding crafts too.
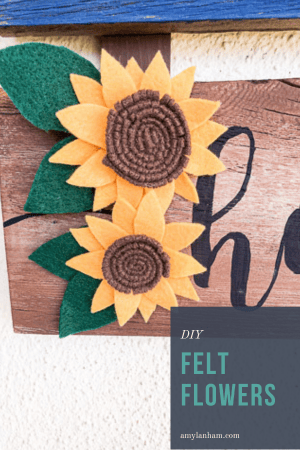

You may also enjoy these flower ideas on Ideas for the Home by Kenarry® –