DIY Rolling Cart Makeover
THIS POST MAY CONTAIN AFFILIATE LINKS. PLEASE SEE OUR FULL DISCLOSURE POLICY FOR DETAILS.
Update an old rolling cart with a simple paint job to turn it into a festive winter cocoa station, a New Year’s Eve bar, or an everyday craft station.
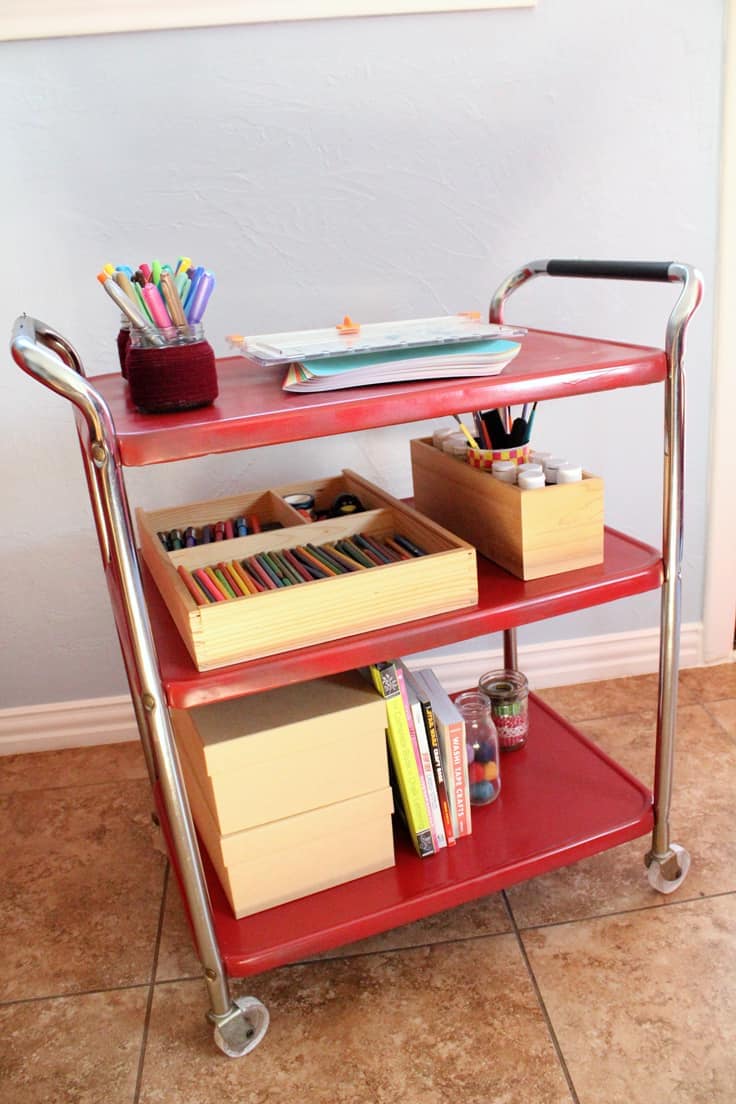
Rolling carts are so handy to have around the house. I’m Keri from One Mama’s Daily Drama, and I’m back again to share one of my favorite DIY projects from this year. I updated this old rolling cart and turned it into a gorgeous piece that I can use in any room of the house.
One of the great things about this DIY rolling cart is that you can use it in a lot of different ways. Load it up, unload it, and change out its job throughout the year. I painted mine a bright, cheery red to match my kitchen, where it lives most of the year, but since it’s on wheels, I can move it anywhere on a whim.
How to Make a DIY Rolling Cart
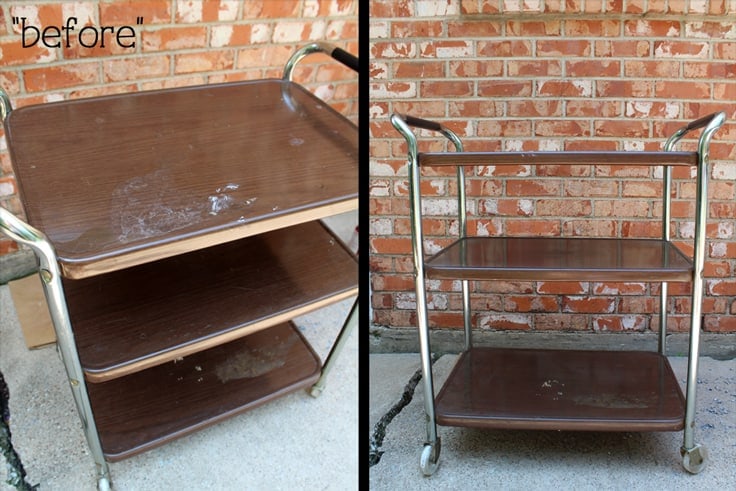
My rolling cart was a hand-me-down from my grandpa’s house that sat in our garage unused for years. You can pick up a new one at lots of home stores like Ikea and Target. You may also have some luck finding one at a thrift shop or yard sale.
What you need:
Want more ideas like this? Subscribe today to get our weekly Ideas in Your Inbox newsletter plus other exclusive gifts and offers — all for FREE!
Tools Needed:
- wrench or screwdriver to disassemble the cart
- all-purpose cleaner
- cleaning rags
- cardboard or a dropcloth to protect your workspace
Supplies Needed:
- metal rolling cart
- spray paint (I used Rustoleum Painter’s Touch 2X Ultra Cover in Colonial Red)
Instructions:
1. Prep the rolling cart
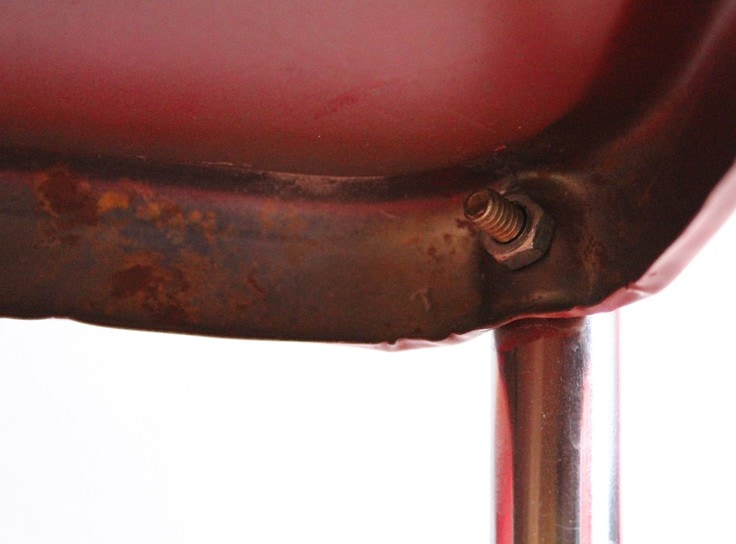
First, I used a wrench to unscrew the bolts at each joint. You may need a screwdriver or something different for yours. I left the wheels attached to the handles. Then I deep cleaned everything with all-purpose cleaner and wiped it dry.
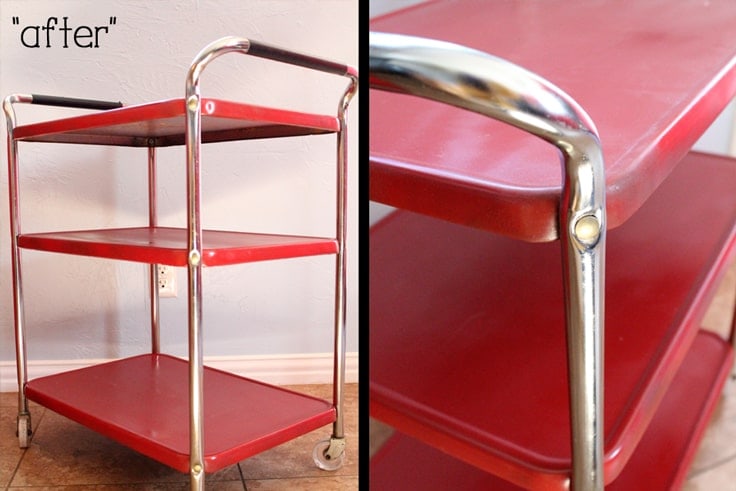
2. Paint the shelves
Lay out each shelf over cardboard. I usually put scrap wood or empty paint cans under my paint project so that they aren’t sitting flat on the ground. This makes it easy to paint the edges without moving it around too much. Let the paint dry completely.

3. Reassemble the cart
Put the rolling cart back together, careful not to scratch the new paint. I left my handles as they were, but you could cover them in new vinyl, cord, or fabric.
Styling Your DIY Rolling Cart
There are really dozens of ways you can use a rolling cart around the house. Use it as a mobile workstation for your office, a rolling home cleaning kit, or a potting station for the garden. Here are three ways I love to use mine:
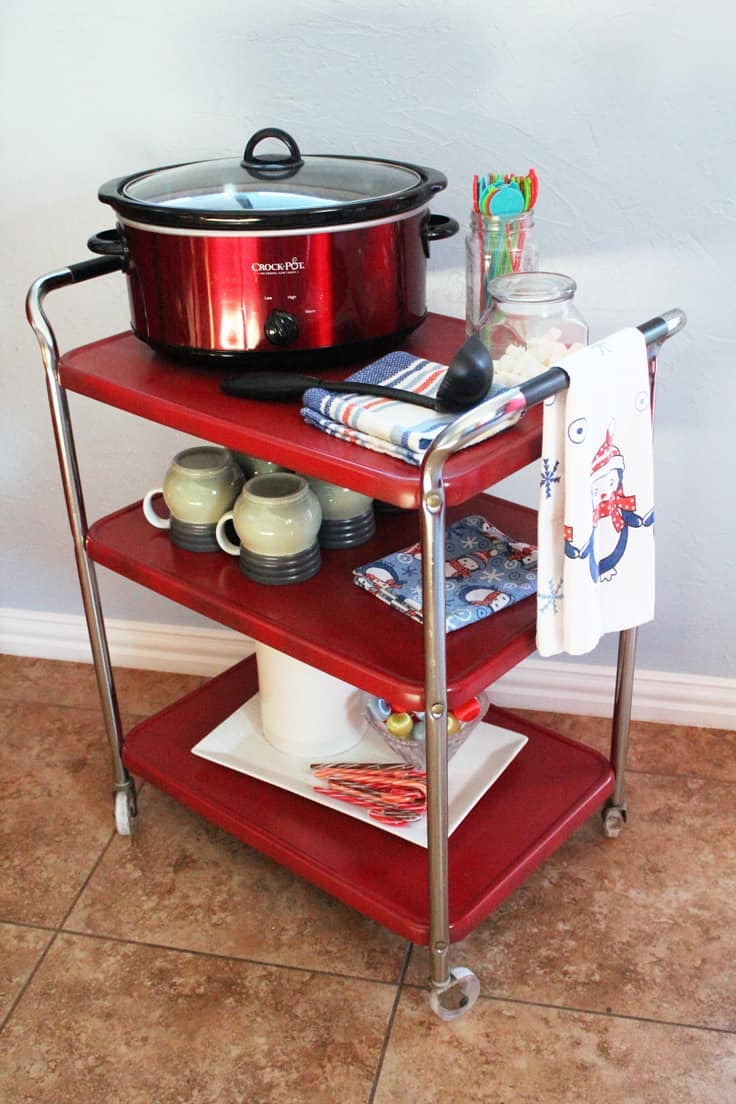
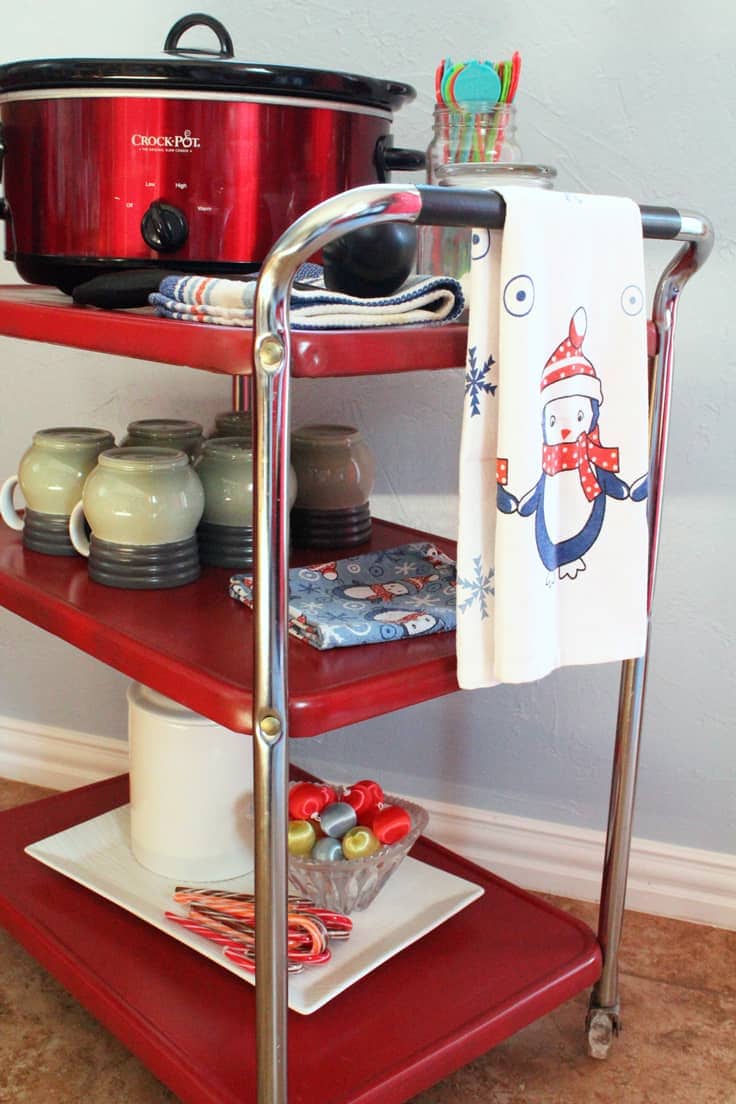
Winter hot cocoa station
Set up a hot cocoa station for your next winter gathering. Heat the cocoa in a slow cooker and stock your cart with plenty of mugs, marshmallows, candy canes, and stir sticks.
You can also add yummy snacks, like this caramel marshmallow popcorn!
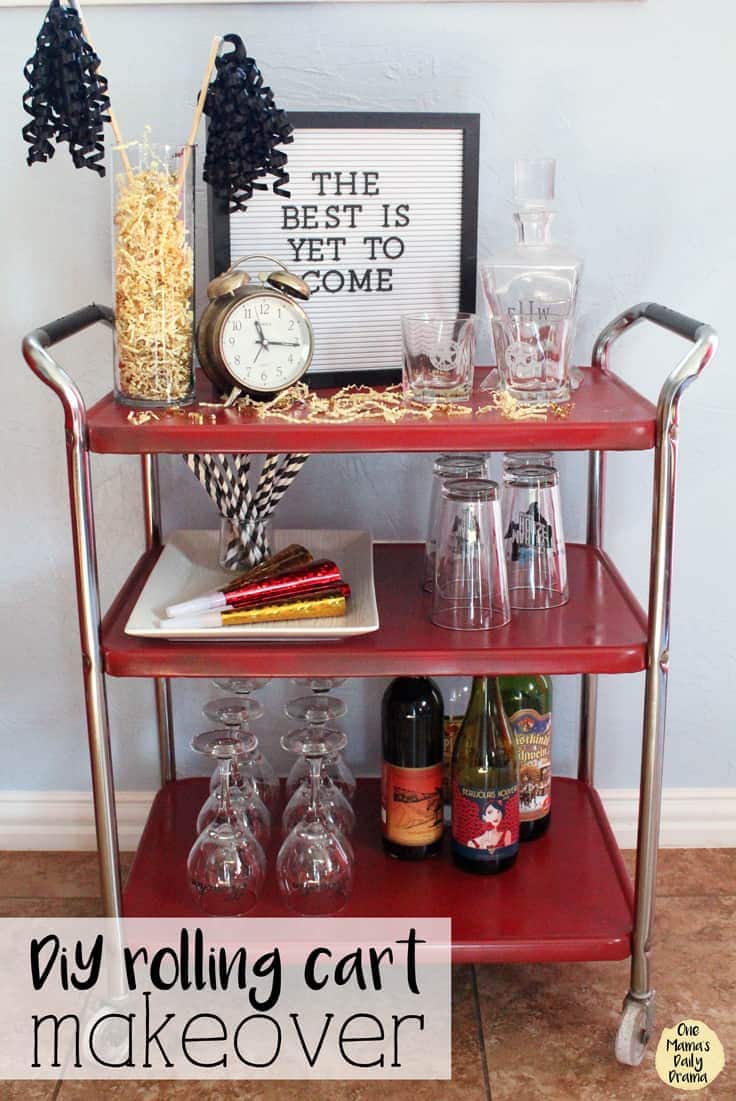
New Year’s Eve bar cart
Keep everything your party needs until midnight in one place. Include your favorite drinks and drink ingredients. Noisemakers are a fun addition, and of course, you’ll need a clock to count down the last minutes.
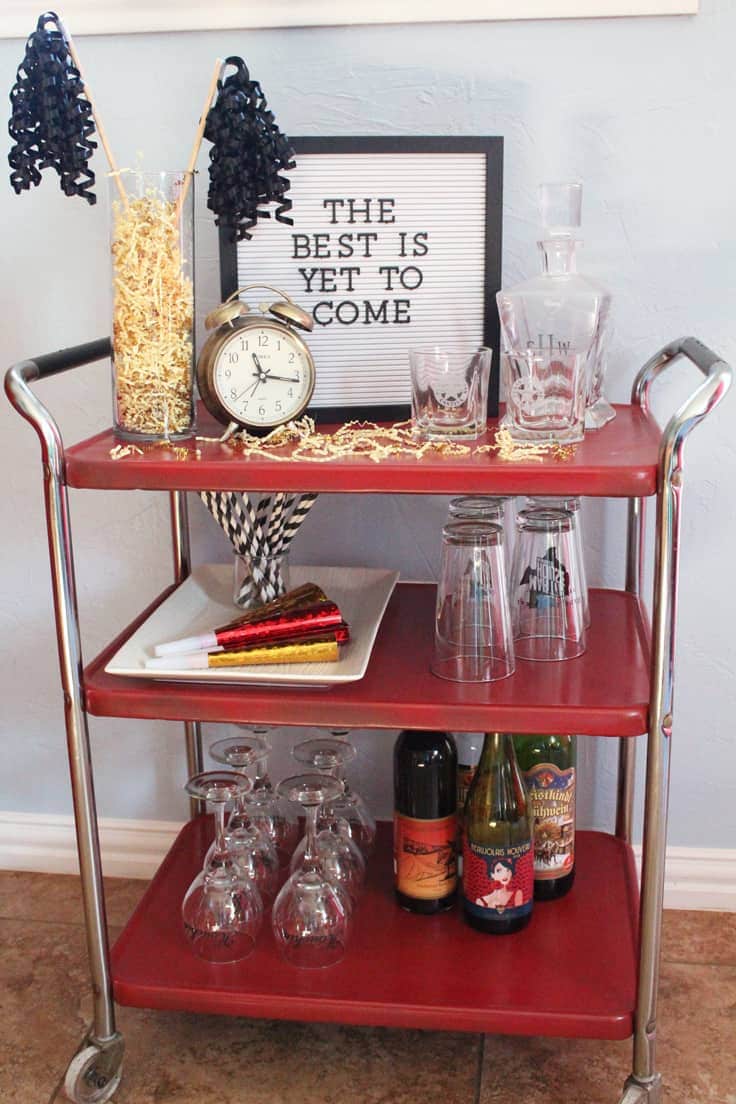
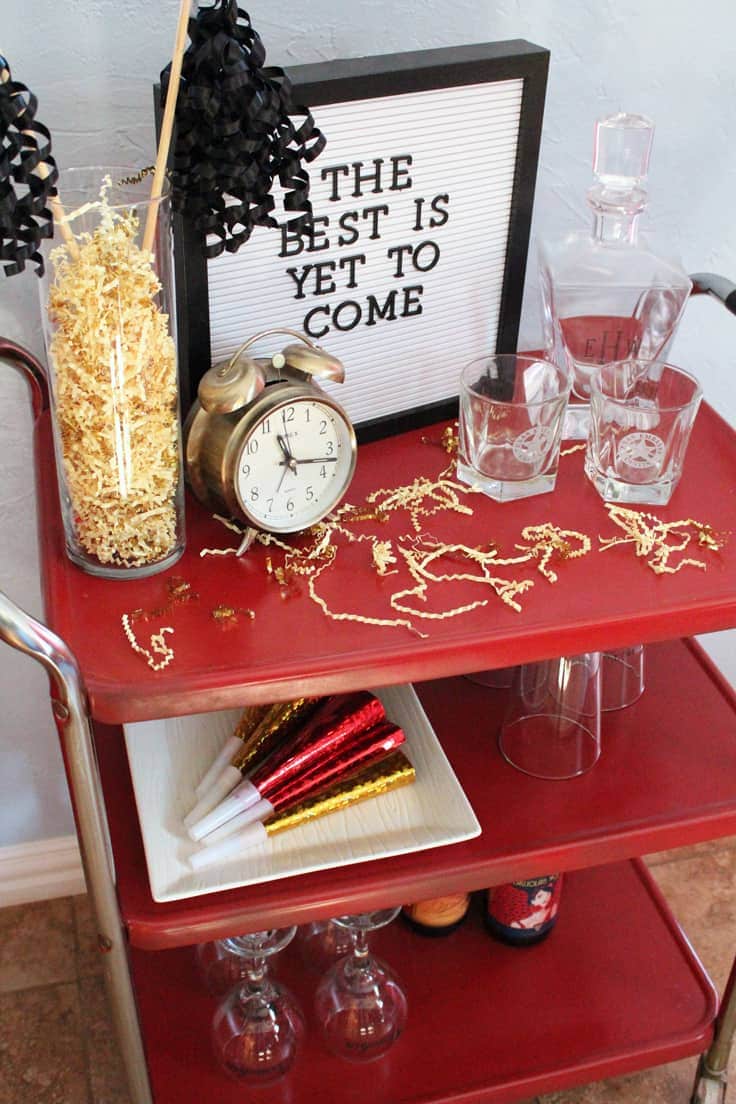
Check out this tutorial on how to style a bar cart for step by step instructions that anyone can follow.
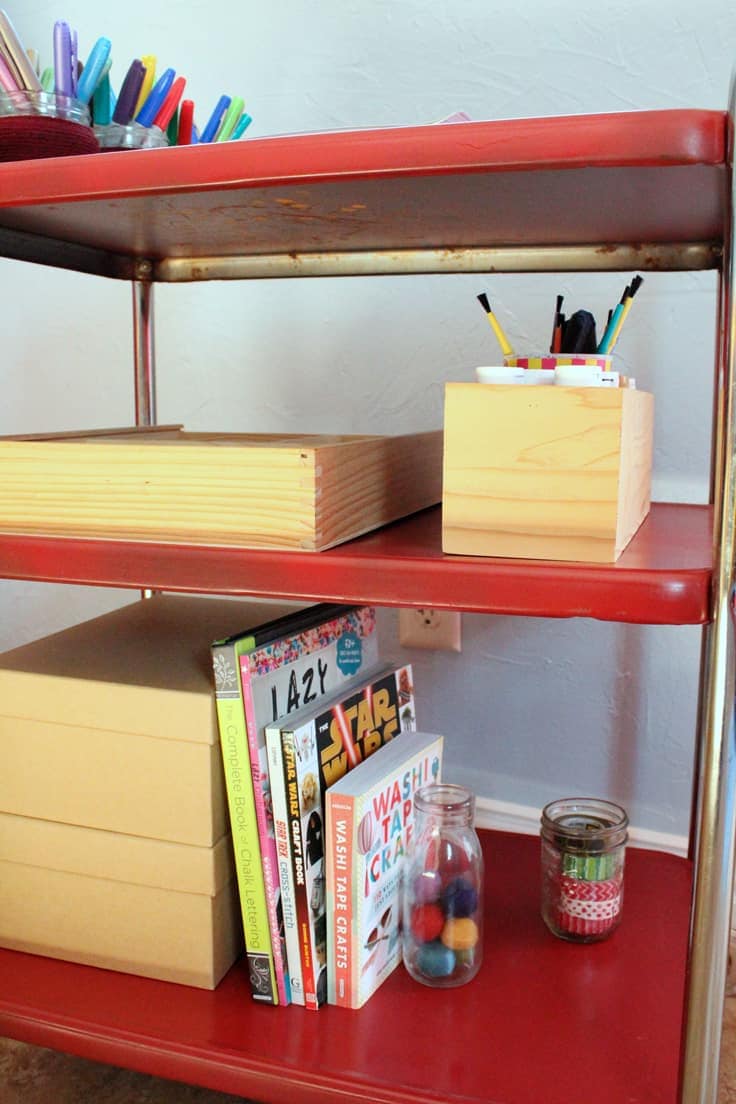
Art and craft supply station
Load up all you or your kids’ favorite supplies for easy access. Stock your cart with plenty of pencils, markers, paper, paint, brushes, and other craft supplies. A few craft books make great inspiration for lazy day fun.
Love the ideas you see here on Ideas for the Home by Kenarry®? Subscribe today to get our FREE DIY & Craft Planning Calendar, plus our weekly Ideas in Your Inbox newsletter filled with creative tips and exclusive offers!
What’s Next?
Merry and Bright Cookie Exchange Party with Printables

10 Secrets to Hosting a Party on a Budget
Printable Vintage-inspired Holiday Greetings
You may also enjoy these party ideas on Ideas for the Home by Kenarry® –
This is so cute Keri!