A Farmhouse Style Picture Frame Tutorial
THIS POST MAY CONTAIN AFFILIATE LINKS. PLEASE SEE OUR FULL DISCLOSURE POLICY FOR DETAILS.
This Farmhouse Style Picture Frame Tutorial walks you through the steps of layering and distressing chalk paint to achieve a time worn look.
Hi friends! I’m Rita Joy from Harbour Breeze Home, and I’m so glad to be back today sharing my latest crafty project – a farmhouse style picture frame. You are going to LOVE it!

Disclosure: This blog post contains affiliate links for products or services we think you’ll like. This means if you make a purchase from one of these links, Ideas for the Home by Kenarry® will make a small commission at no additional cost to you so we can keep the great ideas for the home coming your way. All opinions expressed are derived from personal experience.
It All Started With Saving Money
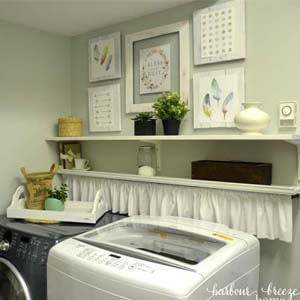
I was recently scrambling to finish the last few things in our recent Laundry Room Makeover. All the big things were done, and it was finally my favorite stage ~ adding all the “pretty”! As I contemplated options for wall decor, I really wanted to save money by using items I already had in the house. Sometimes desperation brings out creativity, and before I knew it I had craft supplies all over my dining table. The end result was a farmhouse style picture frame that became the jumping off point for all the other decor.
I wanted the room to be bright and cheery with a little pop of pink. The frame I dug out of the closet was dark chocolate brown ~ not exactly the look I was going for! But the size was perfect, so I decided to go with it.
I’ll share every step I took with you so you can make your own picture frame too.
Supplies
- Chalk paints in colors Vintage Cupcake (by Country Chic paints) and Cloudy Day (by Cottage Paint)
- Paint brush
- Towel
- Old dry rag
- Section of electric floor scrubber
How to Make Farmhouse Style Distressed Picture Frames
Here’s what I did to make some DIY distressed farmhouse frames. It just takes two different coats of paint and some distressing.
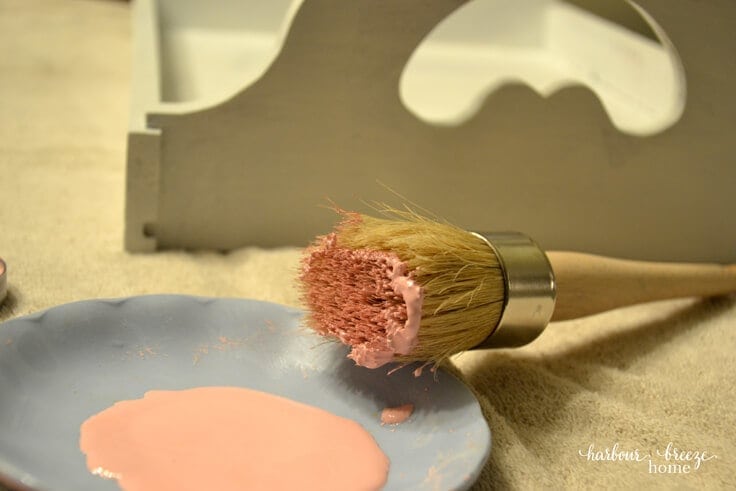
1.) Coat the entire frame with pink paint
I first coated the whole frame with the pink paint. I painted the edges first and then the front.
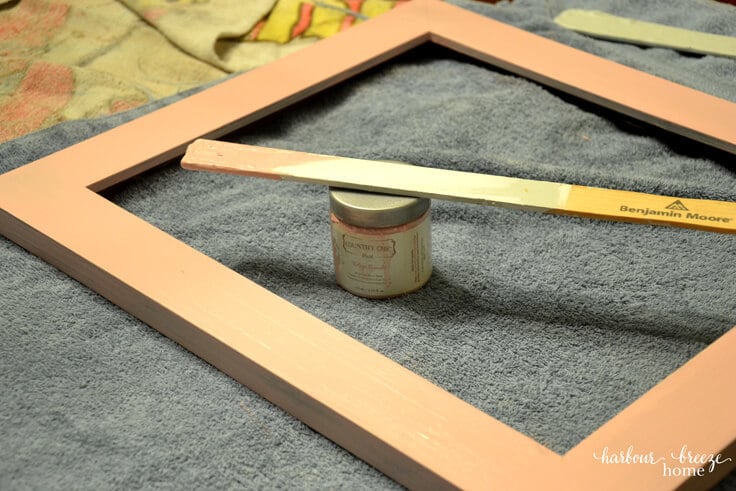
2.) Dry the first coat
Since the base coat must be completely dry before adding the top coat, I sped up the process by using my blow dryer on it.
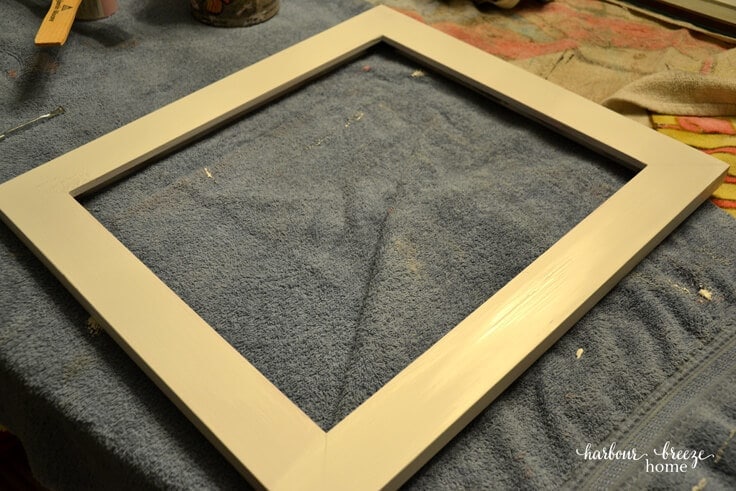
3.) Paint a top coat of white
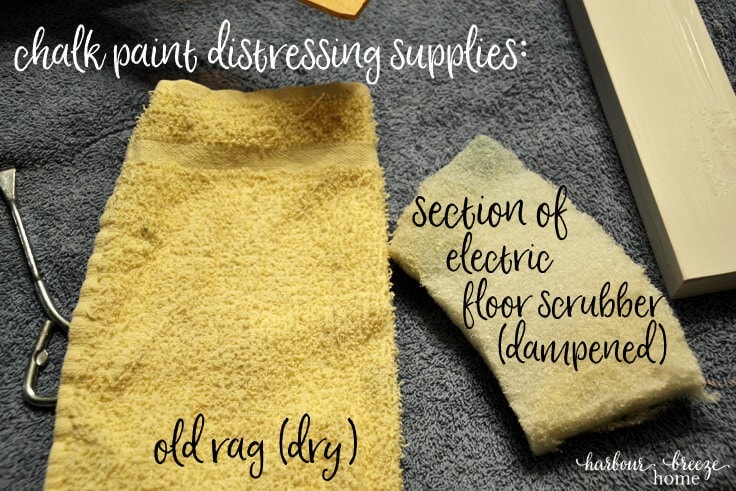
Once the pink paint was completely dry, I painted the top coat of Cloudy Day White. Again, using the blow dryer technique, I sped up the drying process until the paint was completely dry to the touch. Once the top coat was dry, it was time to try out a wet distressing layering technique. These are the supplies I used:
4.) Distress the frame
Although there are various ways to distress paint to give it a timeworn finish, this wet sanding method gives a bit more control over how much paint is removed.
Using the dampened floor scrubber pad (similar to these ~ You must use the white color to prevent color bleeding) and working in one small section at a time, I rubbed gently in circles in the areas where I wanted to remove some of the white paint.
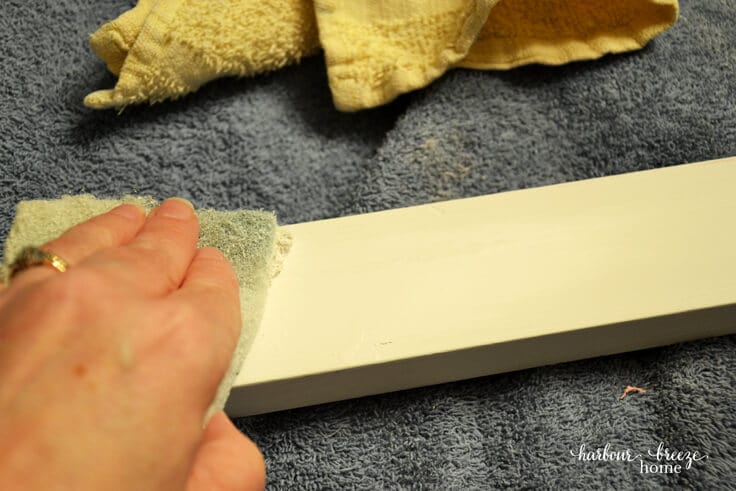
After rubbing gently, I would blot the area with the dry rag. This method allows you to remove just a bit of paint to reveal a hint of the color underneath, or if you keep rubbing, it will go right down to the bare wood (which I did in some areas, too.)
5.) Seal the frame with acrylic wax
After it was distressed the way I liked, I sealed the whole frame with a coat of Cottage Paint’s Acrylic Wax (in flat sheen).
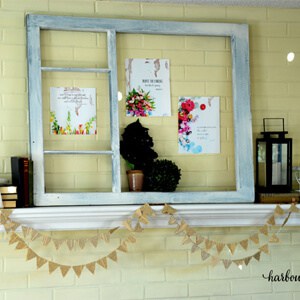
I loved how just a few coats of paint totally transformed a dark and dismal frame into something bright and cheery!
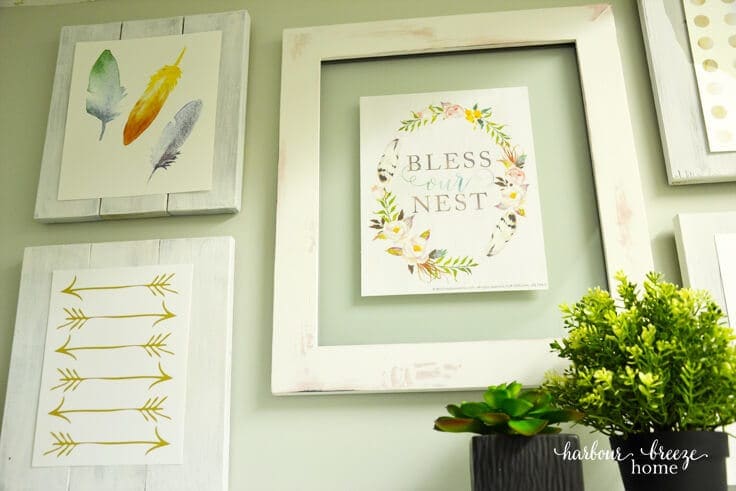
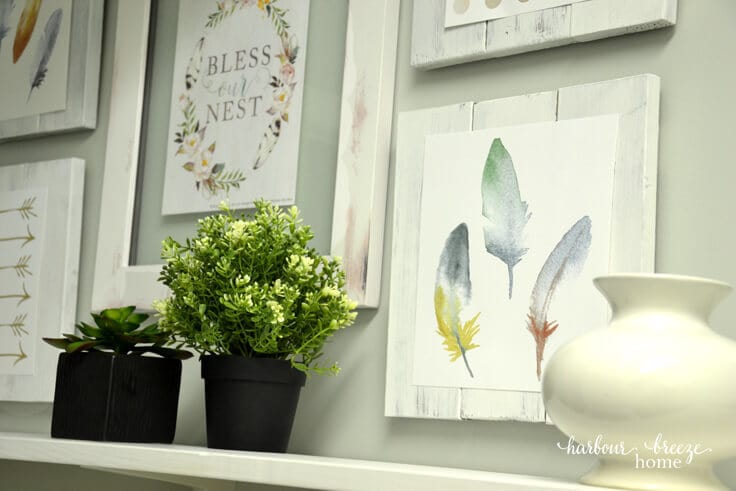
The beautiful artwork pictured is all free printables you can print right at home on your home printer. Sources are as follows: Bless Our Nest | Arrows & Polka Dots | Feathers
Want an even more rustic looking finish for your frames? Check out this easy tutorial on how to create a crackle paint finish.
More Home Decor Projects
If you want to see some more budget-friendly decor projects, you will want to check these posts out:
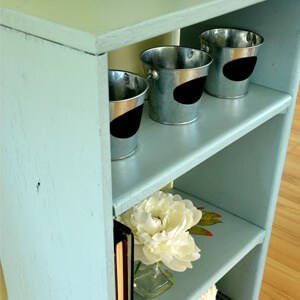
How to Paint a Bookcase with Cottage Chalk Paint (with video)
Love the ideas you see here on Ideas for the Home by Kenarry®? Subscribe today to get our FREE DIY & Craft Planning Calendar, plus our weekly Ideas in Your Inbox newsletter filled with creative tips and exclusive offers!
What’s Next?
While you’re here, be sure to check out other home decor ideas on Ideas for the Home by Kenarry® –
- Painted Wood Crate Storage Idea
- 4 Ways to Use Old Windows as Antique Wall Decor
- Vintage-Inspired Chalkboard Tray
Originally published March 8, 2017. Updated March 2018.