How to Make a Hanging Wall Organizer
THIS POST MAY CONTAIN AFFILIATE LINKS. PLEASE SEE OUR FULL DISCLOSURE POLICY FOR DETAILS.
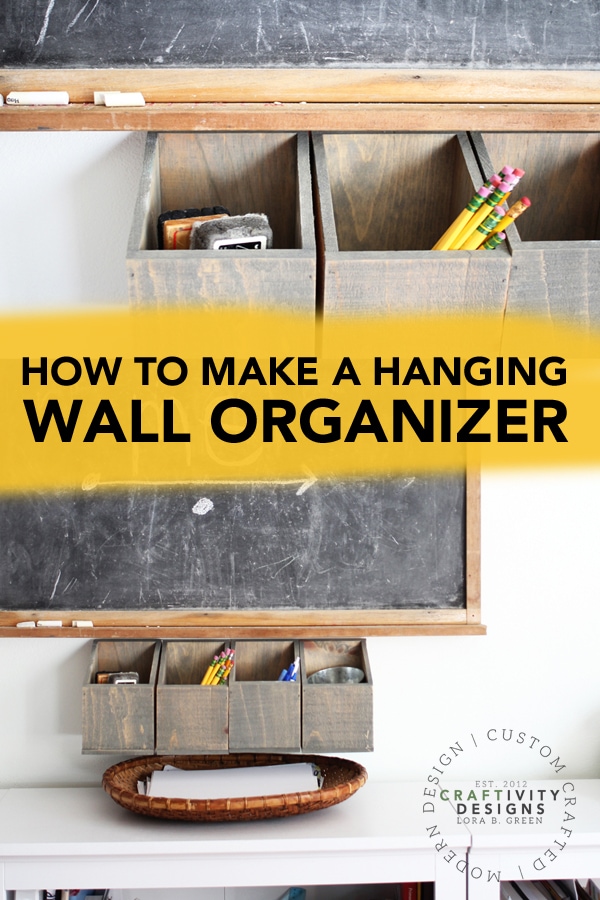
Pencils, pens, and office supplies clutter the surface of desks. Clean it up! Make a hanging wall organizer and get office supplies off your desktop.
It doesn’t take long to fill desks with pens, pencils, and other office supplies. Therefore, it’s important to find storage solutions that utilize the wall space in a home. For example, a hanging wall organizer in our Homeschool Room helps fight the surface clutter that is so common in working spaces.
I’m Lora Green, of Craftivity Designs, where I love solving storage dilemmas such as:
- creating storage hacks for our tiny laundry room
- choosing between a dresser or wardrobe for our small master bedroom
How to Make A HANGING WALL ORGANIZER
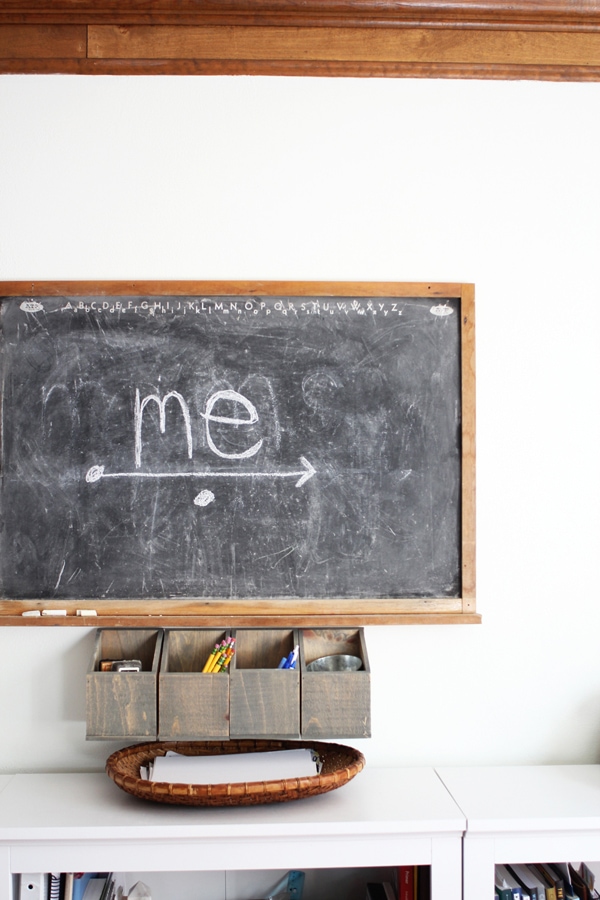
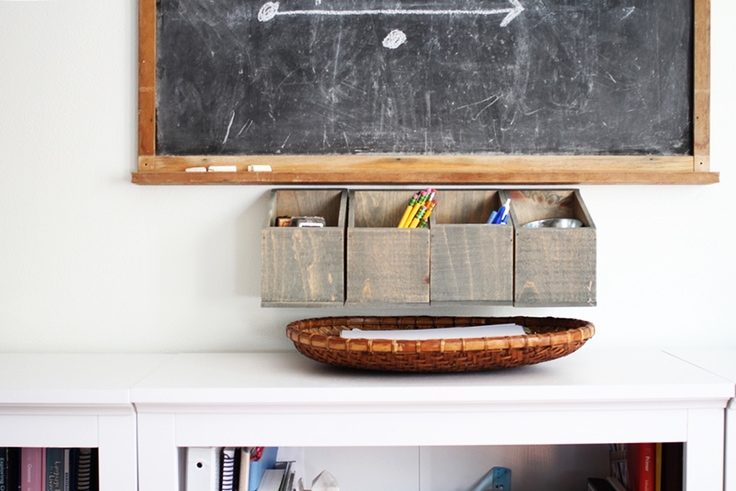
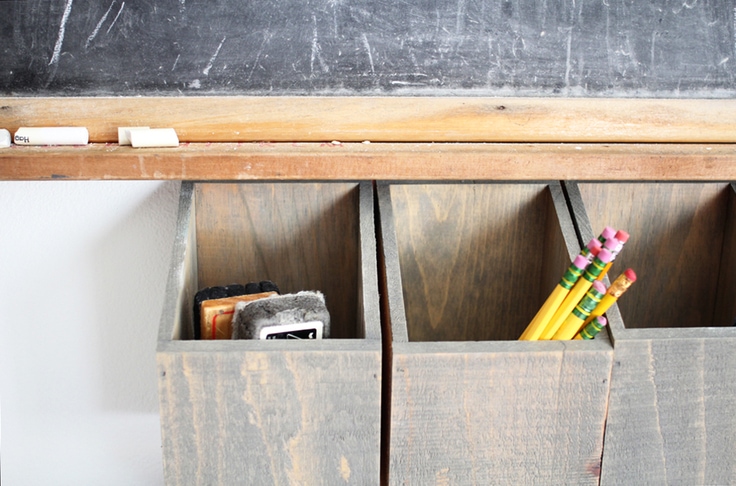
There is a set of 3 bookcases in our homeschool room. Rather than fill the top of the bookshelves with pen and pencil containers, I decided to move the storage to the wall. A hanging wall organizer fits nicely between the chalkboard and bookshelf and keeps the surface clean.
What you need:
Want more ideas like this? Subscribe today to get our weekly Ideas in Your Inbox newsletter plus other exclusive gifts and offers — all for FREE!
Tools Needed:
Supplies Needed:
Instructions:
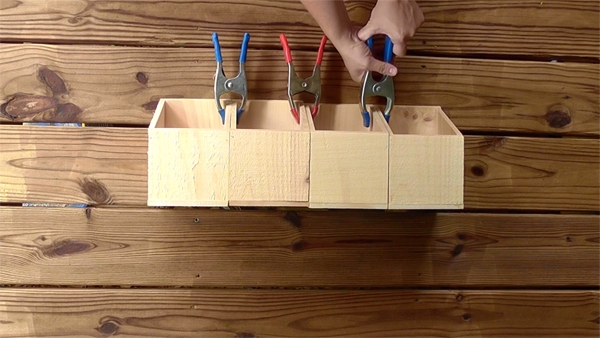
1. ALIGN the Bins
First, align the unfinished wood boxes so that each bin’s side is flush against the next. Ensure that the boxes are even across the top and bottom.
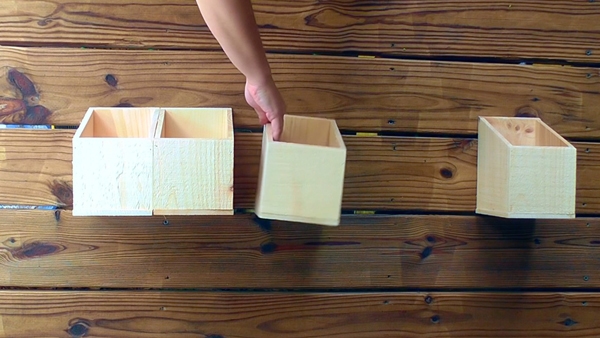
2. CLAMP THE BINS TOGETHER
Once aligned, use spring clamps to hold the boxes in place while you assemble the hanging wall organizer.
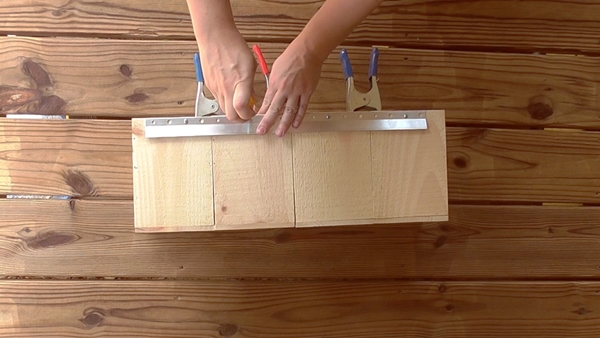
3. ATTACH A CLEAT TO THE hanging WALL ORGANIZER
Now that the bins are clamped in place, flip over the organizer. Attach a hanging cleat to the backs of the wood boxes, using a screwdriver. A cleat is a heavy-duty hanging mechanism that will be able to support weight inside the bins.
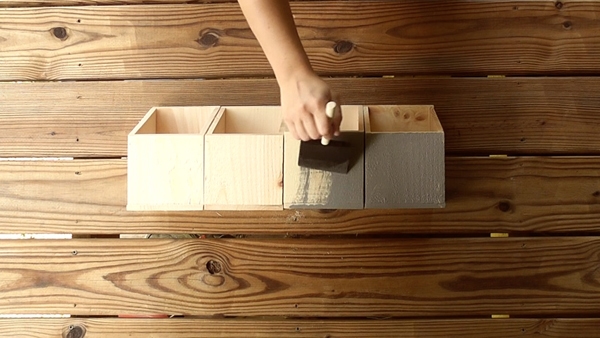
4. STAIN THE WALL ORGANIZER
Once the wall organizer is assembled, remove the spring clamps and stain the unfinished wood. I prefer to use foam brushes that can go in the trash once the project is complete.
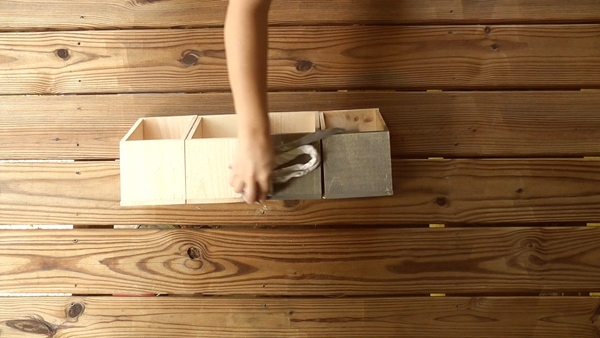
5. RUB THE STAIN WITH A CLOTH
Finally, rub the excess stain away with a cloth rag. If necessary, repeat steps 4 and 5 until you achieve the desired look.
ORGANIZE OFFICE SUPPLIES
Once you’ve built a wall organizer, it’s time to organize (I’ll be honest, that’s my favorite part #nerdalert)! I tucked pencils and pens in 2 bins, and chalk and erasers in the other 2 bins. Quick at hand but mostly out of sight, and completely off the bookcase tops!
Create Labels
This part is optional and you can see I didn’t do it. But I have seen lots of people create vinyl labels with their Cricut or other cutting machines.
Another way you can label the boxes is with paint and stencils.
Or download and print some round labels from Clutter Keeper!

What’s Next?
If you enjoyed this hanging wall organizer you’ll enjoy these organization projects, too.
How to Make a Family Command Center
Organize Finances with Free Savings Tracker Printables
How to Add Handles to Storage Baskets
You may also enjoy these organization ideas on Ideas for the Home by Kenarry® –