How to Make an Easy Origami Corner Bookmark
THIS POST MAY CONTAIN AFFILIATE LINKS. PLEASE SEE OUR FULL DISCLOSURE POLICY FOR DETAILS.
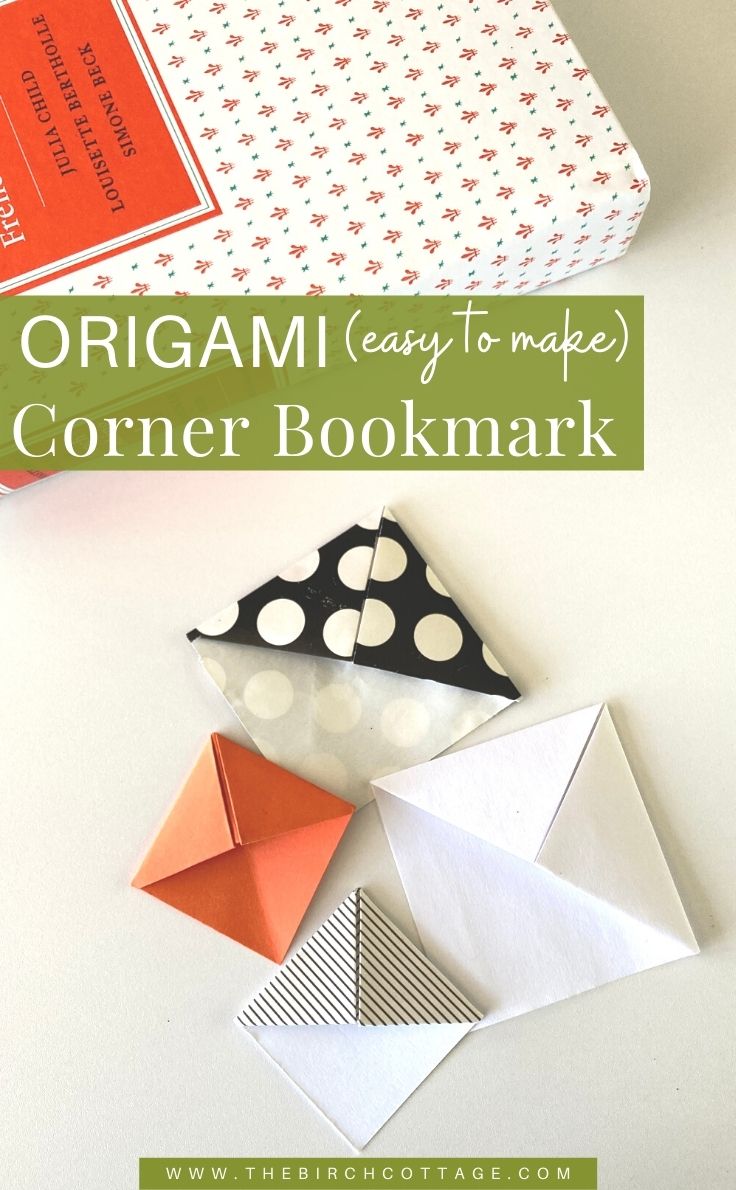
Making an origami corner bookmark from paper really couldn’t be easier! Plus, it’s a fun activity you can even do with your children!
Hello, Kenarry readers! I’m Pam from The Birch Cottage. I’m back again this month sharing with you how to make an easy origami corner bookmark. These easy origami corner bookmarks couldn’t be simpler to make and, to be honest, they’re quite addictive! Add this to your book craft ideas list and make it today.
In fact, I am actually working on sewing up some fabric corner bookmarks. They are very similar to these paper corner bookmarks. I make a lot of handmade gifts for our family for Christmas. This year I’m planning a little themed gifting for our grandchildren around reading.
I love to read and anytime I can find a fun way to encourage our children and grandchildren to read, I’m all for it. One of the really fun things about these origami paper corner bookmarks is that you can actually get your kids involved in the making!
How to Make an Easy Origami Corner Bookmark
What you need:
Want more ideas like this? Subscribe today to get our weekly Ideas in Your Inbox newsletter plus other exclusive gifts and offers — all for FREE!
Craft Tools Needed:
You really don’t have to use any craft tools, but you may find having the following craft tools on hand will make your origami corner bookmark crafting even easier:
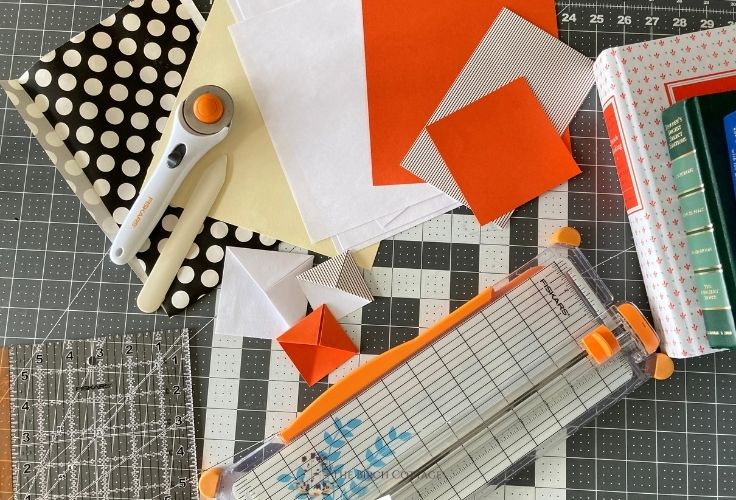
Supplies Needed:
These are the supplies you’ll need. All the exact measurements and quantities are in the printable card at the bottom of this post.
- Paper, such as:
FAQs
Even though this really is an easy craft project, before you just dive in and start trying to make an origami corner bookmark there are a few helpful tips.
What is origami?
Don’t let the word “origami” scare or intimidate you. Origami simply means the art of paper folding. Originating in Japan, traditional origami consists of folding a single sheet of square paper into an object or sculpture without cutting, gluing, or taping.
In fact, napkin folding is a form of origami. You may have visited a restaurant that had a fabric napkin folded to resemble a swan or some other figure. That’s origami at work!
What kind of paper should I use?
Although you can use any square piece of paper, some of the best paper to use are origami paper, gift wrap, printer paper, colored printer paper, or construction paper. You can also use cardstock but may find that it’s just too thick to fold properly. Thinner paper actually works better.
What size paper should I use?
You’ll want to use 6” x 6” square pieces of paper. You can also make the square smaller, such as 5” x 5” or even 4″x4″ – but I wouldn’t go much smaller than 4″. Of course, your finished corner bookmark will be smaller.
Video Instructions
I put together this quick video tutorial that will walk you through each step of making your very own origami corner bookmark. You’ll also find easy to follow pictures below and a detailed printable how-to below.
Instructions
This really is an easy craft project, but sometimes it helps to have an actual photo of the steps involved. I hope these help!
Prepare to Craft
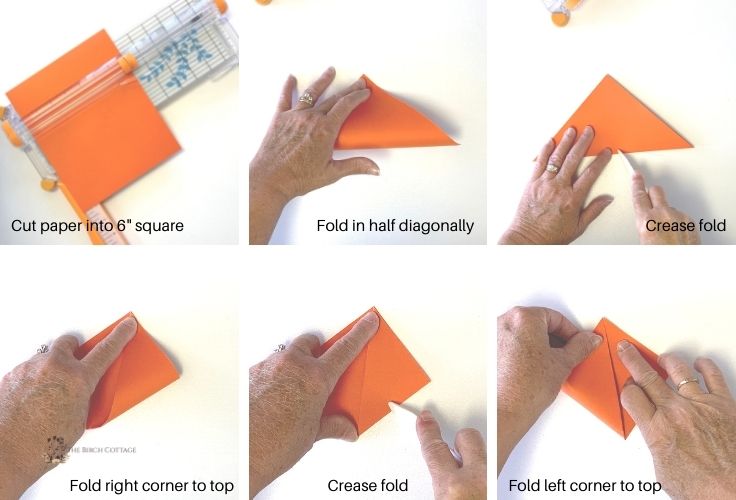
First, gather up your supplies and cut your paper into 6″x6″ squares. You can use a ruler and scissors or a rotary cutter. Or you can use a paper trimmer to cut your squares.
It doesn’t matter what you use to cut your squares. What does matter is that the squares are as square as possible. In other words, make accurate cuts.
Work on a Flat Surface
Working on a flat surface, like your table top, will give you straighter edges and better results than holding the paper in your hands.
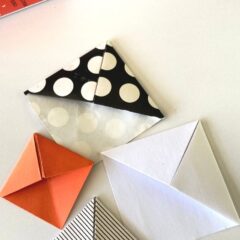
Lay your cut square piece of paper flat on the table in front of you. Then, follow these folding instructions in order:
- Fold the paper in half diagonally.
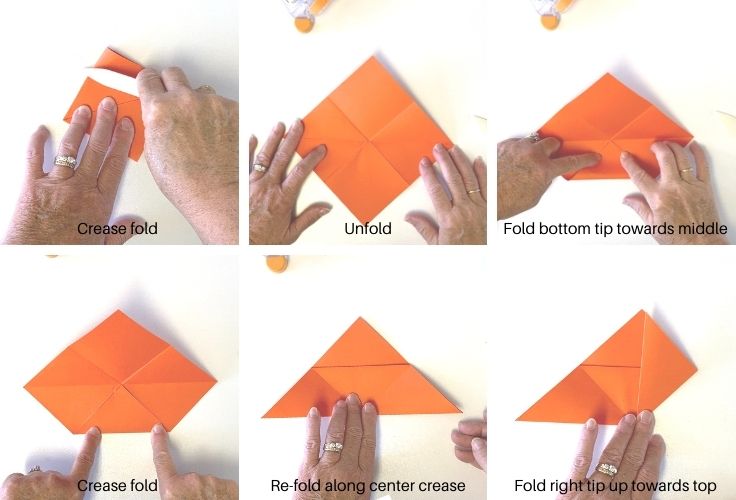
- Fold the two bottom corners up away from you.
- Next, you’ll unfold the bottom corners and fold down one tip from the top (making a pocket. )
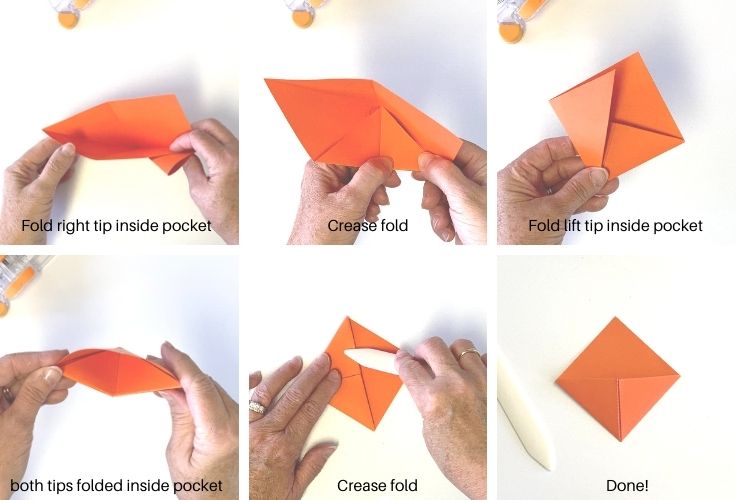
- Finally, you’ll fold the sides back up and tuck the sides in the pocket. Easy, right?!
These pictures will help:
Easy Origami Corner Bookmark
Equipment
- paper trimmer
- scissors
- rotary cutter
- Ruler
- Pencil
- bone folder
Supplies
- 1 6"x6" paper printer, gift wrap, origami, or construction
Instructions
- Use a paper trimmer to cut your pieces of paper, construction paper or wrapping paper into 6”x 6” squares. You can also use a ruler and pencil to mark the square and a pair of scissors to cut out the squares.
- Place the square piece of paper in front of you so that it lays flat on your work surface and so that one of the corners is pointing towards you. Fold the paper in half diagonally to make a triangle. In other words, take the corner that is facing you and fold it up to the opposite corner.Making sure the tips and edges are aligned, run your bone folder or your finger along the crease to make it nice and sharp.
- You should now have a triangle with the straight, folded edge facing you. The point tip should be facing away from you. Now you are going to fold the bottom corners of the triangle up towards the top point. Take the right bottom corner and fold it towards the top of the triangle. Make sure the edges align then run your bone folder or fingernail along the crease to make a nice sharp crease. Repeat with the left side. You will end up with a diamond shape.
- Unfold the bottom corners that you just made in step three.Take the top pointy tip and fold it down towards the bottom. The tip should align with the bottom fold and the edges will align with the crease lines from step three. You can leave the fold just like this or refold it so that it is on the inside. Simply take the tip that you folded down and fold to the inside. Use your bone folder or fingernail to create a nice sharp crease.
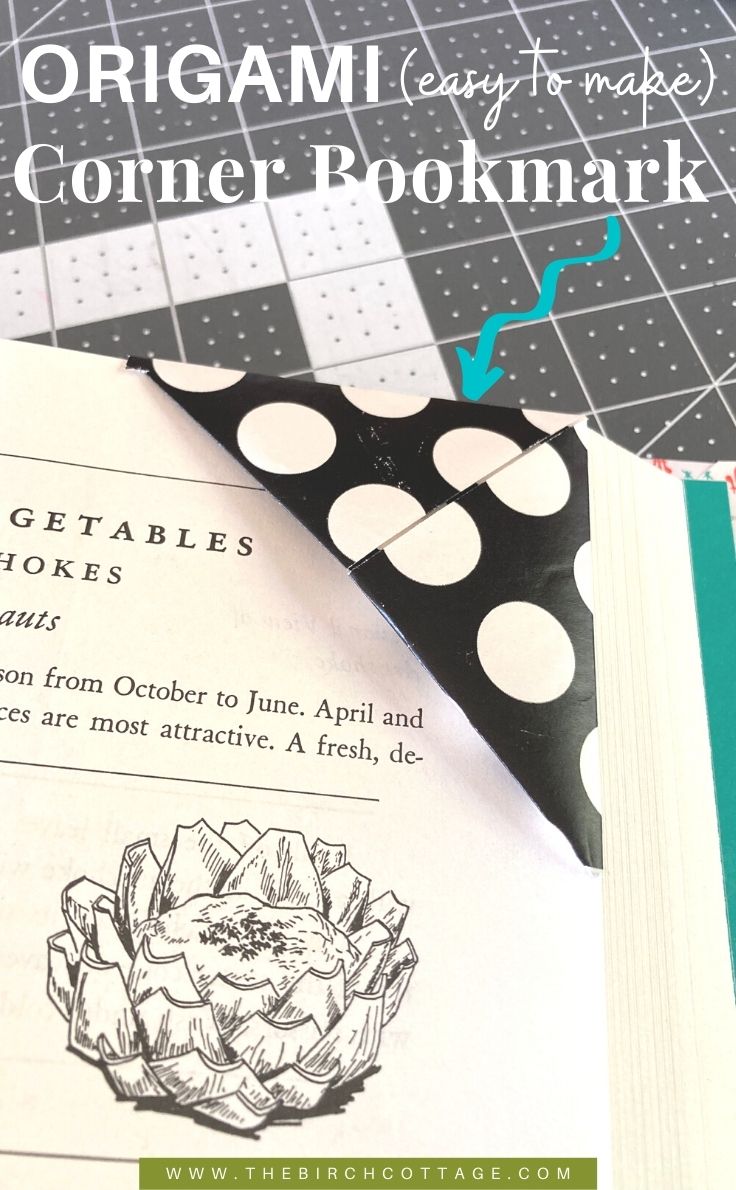
- Take the right corner and fold it half-way inside the triangle. Be sure the tip of the triangle is flush inside the pocket. Repeat with the other corner.
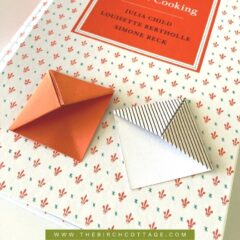
- Your easy origami corner bookmark is now ready to be used! Or you can even decorate it with stickers or stamps or even draw a face on it or a word of encouragement. To use, simply slide the pocket portion of the bookmark over the page you want to mark.
Notes
Love the ideas you see here on Ideas for the Home by Kenarry®? Subscribe today to get our FREE DIY & Craft Planning Calendar, plus our weekly Ideas in Your Inbox newsletter filled with creative tips and exclusive offers!
More Origami Corner Bookmark Tutorials
If you enjoyed this Easy Origami Corner Bookmark tutorial and are ready to take your bookmark making to the next level, you might want to try these creative ideas from other bloggers:
- How to Make an Origami Bookmark That Will Get Kids Excited to Read
- Easy Reindeer Bookmarks for Christmas
- DIY Woodland Animals Origami Bookmarks
- DIY Unicorn Corner Bookmark
- Minion Corner Bookmark

What’s Next?
If you enjoyed this Easy Origami Corner Bookmark craft project, you might also like these ideas from The Birch Cottage:
How to Prepare Acorns for Use with Crafts

25+ Handmade Gift Ideas for Men

20+ Handmade Gift Ideas for Teens

And you just may enjoy these other reading or bookmark themed ideas from Ideas for the Home by Kenarry® –