Mason Jar Tissue Holder – No-Sew Home Decor
THIS POST MAY CONTAIN AFFILIATE LINKS. PLEASE SEE OUR FULL DISCLOSURE POLICY FOR DETAILS.
A mason jar tissue holder is a cute and easy way to add a personal touch to your bathroom. Plus you can decorate them however you like!
Hello! Michelle here from Our Crafty Mom sharing an adorable mason jar tissue holder. I’ve been wanting to make one of these for a long time and now that I know how easy they are I plan to make several for gifts.

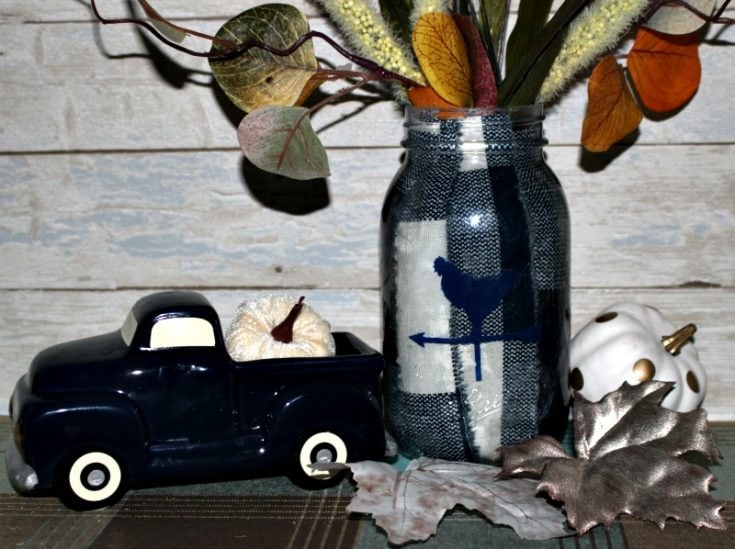
I used pretty fall fabric and Mod Podge to decoupage the fabric onto the glass jar. If you are unfamiliar with decoupage, it is the process of gluing fabric to a surface, and it’s really simple.
The thing I LOVE about this craft is you can use your creativity to paint the jar or use fabric in any style that you like.
You can also add vinyl with a fun quote like “bless you”. The possibilities are endless!
And if you love adorable no-sew crafts, click over to see this no-sew DIY gnome. It’s perfect for the holidays!
How to Make a mason jar tissue holder
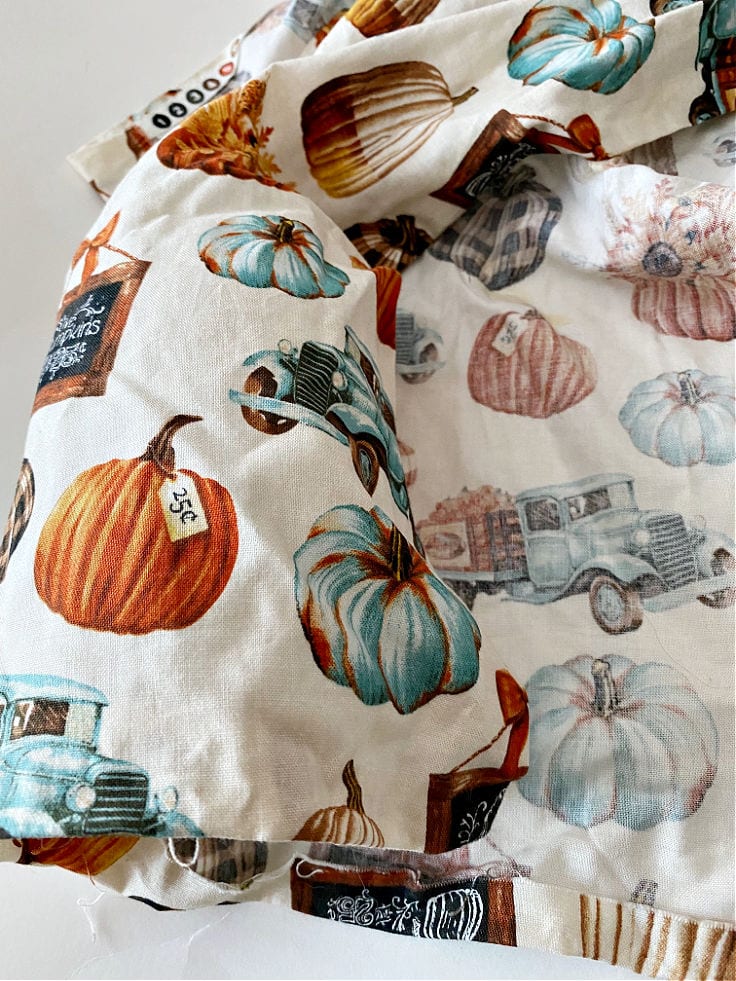
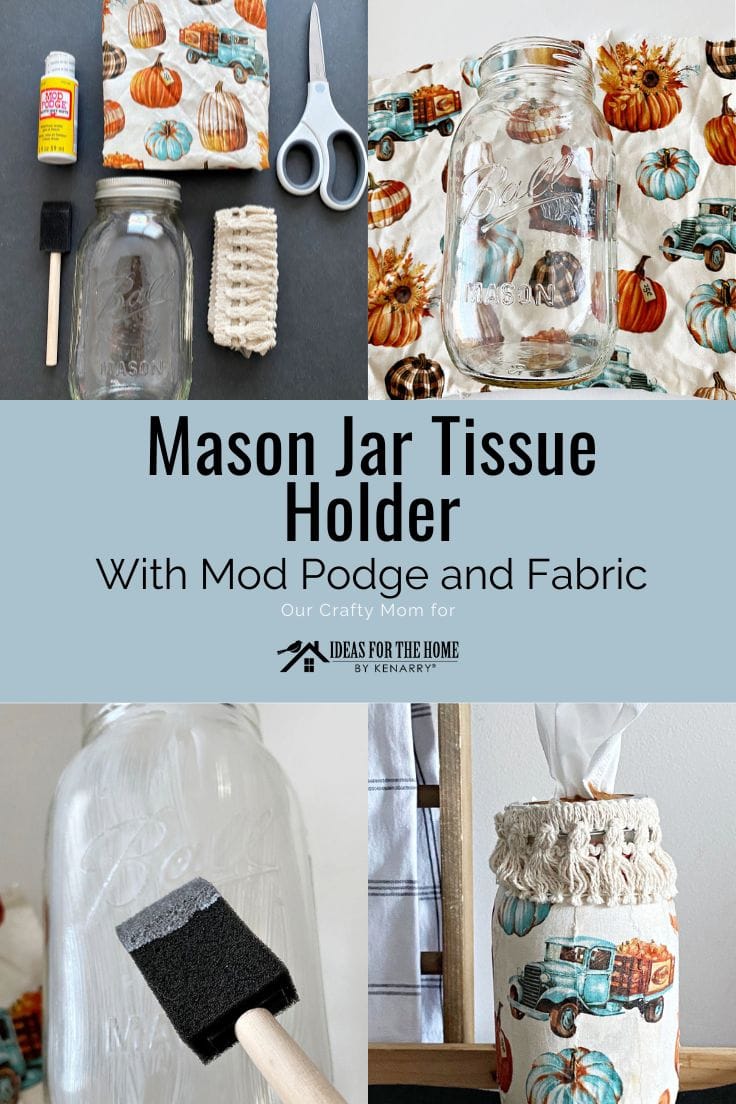
The hardest part of this project is deciding what type of fabric you are going to use. I had a pretty fall design that I used, but you can go with any style that you like.
What you need:
Want more ideas like this? Subscribe today to get our weekly Ideas in Your Inbox newsletter plus other exclusive gifts and offers — all for FREE!
Craft Tools
Supplies:
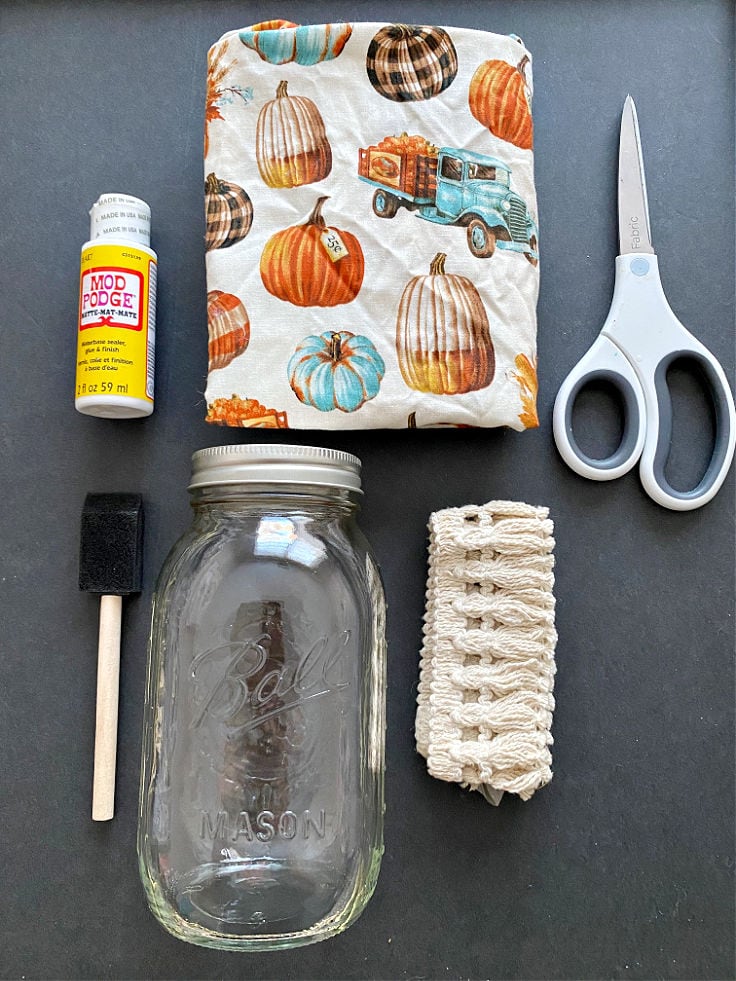
Mason Jar Tissue Holder Tips:
Cut A Square Of Fabric To Size
Place the mason jar on your fabric and cut a square to fit around the jar. I recommend using a plain glass mason jar. The one I used had a raised design on it so it was a little harder to lay the fabric flat.
Cut Fabric Into Strips
Cut the fabric into strips about 2-3″. You can cut a small piece and then tear the fabric. It doesn’t have to be perfectly even as you won’t be able to tell once it is on the mason jar.

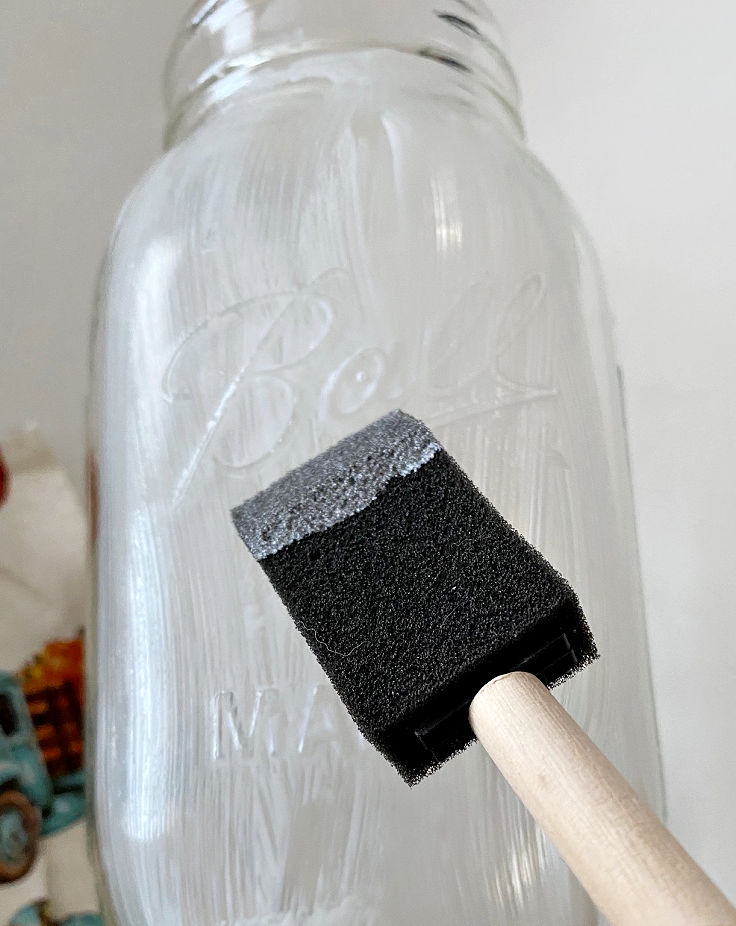
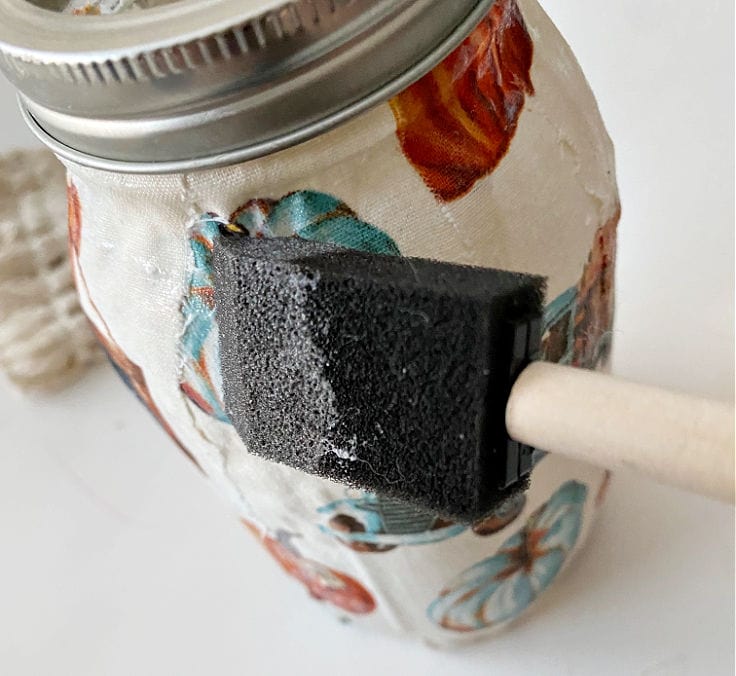
Add Mod Podge
Use a foam brush to add a layer of Mod Podge directly to the mason jar. Let it sit for a minute or two so it gets tacky.
Attach Fabric
Now you want to secure each strip of fabric to the mason jar. Slowly smooth the fabric down to remove any wrinkles.
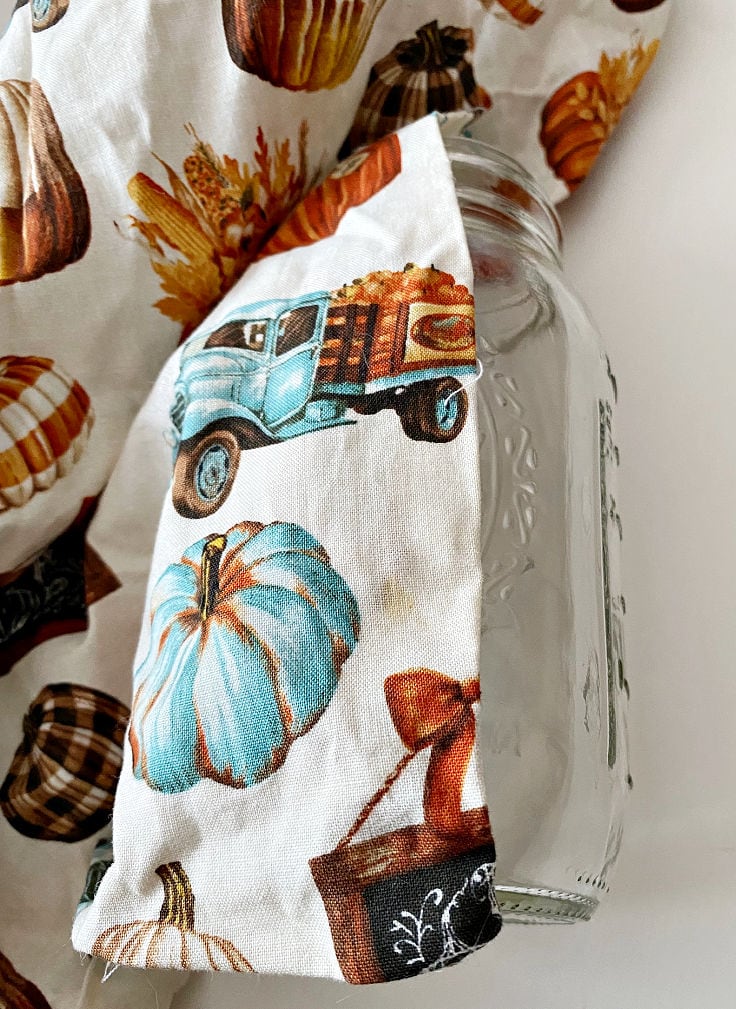
Continue to add the strips of fabric until the glass jar is covered.

Trim Excess Fabric
Cut off any extra fabric from the bottom of the jar and across the top. Add a layer or two of Mod Podge on top of the fabric letting it dry between coats.
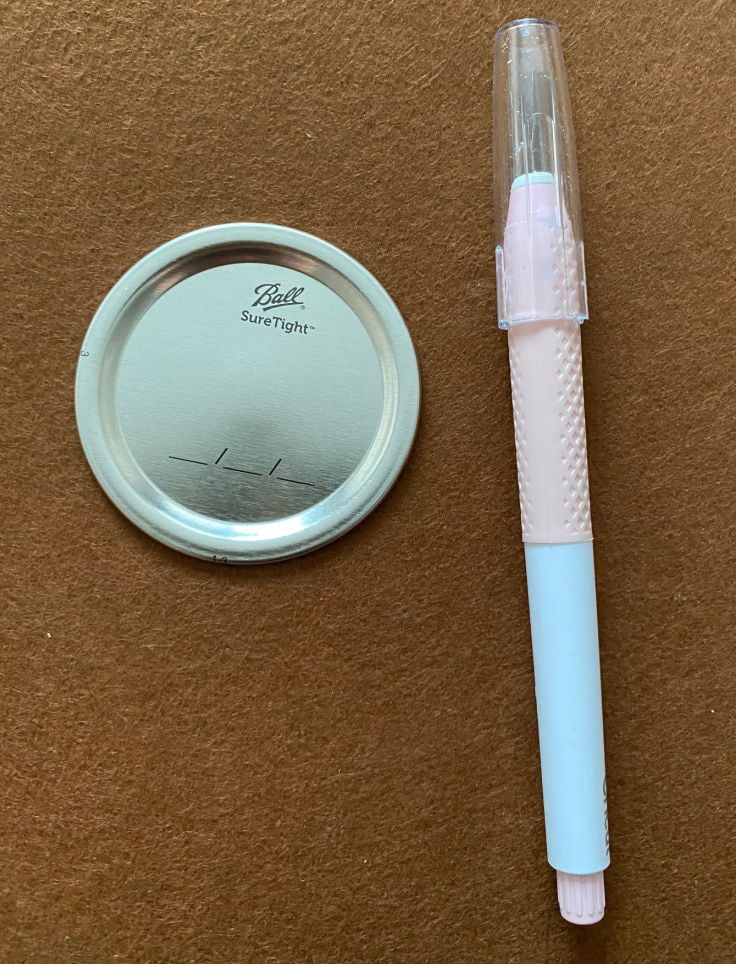
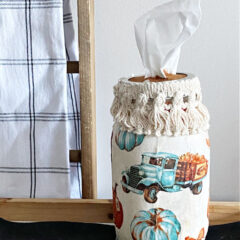
Create Lid For Tissue
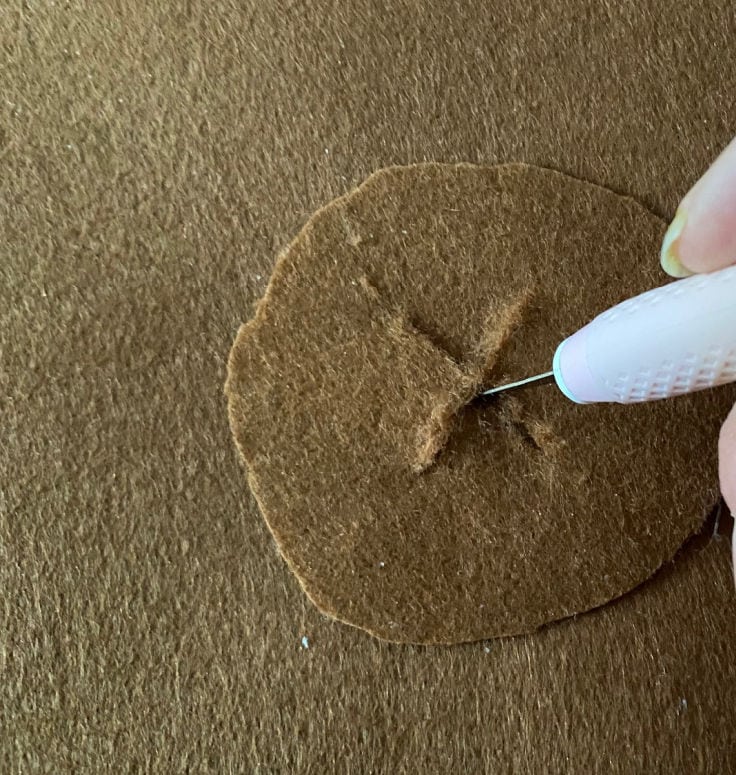
To make the opening for the tissue, use the lid from the jar to cut a circle from felt. You can also use heavyweight cardstock.
A craft knife works great to cut this. Once you cut the circle cut an X in the center of the felt. Be careful not to cut too close to the edge. This will be the opening for the tissue.
Glue Felt To Lid
All that’s left now is to secure the felt to the inside of the mason jar lid with hot glue. Be sure to keep the x in the center so it’s even. You can embellish your mason jar however you like.
I glued a piece of boho fabric that I had in my stash.
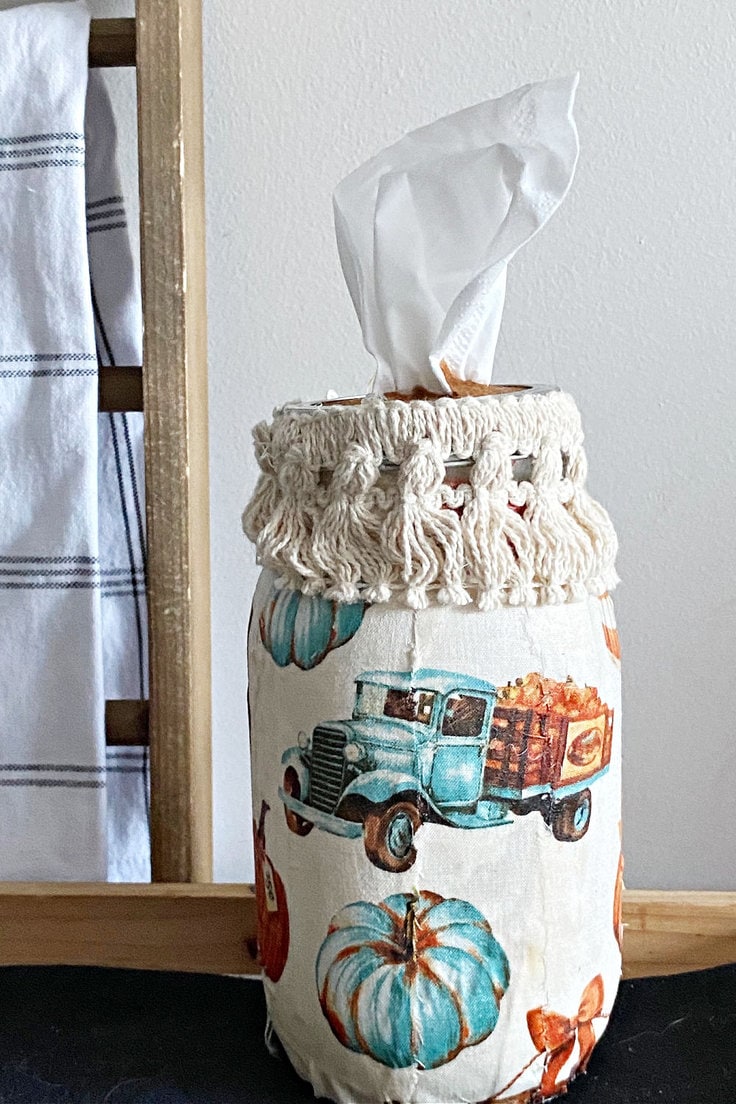
Just place your tissue inside the mason jar and pull the top layer through the lid. So simple and fun to make!
Mason Jar Tissue Holder
Equipment
- scissors
- Craft Knife
Instructions
- Cut a square of fabric to fit around the mason.
- Cut fabric into strips about 2-3" in size.
- Add a layer of mod podge to the mason jar.
- Place strips of fabric onto the mason jar and smooth down.
- Add a layer of mod podge onto the fabric and let dry. Place a second coat of mod podge and let dry.
- Cut a felt circle to fit inside the mason jar lid.
- Cut an x in the center of the felt and glue it into the lid.
- Add your tissue and enjoy!
Love the ideas you see here on Ideas for the Home by Kenarry®? Subscribe today to get our FREE DIY & Craft Planning Calendar, plus our weekly Ideas in Your Inbox newsletter filled with creative tips and exclusive offers!
What’s Next?
If you liked this mason jar tissue holder, then you’ll enjoy these mason jar crafts too.
Mason Jar Christmas Centerpiece
You may also enjoy these mason jar ideas on Ideas for the Home by Kenarry® –