Create Lippan Art With This Easy Tutorial
THIS POST MAY CONTAIN AFFILIATE LINKS. PLEASE SEE OUR FULL DISCLOSURE POLICY FOR DETAILS.
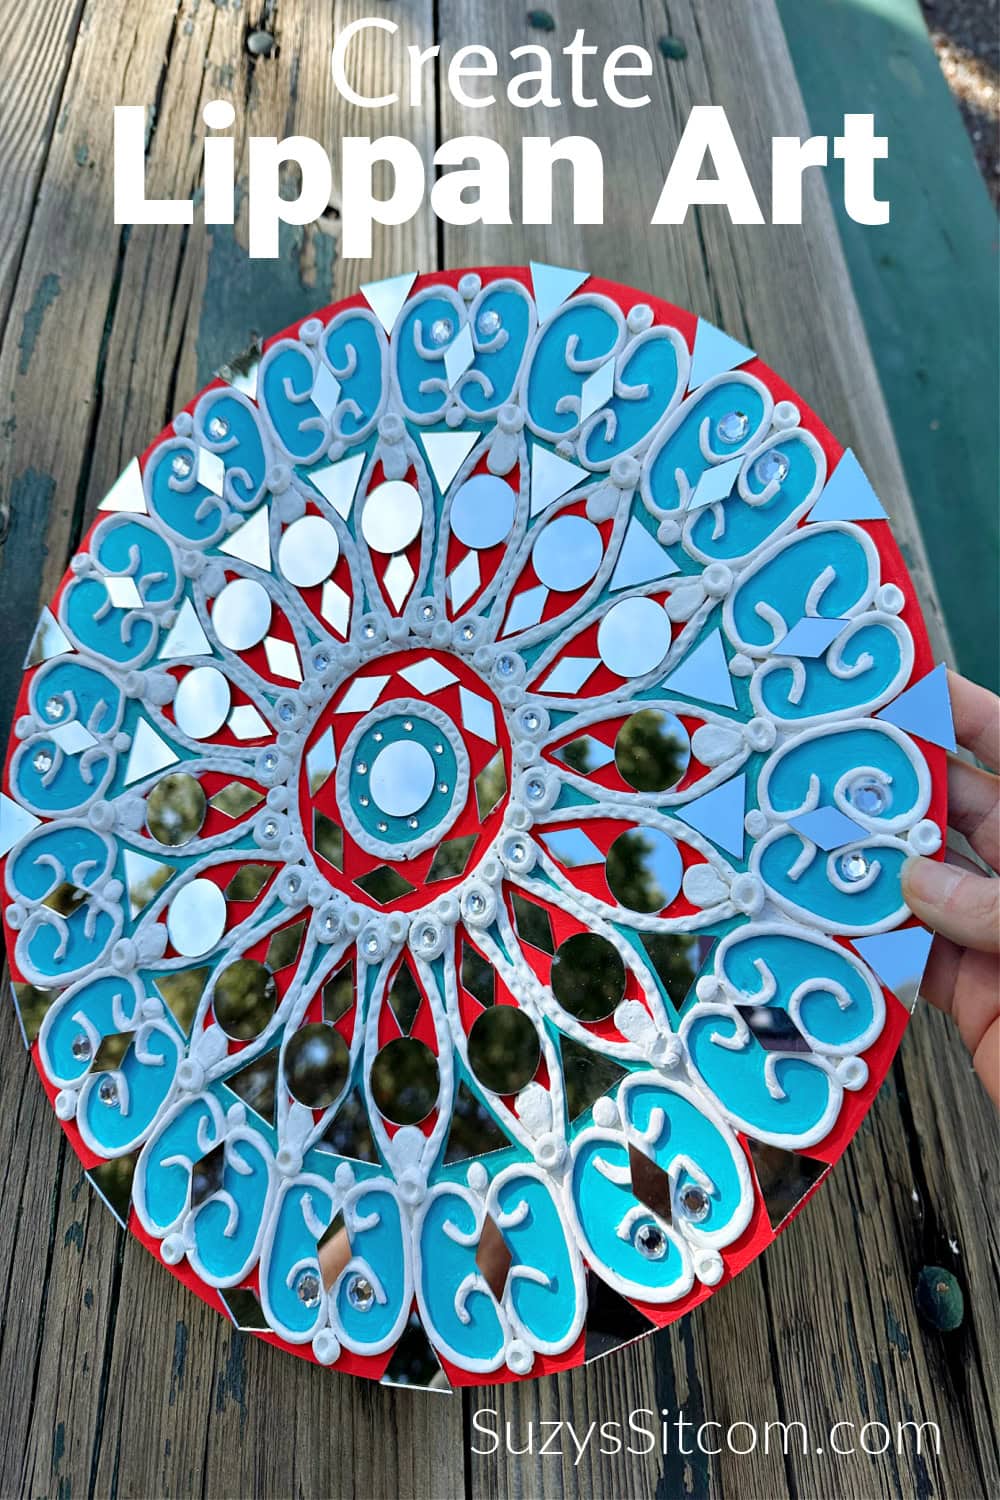
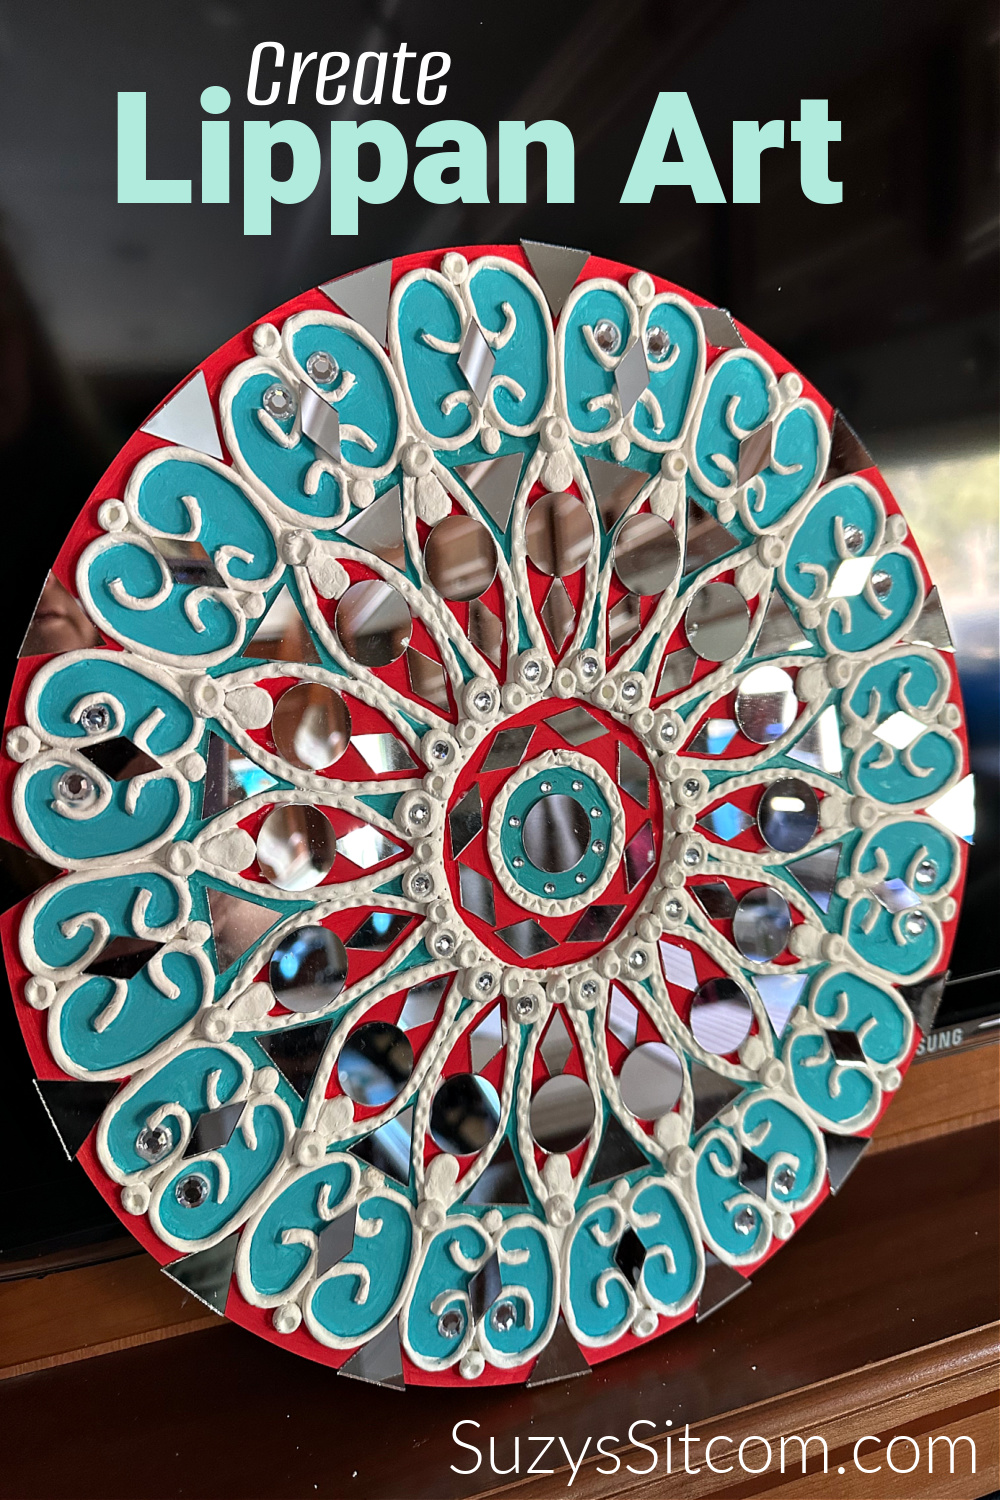
Lippan Art, also known as Mud and Mirror Work is a traditional mural craft from India. Learn how to create a beautiful Lippan Art design with air dry clay, paint and mirrors!
Creating Lippan Art is a fun and unique way to create a beautiful mirrored design. This traditional craft which originated in India involves creating an intricate geometric design, painting in bright colors, rolling out and applying air dry clay, and finally adding tiny mirrors. The result is an amazing and unique piece of art!
This is Suzy from SuzysSitcom and I would love to show you how to create your own unique Lippan Art design. I love to peruse Pinterest to find unique crafts, and over the past few months I have experimented with Sand Painting, Faux Cloisonne, and now Lippan Art.
How to create Lippan art
The beautiful look of this art can really best be show with a bit of movement. So I put together a short video to show you how beautiful Lippan Art can be.
Ready to make your own?
What you need:
Want more ideas like this? Subscribe today to get our weekly Ideas in Your Inbox newsletter plus other exclusive gifts and offers — all for FREE!
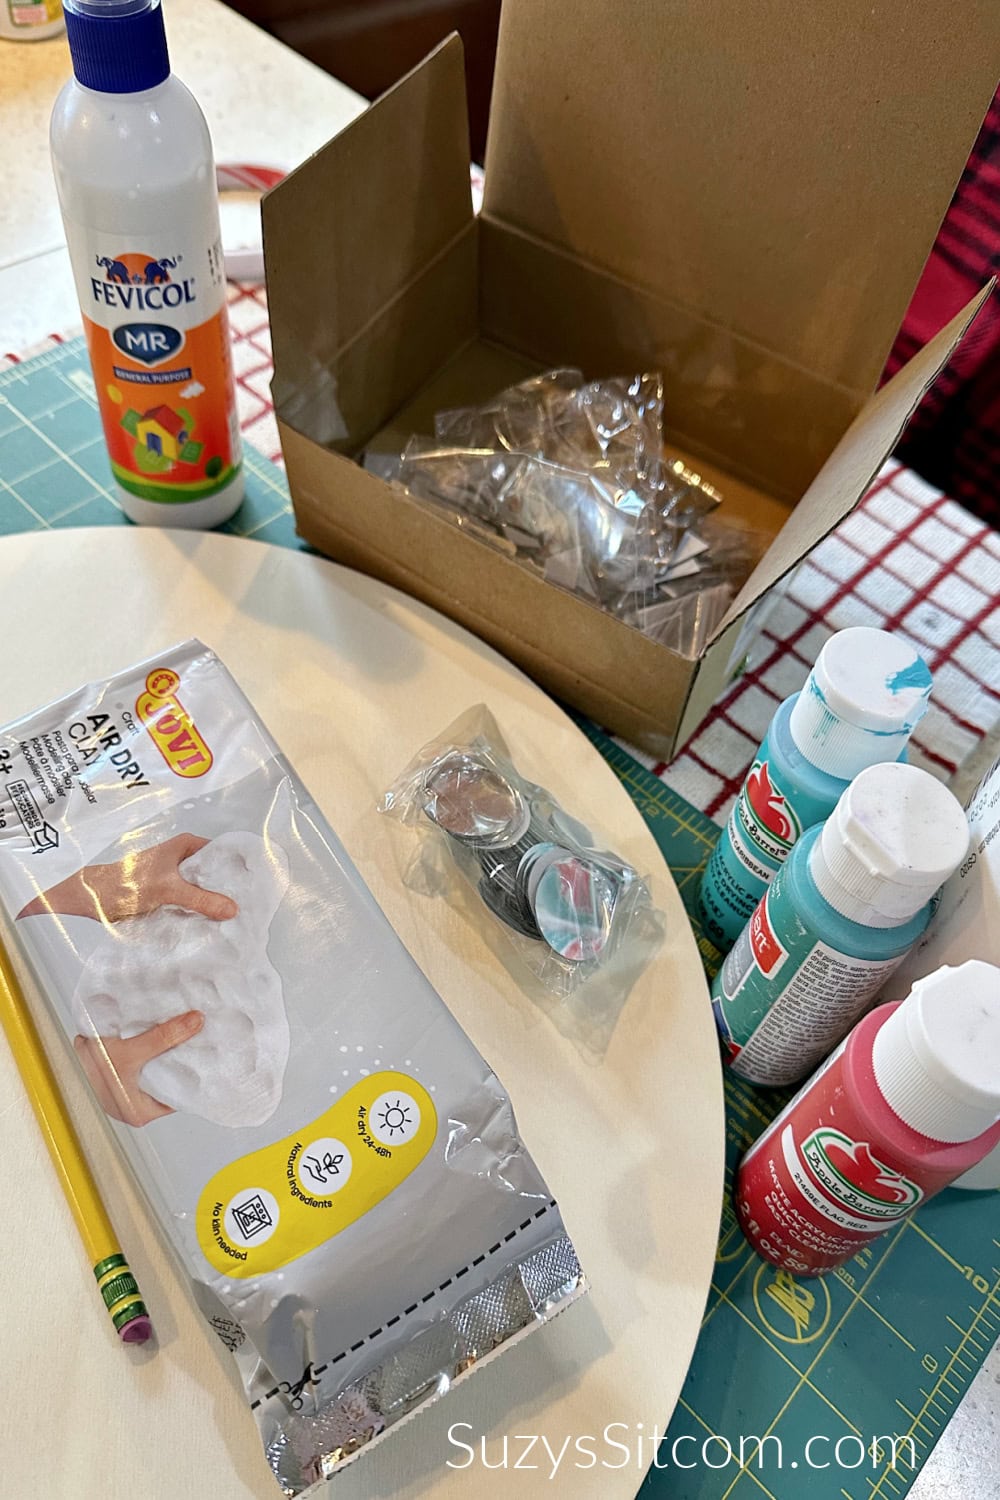
- 14″ Round Wood Circle
- Air Dry Clay
- Fevicol Glue
- Acrylic Paint
- Mini Mirror Mosaic Tiles
- Ruler
- Gemstones
Lippan art Tips:
Sketching in the design
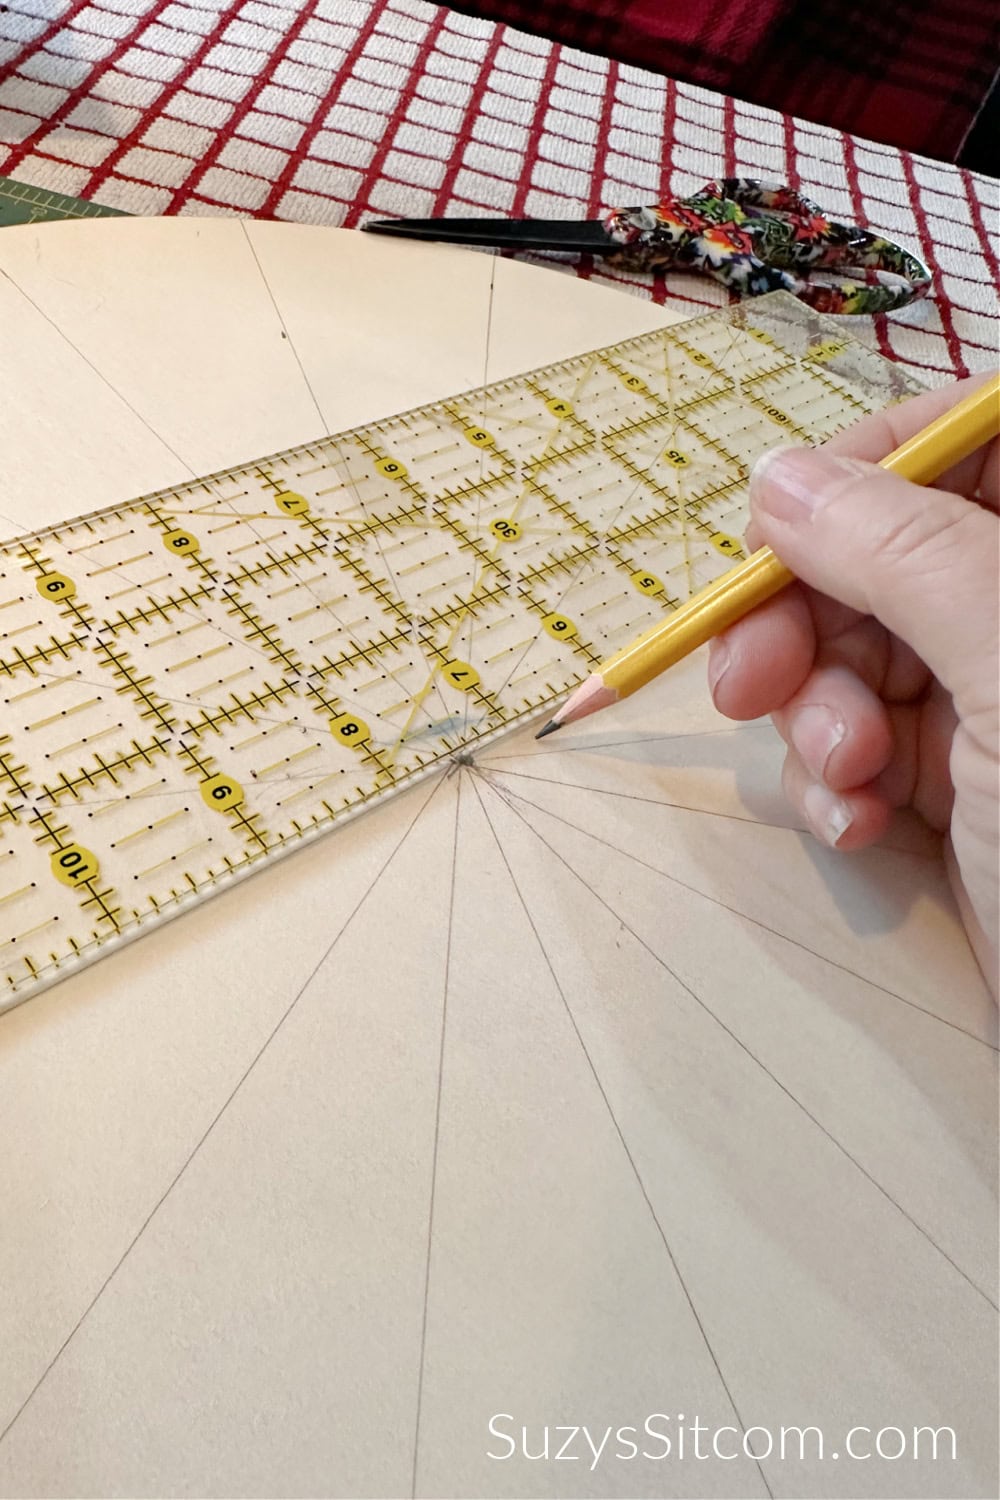
Begin by finding the center of the wooden circle and start drawing in lines. Draw a line down the center and then one perpendicular to create four even units. You want your lines evenly spaced. Create as many of these lines as you like as these will be the lines that you use for drawing in the details.

I use found items to help create my circles. In this case- a roll of tape! I created a center circle using it as a template being careful to make sure it is in the center.
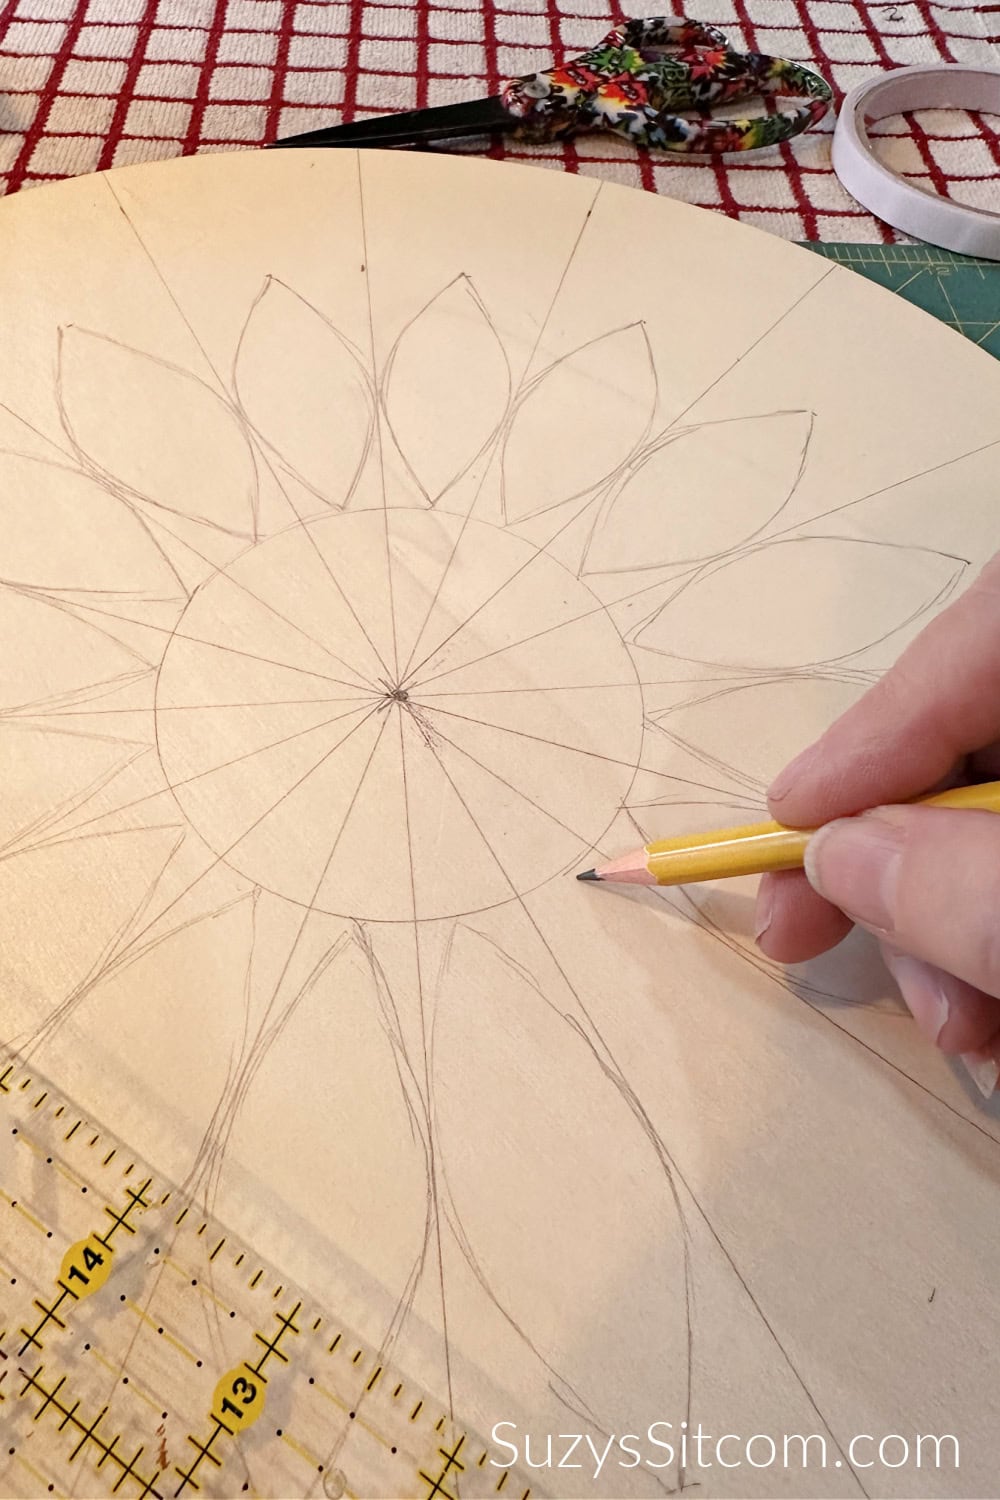
Use your lines to add in details. There is no wrong way to do this and each design with be entirely unique. Add in shapes such as circles, petal shapes, triangles, ovals, or anything that strikes you.
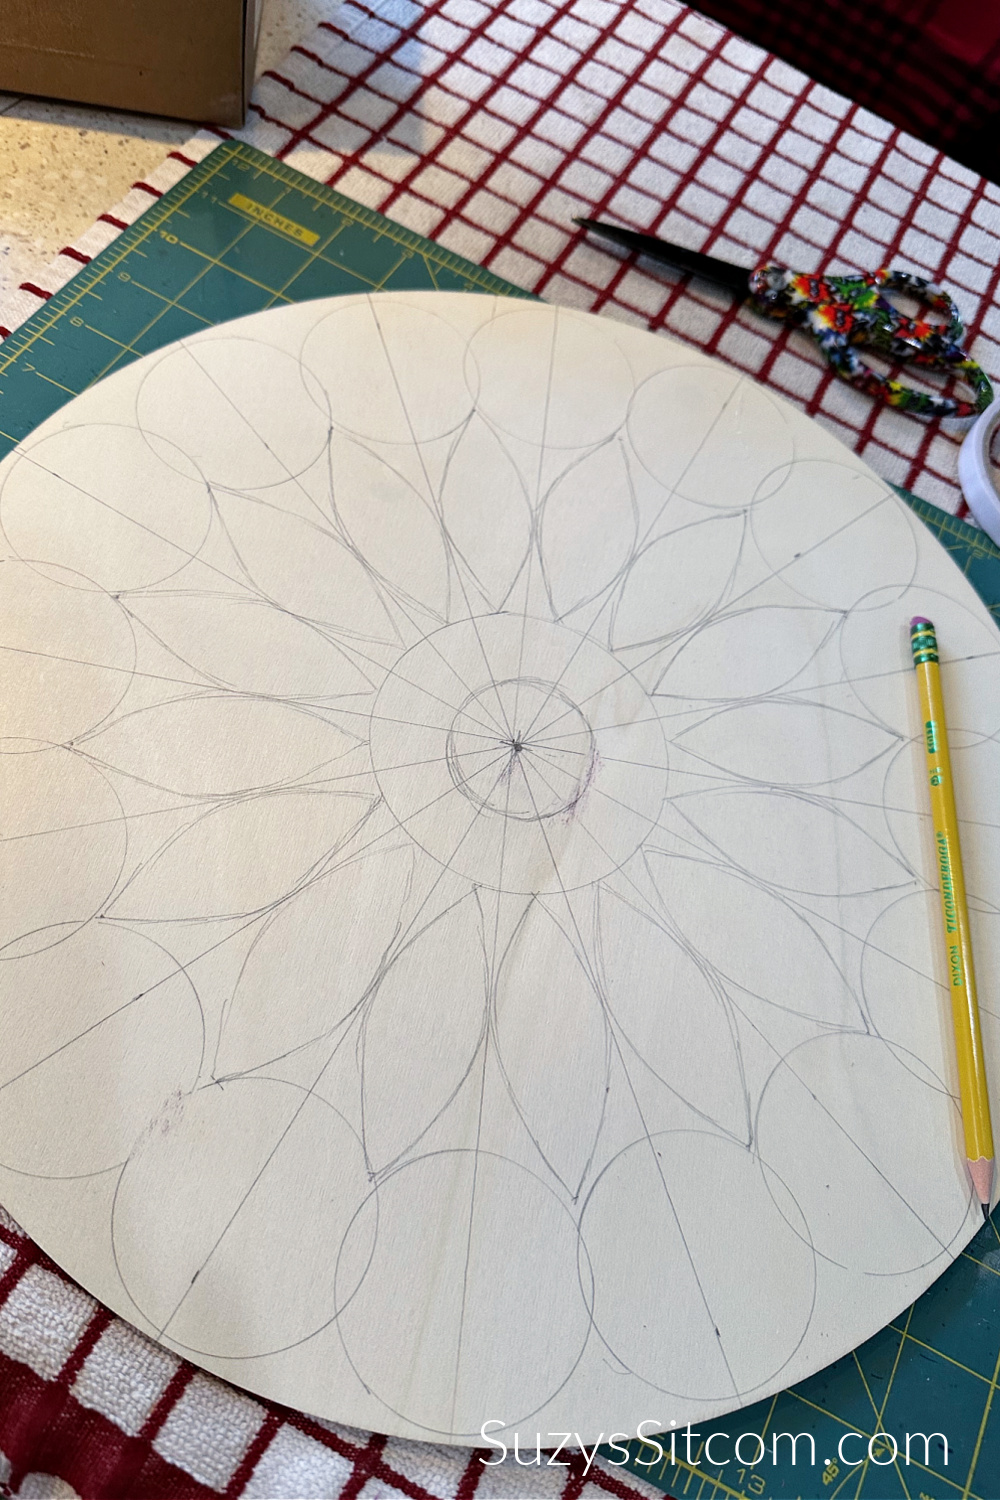
This is my finished design. I will use this to base where I add my lines of clay.
Adding the clay to your lippan art
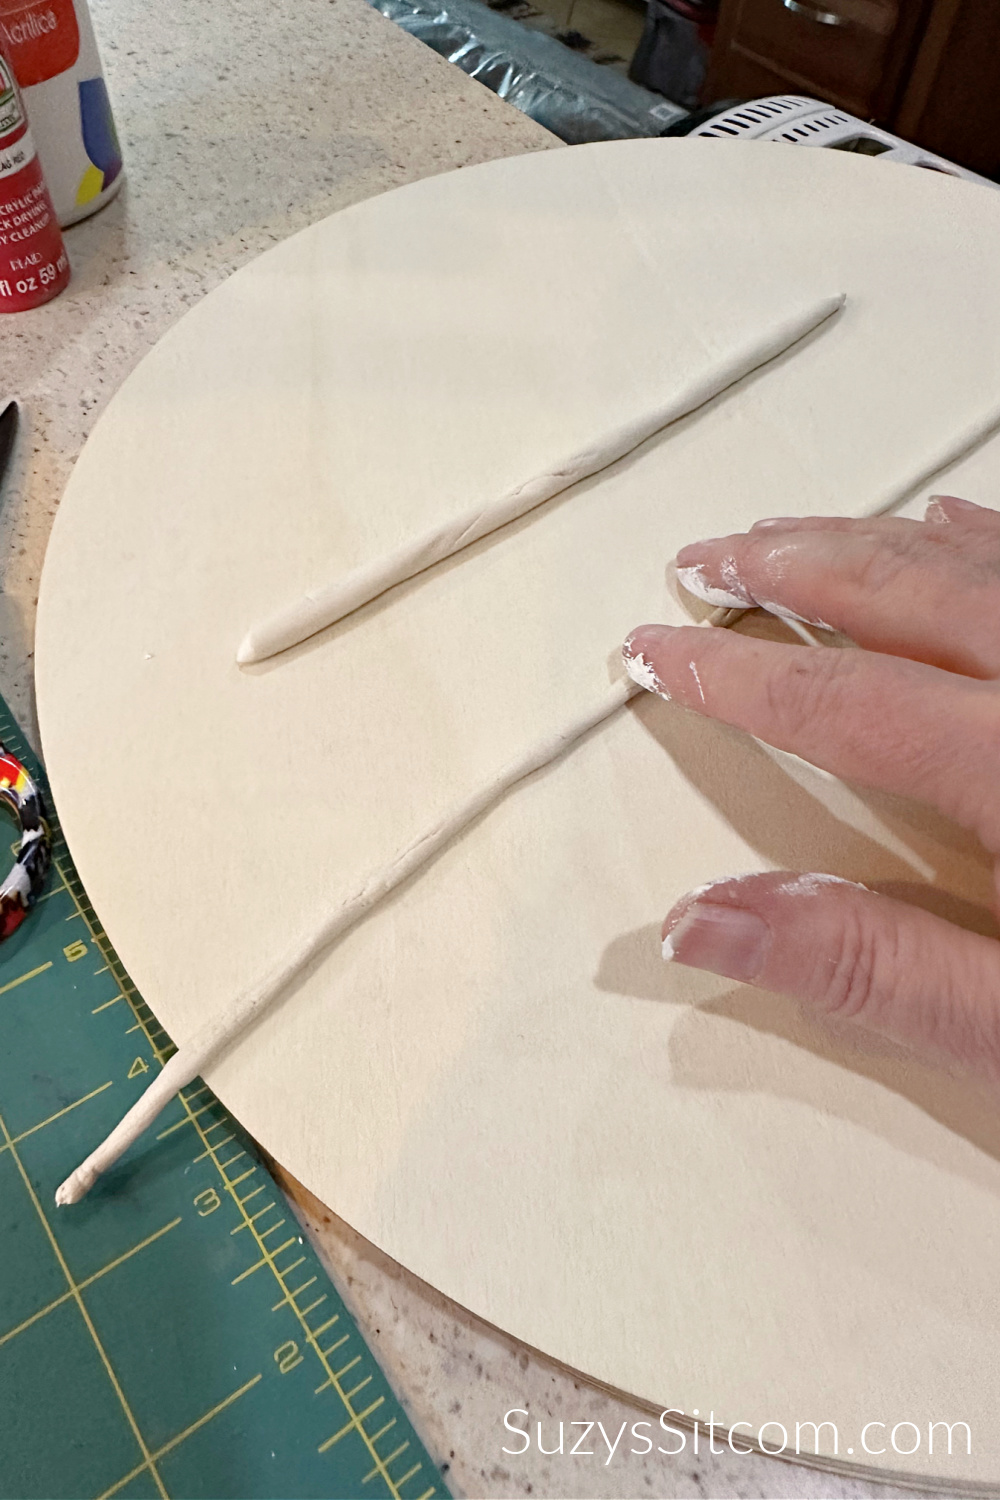
Open the air dry clay and put it in a zip lock bag. Why? Well it will dry out quickly if you don’t! You need to work with just a small bit of clay at a time. Roll it out into an even, narrow tube as shown above. As you work with the clay, you will develop your own technique and soon all of your tubes of clay will be even and uniform in width.
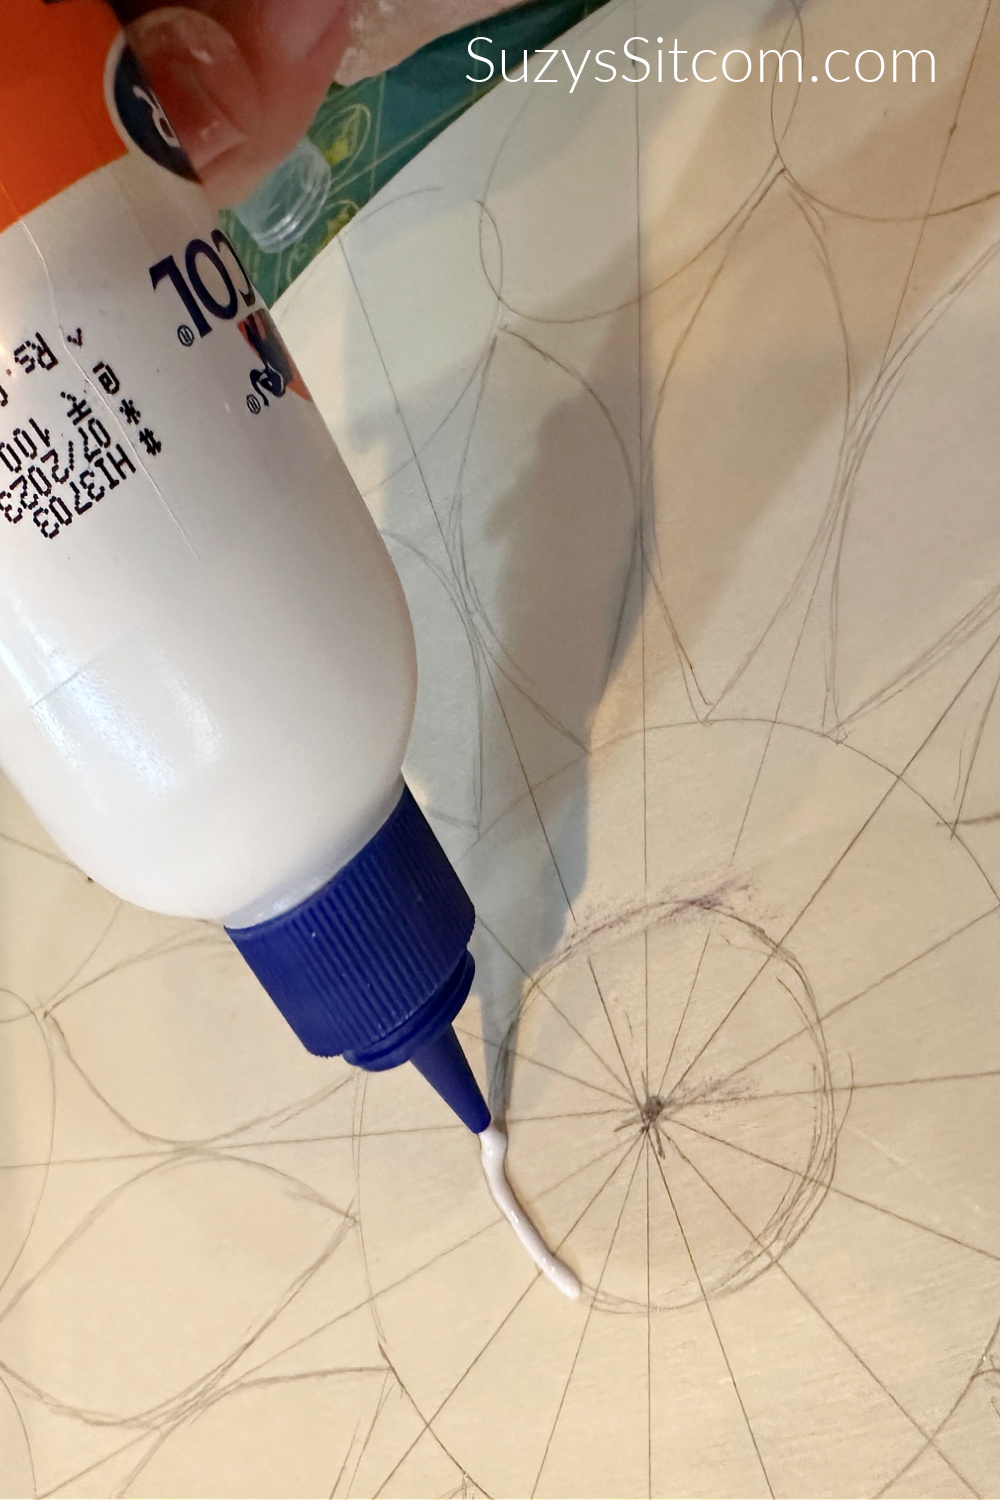
Fevicol Glue is what was recommended by professional Lippan Artists, so I located it on Amazon just for this project. I want you to know that this glue is going to be my new go-to where glue is concerned! It is easy to apply, dries quickly, and has a great bond. Use the bottle to apply glue along one of your pencil lines.
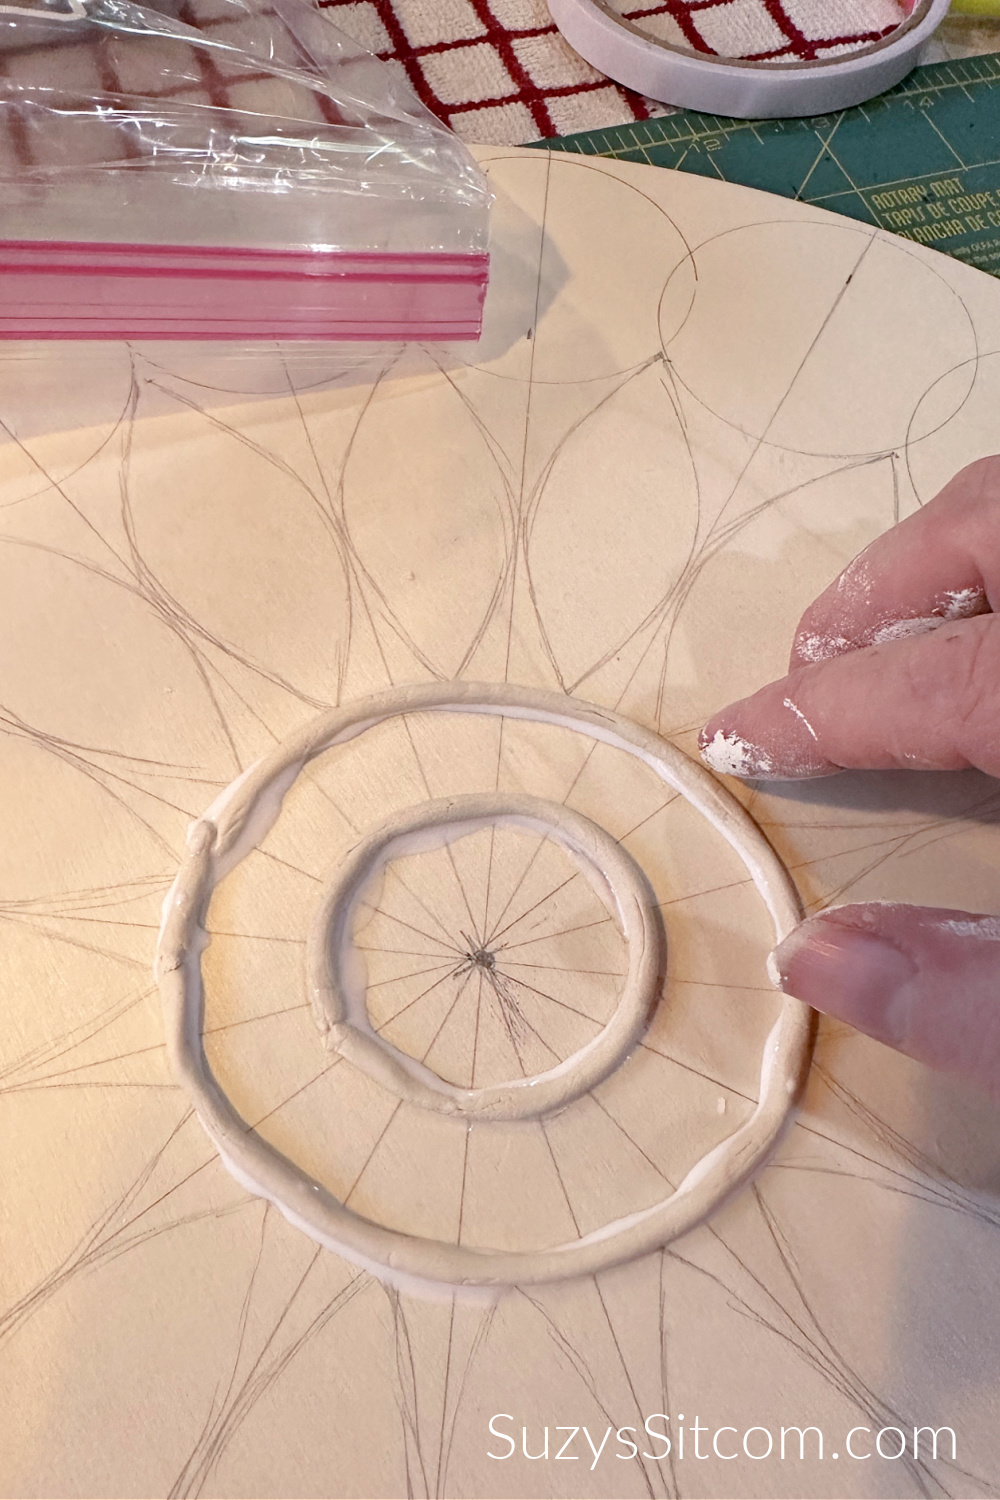
Place the tube of air dry clay over the line of glue. (Note that my lines are a bit wavy, but as I proceeded with this project, my lines get much better with practice).
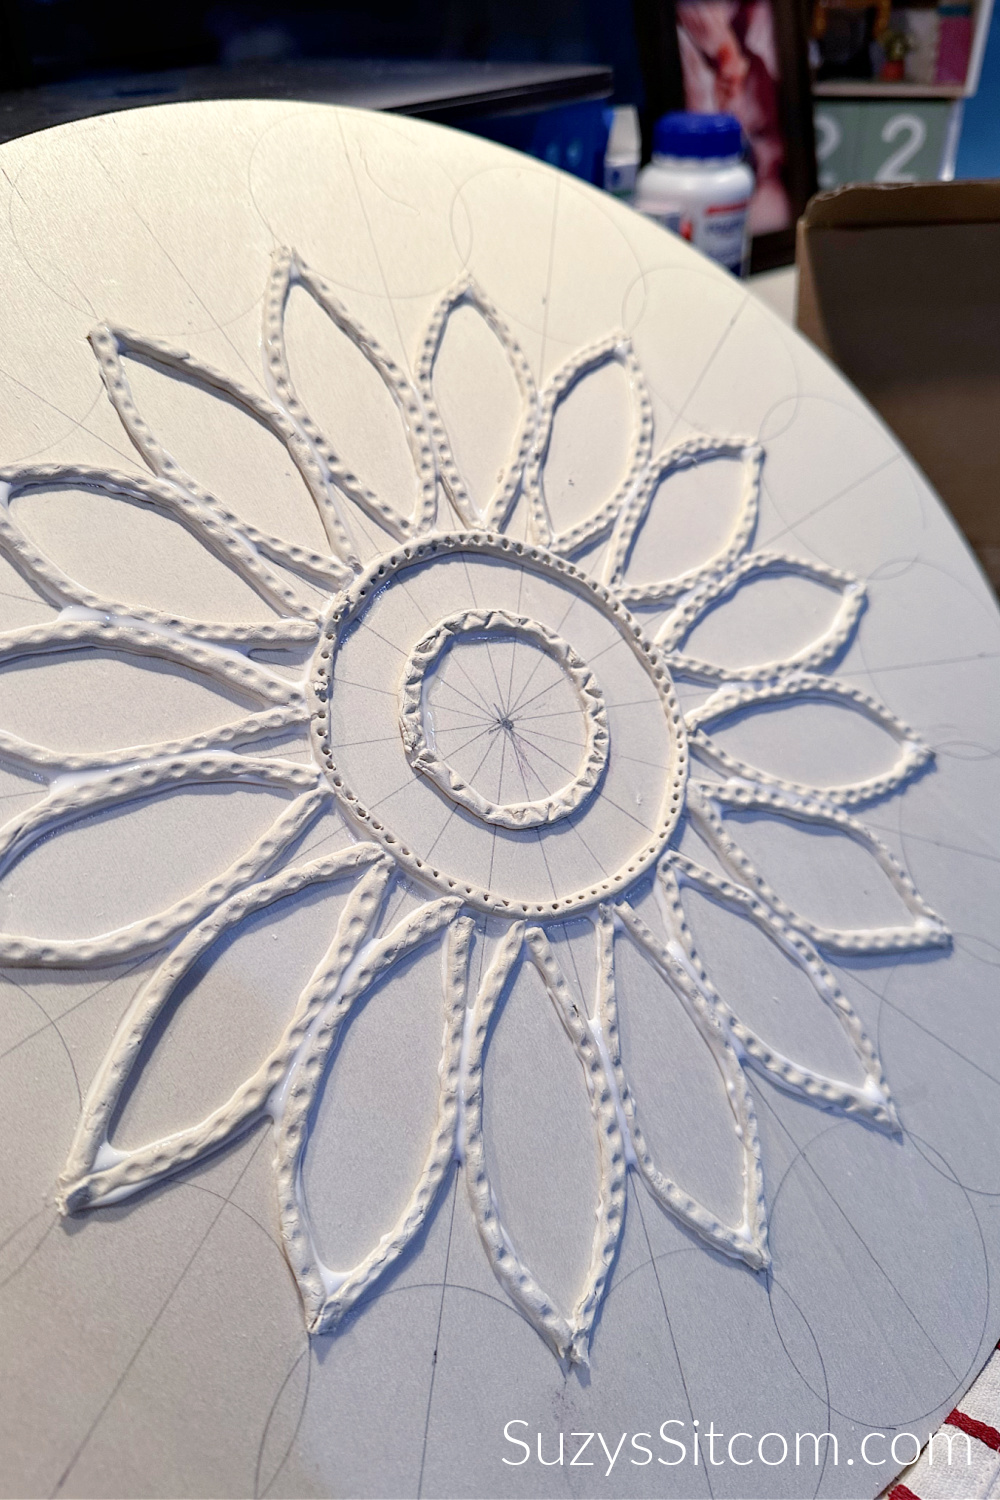
Adding Texture to the clay lines
Add a bit of texture if you like with the end of a paintbrush or pencil tip. Texture gives your project more interest and makes the lines look more even.
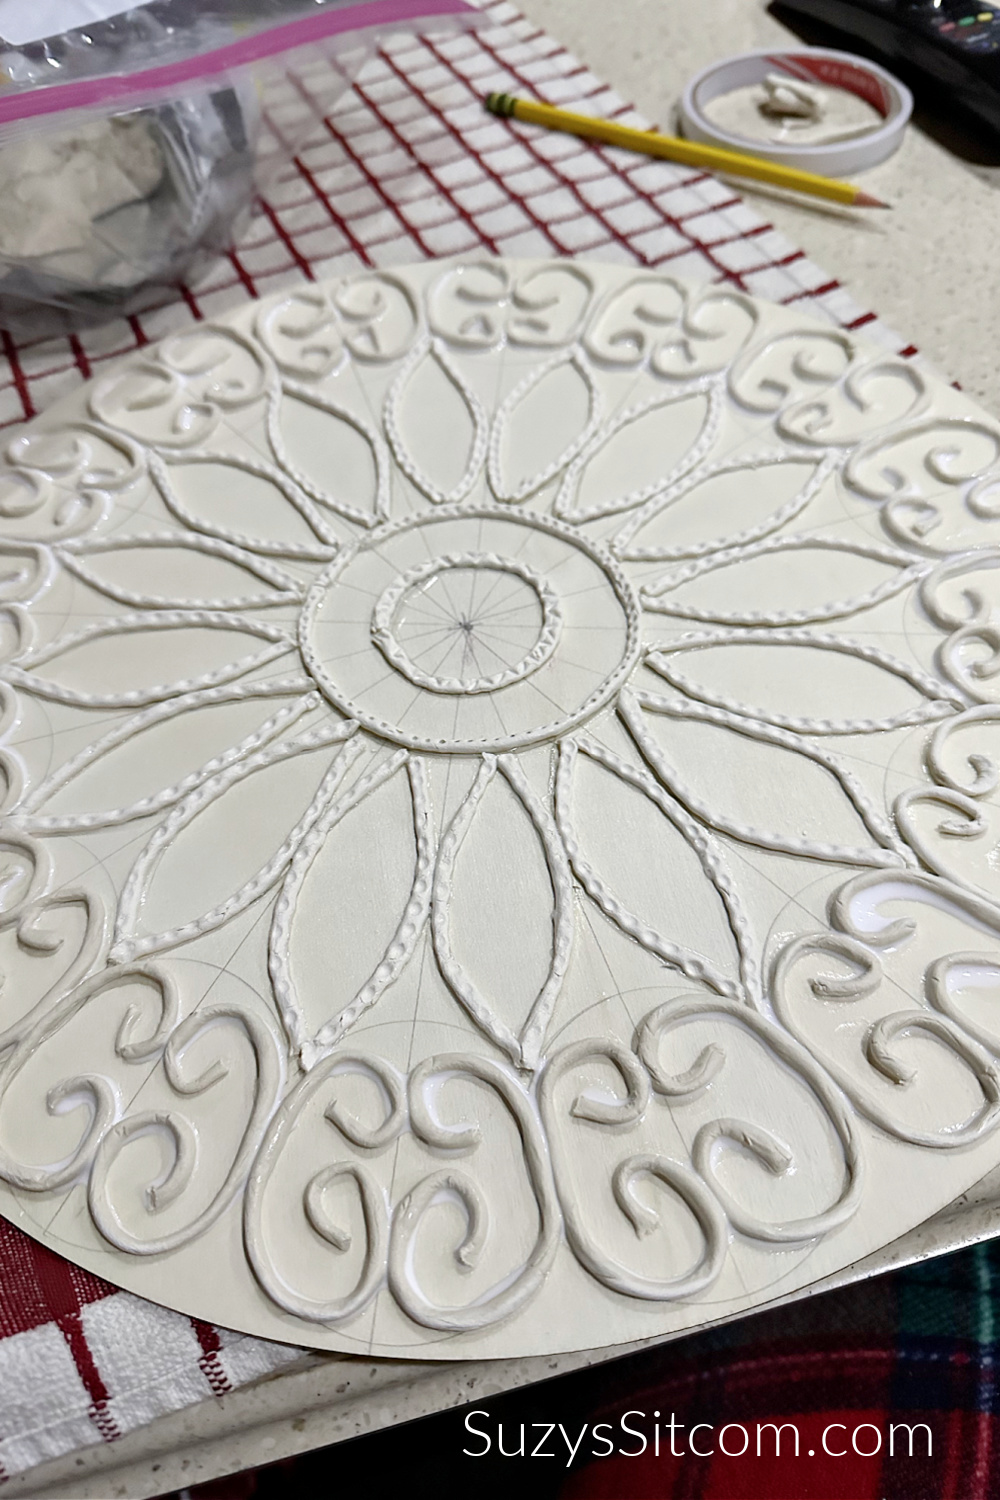
With all lines in place, I could totally stop here and go to painting.
I decided to add in a bit more detail. I rolled balls of clay, added drops of glue, and then pushed into the center of each ball of clay with the end of a paintbrush. Once all of the clay has dried, it is now ready for paint!
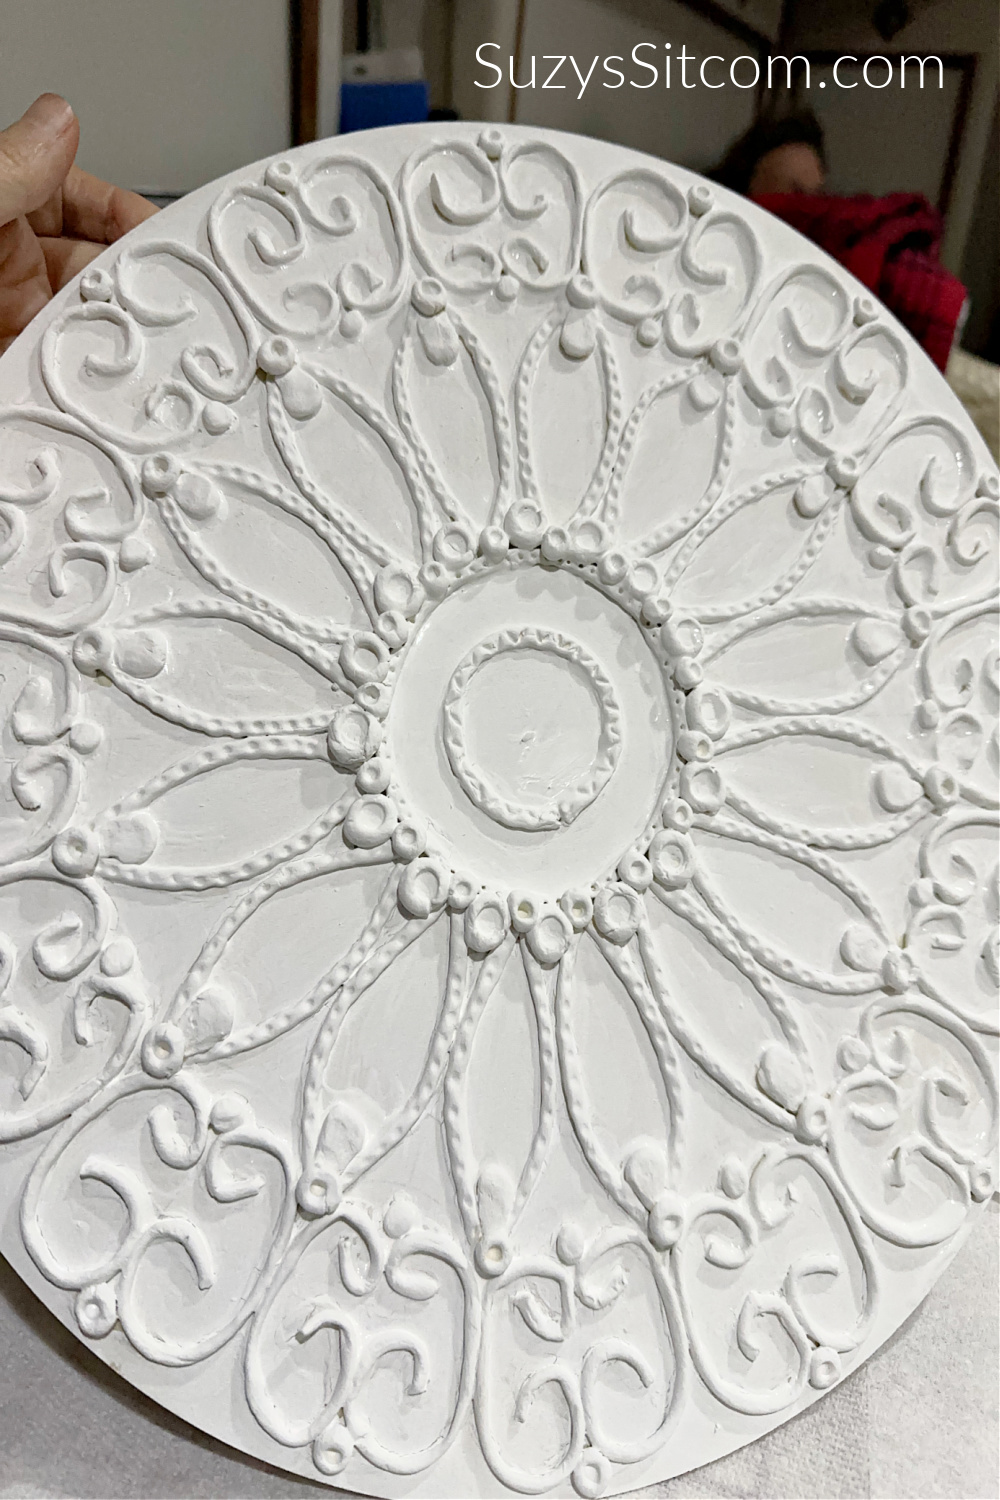
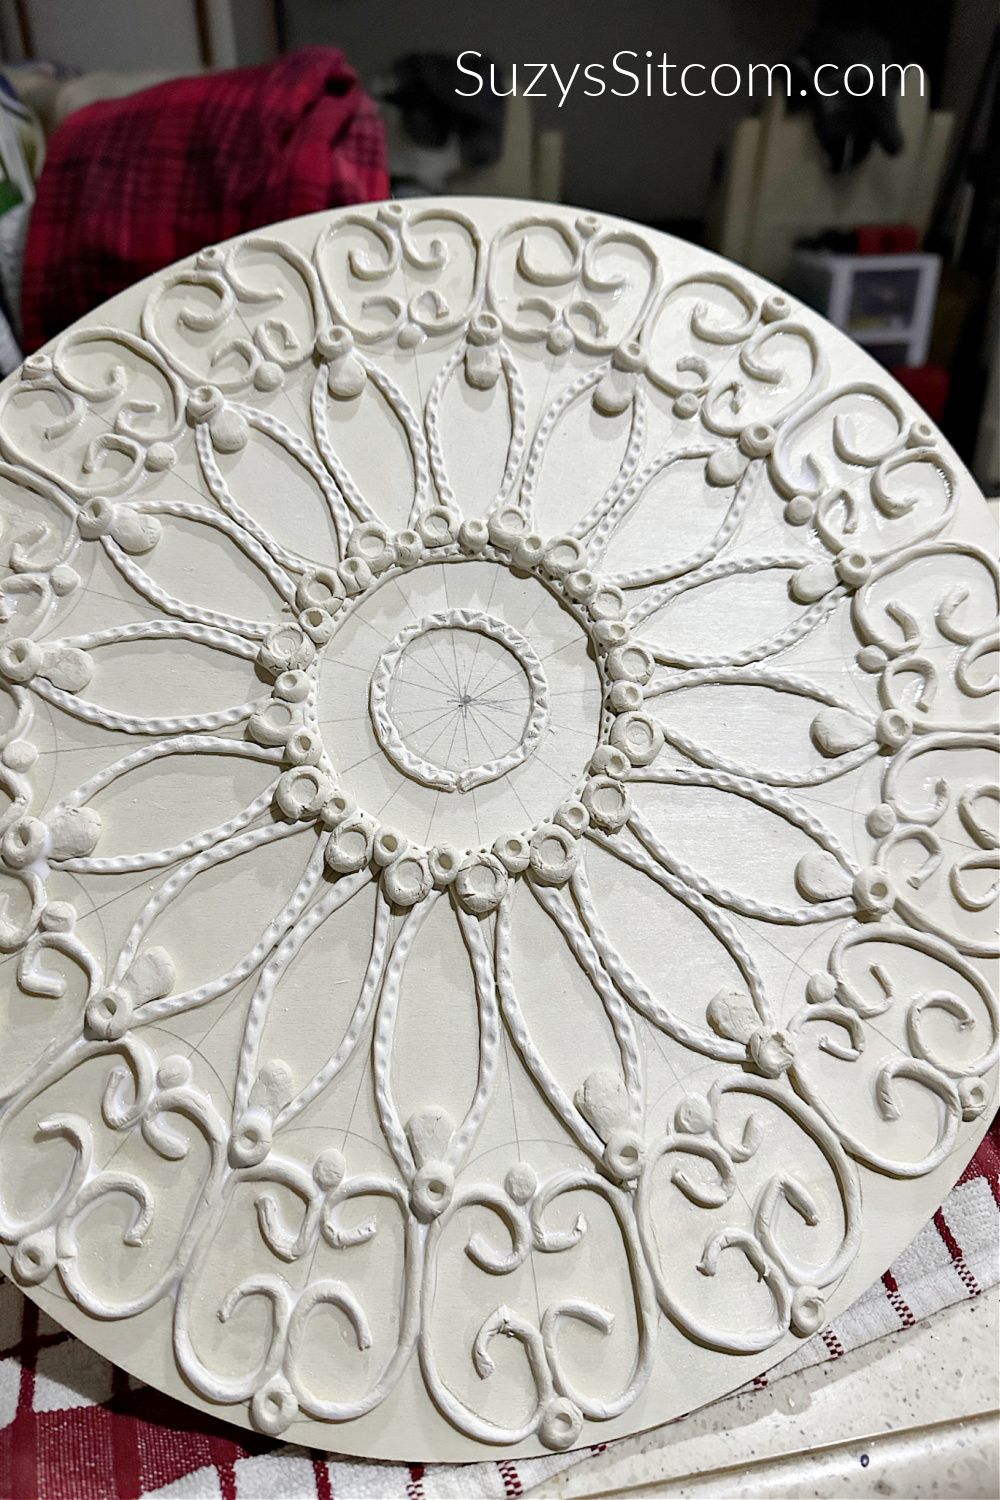
Lippan Art: Adding Paint
Paint the entire piece with white acrylic paint, being sure to get into all of the little nooks and crannies.
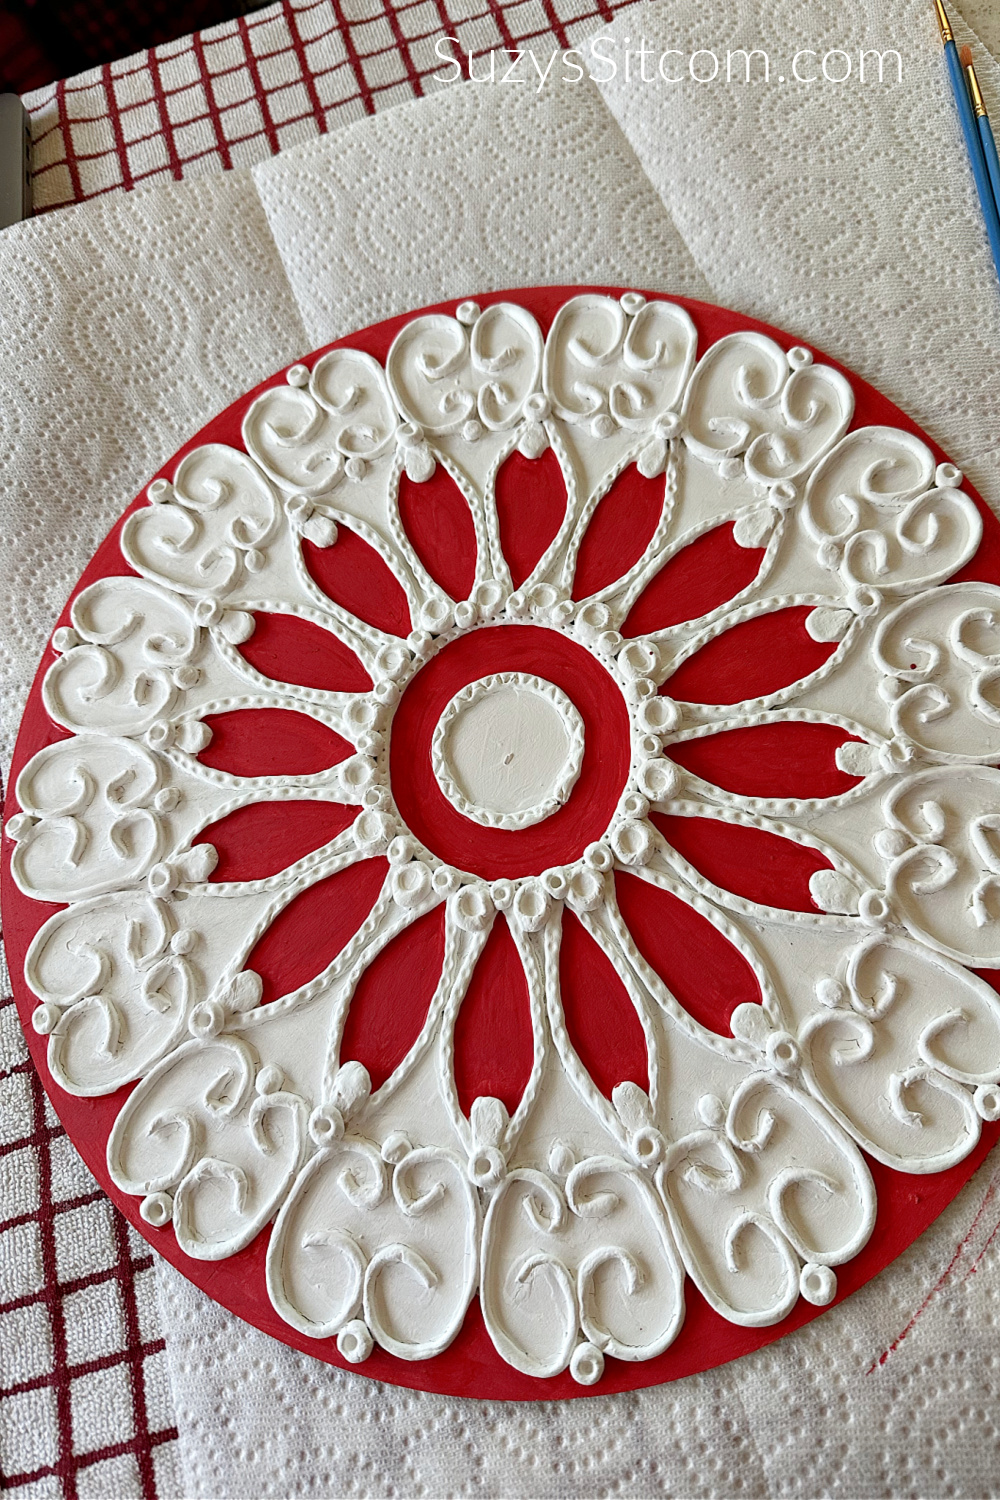
Once the white paint has dried, go into select areas with colored paint. Most Lippan Art includes bright colors, and you are only limited to your own imagination. While I chose red and teal for my project, any colors that you love will be perfect.
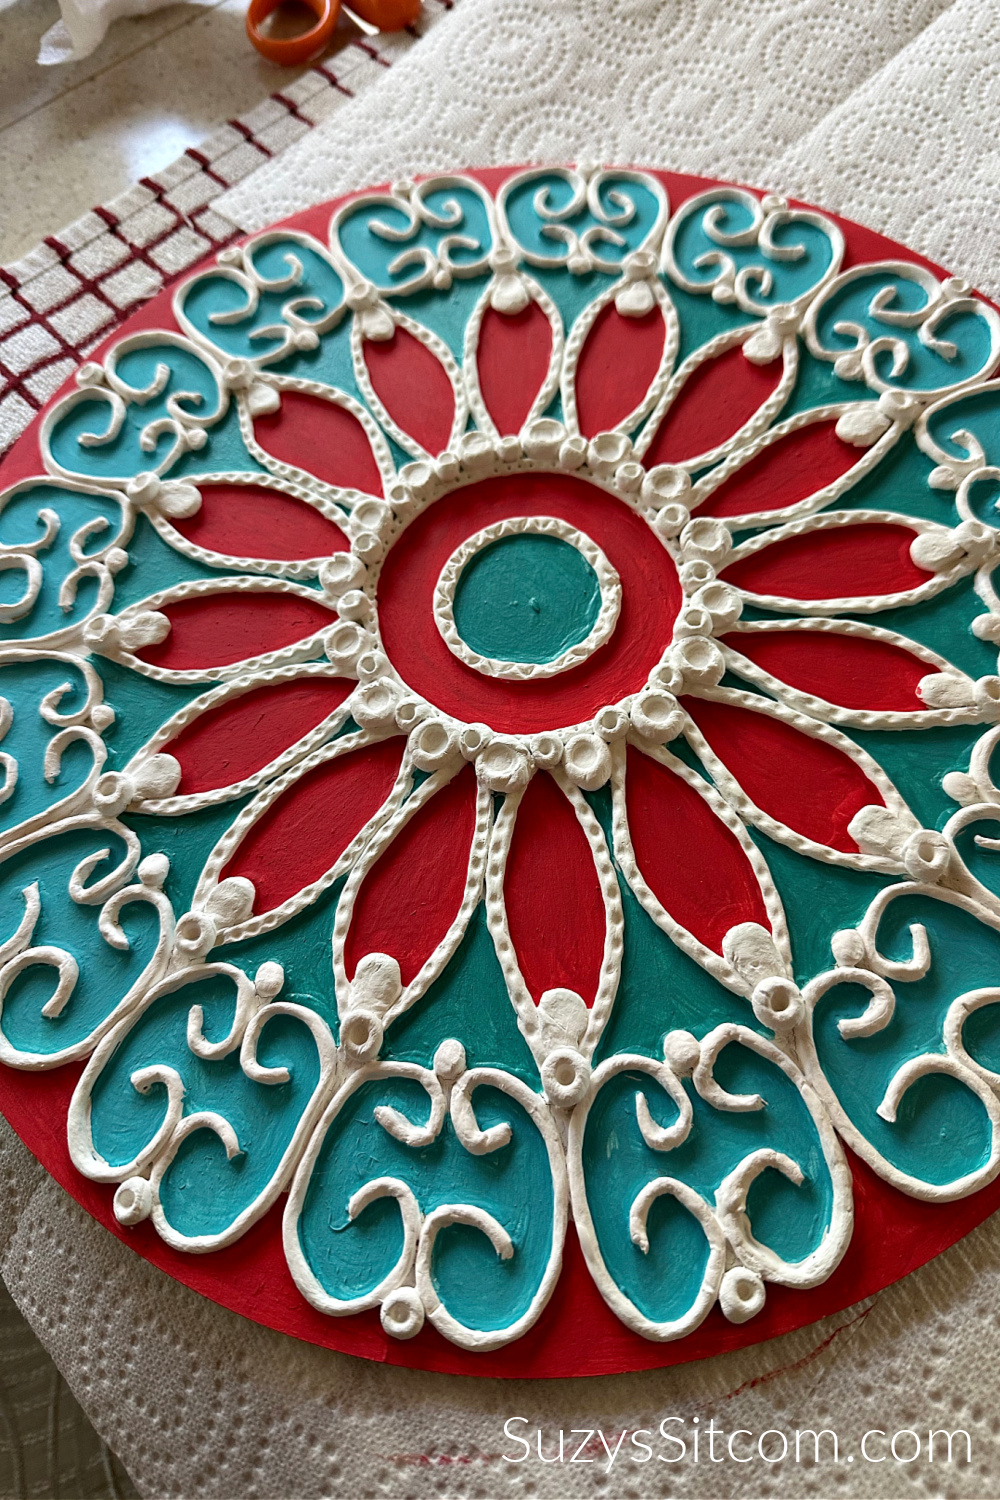
Teal paint is in place, and once all the paint has dried, you will be ready for the final step.
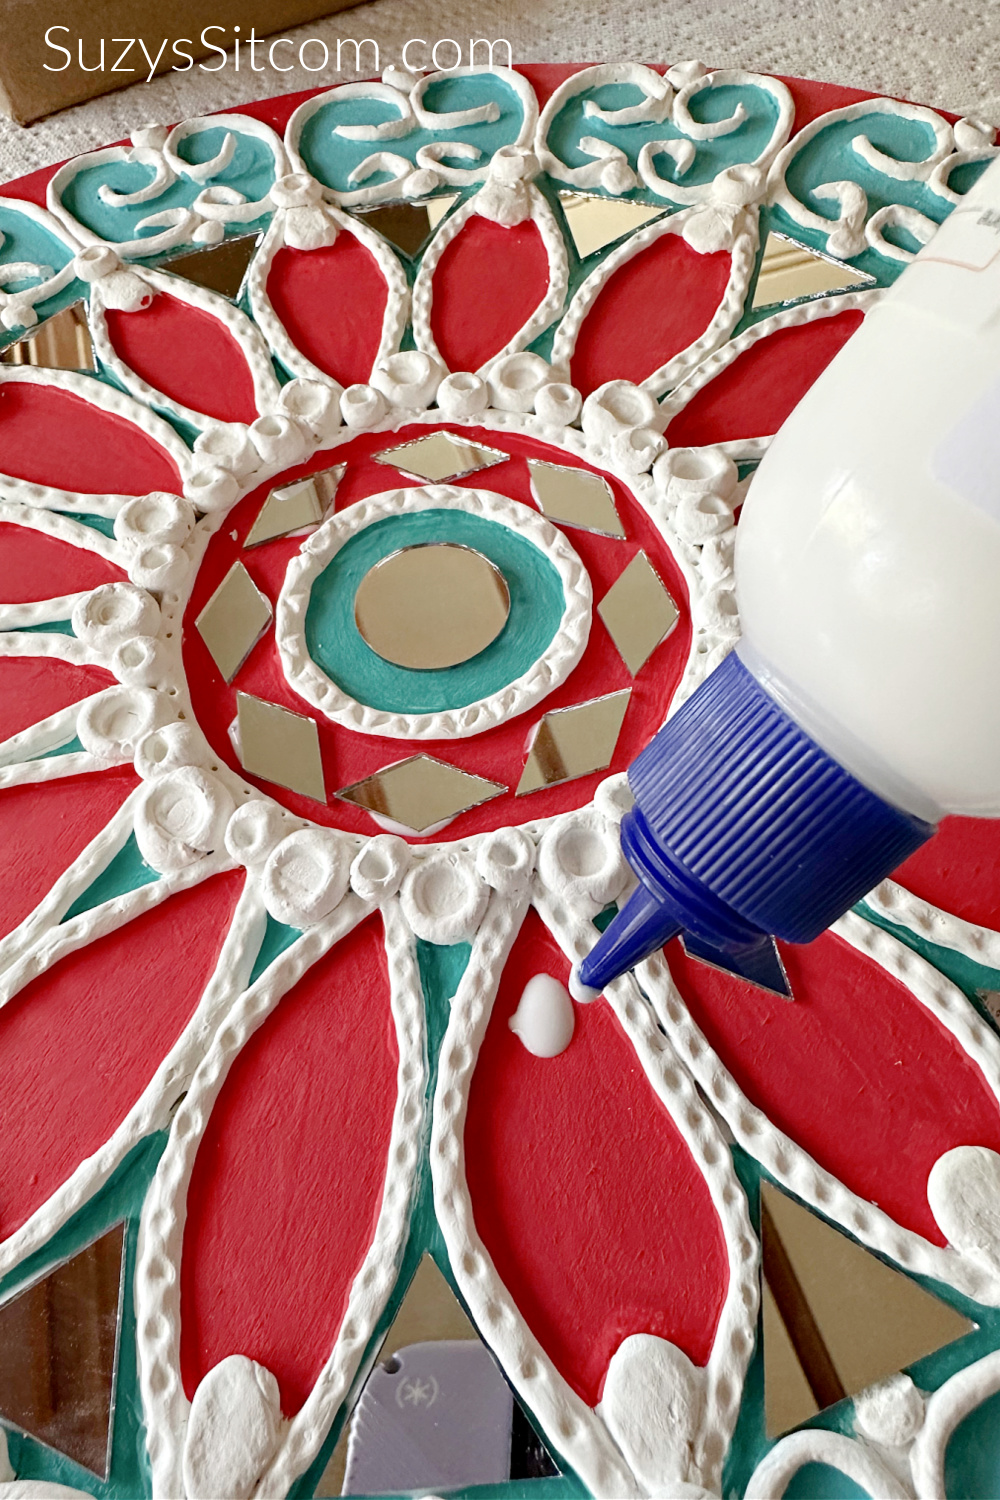
Lippan Art: Adding Mirrors
Add a few drops of glue and place your mirror tiles in place. There are no rules! Finally, add mirrors to wherever you want to add in your Lippan Art design. I also added some gemstones here and there. You can never have too much bling.
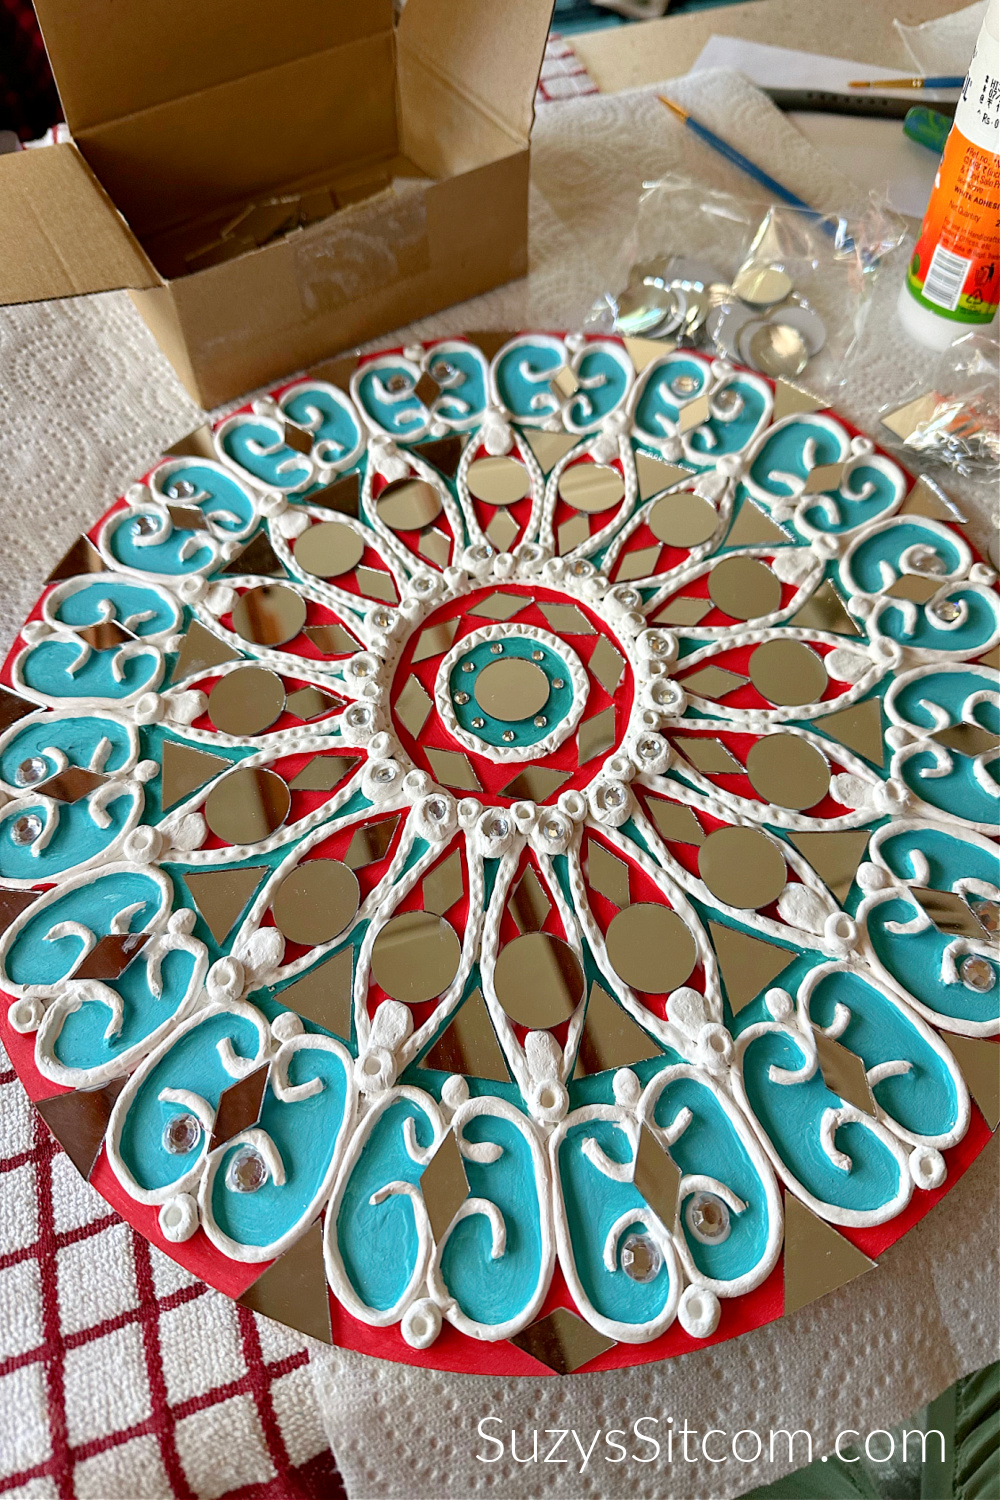
The final piece is ready! Lippan Art is a beautiful extra touch to your decor bringing bright color, geometric design and of course the brilliance of tiny mirrors. And each design is uniquely yours!
Create Lippan Art
Equipment
- 1 Ruler
Supplies
- 1 ea 14" wooden circle
- 1 ea Air Dry Clay
- 1 bottle Fevicol Glue
- 1 set Acrylic Paint
- 1 set Mini Mirror Mosaic Tiles
- 1 set Gemstones
Instructions
- Find the center of the circle. Use a ruler to divide the circle into even sections, drawing lines with a pencil.
- Use the pencil to add in details such as circles, ovals, and other shapes using the lines to keep everything uniform.
- Roll out a small bit of air dry clay into a long narrow tube.
- Add a line of glue onto one of the pencil lines and place the narrow tube of clay over top of the glue.
- Add any texture to the clay lines using the end of a paintbrush or pencil point.
- Repeat the previous step until all design is in place. Allow air dry clay to dry thoroughly before going to the next step.
- Paint the entire piece white with white acrylic paint. Allow the paint to dry.
- Add bright colored acrylic paint to select sections of the design.
- Use the Fevicol Glue to attach the mini mirror mosaic pieces to the Lippan Art. Add any gemstones.
Video
Love the ideas you see here on Ideas for the Home by Kenarry®? Subscribe today to get our FREE DIY & Craft Planning Calendar, plus our weekly Ideas in Your Inbox newsletter filled with creative tips and exclusive offers!
Love Unique Craft Ideas?
If you enjoyed this tutorial on Lippan Art, you may like some of the other unique craft tutorials featured on my website, SuzysSitcom!
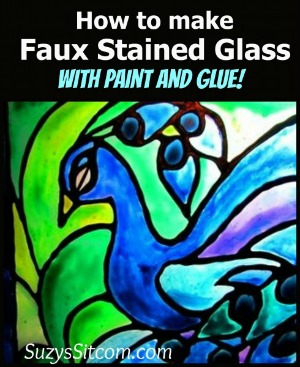
How to make Faux Stained Glass
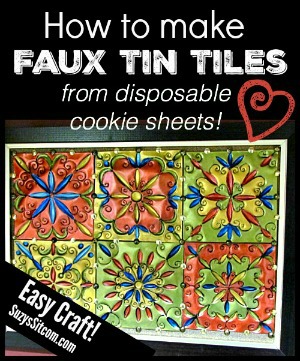
Create Faux Tin Tiles with Disposable Cookie Sheets
How to make Mosaics the Easy Way
You may also enjoy these 3 ideas on Ideas for the Home by Kenarry® –