Creating With Resin: A Beautiful Gift Idea
THIS POST MAY CONTAIN AFFILIATE LINKS. PLEASE SEE OUR FULL DISCLOSURE POLICY FOR DETAILS.
Creating with resin is simpler than you might think. This fun tutorial shows you an easy way to create beautiful resin-coated cutting boards. These cutting boards are a great gift idea and fun to make!
Resin starts as a liquid and then hardens into a shiny hard slick surface. You can pour it into molds, add items such as dried flowers, insects, or leaves, or use it to cover a surface. It has so many possibilities. Using the basics of resin pouring, we are going to create a beautiful gift set of cutting boards with a slick resin finish!
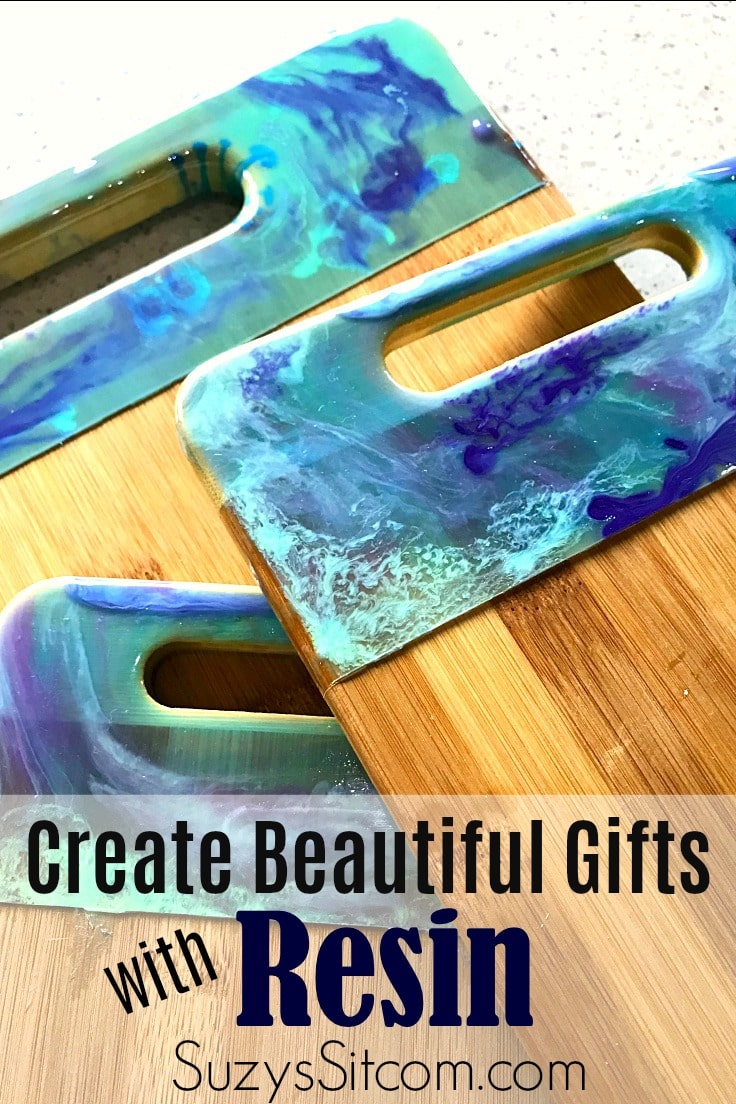
This is Suzy from SuzysSitcom. I have to tell you that working with resin is a new thing for me. I’ve seen it done over the years mainly on jewelry. After studying a bit about creating with resin, I decided to try my hand at pouring resin and adding color to create a beautiful marbled effect on cutting boards. This craft is perfect for holiday giving!
How to create with resin
Resin is a picky substance. It prefers mild temperatures in order to cure, it must be mixed correctly for the finish to be perfect and allowed to dry for at least 24 hours. And most of all, it can be a messy task, requiring your concentration.
Keeping all of the above in mind, I went about getting my supplies together and planning how to create these amazing cutting boards.
What is resin?
Resin is basically a plastic substance. Lots of people use resin in art projects as a protective, thick layer.
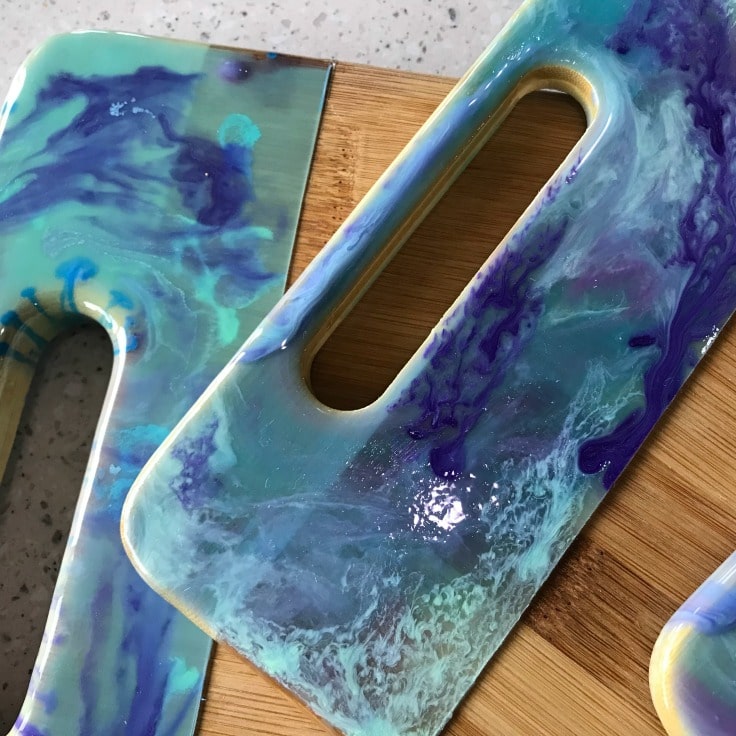
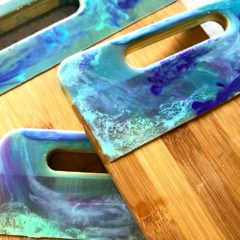
In this project, you can see a marbling effect with different colors of resin. You’ll be able to mix and pour resin on a cutting board and create a really stunning and unique gift idea in no time at all.
Since I live full time in a RV, this proposed a problem. There is not enough space to allow a project to dry 24 hours without being bumped by a person or sat on by a dog. And…the husband is still traumatized by the stain in the carpet from my batik fabric project a few months ago.
Fortunately, the campground restaurant is now closed for the season. So with permission, I set up there to take on the task of resin pouring!
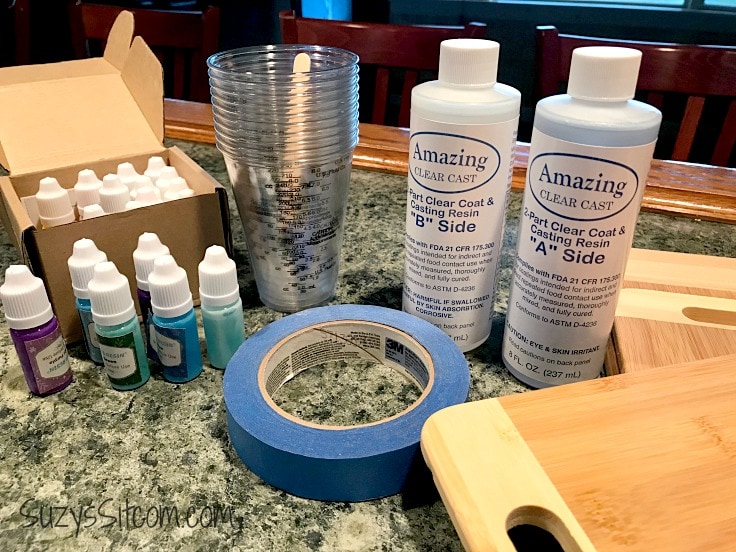
What you need:
Want more ideas like this? Subscribe today to get our weekly Ideas in Your Inbox newsletter plus other exclusive gifts and offers — all for FREE!
- Clear Cast Resin Kit (Food Safe)
- Opaque Resin Dyes
- Cutting Board Set
- Painters Tape
- Stirring Sticks or Popsicle Sticks
Instructions:
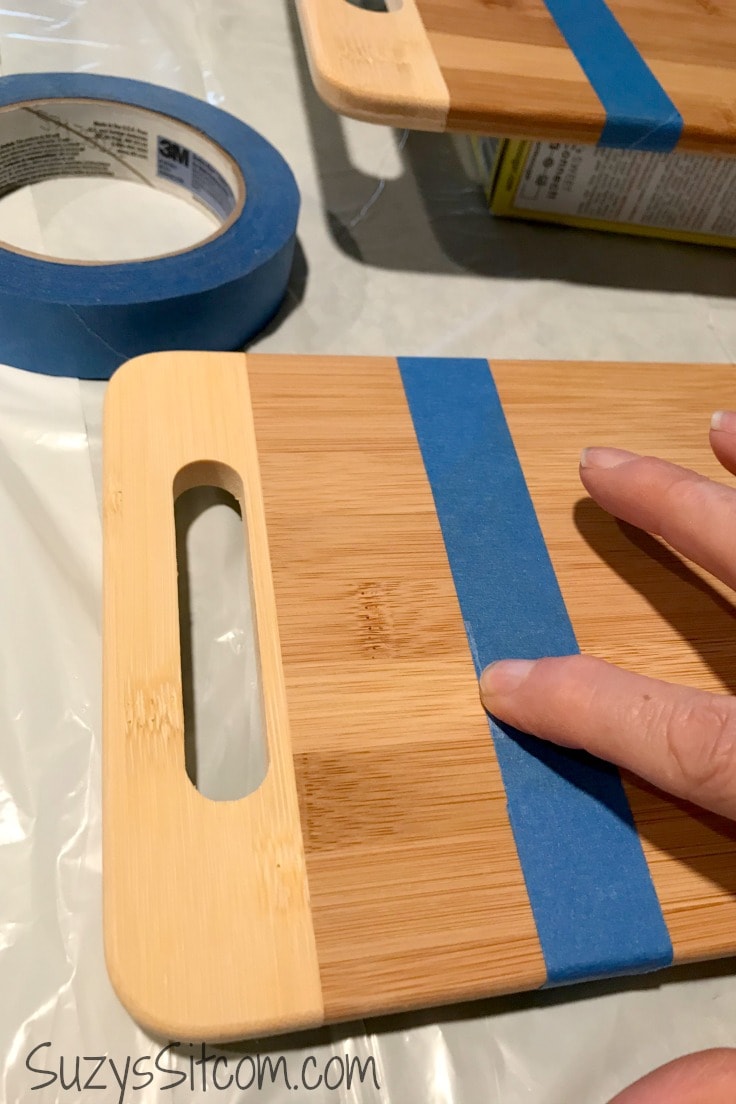
1. Prepare the surface
Begin by marking off where you would like the resin to end on the cutting boards with the painter’s tape. Press the tape firmly onto the cutting board so that no resin will go under it. Place the tape on both sides of the cutting board as you will be coating both sides.
Resin is very messy! Be sure to protect your work surface! I used large trash bags to cover the countertop. Set each cutting board on top of a small box or disposable item to lift the cutting board above the tabletop.
2. combine the resin
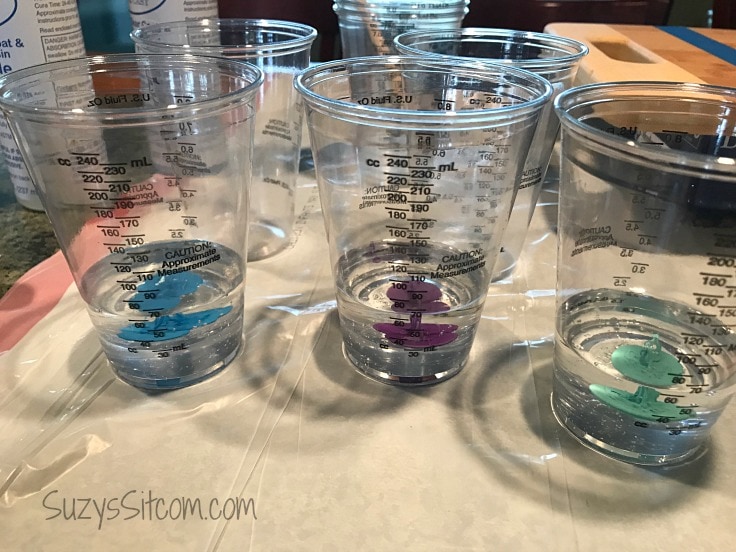
The resin will come in two containers: one marked A and one marked B. Once the resin is combined, the resin is activated. It is important to combine equal amounts of A and B. The resin kit that I purchased included lots of plastic cups with measuring marks on the side for convenience. For best results be sure to measure accurately!
I created 3 base colors for my cutting boards, blue, green and purple. Once each of the 3 cups contained equal amounts of A and B (in my case 30 ml of each), I added about 5 drops of opaque resin dye to each one to create the color.
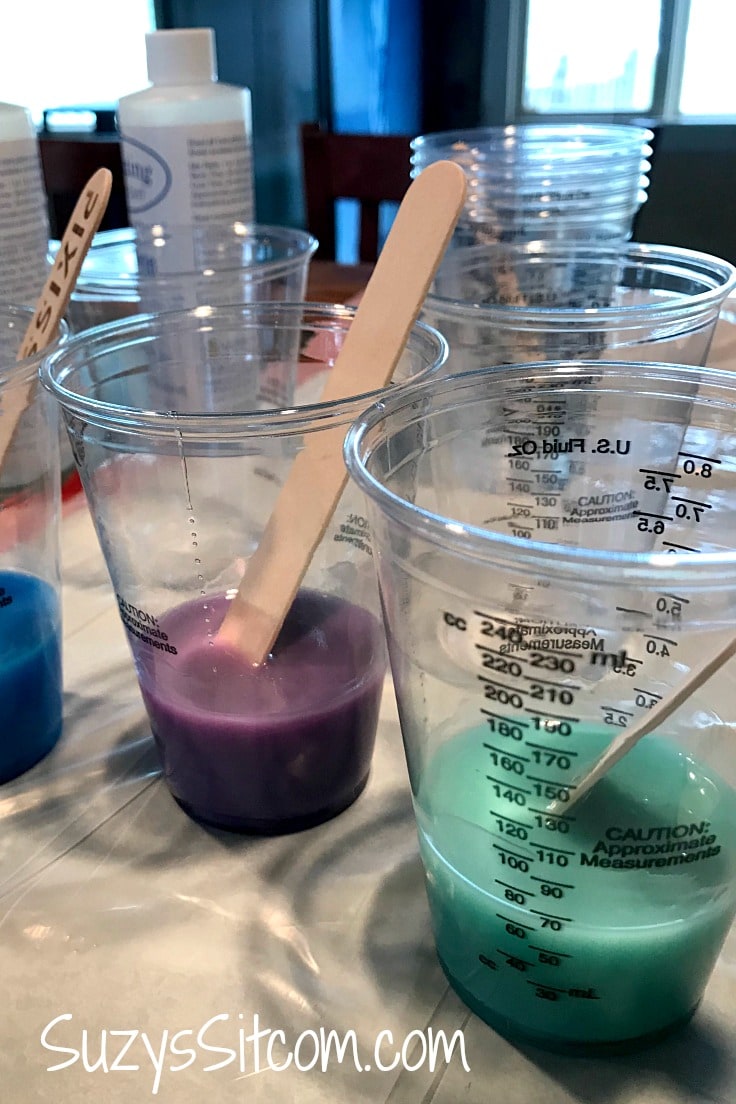
3. stir the resin
Using stirring sticks, mix the color and resin parts A and B together. Mix slowly so as not to create bubbles, being sure to scrape the sides and bottom thoroughly for about 2-3 minutes. (Proper curing depends upon a thorough mix). Keep in mind that you have a good 25 to 30 minutes to work with your resin before it begins to harden.
This video showing how to mix two part resin might be helpful to you:
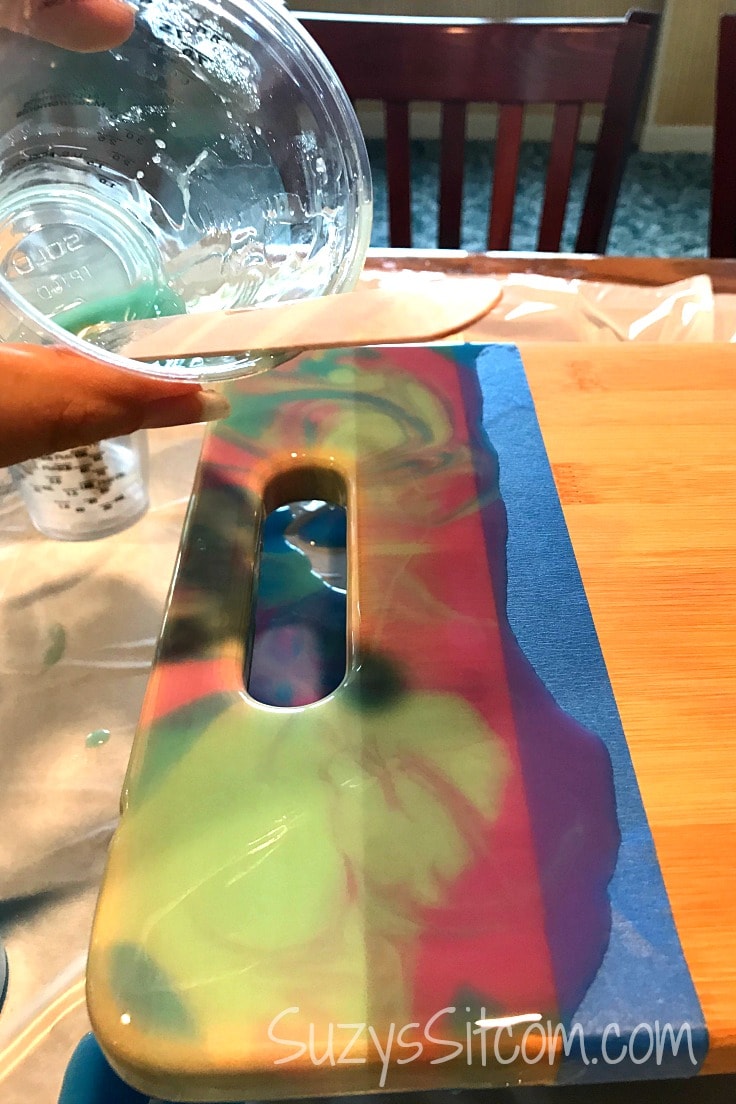
4. pour the resin
Gently pour small amounts of the resin onto the cutting board, overlapping the tape by just a bit. Allow it to drip over the sides and onto the protected tabletop. Add enough of each color to gently blend with a popsicle stick.
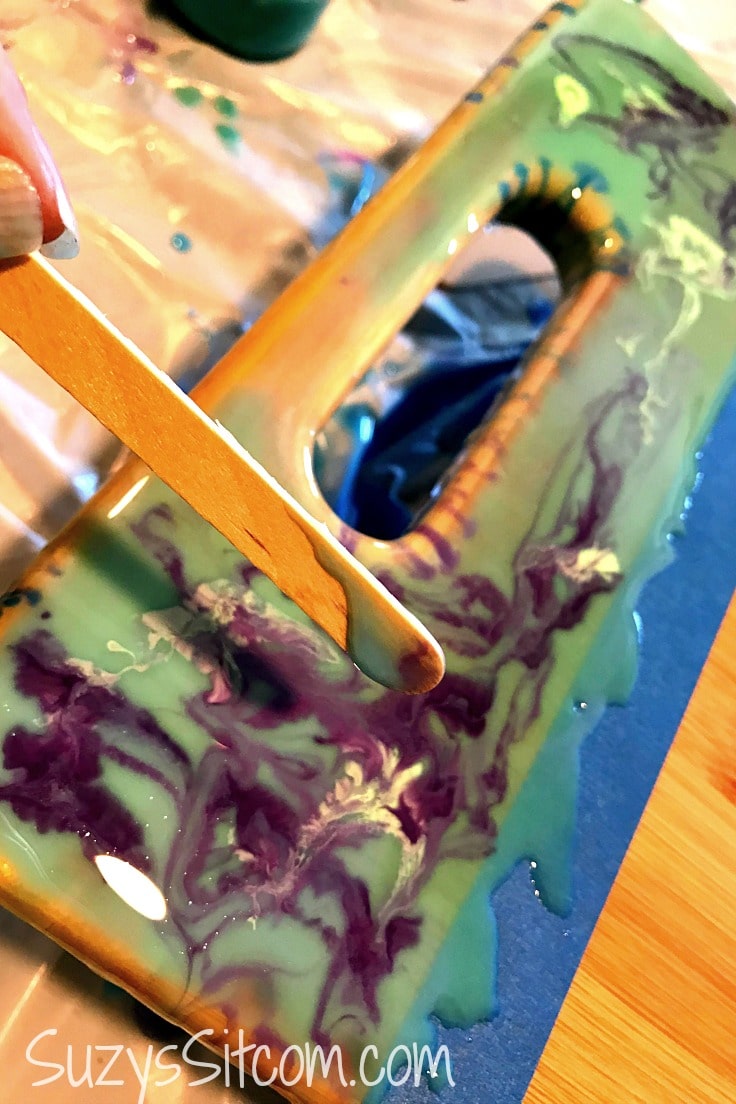
5. add more color
To add stronger pops of color, add drops of dye directly onto the resin surface. Allow them to spread and push them around a bit with the popsicle stick until you achieve a combination that you are happy with.

6. allow the resin to cure
Allow the resin to cure for 18-24 hours. (You may need to dab off drops from underneath with a paper towel for the first 30 minutes or so).
After the one side has cured, repeat for the other side of each cutting board.
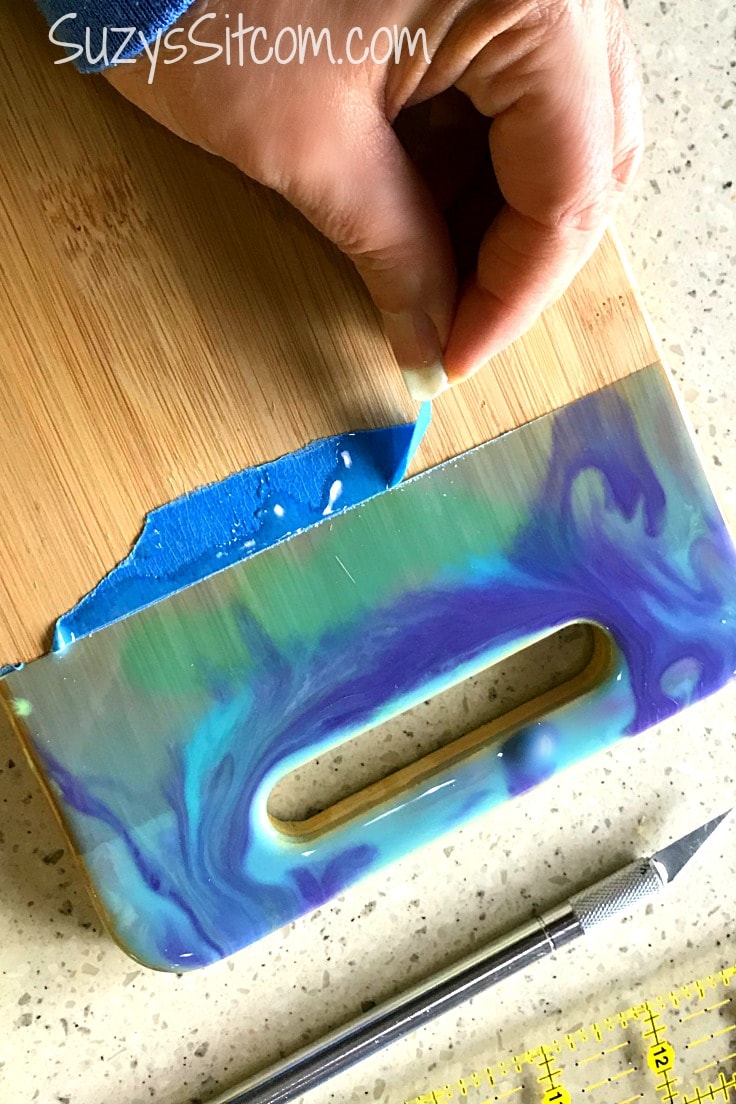
7. creating with resin: finishing steps
Use a ruler and craft knife to score the resin along the line of the painter’s tape. Peel off the painter’s tape.

I have to say that this project had its challenges and I was a bit unsure of how these would turn out while waiting on the drying stage. But the end result was so worth the effort! These beautiful cutting boards will make amazing, unique gifts for my friends and relatives this year.
I see many more resin projects in the future!
Love the ideas you see here on Ideas for the Home by Kenarry®? Subscribe today to get our FREE DIY & Craft Planning Calendar, plus our weekly Ideas in Your Inbox newsletter filled with creative tips and exclusive offers!
More unique craft ideas from the Sitcom!
Do you love unique craft ideas? Be sure to check out my website for hundreds of fun craft projects that you will not find anywhere else!
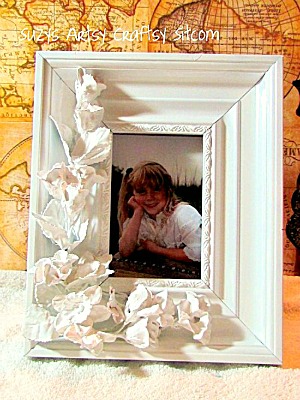
How to make a Faux Porcelain Frame!
How to make Wax Covered Pine Cones!

Fun to Make Jar O’Nutcracker Spoons!

You may also enjoy these craft projects on Ideas for the Home by Kenarry® –
That is so cool, Suzy. I think this would be so fun to get together and do with a Ladies Night Out group. You know, one person gets all the supplies and then you all do that together. Seems pretty easy, and such a stunning result. Thanks for sharing:)
I’m glad you enjoyed the tutorial! I love the results and plan on coming up with more resin ideas in the future. Yes, it would definitely make a great group project!
Have you found there’s any risk of water or other liquids from food – like chicken or other meats – or even acidic veggie & fruit juices working it’s way under the rough edge of the resin & loosening it?
Epoxy resin generally adheres with nearly all surfaces. The thinner the resin, the more likely it is to penetrate the pores of the wood and adhere to it. It is also food safe! Hope that helps!
Could you use this on the top of a glass table that you eat at or would it be better to add it to the bottom? Thanks.
Hi Judy,
We don’t have any experience using epoxy resin on a glass table top. I would try looking online for those specific terms to find a tutorial that fits what you’re looking for.
Good luck with your project! It sounds really cool.
Best wishes,
Carrie