DIY Burp Cloth Tutorial
THIS POST MAY CONTAIN AFFILIATE LINKS. PLEASE SEE OUR FULL DISCLOSURE POLICY FOR DETAILS.
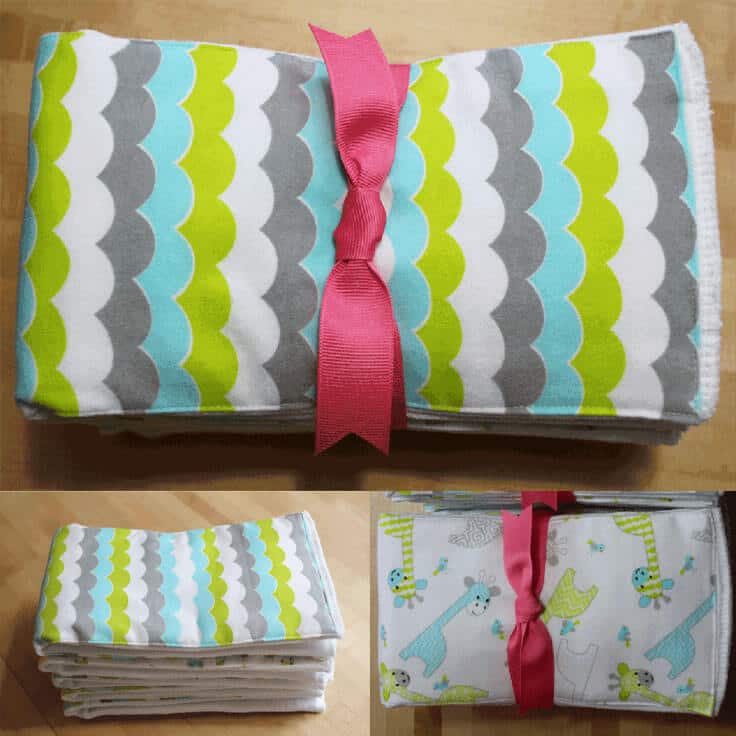
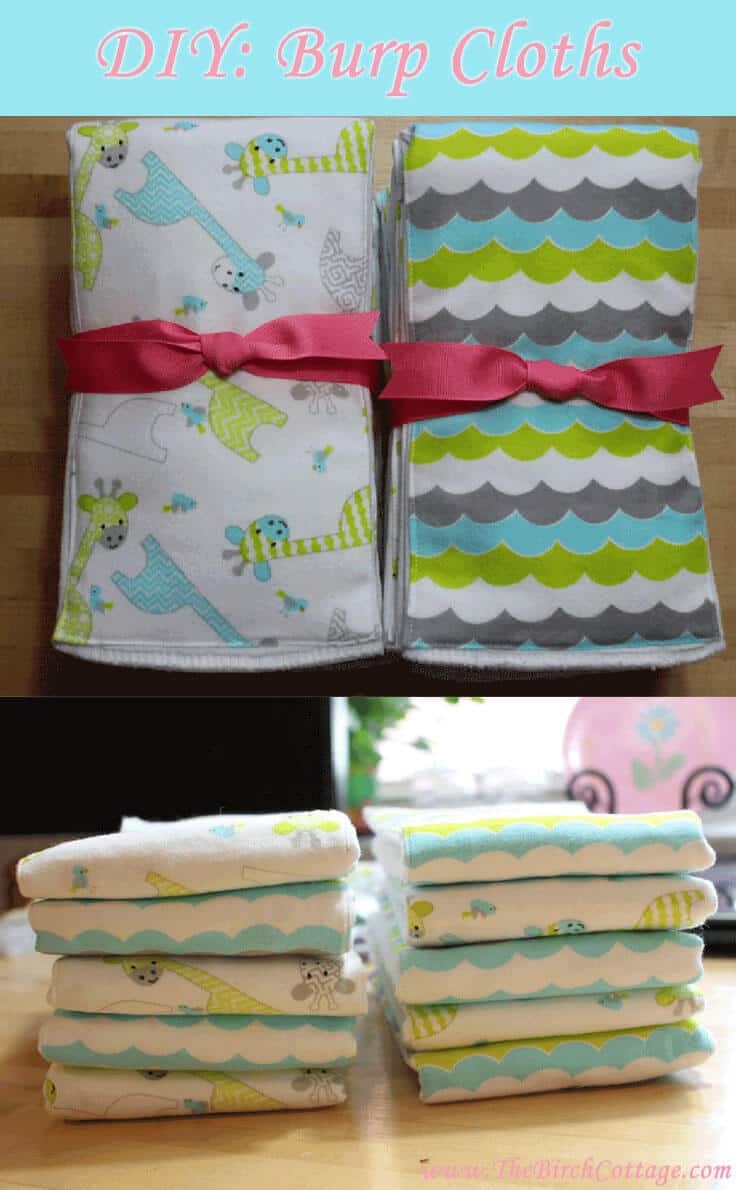
This easy to sew DIY burp cloth tutorial uses pre-folded cloth diapers and flannel. Learn how to make your own with this adorable easy-to-sew burp cloth tutorial.
Hello, Ideas for the Home by Kenarry® readers! I’m Pam from The Birch Cottage and I’m back again to share another DIY project with you. This project is just absolutely adorable (if I do say so myself) and I am so excited to share my DIY Burp Cloth tutorial with you for two special reasons! As you’ll quickly learn if you follow me on social media or visit my blog (and I hope you do), I have a son who lives in Georgia along with his beautiful wife and they just had twins on July 3rd. So, yep, I’m the very proud grandmother of two absolutely adorable twin girls!

When my daughter-in-law was still expecting the girls, I searched all over Pinterest and Google for DIY baby inspiration. What I kept coming across were these adorable burp cloths. I don’t know of anything that makes for a better burp cloth than a cloth diaper, so that was my starting point. I actually found several tutorials online and I’ve borrowed some different ideas and come up with my own version of these easy to sew baby must-haves.
Instructions
Step 1: Gather Your Supplies
To start with, you’ll want to purchase some premium pre-folded cloth diapers. I purchased a 10-pack from Target, but you could also purchase the cloth diapers online or from your favorite retailer. I also purchased some flannel fat quarters from my local fabric store. You can use cotton, but I thought the flannel would make for an extra soft and extra absorbent touch.
Step 2: Pre-wash and Iron Cloth Diapers and Fabric
Next, you will want to pre-wash both the cloth diapers and the fabric you purchased for this project. Once washed, I ironed my diapers and my fabric.

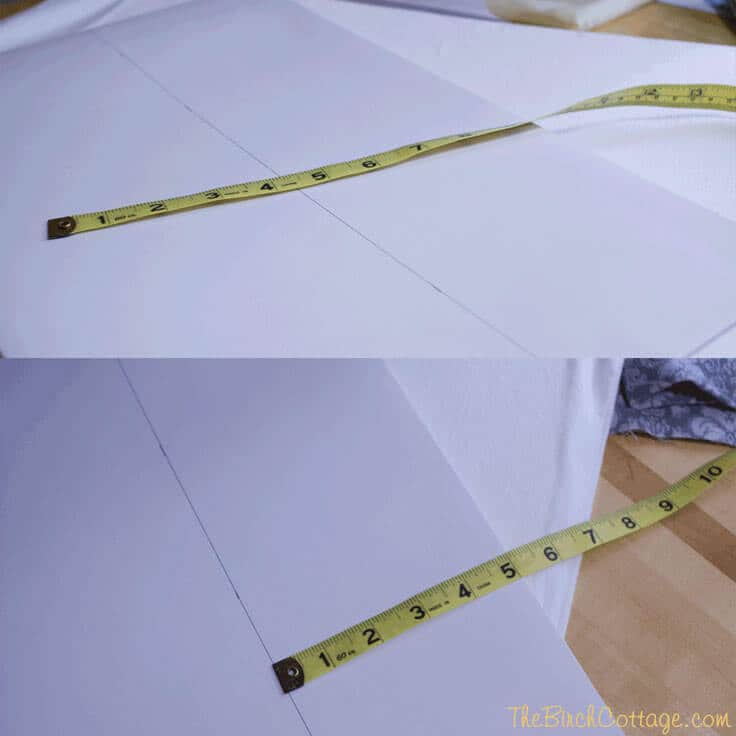
Step 3: Cut Fabric
After pre-washing and ironing the fabric, I cut my fabric into 22″ x 6″ strips. You will need one strip for each diaper. I also made a template out of cardboard (I used a gift box and just cut it to 5″ wide) that I will use in the next step to press my seam allowance.
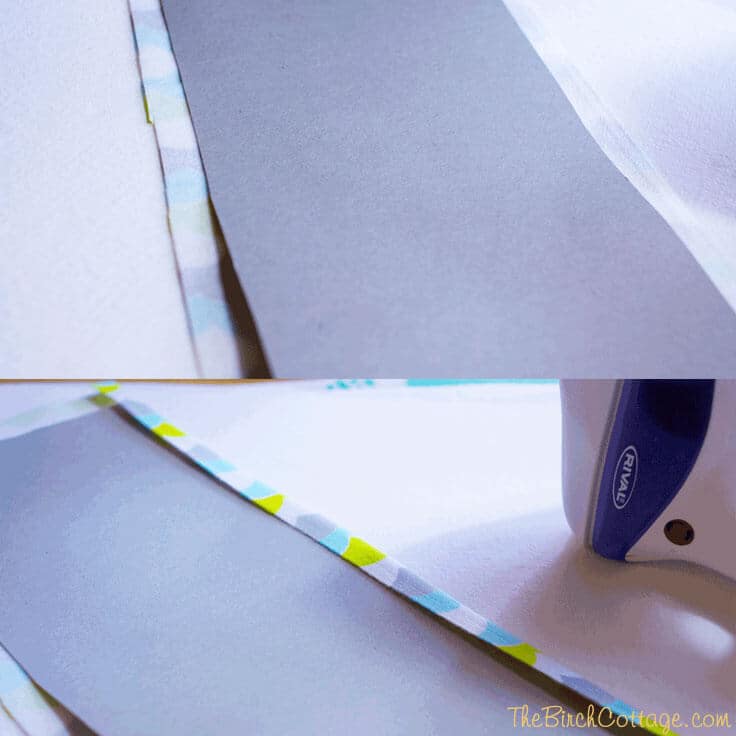
Step 4: Press Seam Allowance
To prepare my fabric for sewing onto the diaper, I used my template that I made out of cardboard and marked off 1/2″ down the side. I laid the template on top of my fabric and pressed, creating a nice fold for my seam allowance.
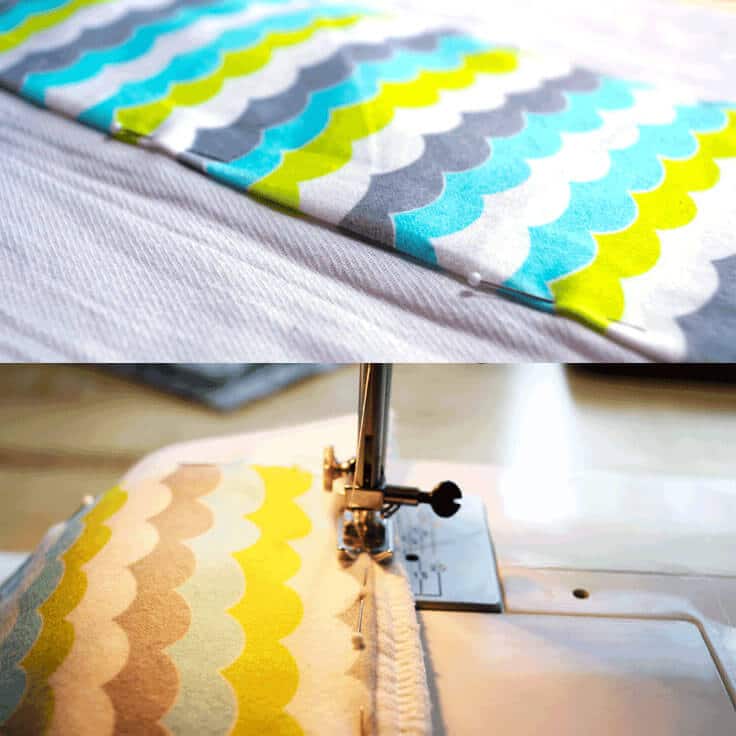
Step 5: Sew Fabric on Cloth Diaper
Center fabric over folded area of diaper, face up, and pin in place. Sew 1/4 seam along all edges of fabric.
Done! Now you have some adorable, customized baby burp cloths. Who needs plain old ordinary burp cloths when you can easily make these adorable DIY Burp Cloths?! I hope you’ve enjoyed this project as much as I enjoyed making them for my precious granddaughters.
Thanks again for visiting Ideas for the Home by Kenarry®! I’ve truly enjoyed sharing this DIY project with you and look forward to bringing you another fun project for the home next month! If you’d like to see what I’ve been up to on my blog, check out some of my latest projects:

The Yummiest Pulled Pork Recipe

Love the ideas you see here on Ideas for the Home by Kenarry®? Subscribe today to get our FREE DIY & Craft Planning Calendar, plus our weekly Ideas in Your Inbox newsletter filled with creative tips and exclusive offers!
What’s Next?
While you’re here, be sure to check out other craft projects on Ideas for the Home by Kenarry® –
2 Comments