How To Make A DIY Chalkboard Sign For Spring
THIS POST MAY CONTAIN AFFILIATE LINKS. PLEASE SEE OUR FULL DISCLOSURE POLICY FOR DETAILS.
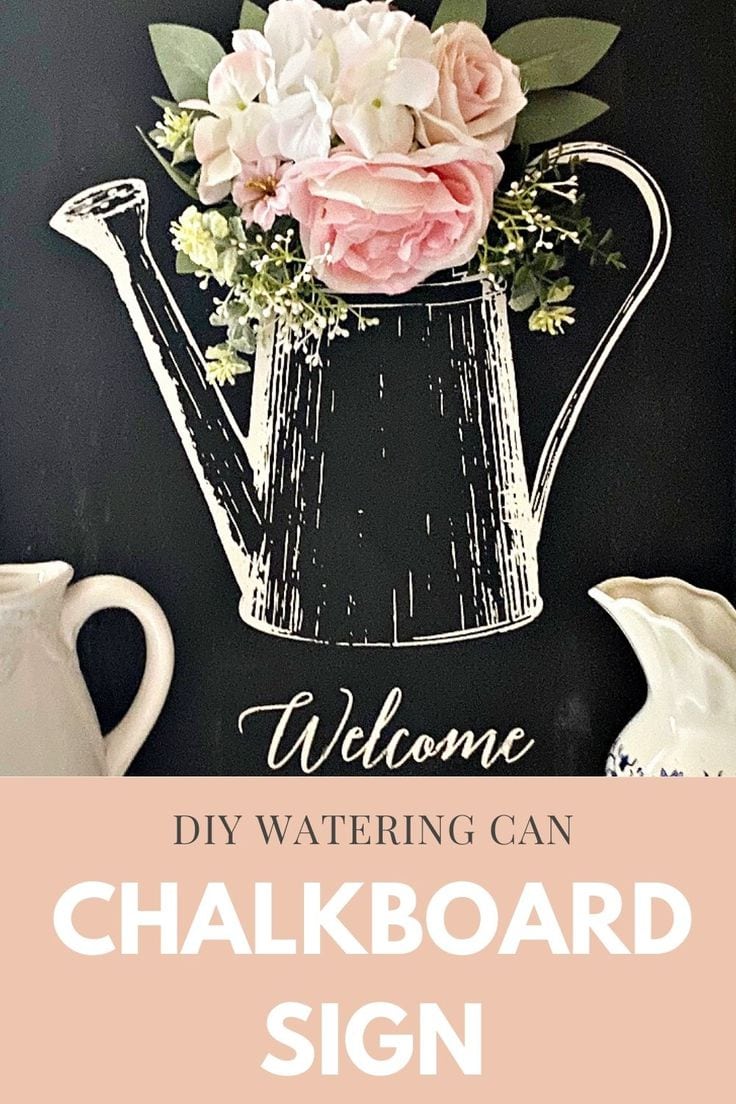
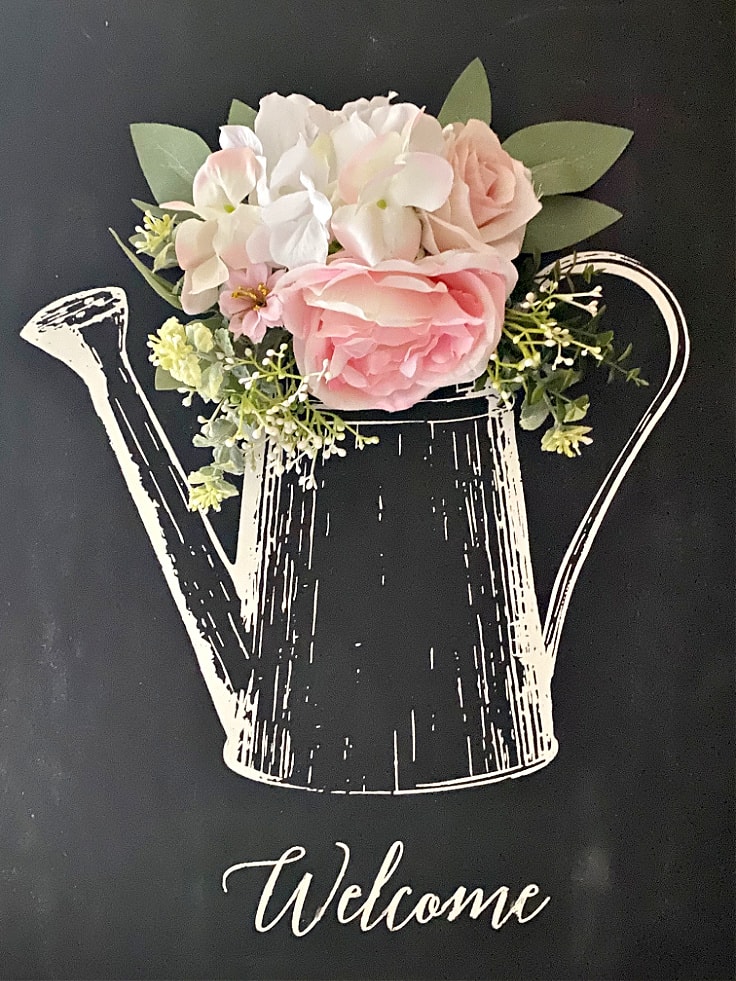
This is how to make a really easy DIY chalkboard sign of a watering can that is popping with flowers! Perfect for weddings or door hangings.
Hello! I’m Michelle from Our Crafty Mom. I love to decorate my home with handmade crafts and decor. Chalkboard signs continue to be extremely popular. One of the reasons is because they pretty much go with any style of decor. This watering can chalkboard sign can really be displayed all year long, but it is just perfect for Spring!
Stencils have come a long way since I first started using them many years ago. Now they have silk screen styles that leave virtually no bleeding! There are all kinds of seasonal and everyday decorating styles too. Plus, if you buy one at the craft store you can usually use a coupon!
Make this chalkboard sign to hang in your entryway. Set up a console table with a DIY spring topiary and you’ve got a wonderful focal point to welcome visitors!
How to Make A DIY chalkboard Sign
This beautiful welcome sign would make a really sweet gift for a friend’s birthday or DIY wedding decor. You can easily change out the flowers to whatever style and color that you like.
What you need:
Want more ideas like this? Subscribe today to get our weekly Ideas in Your Inbox newsletter plus other exclusive gifts and offers — all for FREE!
Craft/DIY Tools Needed:
Supplies Needed:
These are the ingredients you’ll need. All the exact amounts are in the printable card at the bottom of this post.
Tips For painted wood signs
I’m going to share all of the exact steps in the printable craft card at the bottom of this post. First, here are some tips that will help you make the best chalkboard sign.
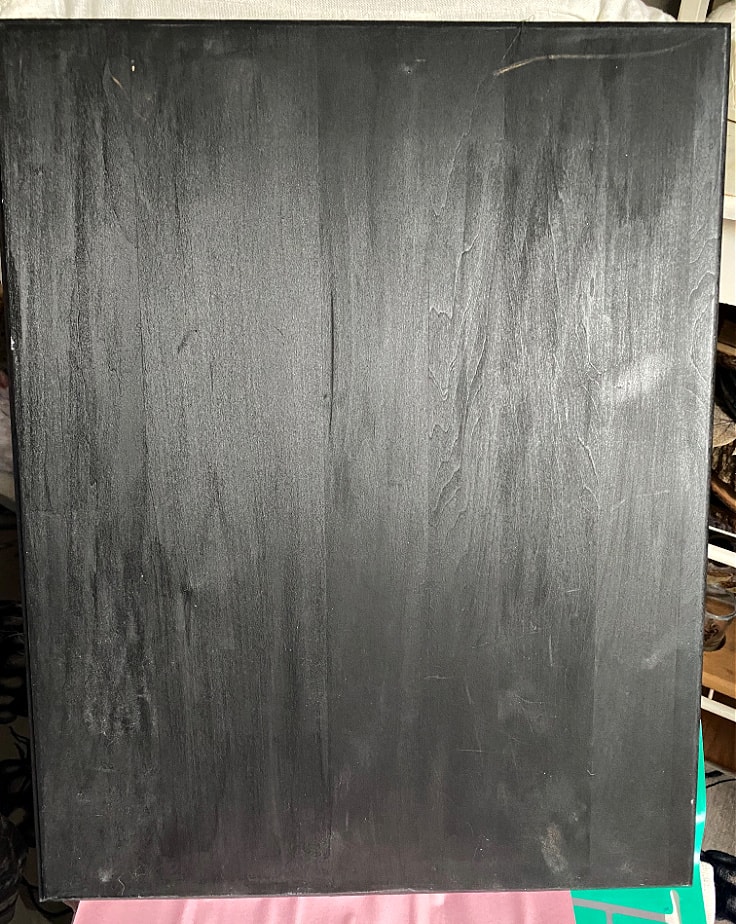
Prep The Wood With Primer
When using silkscreen stencils with painted wood, it’s best to add a clear wax first. Otherwise, the transfer may pull up some of the paint. Ask me how I know this?!
Let the wax dry overnight and you will have a very smooth transfer!
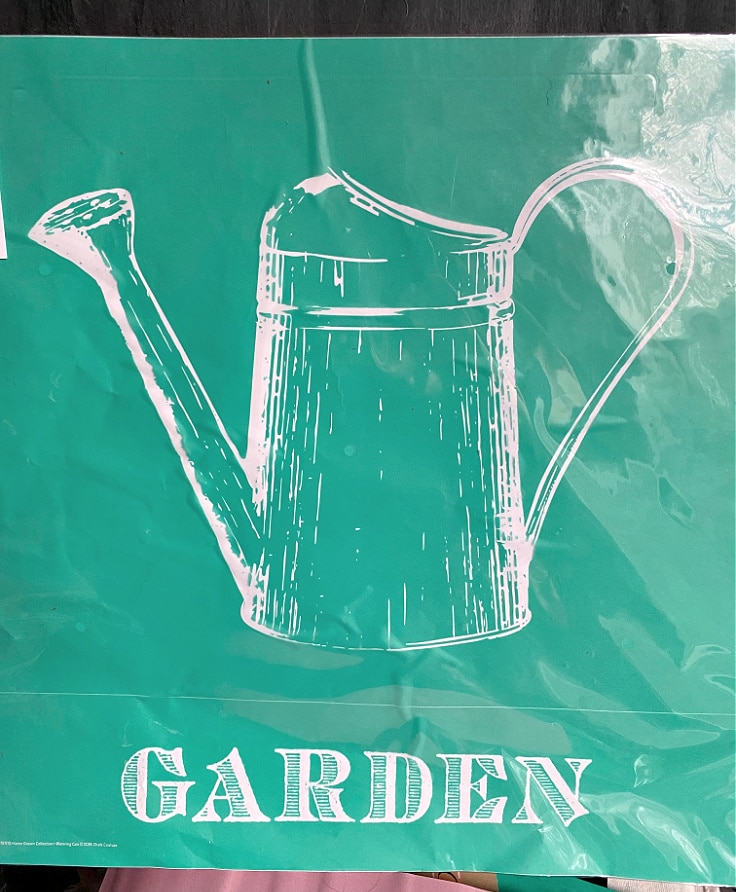
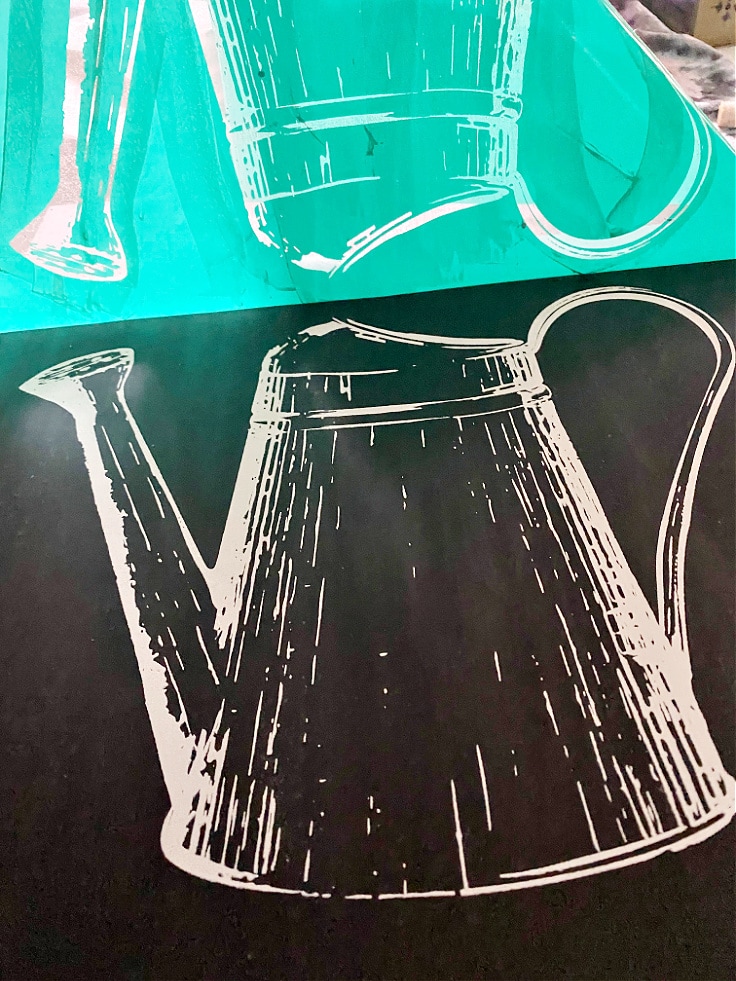
add the image to the chalkboard
Place the silkscreen transfer onto the center of the chalkboard. If you are using a stencil, you can add a little bit of tape to secure it. The silkscreen is sticky, so it will stay in place.
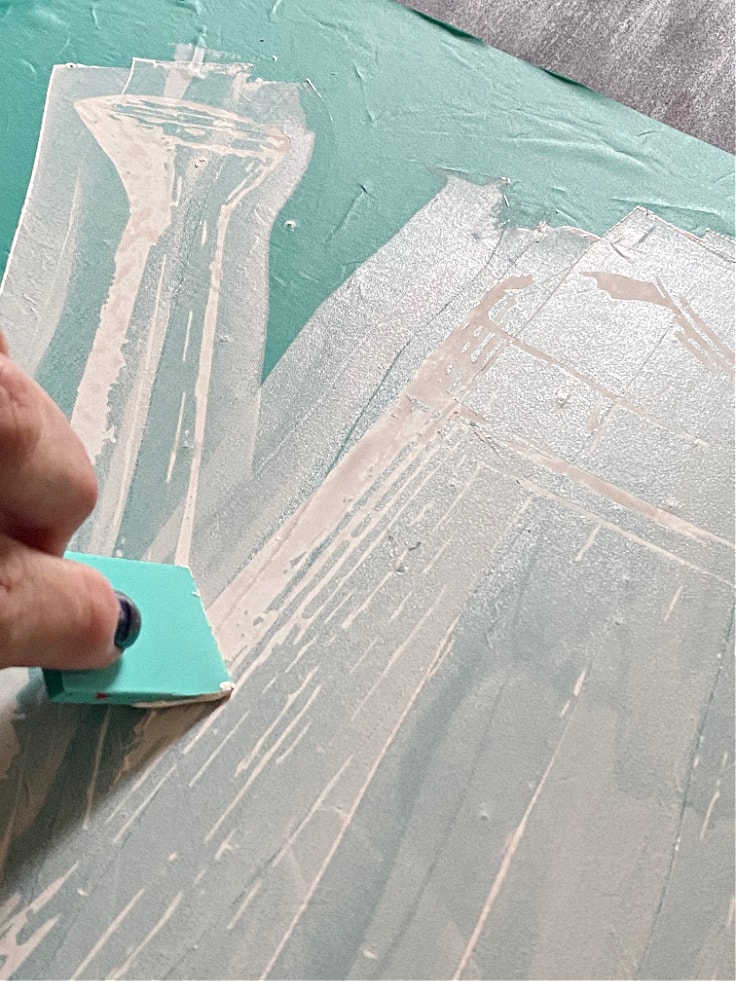
Use the squeegee to add the chalk paste
Apply the chalk paste on top of the transfer making sure you cover all of the open space-in this image the white spaces.
Remove the transfer
Slowly remove the transfer from the chalkboard. Be sure to remove carefully so you don’t pull up any of the paste.
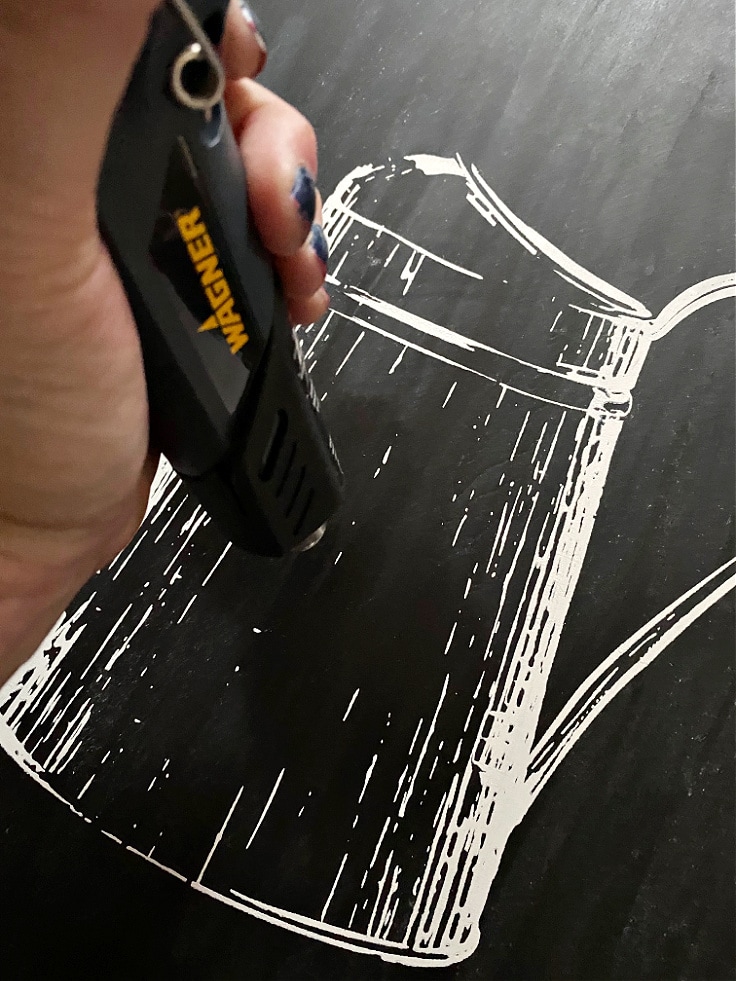
Let the Chalk Paste Dry
You can let the paste dry, or if you are an impatient crafter like me, you can use a heating tool to speed up the drying process.
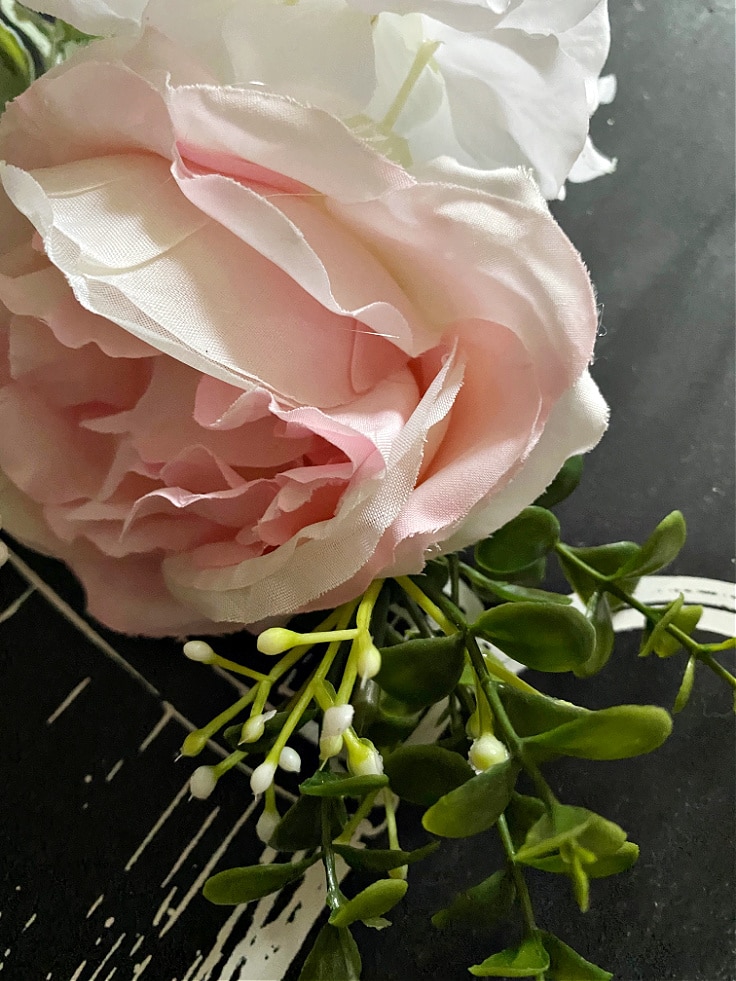
hot glue the flowers
Use the snips to trim the flowers. Hot glue them to the top of the watering can, so it looks like they are coming out of the top of the can. It gives it a fun 3-D effect.
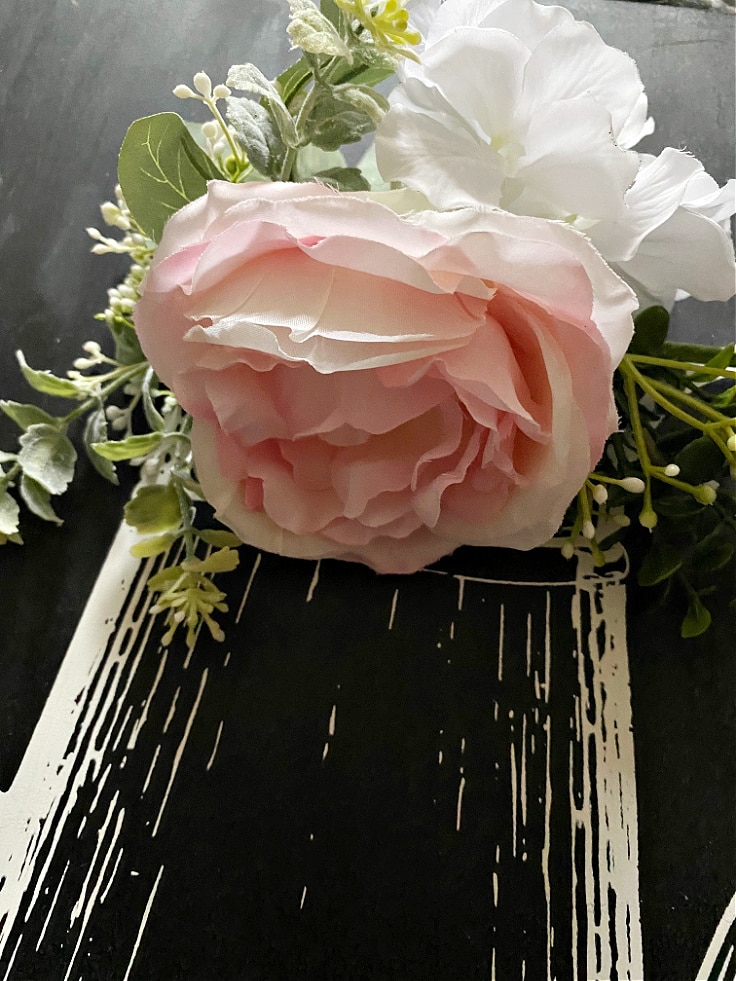
add greenery
Once you have the flowers secure, add greenery and accent stems around the flowers using hot glue.
That’s all there is to it. Take a step back and enjoy your beautiful handmade chalkboard sign. This could be hung on a covered porch, as a beautiful welcome sign. It can also be displayed standing on a buffet table, or hung in your entry way. There are so many places this can be displayed.
You can even use a chalk pen to write out the menu for a wedding, or write “Congrats” and display it at a baby shower. The ideas are endless!
I hope you enjoyed this pretty craft. Keep this in mind for Mother’s Day too!

DIY Chalkboard Sign
Equipment
- Hot Glue Gun
- Wire Cutters
- Squeegee
Supplies
- 1 Watering Can Stencil
- 1 bunch Silk Flowers
- 1 can Chalk Paste
- 1 Creme Wax
- 1 Wood Chalkboard Sign
Instructions
- Prep the wood with primer. I used a clear creme wax.
- Let the wax dry overnight.
- Place the silkscreen transfer onto the center of the chalkboard. If you are using a stencil, you can add a little bit of tape to secure it. The silkscreen is sticky, so it will stay in place.
- Apply the chalk paste on top of the transfer making sure you cover all of the open space-in this image the white spaces.
- Slowly remove the transfer from the chalkboard. Be sure to remove carefully so you don’t pull up any of the paste.
- You can let the paste dry, or if you are an impatient crafter like me, you can use a heating tool to speed up the drying process.
- Use the snips to trim the flowers. Hot glue them to the top of the watering can, so it looks like they are coming out of the top of the can. It gives it a fun 3-D effect.
- Once you have the flowers secure, add greenery and accent stems around the flowers using hot glue.
Love the ideas you see here on Ideas for the Home by Kenarry®? Subscribe today to get our FREE DIY & Craft Planning Calendar, plus our weekly Ideas in Your Inbox newsletter filled with creative tips and exclusive offers!
What’s Next?
If you enjoyed this DIY chalkboard sign then you’ll enjoy these DIY signs too.
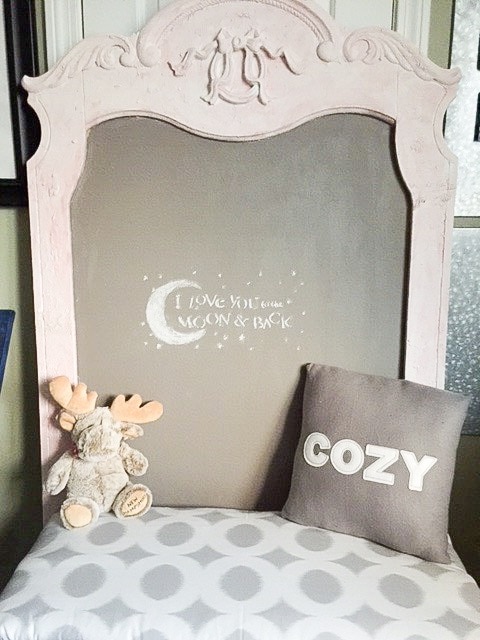
Farmhouse Chalkboard from Old Mirror
You may also enjoy these chalkboard ideas on Ideas for the Home by Kenarry® –