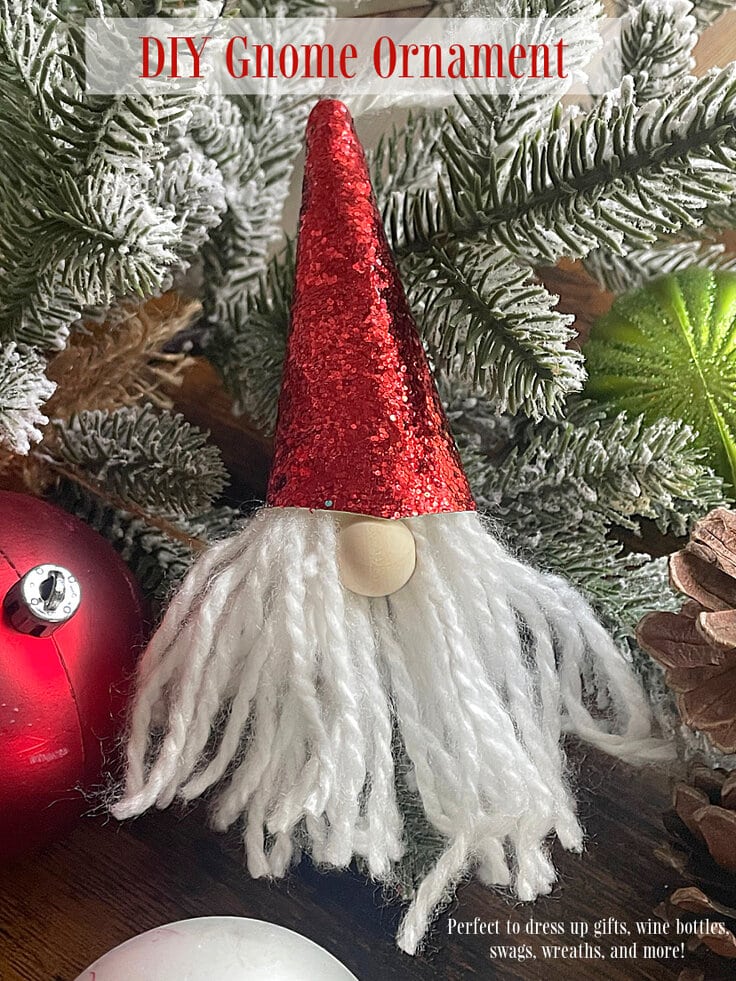
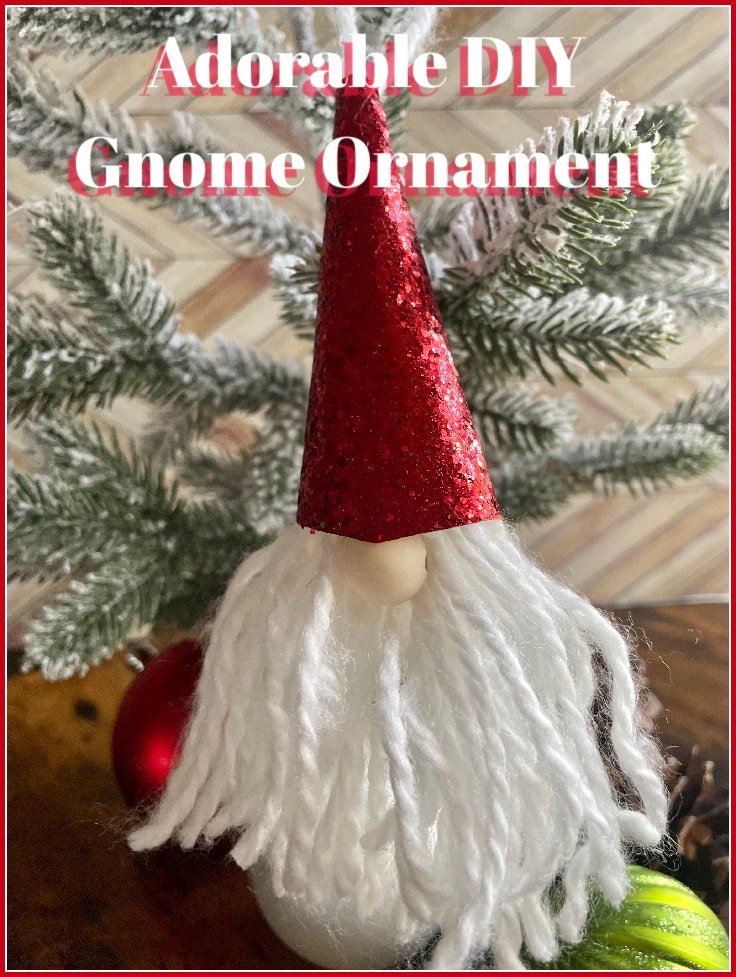
DIY Gnome Ornaments
THIS POST MAY CONTAIN AFFILIATE LINKS. PLEASE SEE OUR FULL DISCLOSURE POLICY FOR DETAILS.
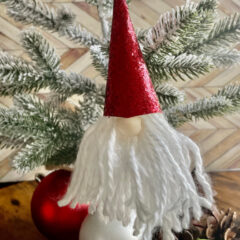
These adorable DIY Gnome Ornaments iare so easy and fun to make that you may find your house overrun with them. They are perfect for ornaments but also make fantastic package toppers, and can used to create a fun banner for the mantle, hanging from wine bottles, and more!
I am Jody, a homeschooling free-lancing momma with a love for all things farmhouse, Christmas and coffee, and have a serious addiction to list-making! These gnomes will look cute next to a homemade macaron ornament!
I can hardly pass through a home decor store without snatching up all the sweet little gnomes, especially the Christmas ones! If you are the same way you are going to fall in love with how cute these little Gnome Ornaments are and how quickly you can make them up.
How to Make DIY Gnome Ornaments
You will just need three basic supplies to make these adorable DIY Gnome Ornaments for your tree or to dress up any of your holiday decor or supplies. The hardest part of this entire project is not burning yourself with the glue gun. I speak from experience, I am pretty sure I have burned off enough fingerprints to get away with a crime!
I grabbed the yarn and bead from Dollar Tree, and it left me with a ton of material leftover for more gnomes or other crafts. The glitter craft sheet came from Hobby Lobby near the felt.

What you need:
Want more ideas like this? Subscribe today to get our weekly Ideas in Your Inbox newsletter plus other exclusive gifts and offers — all for FREE!
Craft Tools Needed:
Supplies Needed:
DIY Gnome Ornament Tips:
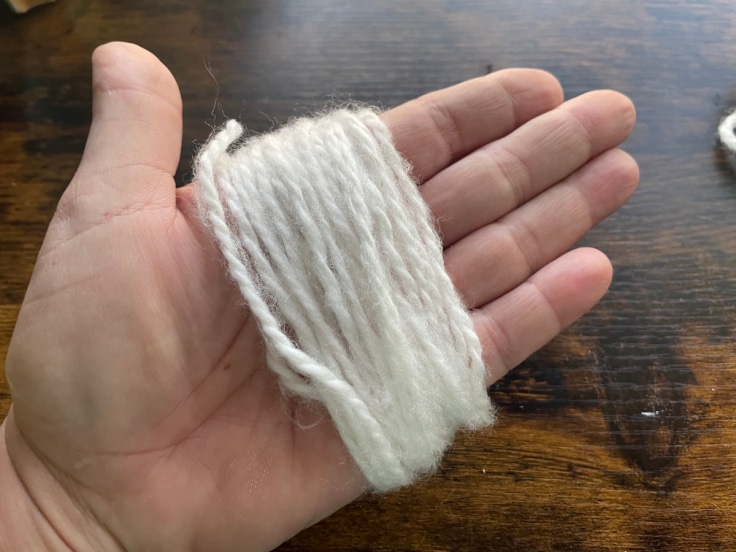
First, you will want to wrap the yarn loosely enough to slip it off your hand but not so loose that it unravels and is uneven.
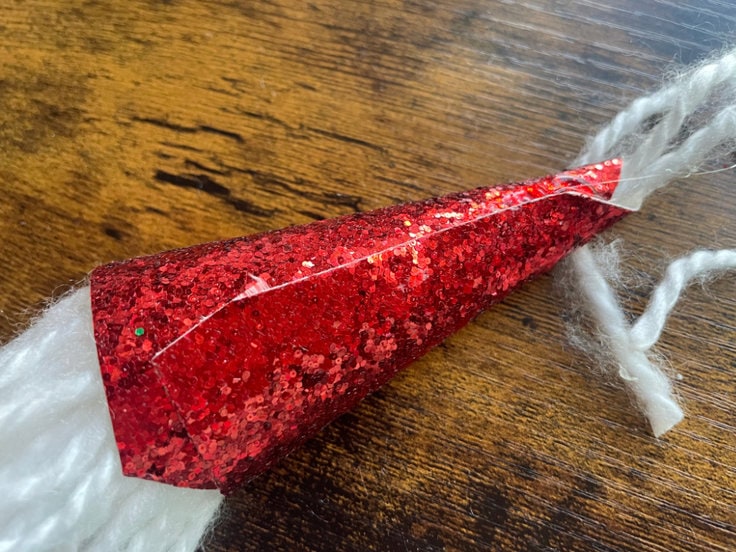
After you roll your glitter sheet, trim the botttom and the back so there is not much overlap BEFORE hot gluing. Once you have the excess trimmed you can just rewrap it around the hanging string and glue it after adjustments
Also, make sure you don’t glue it to the string as you will need the string to move freely for hanging but you can secure it to the beard where you want it to keep it from moving.
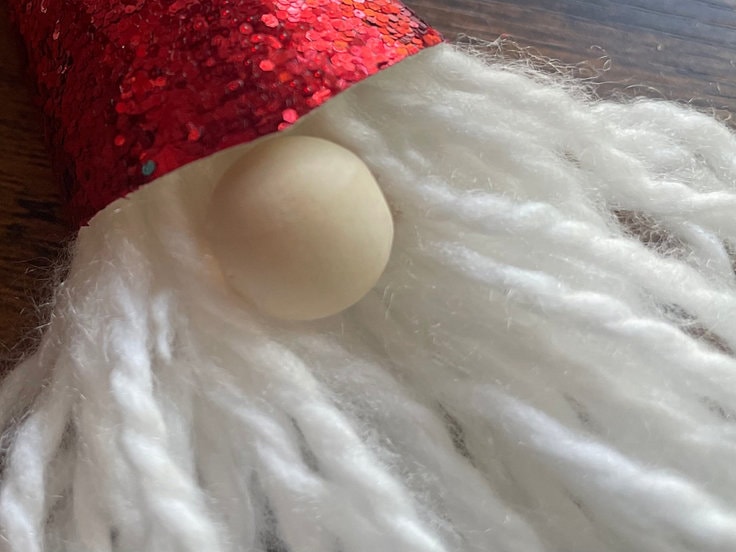
It is much easier to add a little bit of hot glue to the back of the wooden bead rather than add it directly to the beard and tuck the nose slightly under the hat.
You can customize your DIY Gnome Ornaments by changing the size you make, the fabric type of the hat, and even the beard color to create a little army of gnomes that perfectly complement your decor.
Tie multiple gnomes to a longer strand of yarn to create a gnome garland.
DIY Gnome Ornament
Equipment
- 1 Pair of scissors
- 1 glue gun
- 1 glue stick
Supplies
- 1 piece red glitter craft sheet
- 1 skein white yarn
- 1 piece unfinished wood craft bead
Instructions
- Wrap white yarn tightly around the widest part of your hand 25 times.
- Slip loops carefully off your hand and slide a piece of yarn through the middle of the loops and tie into a knot.
- At the opposite end slip your scissors through and cut off all the loops.
- Cut a square of your glitter craft fabric about 3” x 4” and wrap into a cone shape around the long string To create the shape of a little gnome hat.
- Slide off the string and trim it so that the overlap is not showing in the front and it is straight along the bottom.
- Wrap around the long string again and hot glue to itself , slide over the string until it is covering the beard to where you would like it and then you add a dab glue Between the beard and the hat so that it doesn’t move around.
- Finally add a little hot glue to the back of a wooden bead and tuck it just under the edge of the hat so it looks like it’s peeping out.
- Trim the beard a bit with scissors to shape it.
- That’s it, your adorable little gnome is ready to be hung on the tree, used in a package, hung off a bottle of wine or you can make many of them and create an adorable swag for your fireplace or Christmas tree.
Love the ideas you see here on Ideas for the Home by Kenarry®? Subscribe today to get our FREE DIY & Craft Planning Calendar, plus our weekly Ideas in Your Inbox newsletter filled with creative tips and exclusive offers!
You may also enjoy these other DIY Ornament ideas on Ideas for the Home by Kenarry® –