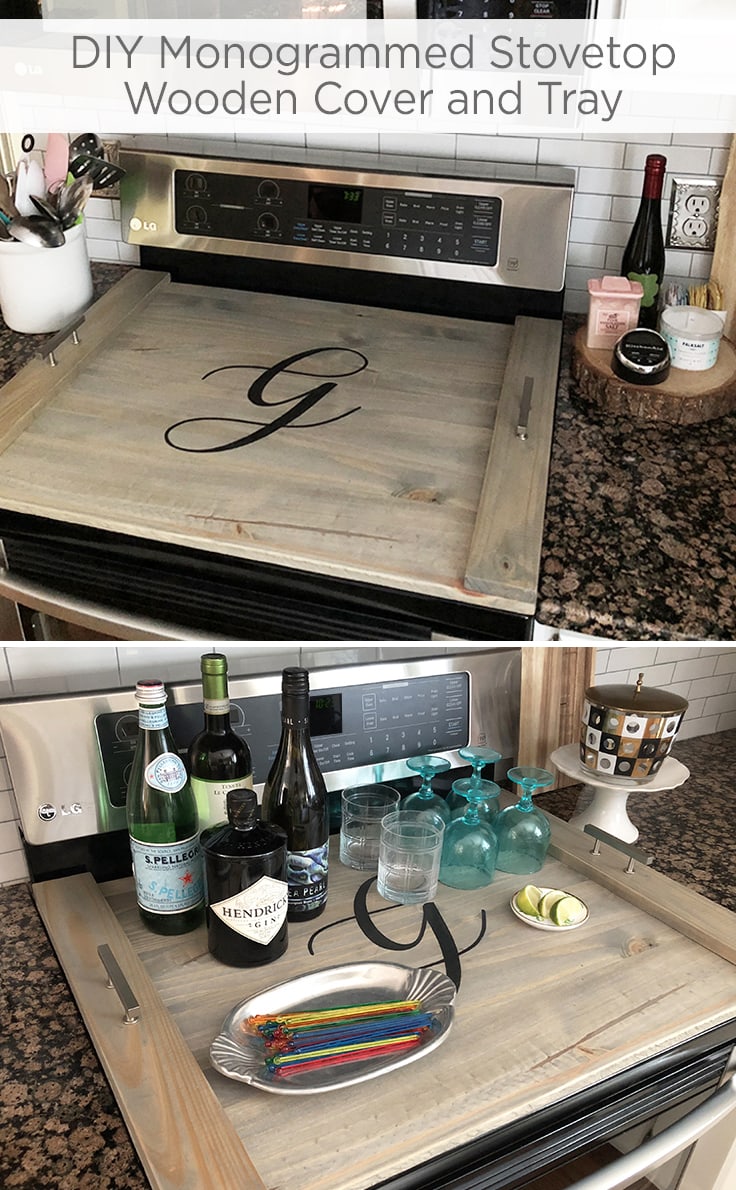
DIY Monogrammed Wooden Stovetop Cover And Tray
THIS POST MAY CONTAIN AFFILIATE LINKS. PLEASE SEE OUR FULL DISCLOSURE POLICY FOR DETAILS.
This DIY monogrammed wooden stovetop cover and tray is a great way to add more work and counter space to your kitchen but it can also function as a serving tray when not in use.
Hi Ideas for the Home readers, it’s Lori from Greco Design Company and today’s post is both useful and pretty. Follow the easy-to-make instructions to create your own Monogrammed Wooden Stovetop Cover and Tray. It’s easy to make, and the monogram adds a personal touch to any home.
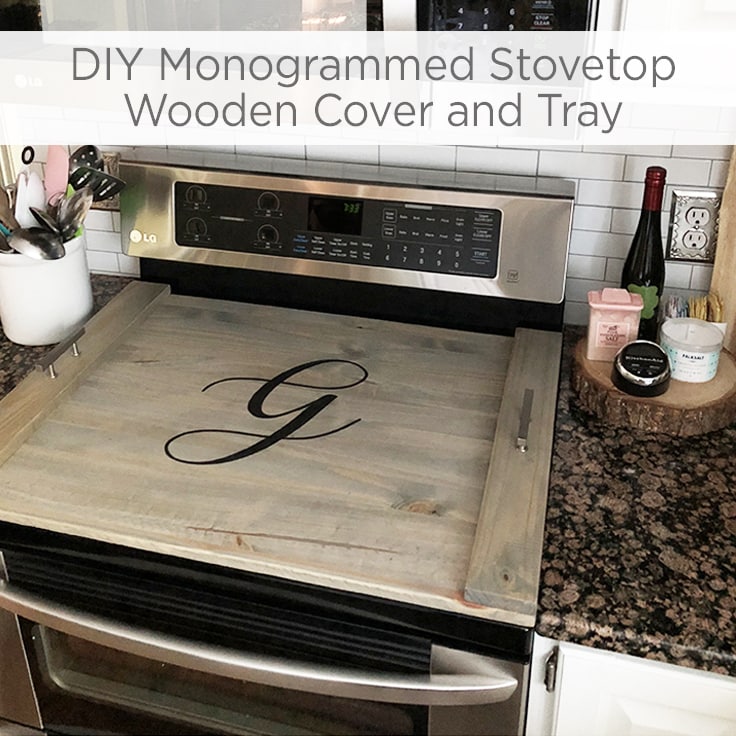
I don’t know about you but I always seem to need extra counter space. My stovetop is an electric cooktop and even though it’s a flat surface, I don’t want to scratch and ruin the surface with everyday prep work. This wooden stove top cover works over any cooktop surface too.
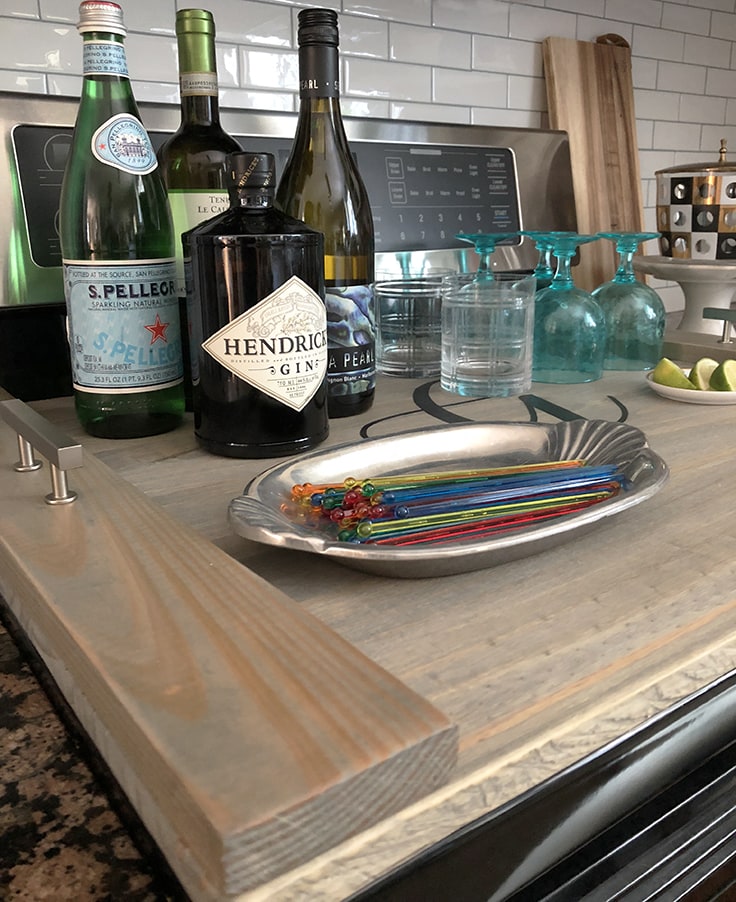
In addition to adding to my everyday counter space, this wooden cover becomes a bar area when we entertain. And the handles make it easy to move and function as a tray too.
How to Make a monogrammed Wooden stovetop cover and tray
Want more ideas like this? Subscribe today to get our weekly Ideas in Your Inbox newsletter plus other exclusive gifts and offers — all for FREE!
You’ll need a few pieces of wood and some basic tools but making this wooden stove top cover is an easy, fun summer project.
What you need:
- A large piece of wood for the base – I use common board because it’s pretty inexpensive and it’s good durable wood. You can find almost any size pieces at most home improvement stores. My cover is 30 x 22″
- A saw (most home improvement stores will cut wood pieces down for you of you don’t have a saw)
- Wood stain – I used this one because I love the gray color but I’ve been using these Minwax Wood Finishing Cloths too and they’re another great option.
- Sandpaper or electric sander
- Wood glue
- Acrylic paint
- Small paintbrush
- Old rags or paper towels
- Two drawer handles with screws. I got mine at Lowes, but these are similar.
- Screwdriver
- Polyurethane sealer
- Access to a computer
Instructions:
This tutorial has step-by-step pictures and instructions. Follow them and you’ll have a stunning stove cover for your next party.
1. measure your stovetop
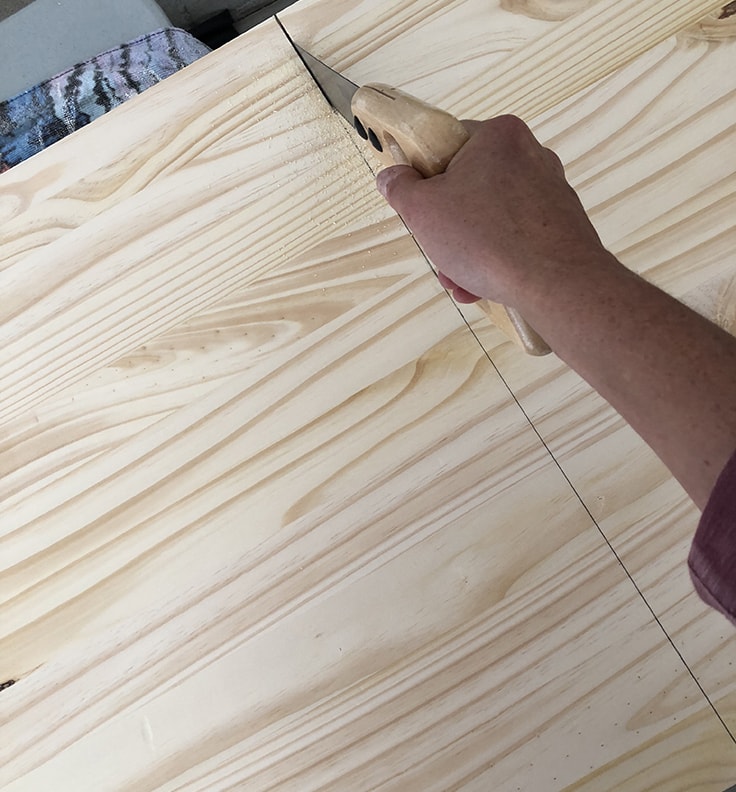
First, measure your stovetop area and find a piece of wood that will work. Also, get 2 pieces of wood for the side handles. These pieces can be any width you’d like – they just need to accommodate the handles (mine are 4″ wide). Cut your wood with a saw if needed.
2. Sand & stain the wood
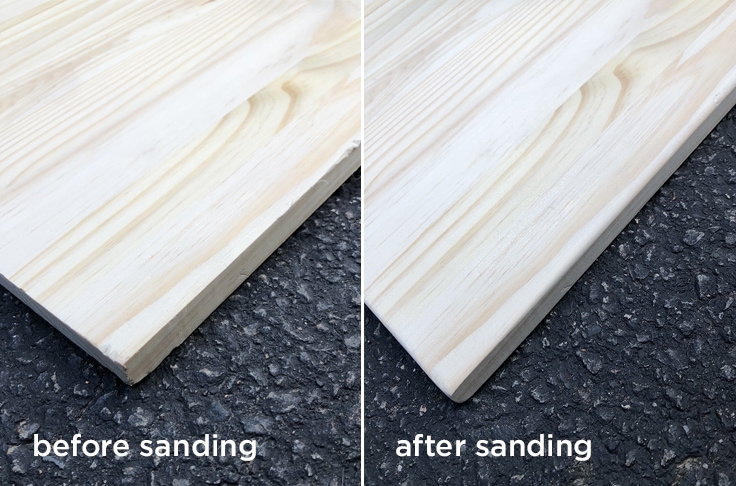
You’ll want to sand the wood so that the edges are smooth and rounded, and the surface is good for staining.

Then, stain all three pieces of wood your desired color. I use paper towels for easy cleanup. Just rub the stain into the wood and let it dry.
3. attach the wood sides

Once the stain is completely dry, attach the smaller wood pieces to the left and right sides with the wood glue. Be sure they’re straight and let the glue dry fully.
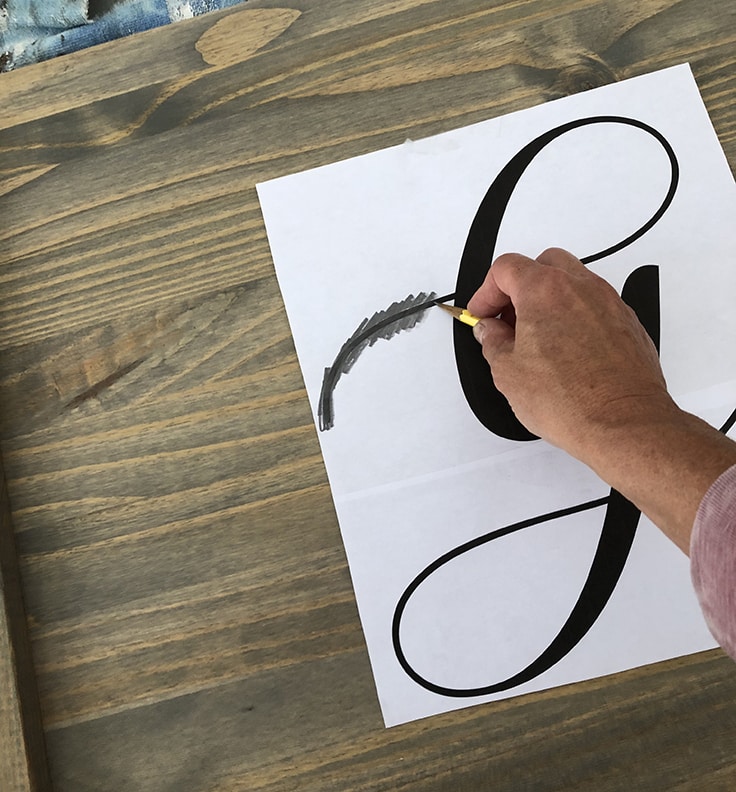
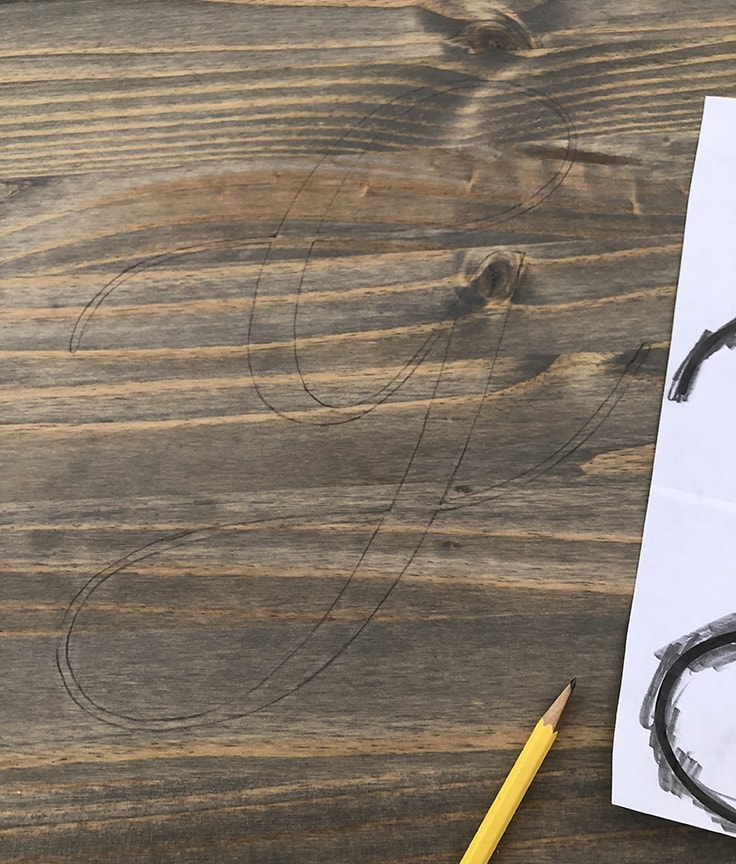
4. design & transfer your monogram
This step is optional and you can do a monogram or any generic design. If you opt for a generic design, It’s easy to find free clip art online. But no matter what design or letter you choose, you can follow these instructions on how to transfer it onto the wood.
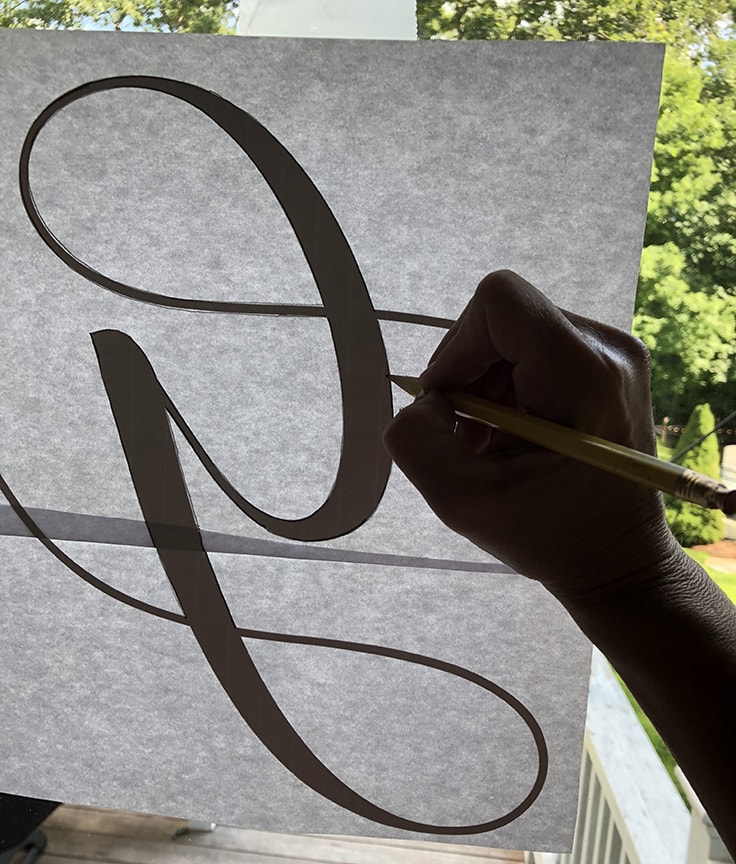
- Be sure that the stain on the wood is completely dry before doing this.
- Print out either your design or monogram onto a piece of paper at the size you would like.
- Then turn the paper over and trace the outline of your monogram/design onto the back of the paper with a pencil.
- Then flip the paper over so that’s it’s right reading, place it on the cover where you want it to go and, with your pencil, rub the outline of the monogram so that the pencil outline transfers onto the wood.
5. paint Your monogram
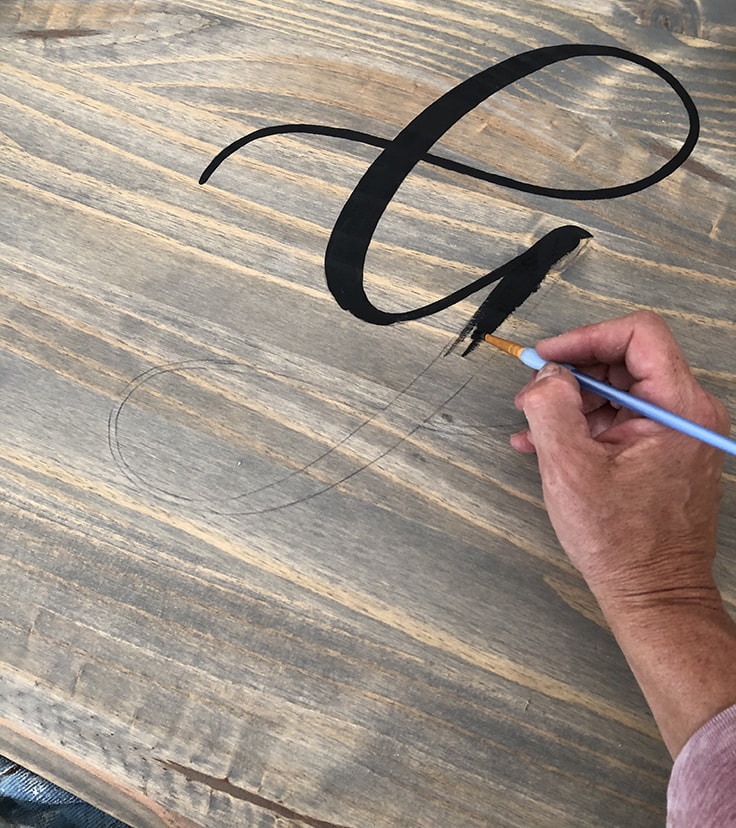
Once your monogram outline is transferred onto the wood, use your acrylic paint to fill in the design. You may need 2 coats of paint for this step.
6.seal the wood
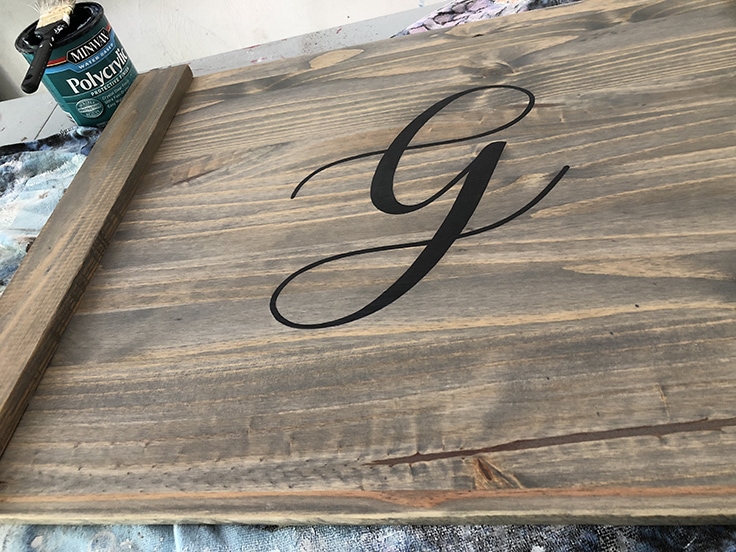
Once your paint is fully dry, add a coat of polyurethane sealer.
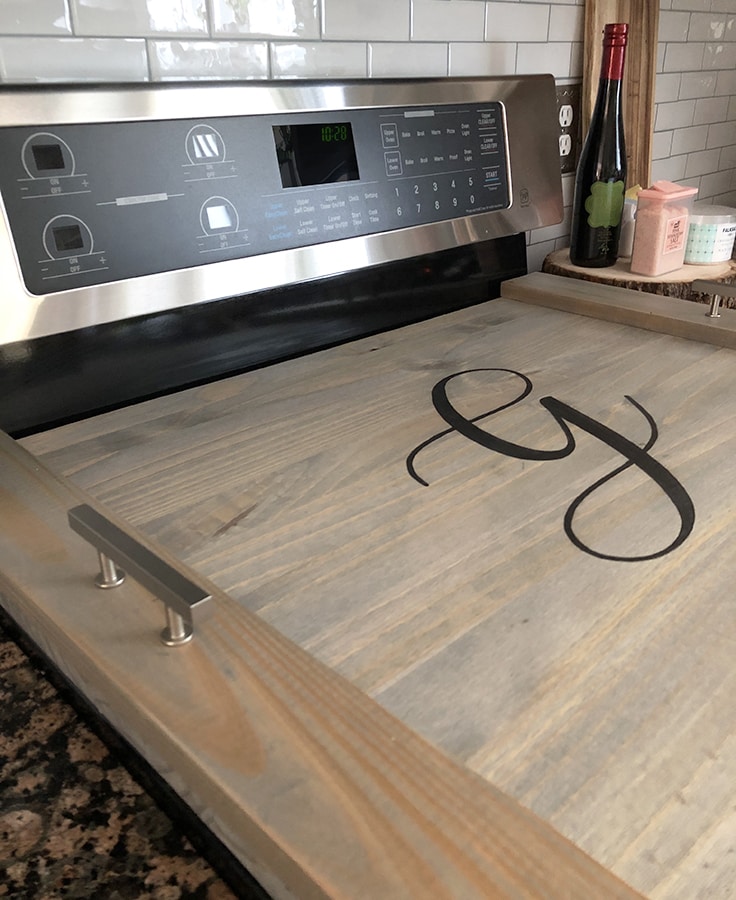
7. attach the handles
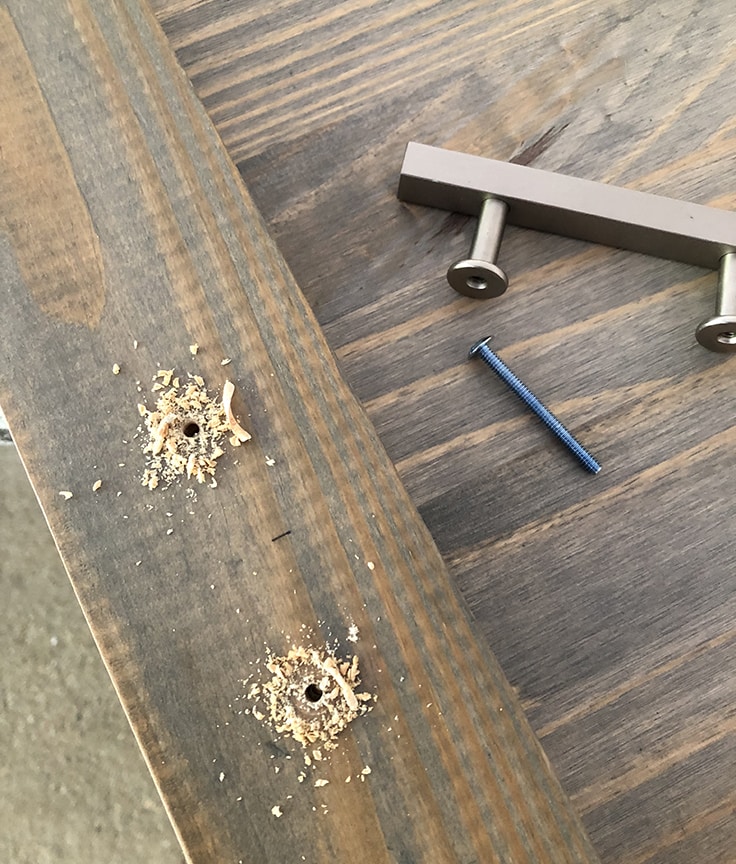
Next, you’ll need to attach the handles. Mark where the handles will go and drill holes into your cover on either side. Then screw in the handles from the bottom.
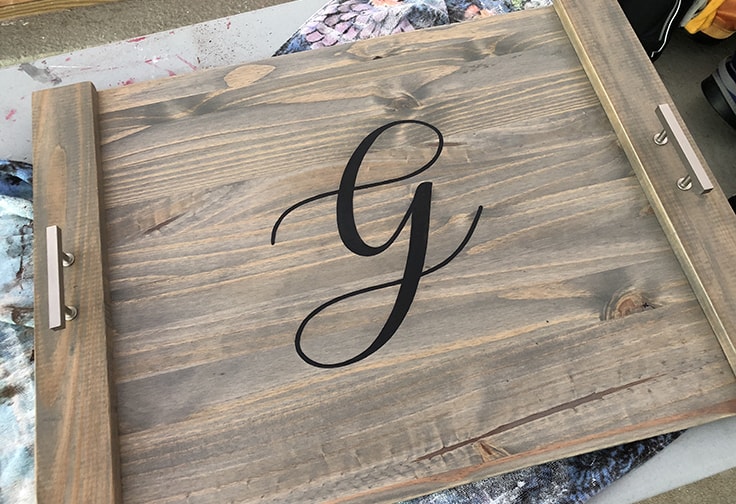
Decorate your stovetop cover with extra decor items
Now you have extra countertop space when you need it for parties and entertaining! Isn’t it beautiful?
Love the ideas you see here on Ideas for the Home by Kenarry®? Subscribe today to get our FREE DIY & Craft Planning Calendar, plus our weekly Ideas in Your Inbox newsletter filled with creative tips and exclusive offers!
If you enjoyed this DIY monogrammed stovetop wooden cover then you’ll love these other wood projects too.
DIY Wooden Ladder
How to Make an Extra Large Wood Sign

DIY Rustic Wood Headboard
You may also enjoy these DIY projects on Ideas for the Home by Kenarry® –
Would it make sense to add additional frame on the bottom if you don’t have a flat top stove? I want to make sure its level. Thanks!
Hi Stephanie!
Yes, adding a little frame around the bottom to go around your burners would be a great addition to this project. Let us know how yours turns out.
Best wishes,
Carrie from Ideas for the Home by Kenarry
Did you put anything underneath to prevent scratching?
Hi Callie,
Thanks for reaching out with a great question! Lori Greco who created this project did not put anything underneath the stovetop cover to prevent scratching.
Best wishes,
Carrie
Ideas for the Home by Kenarry