• About Us
    • Contact Us
    • Work With Us
    • The Creative Team
    • Disclosures
  • Subscribe
  • Shop Our Products
  • My Account
  • Cart
  • Nav Social Menu

    • Facebook
    • Instagram
    • Pinterest
    • Twitter
  • DIY & Decor â–¾
    • Crafts
    • Home Decor
    • Home Improvement
    • Technology
  • Recipes â–¾
    • Breakfast
    • Appetizers
    • Side Dishes
    • Easy Dinner Ideas
    • Slow Cooker
    • Fun Food
    • Desserts
  • Clean/Organize
  • Kid Ideas â–¾
    • Birthdays
    • Castle Playroom
    • Outer Space Bedroom
    • Teacher Appreciation
    • Travel Tips
  • Free Printables
  • Holidays â–¾
    • Cinco de Mayo
    • Mother’s Day
    • Memorial Day
    • Father’s Day
    • Independence Day
    • Halloween
    • Thanksgiving
    • Christmas
    • New Year’s
    • Valentine’s Day
    • St. Patrick’s Day
    • Easter
    • Gift Ideas

Ideas for the Home

You are here: Home / Home Decor Ideas / Make DIY Drawer Pulls from Wood Slice Branches

By Rita Joy Harder on April 11, 2018 Leave a Comment

Make DIY Drawer Pulls from Wood Slice Branches

Home Decor Ideas

  • Share
  • Tweet

Add a touch of rustic style with this easy to follow tutorial on how to make DIY drawer pulls from wood slice branches. It’s simple and stylish!

Hi Friends! I’m Rita Joy from Harbour Breeze Home, and I’ve been busy as a bee in my house this Spring! I’ve been organizing, rearranging, and adding fresh colors of Spring to my decor.

While working on a project for our living room, I ran into a problem that resulted in today’s project. I had just finished painting an end table and needed a new drawer pull. As I looked around the supplies we had on hand, my eye landed on a pile of wood slices my husband had made for a previous project. We decided to try our hand at making DIY Drawer Pulls from those Wood Slice Branches. It ended up being a surprisingly simple and stylish solution!

Collage of wood slice drawer pulls

How to Make DIY Drawer Pulls from Wood Slice Branches

Disclosure: This blog post contains affiliate links for products or services we think you’ll like. This means if you make a purchase from one of these links, Ideas for the Home by Kenarry® will make a small commission at no additional cost to you so we can keep the great ideas for the home coming your way. All opinions expressed are derived from personal experience.
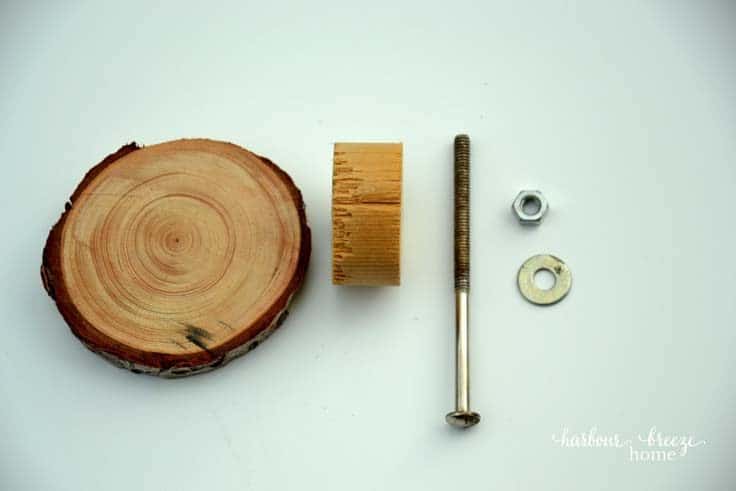
What you need:

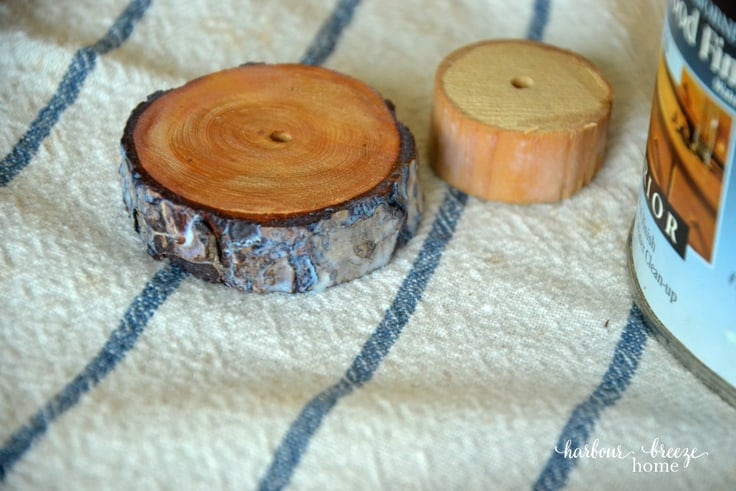
  • A wood slice (Ours was 2 1/4 inches in diameter and 1/2 inch thick)
  • A 1 1/4 inch wooden dowel cut approximately 1/2 inch thick (ours is a little more)
  • Varathane varnish (or a polyacrylic sealer of choice)
  • A drill with bit to fit the diameter of your carriage bolt
  • A smooth head carriage bolt with fitting washer and nut set (ours was 2 3/4 inches long, but a shorter one would have worked.

Pile of wood slices made out of branches sitting on a white table

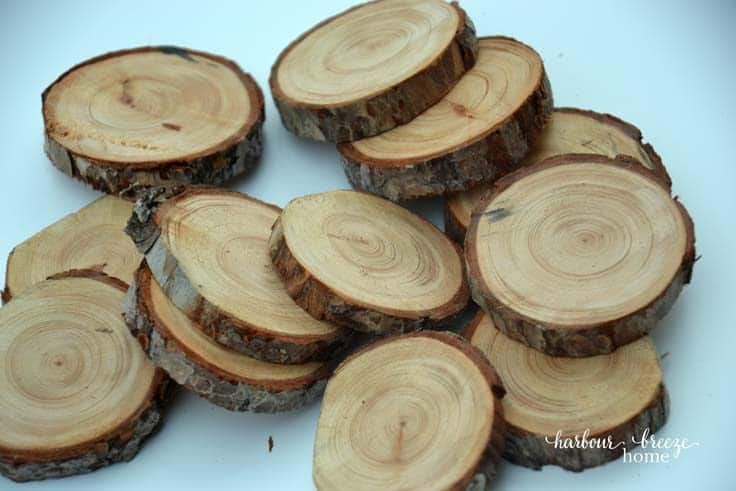
Purchase or cut your own wood slice

There are sources where ready to use wood slices can be purchased. However, if you want to cut your own like we did, here’s how to do it:

  1. Find a suitable branch – For the purposes we needed, we searched for a branch that was about 2 1/2 inches in diameter. Since we live by the ocean, we just searched for one on the beach while out for an evening stroll. Any type of branch will work, although some branches will be more dense and harder to saw through than others.
  2. Using a chop saw or sliding mitre saw, cut the branch 1/2 inch thick – Be sure to use safety glasses and precautions when using a saw.
  3. Let the branch dry out completely before using – We let ours dry out naturally in the air (for a few months), but if you want to speed up the process, you can place them in a low temperature oven spread in a single layer and “bake” for 2 hours.

Cut a piece of 1 1/4 inch dowel about 1/2 inch thick

Using the chop saw again, cut a piece of wooden doweling approximately 1/2 inch (or a little more) thick. If you don’t have a saw for this step, your local hardware store may be able to make this cut for you.

This piece is what will become the space behind the wood slice where you will place your fingers when you want to pull open the drawer.

a wood slice from a branch with and a wooden dowel with holes drilled in the center of each

Using a ruler, draw an X on the wood slice and dowel to determine the center position.

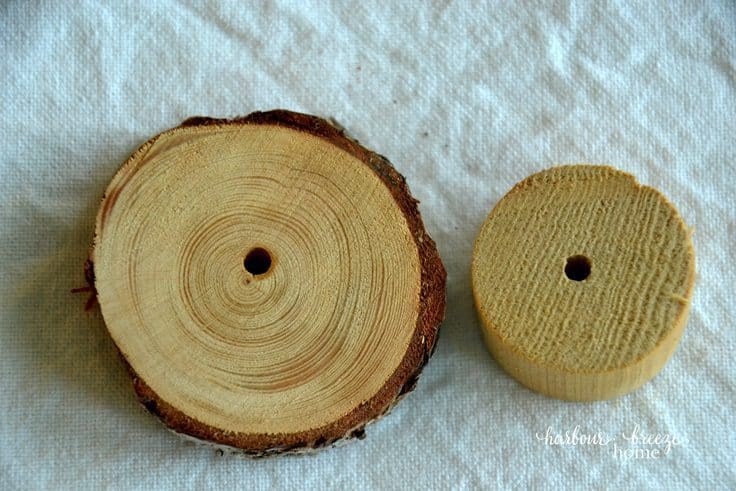
Drill a hole in the center of the wood slice pulls

Using a drill bit to accommodate the size of your carriage bolt, drill a hole at each center point.

Seal the wood slice and dowel.

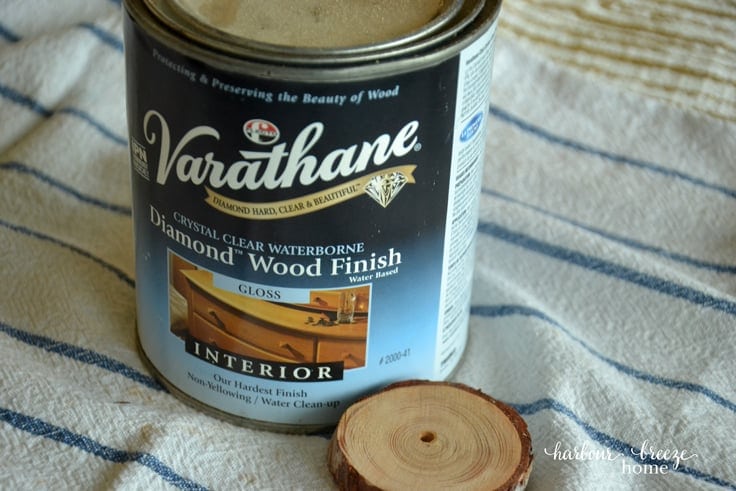
If you want to stain the wood slice a darker color, this is the point at which you would do that. For my purposes, though, I just wanted to seal the wood. I used Varathane sealer in matte finish, and using a brush, brushed on a thin layer on the sides and top and bottom of both pieces. Before proceeding to the next steps, make sure it dries completely.

Assemble the wood slice drawer pull

To assemble the pull, place the dowel behind the wood slice and insert the carriage bolt through the drilled holes.

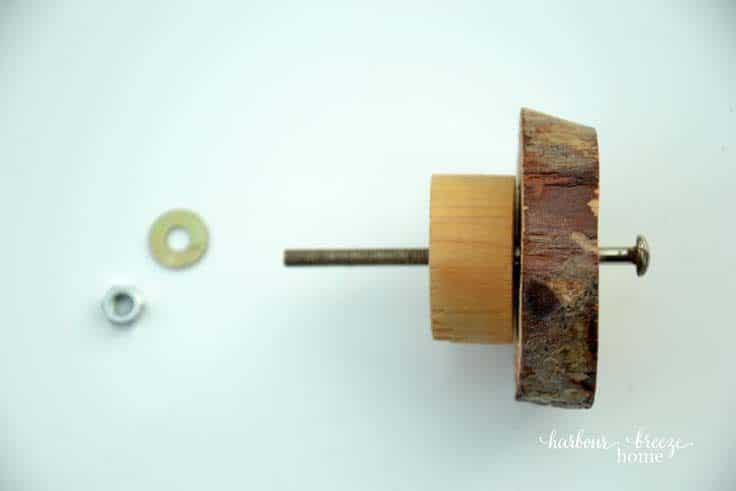
Insert the carriage bolt into the hole for the drawer pull in the drawer front.

picture of inserting a wood slice drawer pull into a drawer front

Place the washer on first and then twist the nut onto the screw end until it fits tight against the drawer.

 a top down picture of wood slice in a drawer front

You did it!

picture of navy blue drawer front with a wood slice drawer pull

Now you have a rustic accent to spice up an ordinary piece of furniture!

(To see the whole tutorial on our end table turned laptop stand, click here.)

Wood slices make a lovely rustic touch and can be used in so many ways! Here are a few other options you might consider for wood slices:

  • Use little pedestals for miniature bud vases.
  • Drill a hole in the top and use as label holders for baskets (like these).
  • Place on a table in a circle to form a stand for a pitcher of flowers.
  • Transfer images onto wood slices and make them into DIY coasters.
  • Drill holes in the sides, tie together and make a garland.
  • Attach together in a circle and make a wreaths.
  • Prop in the corners of a vintage window with panes as wall decor.

What’s Next?

While you’re here, be sure to check out other DIY projects on Ideas for the Home by Kenarry® –

  • DIY Mason Jar Pencil Holder
  • How to Make Rustic Wooden DIY Luggage Tags
  • How to Make Easy DIY Wood Place Card Holders
  • Share
  • Tweet

Home Decor Ideas

About Rita Joy Harder

Rita Joy is a wife, mom, passionate homemaker, and blogger at Harbour Breeze Home. She loves the challenge of making a pretty and functional home (on a tight budget) and cooks because her family needs to eat! Along with rearranging furniture and painting rooms, she loves to find quaint coffee shops (with yummy baked goods!).

Rita Joy shared her great ideas on Ideas for the Home by Kenarry® from October 2016 - August 2018. Follow Rita Joy on Facebook, Twitter, Pinterest and Instagram.

In this ultimate guide, you'll learn how to make a burlap wreath with ribbon for your home. The FREE eBook includes easy step-by-step instructions plus inspiring craft and decor ideas to make wreaths for fall, Christmas, Easter and other holidays.

Subscribe today to get ideas in your inbox plus FREE exclusives only for Idea Insiders!

Almost there! Now just check your email to confirm your e-mail address and get your free eBook.

There was an error submitting your subscription. Please try again.

You're already signed up! YAY! As an Idea Insider you have instant access to our Kenarry Idea Insider Resource Library with exclusive printables, offers and other freebies as soon as you confirm your subscription.
Previous Post: « Learn How to Make DIY Terra Cotta Pot Luminaries
Next Post: Funny Teacher Appreciation Card: Free Printable »

Reader Interactions

Leave a Reply Cancel reply

Your email address will not be published. Required fields are marked *

Recipe Rating


This site uses Akismet to reduce spam. Learn how your comment data is processed.

Primary Sidebar

Welcome

Carrie Ypma from Ideas for the Home by Kenarry®Hello, I'm Carrie! Welcome to Ideas for the Home by Kenarry® where we want to help you create a home you love. We're glad you're here! Read more...

Sign Up and Get a Free Gift

Subscribe to become an Idea Insider. You'll get our weekly newsletter plus special deals and other resources that are only for subscribers -- all for FREE!

Almost there! Now just check your email to confirm your e-mail address and get your free eBook.

There was an error submitting your subscription. Please try again.

You're already signed up! YAY! As an Idea Insider you have instant access to our Kenarry Idea Insider Resource Library with exclusive printables, offers and other freebies as soon as you confirm your subscription.
In this ultimate guide, you'll learn how to make a burlap wreath with ribbon for your home. The FREE eBook includes easy step-by-step instructions plus inspiring craft and decor ideas to make wreaths for fall, Christmas, Easter and other holidays.
  • About Us
  • Subscribe
  • Shop Our Products
  • My Account
  • Cart

Footer

Disclosure: Posts may include affiliate links for your convenience. As an Amazon Associate I earn from qualifying purchases. All opinions are our own. You are reading and following advice from Kenarry, LLC at your own risk. Always use safety precautions. You should read and follow manufacturer’s directions for the products and tools you use. Read more.


Privacy Policy: The privacy of your personal information is important. We make every effort to safeguard your information and will never sell it to third parties. Read our privacy policy.

Terms of Use: You are welcome to link to this site or use a single image and brief description to link back to any post. Republishing posts in their entirety is prohibited without permission. All images are property of Kenarry, LLC. Do not crop or remove watermark. Do not reproduce without link back or permission. If you do link to this site, please contact us to let us know. All free printables offered are for personal use only. Pinning is always welcome and appreciated. Thank you!

As it relates to comments and content posted on this blog by those other than the owners, any such content that contains the copyrighted and/or proprietary work of others is expressly prohibited and will be removed. Repeated posting of such content by the same user may result in that user being banned from this site.

Copyright © 2021 Kenarry LLC · Powered by Captivating Theme on Genesis Framework · WordPress · Log in