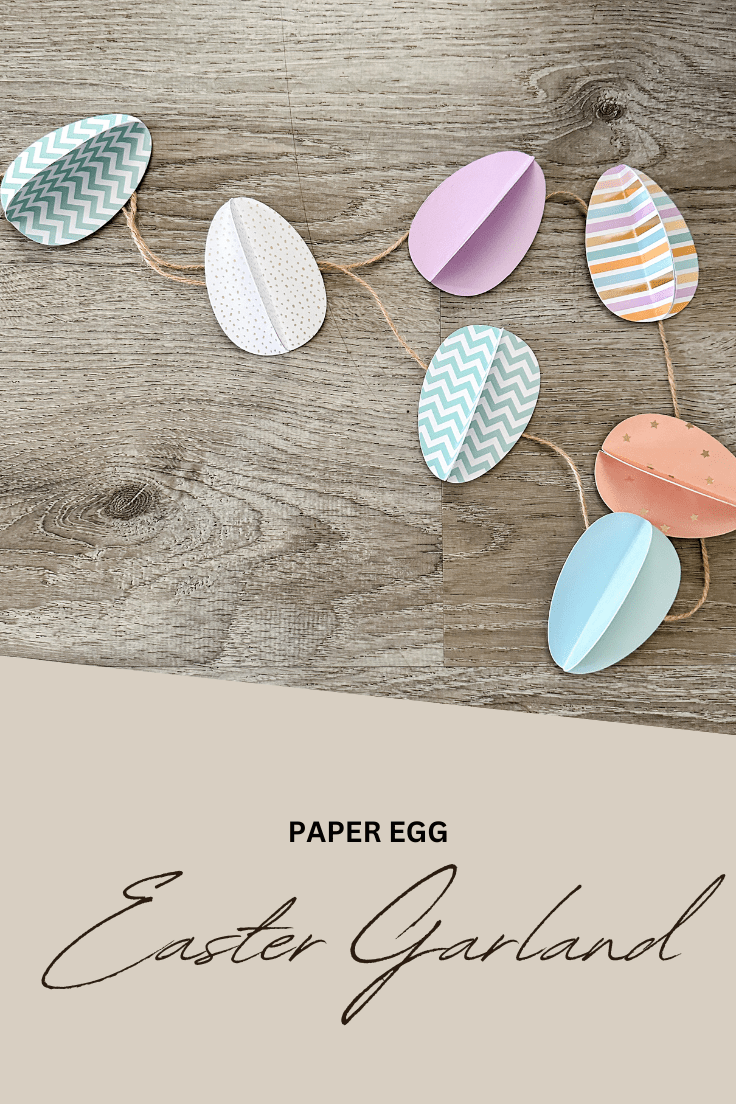
Easter Egg Garland
THIS POST MAY CONTAIN AFFILIATE LINKS. PLEASE SEE OUR FULL DISCLOSURE POLICY FOR DETAILS.
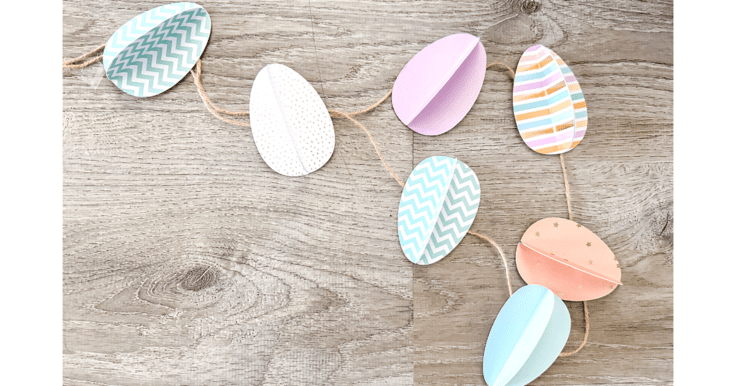
This Easter egg garland is so simple to make and will look great welcoming guests to your Easter celebration!
Hello my name is Amy and I blog at amylanham.com. I love decorating for all the holidays, but sometimes it’s hard to find easy Easter holiday decorations.
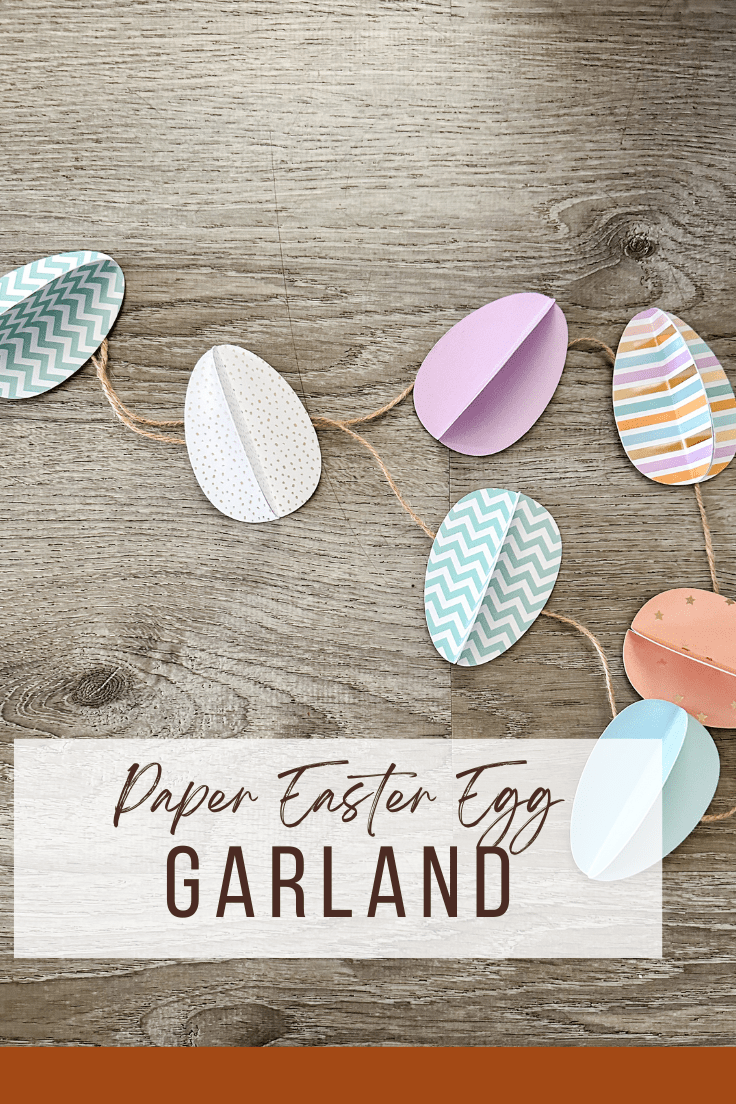
That’s why I created this super simple Easter egg banner. It’s really easy to make, and can be completely customized to match with your house or different themes for the holiday.
How to Make Easter Egg Garland
This is a fun Easter craft to make with your friends or your kids – and then you get to display it in your home. The best thing about this DIY Easter home decor is that you get to be creative with coordinating paper.
What you need:
Want more ideas like this? Subscribe today to get our weekly Ideas in Your Inbox newsletter plus other exclusive gifts and offers — all for FREE!
Craft Tools Needed:
Supplies Needed:
Easter Egg Garland Tips:
How many different papers do i need?
I would recommend having at least 6-8 coordinating papers. Have fun browsing the scrapbook paper aisle and get as much paper as you want. The more paper you use, the better it will turn out!
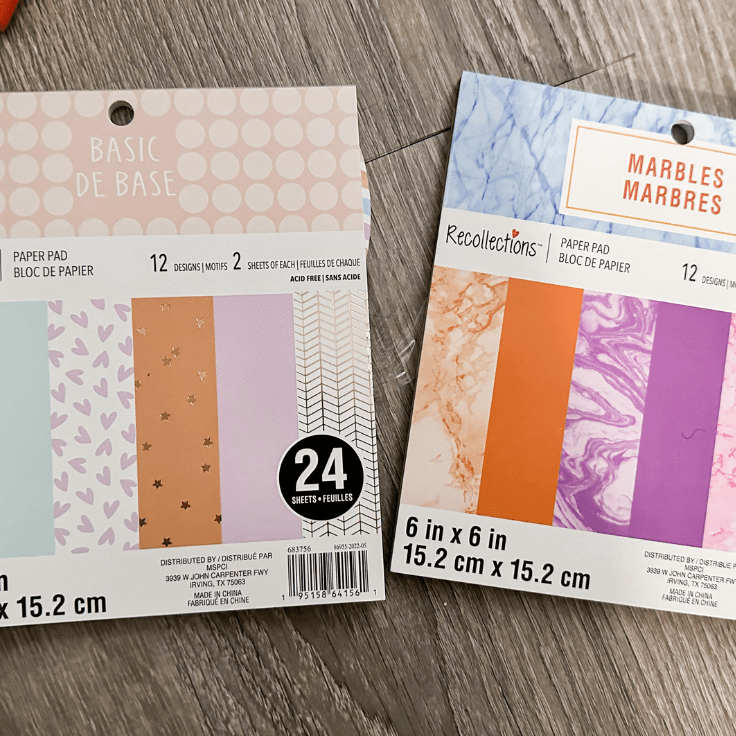
The project can be made with less, but I think that the fun of this project is that not all the eggs match. If you prefer matching, then you would just need one or two coordinating colors.
What if I don’t have a cricut?
Not a problem! A Cricut makes this project incredibly easy, but if you don’t have a cricut or other cutting machine that’s not a problem.
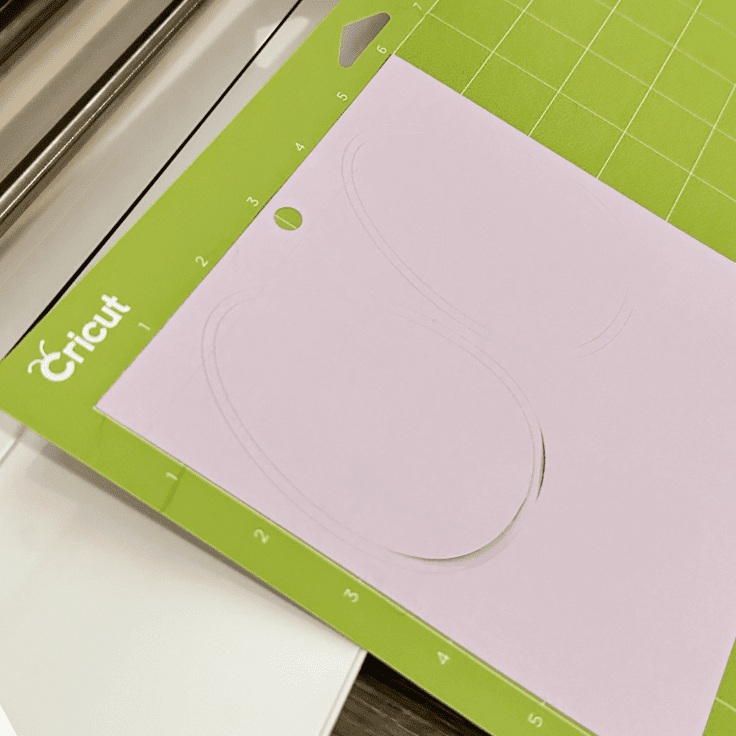
Find an image of an egg, or just freehand draw one. Then use that image to cut out the coordinating papers. Try to make sure the eggs are cut as close to the same size as possible. This is easier with a Cricut, but not impossible by hand.
The rest of the steps after cutting are exactly the same.
Where should I hang my garland?
This is the fun part! Anywhere you want. It would look really cute hanging on the front door above a wreath. Can be hung on the mantel or on a picture ledge.
I also think it would look beautiful at the centerpiece to a long table. So many ideas. No matter where you put it, it’s going to look great!
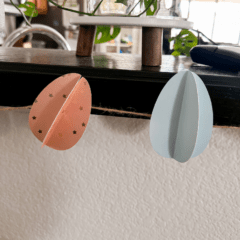
The Eggs keep flopping forward when I try to hang it, what should I do?
This is because the eggs are a little top heavy. If you find they are too heavy and won’t stay put when you try to hang them there are a couple options.
- Tape the eggs individually to the wall
- Create each egg twice and attach the 2 together, one in the front and one in the back. So instead of each egg having 2 pieces of paper, they would have 4.
Easter Egg Garland
Equipment
- Cricut or other cutting machine or scissors
Supplies
- Tape
- Glue
- Twine
- Coordinating Paper
- Egg Shape
Instructions
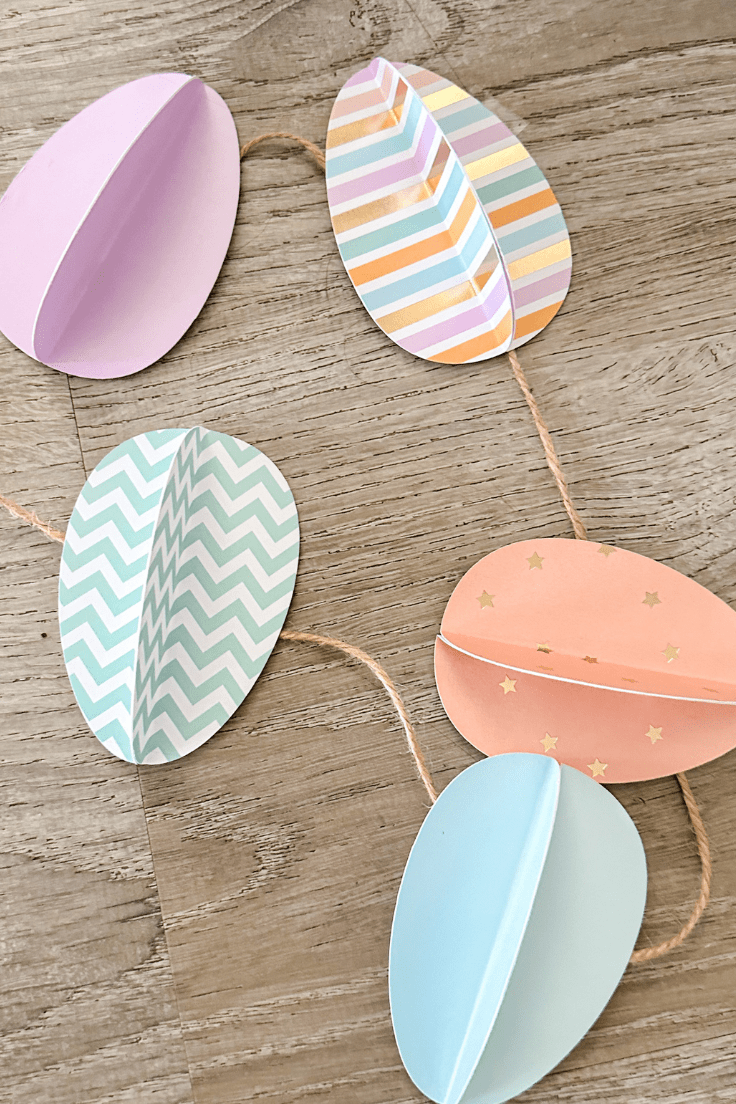
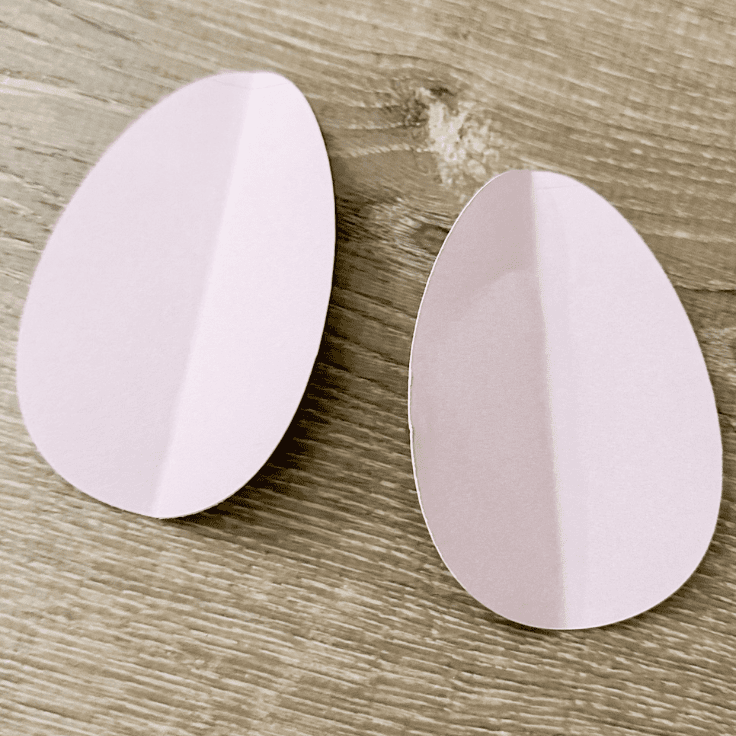
- Using a cutting machine, cut out 2 egg shapes out of each paper.
- Fold all of the eggs in half.
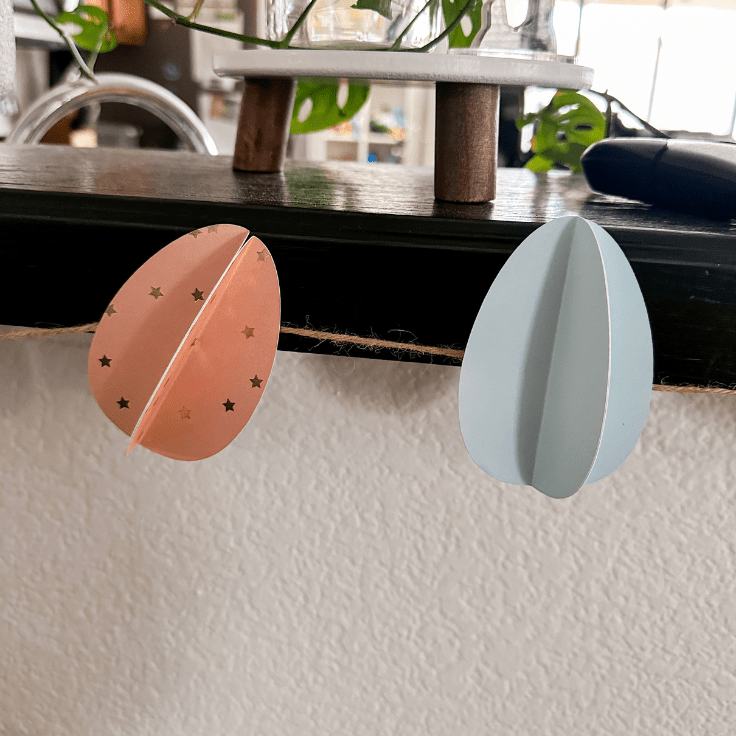
- Glue two eggs of the same paper together.
- Tape the twine onto the back of the eggs to create a garland.
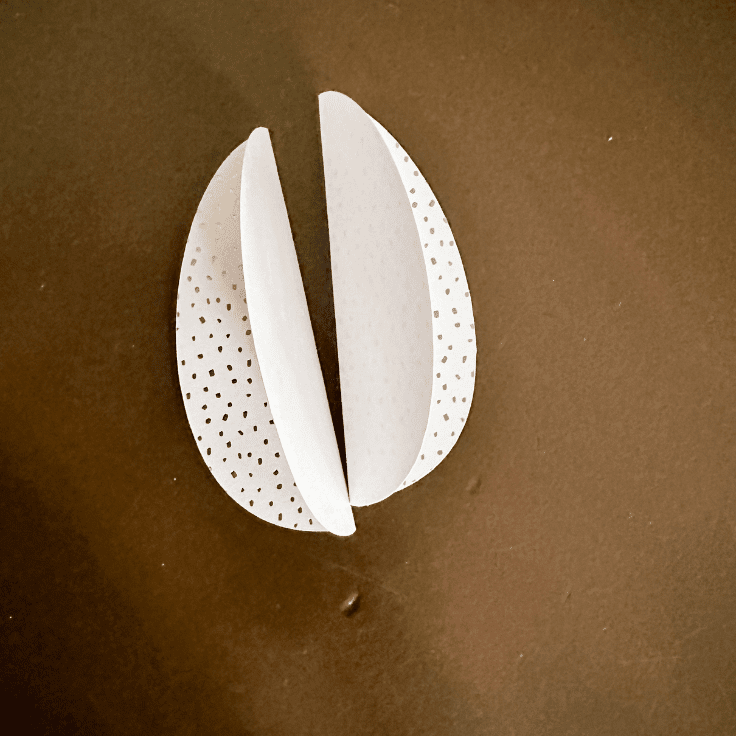
- Optional: Glue two more eggs of the same paper to the original two eggs to create a full egg.
Love the ideas you see here on Ideas for the Home by Kenarry®? Subscribe today to get our FREE DIY & Craft Planning Calendar, plus our weekly Ideas in Your Inbox newsletter filled with creative tips and exclusive offers!
What’s Next?
If you enjoyed this Easter Egg Garland, you will also enjoy these other Easter ideas.

Chocolate Chip Cookie Strawberry Trifle
You may also enjoy these Easter ideas on Ideas for the Home by Kenarry® –