Fun to Make Pebble Art
THIS POST MAY CONTAIN AFFILIATE LINKS. PLEASE SEE OUR FULL DISCLOSURE POLICY FOR DETAILS.
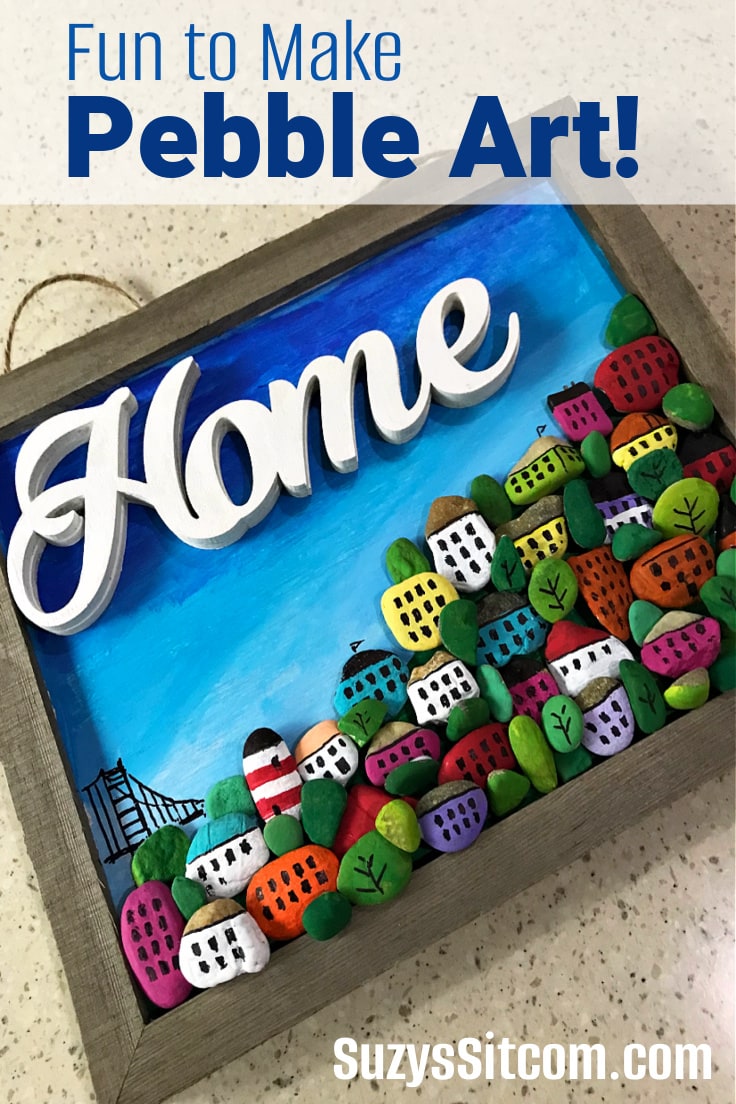
Create colorful, layered art with just pebbles and paint! This fun project is so simple to make and is a great project for both adults and children. Make it as detailed as you like. Paint a fun little pebble neighborhood and add a bright spot to your decor!
Making art from found objects is a great way to not only use your imagination, but create an amazing, layered piece of art that will make you smile. Pebbles can be found everywhere, and the imagination has no limits! This fun to make Pebble Art village will add a touch of whimsey to your home decor.
This is Suzy from SuzysSitcom, and some of you might know that my husband and I are full time travelers in our RV. Pebbles are everywhere! And they all call my name. I tend to create from what inspires me on the road and when I see an interesting rock, I am inspired! In this case, many interesting pebbles!
How to Make Pebble Art
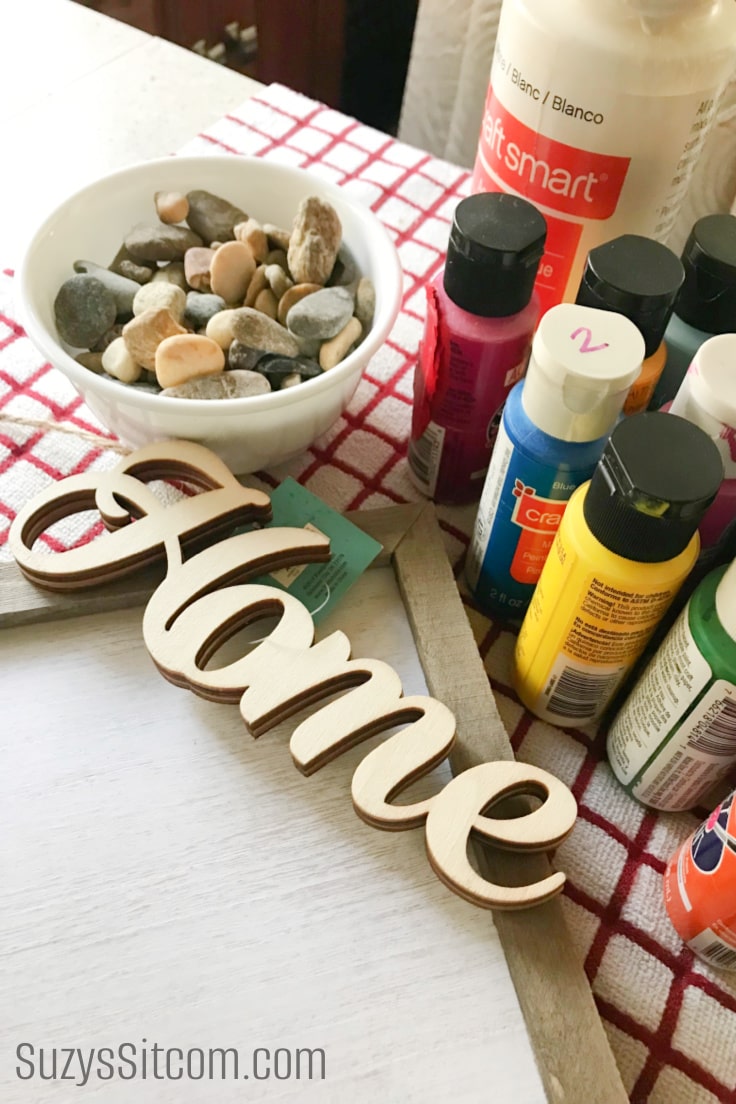
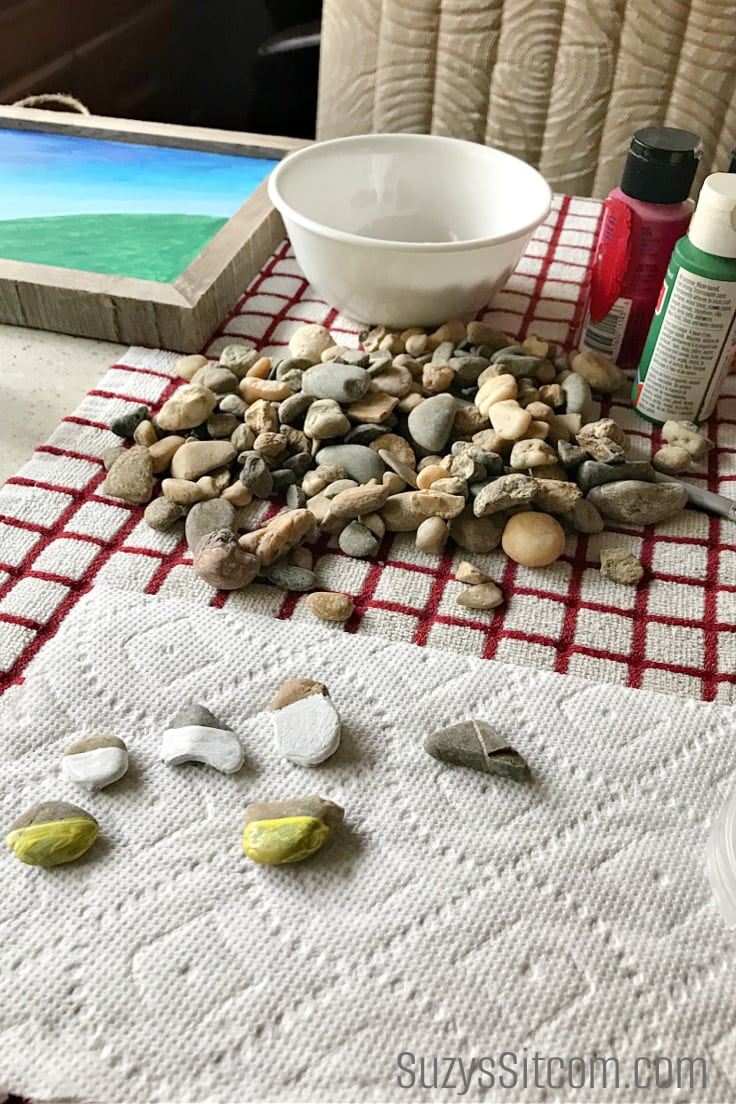
The pebbles in this project were found in our travels. They were simply small rocks with interesting shapes. You can find them most anywhere. Choose what inspires you! The majority of the pebbles in this project were 1″ or less in size.
The entire tutorial is in a printable card at the bottom of this post. But first, here is a little bit of info about the tools and supplies you’ll need.
What you need:
Want more ideas like this? Subscribe today to get our weekly Ideas in Your Inbox newsletter plus other exclusive gifts and offers — all for FREE!
- A variety of Pebbles – 1″ and less in size
- 8″ x 10″ rustic hanging plaque – similar here
- “HOME” wood cut out (7″ x 2-1/2″) – similar here
- Acrylic paints
- Tacky Glue
- Black Sharpie Marker
How to Make pebble art
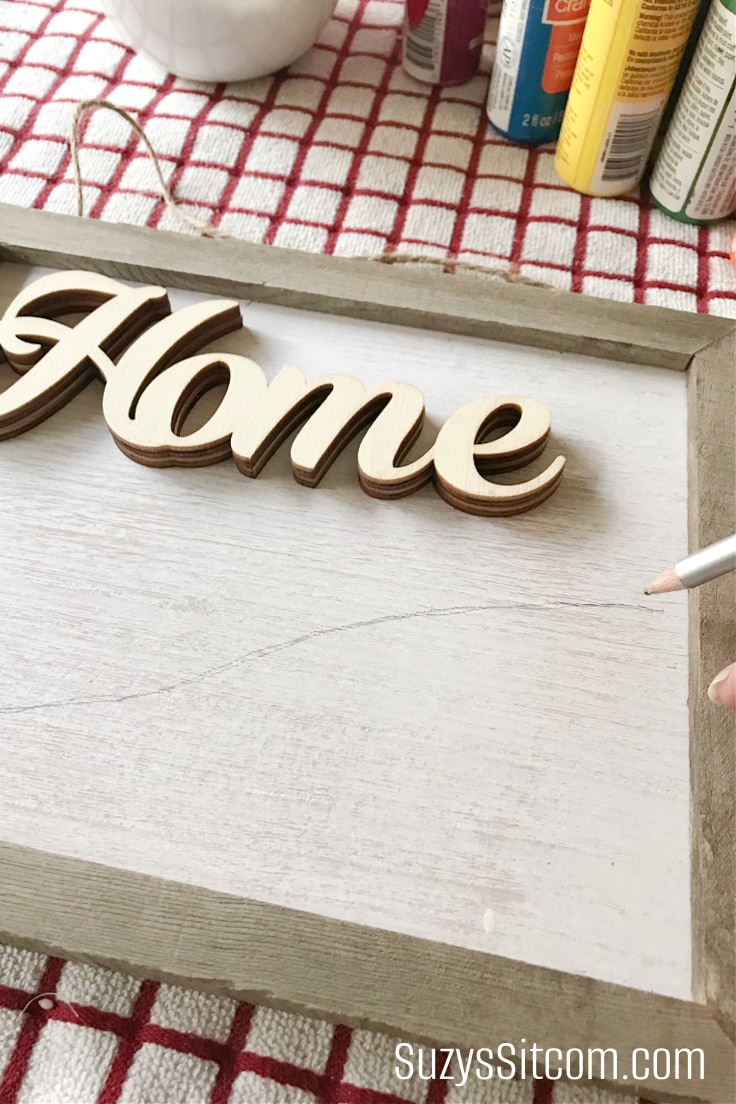
Choose Your placement
Use a pencil to draw the hilltop for your village on the rustic plaque. This will be the basic line of your background colors. Decide on the placement of your HOME wood piece. (Do not glue in place yet).
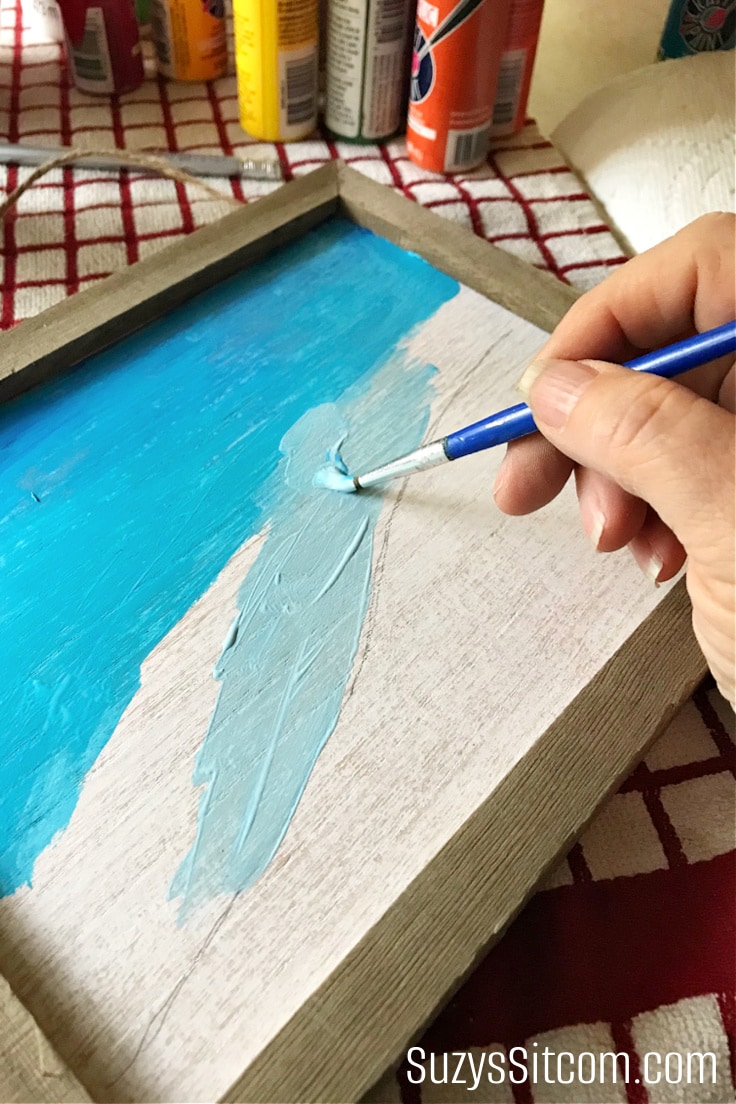
Painting the Background
For the sky, choose three different colors of acrylic paint in blue (light, medium and dark). Paint the darker blue towards the top of the sky and the lighter blue towards the hilltop line. Use a dry brush to help blend the colors together before they are dry.
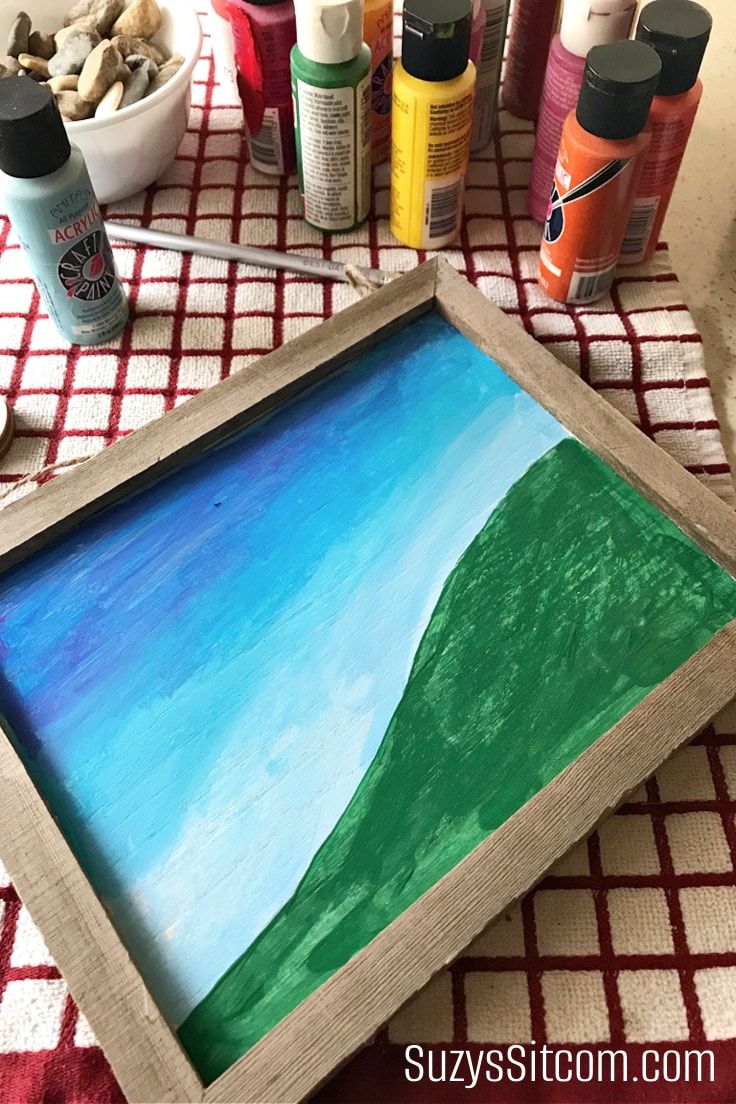
Use green acrylic paint to paint in the hillside. It does not have to be perfect. The green will barely show once your village is in place! Finally, paint the HOME wood piece your choice of color. I painted mine a bright white to show up well against the sky.
Painting the Houses
Now for the fun part! Sort through your pebble collection and choose pebbles that seem to be rectangular, square, or have interesting points. As you can see above, they are not perfectly shaped, but here is where the imagination comes in to play! Use colorful acrylic paints to paint in basic details. (Sometimes, two coats of paint will be needed).
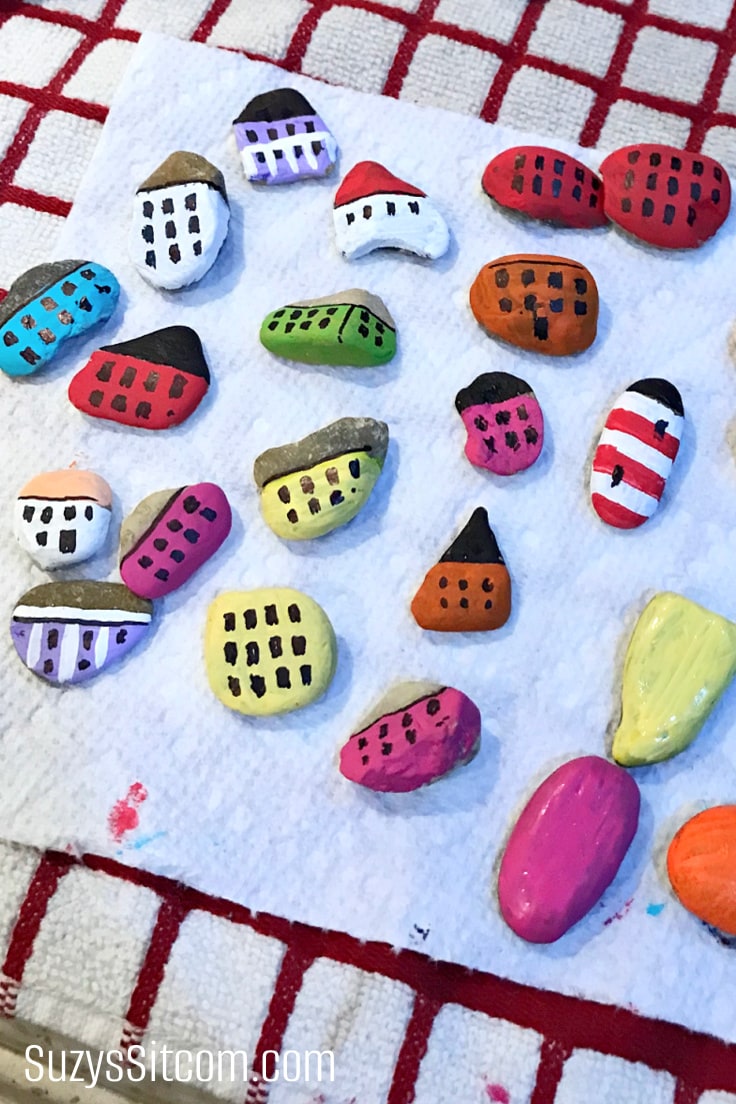
Some of the roofs were painted a color, some were left the original rock color, and some simply had no roofs! One pebble even became a lighthouse!
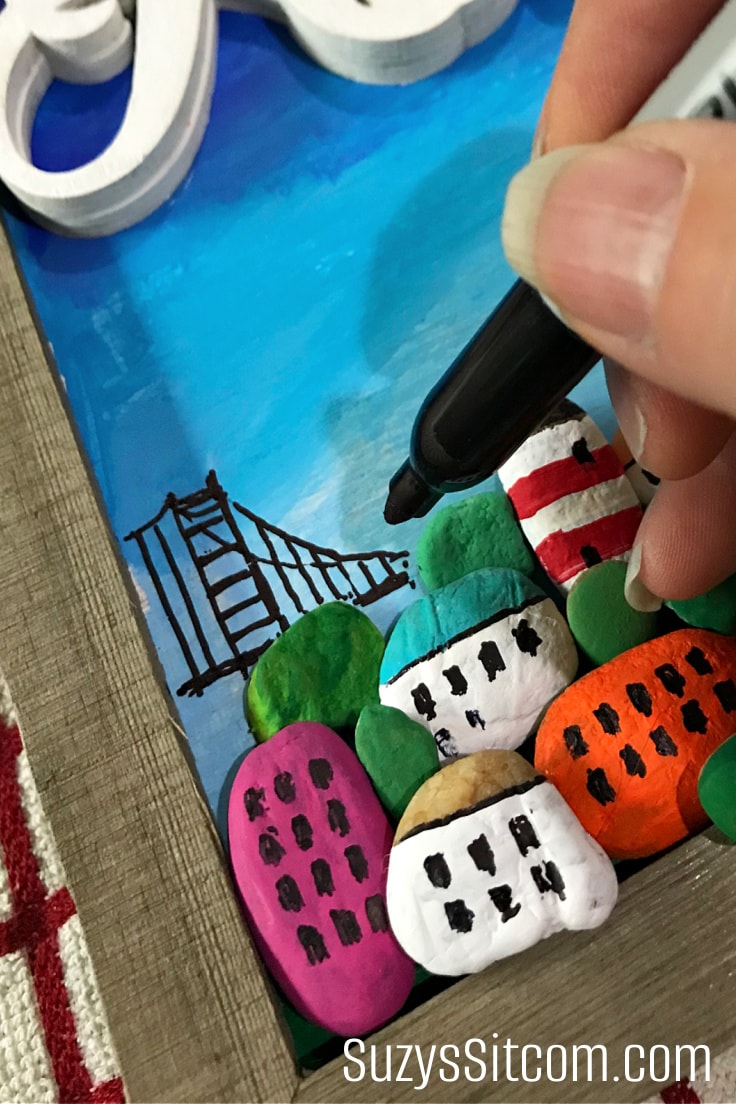
Once the paint is dry, add details such as windows and rooflines using a black Sharpie marker.
Painting the Houses
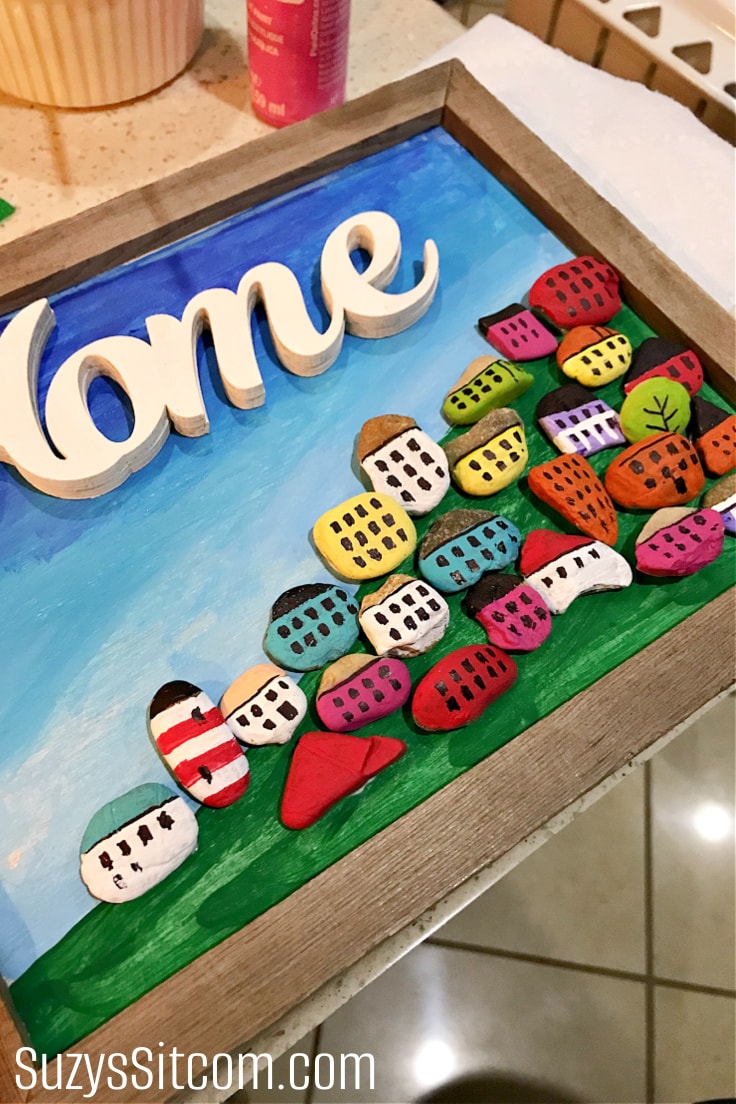
Use white tacky glue to glue the houses and the HOME sign in place. Tacky glue takes about 30 minutes to dry completely, so allow the project to lay flat while drying. Add as many houses as you like. You will fill in empty spaces with little pebble trees.
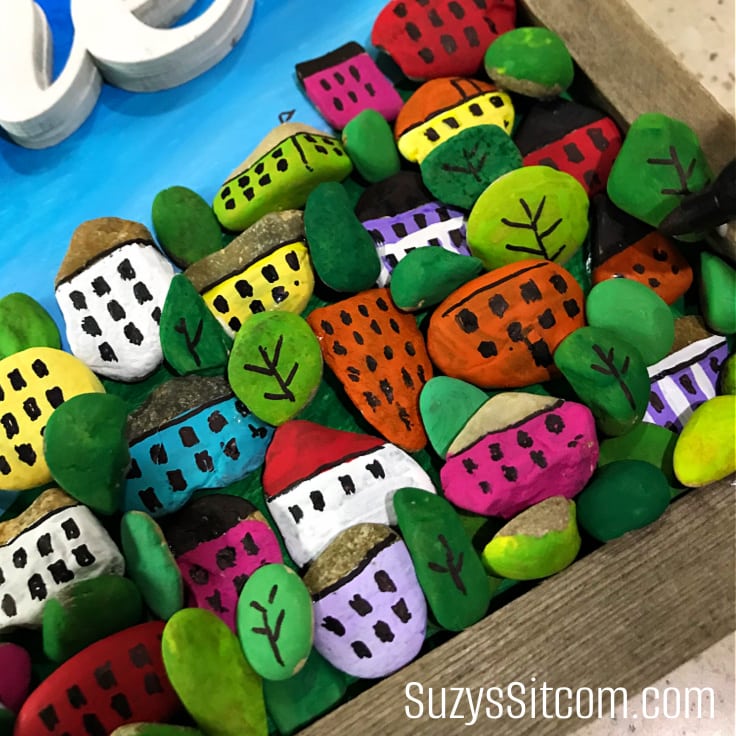
Pebble Art- Painting the Trees
Use various colors of acrylic paint in greens for the trees. I chose more rounded rocks and some long pointy pebbles for the trees. Use these smaller pebbles to fill in between houses. Glue in place with tacky glue and allow to dry. Once dry, fill in little details with black Sharpie marker.
Final Details
Use a black Sharpie marker to add any final details. I added in a suspension bridge and a few flags on the houses. You could add tiny birds in flight, antennas, and anything else your imagination comes up with!
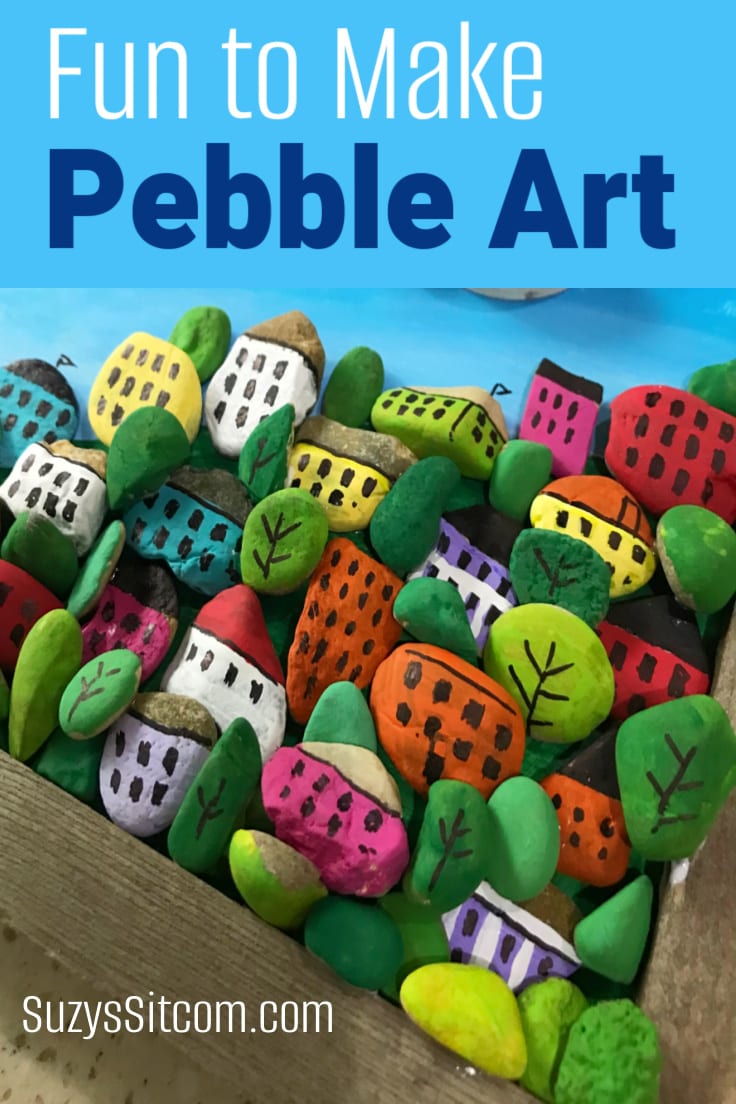
The final piece of Pebble Art is a wonderfully whimsical picture that will add color and fun to your decor! Here’s the printable card with everything you need to know about how to make a fun village of Pebble Art!

Fun to Make Pebble Art
Supplies
- Approx 40 Pebbles 1" size or less
- 1 ea 8" x 10" rustic wood plaque
- 1 ea 7" x 2-1/2" wood HOME sign
- 1 set Acrylic paints Many colors
- 1 ea Tacky Glue
- 1 ea Black sharpie marker
Instructions
- Draw out line of hillside with pencil on the wooden plaque.
- Use three colors of blue to paint in the sky with the lightest color towards the hillside. Use green for the hillside. Paint the HOME sign white.
- Use colorful acrylic paints to paint the houses and buildings on uniquely shaped pebbles. Once dry, add in fine details with black sharpie marker.
- Use tacky glue to glue the houses, buildings and HOME sign in place. Allow to dry at least 30 minutes
- Use multiple colors of green to paint the trees on smaller pebbles. Allow to dry and then add in details with black sharpie marker.
- Use tacky glue to glue trees into place. Allow to dry.
- Use the black sharpie marker to add in final details to the background.
Love the ideas you see here on Ideas for the Home by Kenarry®? Subscribe today to get our FREE DIY & Craft Planning Calendar, plus our weekly Ideas in Your Inbox newsletter filled with creative tips and exclusive offers!
Love Creating?
If you loved the idea of creating Pebble Art, then you may like some of my other tutorials on my website, SuzysSitcom! Here are just a few!

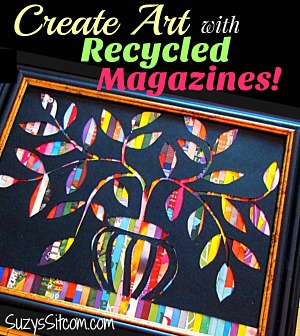
Create Art with Recycled Magazines
You may also enjoy these 3 craft ideas on Ideas for the Home by Kenarry® –