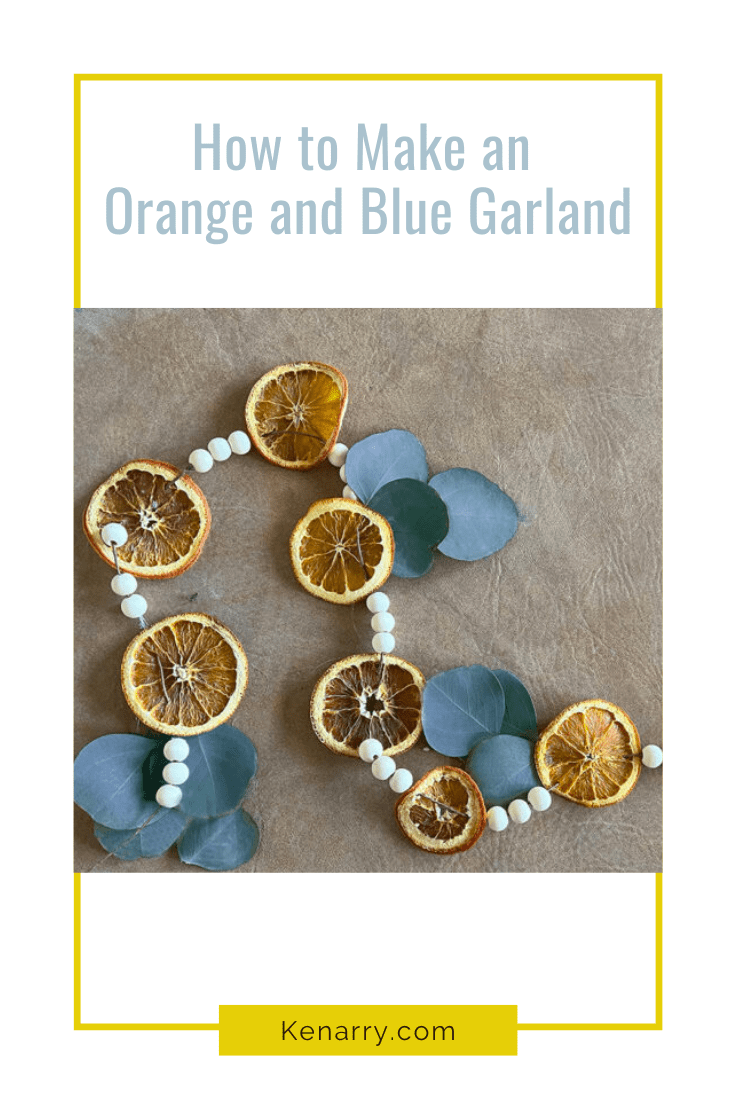
How to Make a Dried Orange and Blue Garland
THIS POST MAY CONTAIN AFFILIATE LINKS. PLEASE SEE OUR FULL DISCLOSURE POLICY FOR DETAILS.
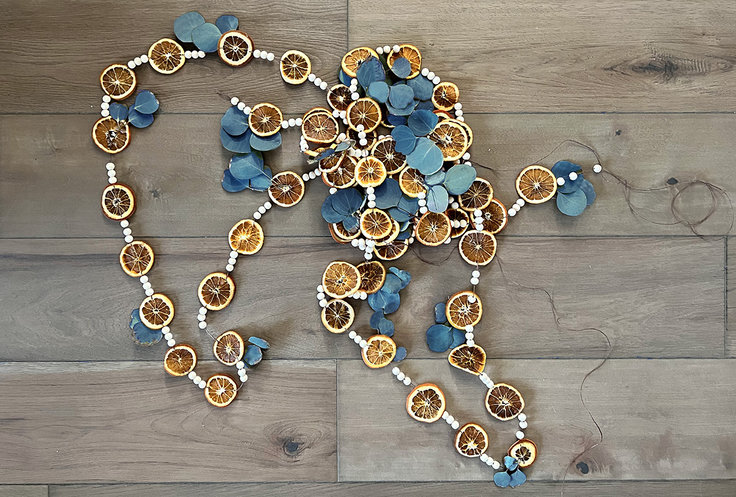
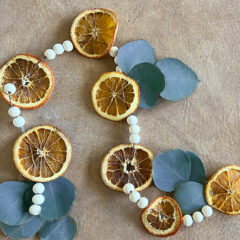
What better way to kick the holiday season off than creating a beautiful dried orange and blue garland to greet your guests when they arrive?
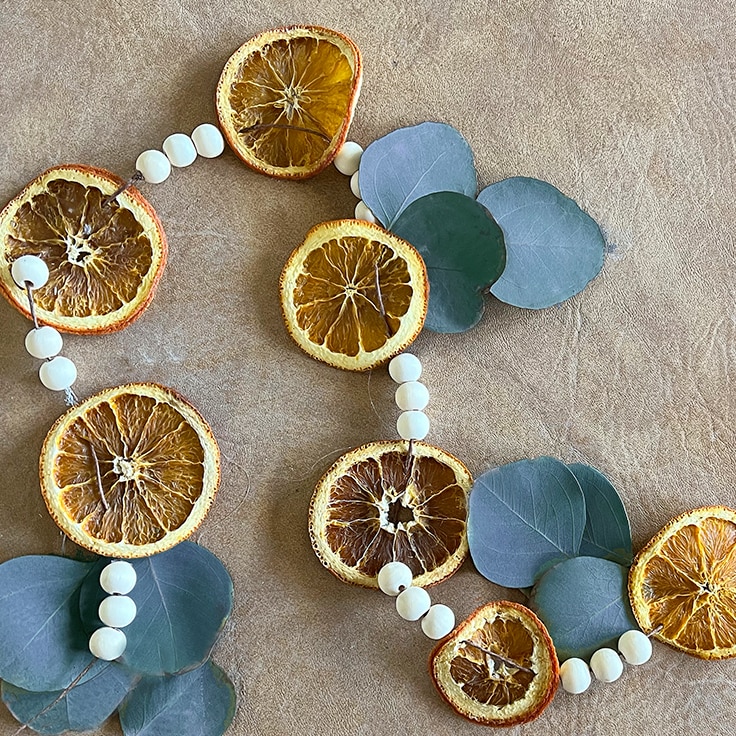
The colors from this garland easily transition from fall into winter, meaning you can keep it up longer. It’s made from dried orange slices and Silver Dollar Eucalyptus leaves. String it over your doorway to greet guests or over your mantle to add a dramatic touch of fall to your home decor. You can even make a shorter length and add tassels on the ends to place on a table.
Hi my Kenarry friends, I’m Joannie Hambel from Hambels Get Real and like you, I love making crafts. I created this simple dried orange and blue garland to go over my doorway this fall and I’m so excited that I get to team up with Ideas for the Home and share it with you. When I’m not guest blogging here, you can find me over at Hambel’s Get Real where I share diy tutorials and tips to add character to your home.
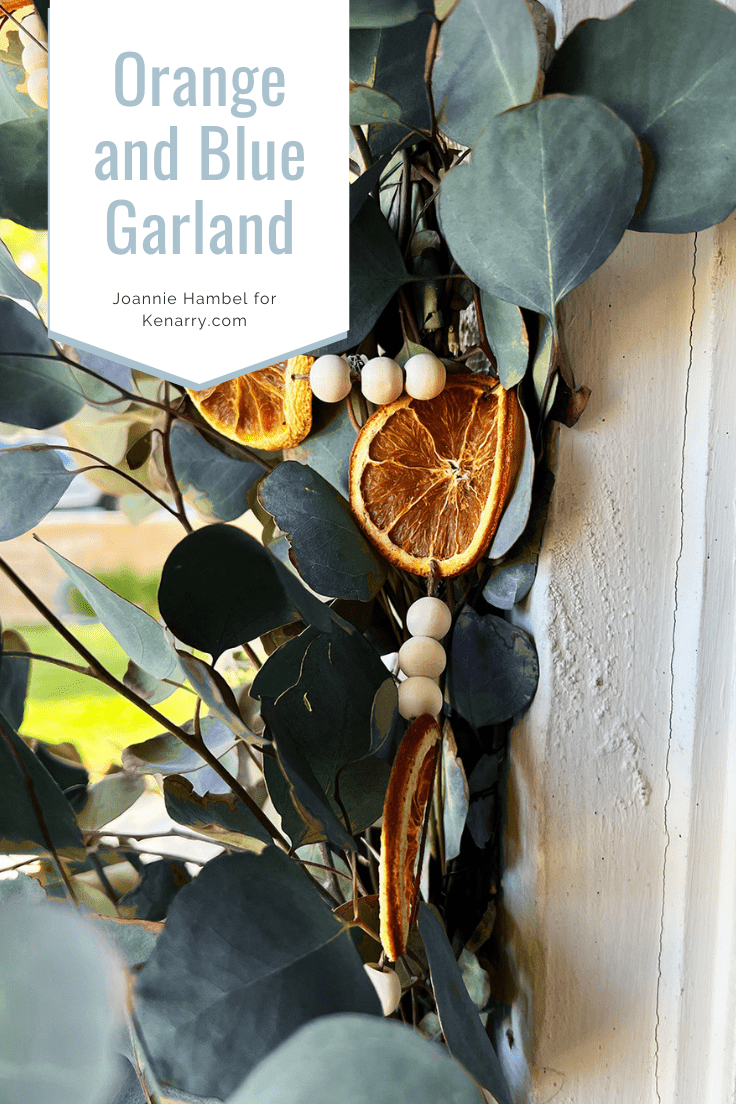
This dried orange garland is so pretty and smells amazing. The silver dollar Eucalyptus leaves add just the perfect shade of silvery blue foliage to help make this garland last through multiple seasons. You won’t believe how incredibly simple it is to make either.
And if you love this blue and orange color scheme, you’ll also want to make these precious blue and orange pumpkins!
How to Make a dried orange and blue garland
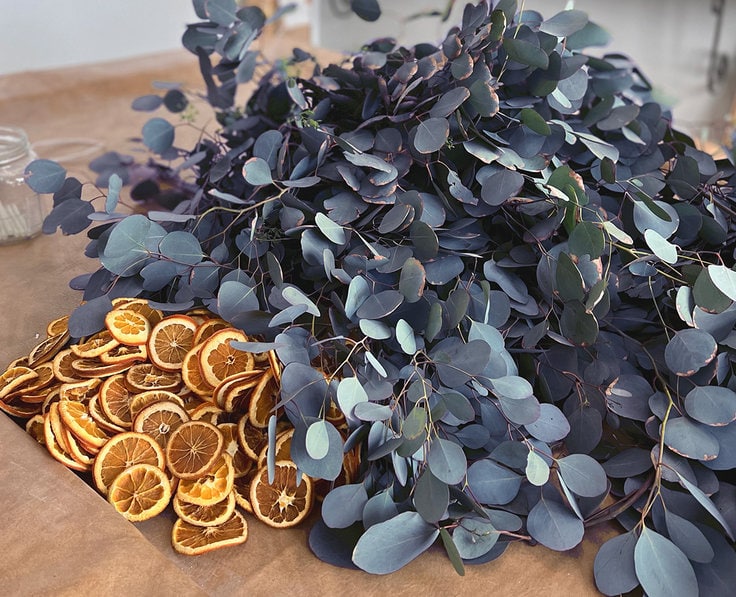
Head to your nearest craft supply store and pick up hemp cord wire and wood beads. The rest of the supplies are easy to find at your local grocery store or around your neighborhood. If you don’t have Eucalyptus trees around, you may substitute with another type of leaf or buy faux eucalyptus stems and the garland can be stored for next year.
What you need:
Want more ideas like this? Subscribe today to get our weekly Ideas in Your Inbox newsletter plus other exclusive gifts and offers — all for FREE!
Craft Tools:
- Hot glue gun
- Scissors or wire cutters if you chose to use faux stems
- Tapestry needle or similar needle with a large eye
- Oven or dehydrator
- Perforated baking sheets or Cookie sheets
Supplies:
- Oranges preferably Naval or Valencia
- Eucalyptus branches with leaves attached or faux stems if you’d like to have an easy to store version.
- 12 mm Wood Beads
- Natural Polished hemp #20
- Hot glue sticks
- Paper towels
- Parchment paper (only if not using perforated baking sheets)
Creating your Dried orange and Blue garland
Step 1: Drying your Oranges
My oven has a dehydrator function on it. It sets the oven temperature to 140 °F with the convection fan going. If yours won’t go this low, set it to the warm setting, or to the lowest temperature it goes. Another option is to use a dehydrator.
I started this in the evening so that my orange slices could dehydrate while I slept. If you don’t have a dehydrator or a dehydrate function on your oven, you may want to start this in the morning to keep an eye on your orange slices and ensure you don’t burn them.
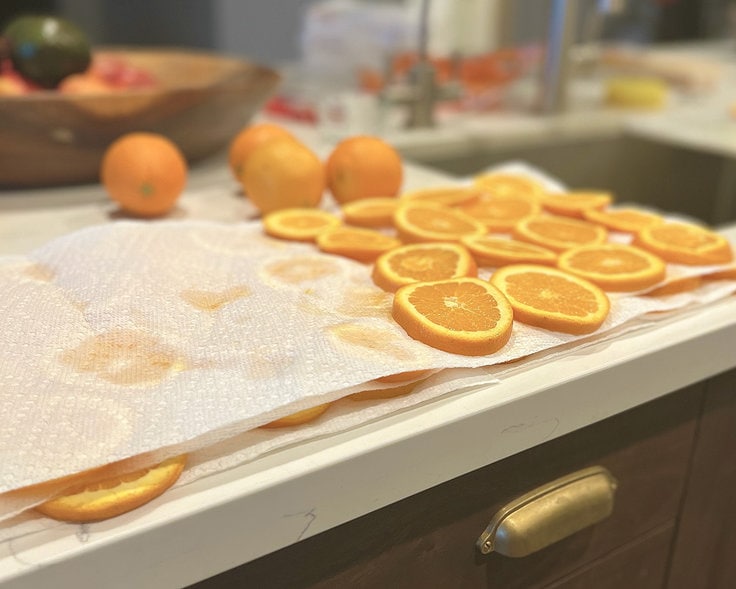
Cut your oranges into slices. I kept mine 1/8 – 1/4″ thick. As you cut them place them on paper towels to dry off the excess moisture. Arrange them on your baking sheets.
The orange slices can touch but not overlap. If you are using regular cookie sheets, line them with parchment paper first.
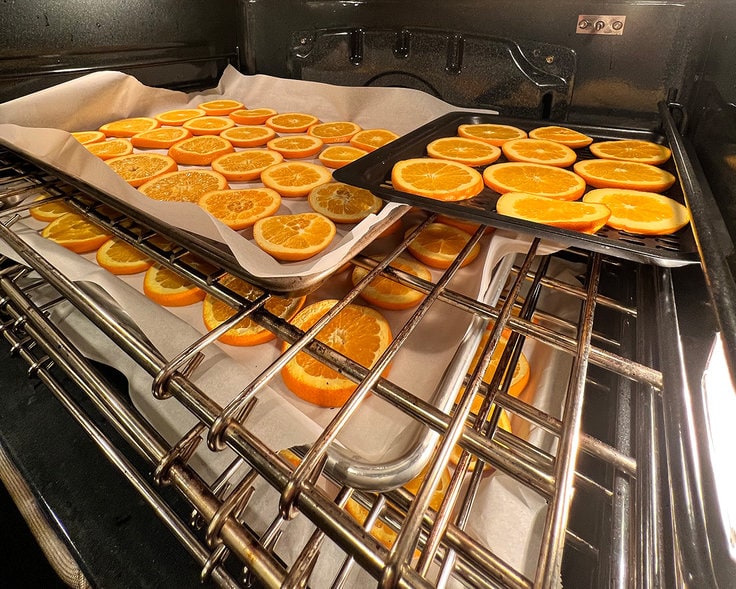
Once you have them in the oven, check on them every few hours. If you are using a dehydrator you can be less aggressive with checking on them since I slept most of the time my orange slices were drying. My slices took 12 hours on the dehydrate setting.
Step 2: Make Sure You Have A Nice Work Space
This garland can get pretty long. Set yourself up for success with a large workspace close to an electrical outlet. Hot glue gun cords are often too short so I extend mine with an extension cord.
I placed all my wood beads and dried orange slices into separate bowls to make grabbing them easier.
Step 3: Assembling Your Dried Oranges and Blue Garland
Measure out your hemp cord to the length you’d like the garland to be and then add an extra foot. Cut your cord.
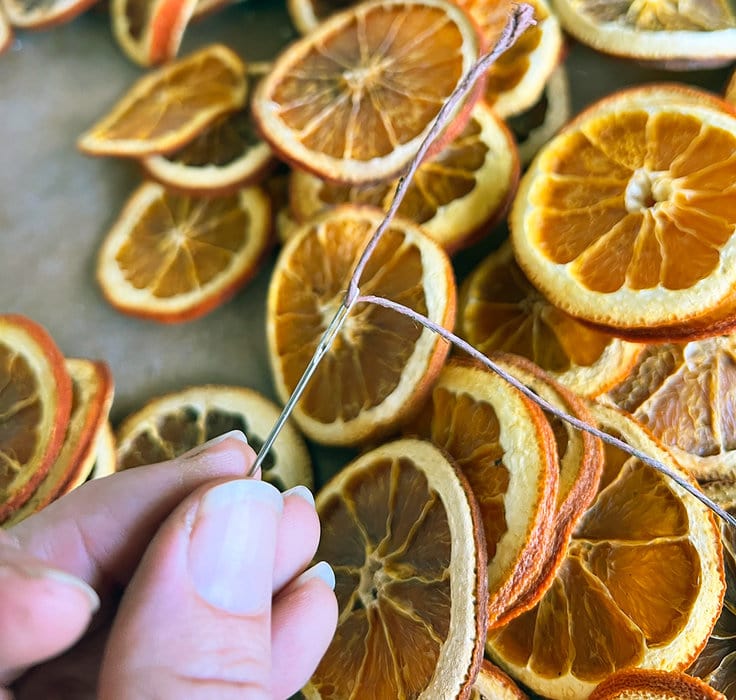
Thread your hemp cords through your tapestry needle with 3″ of extra hanging from the needle. This cord is waxed and holds in the needle really well, however those 3″ will make sure if you drop it the needles doesn’t separate from your cord.
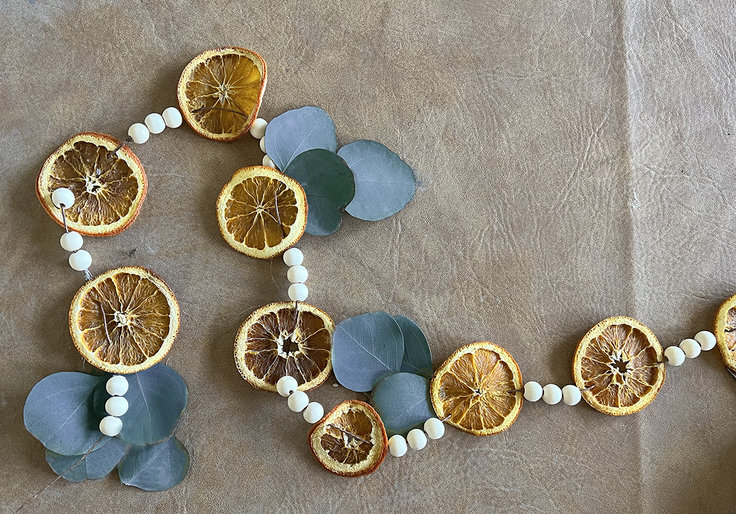
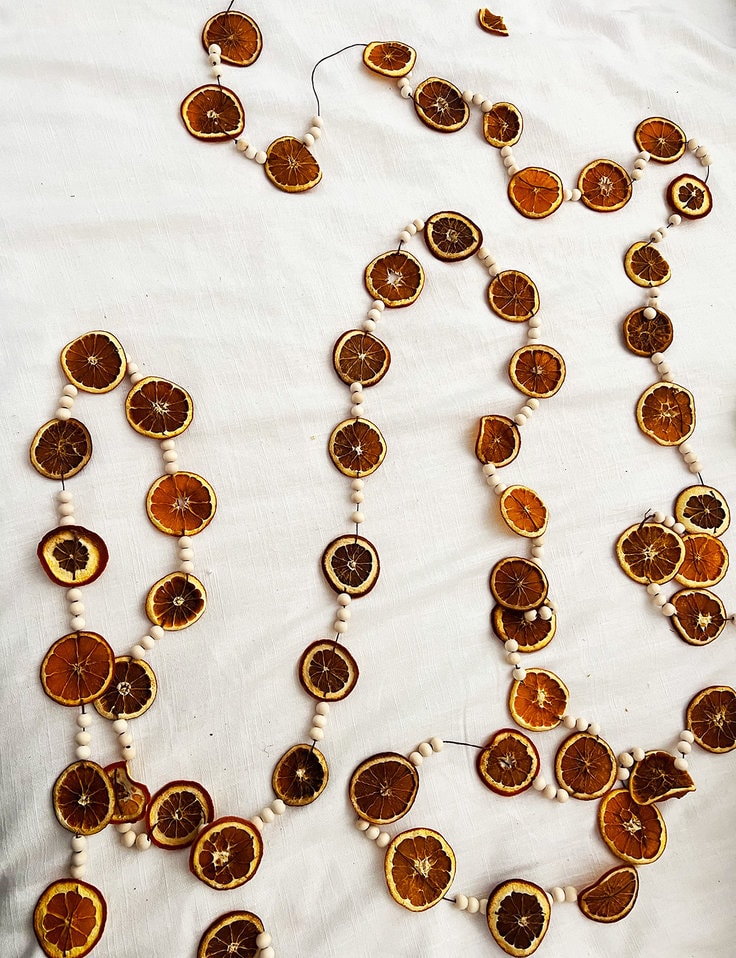
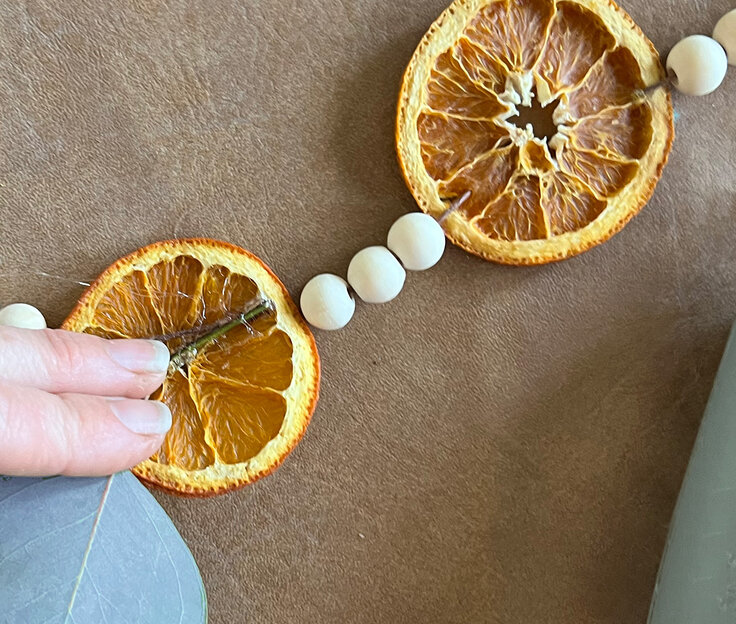
Start with three wood beads threaded onto your cord and then follow with a dried orange slice.
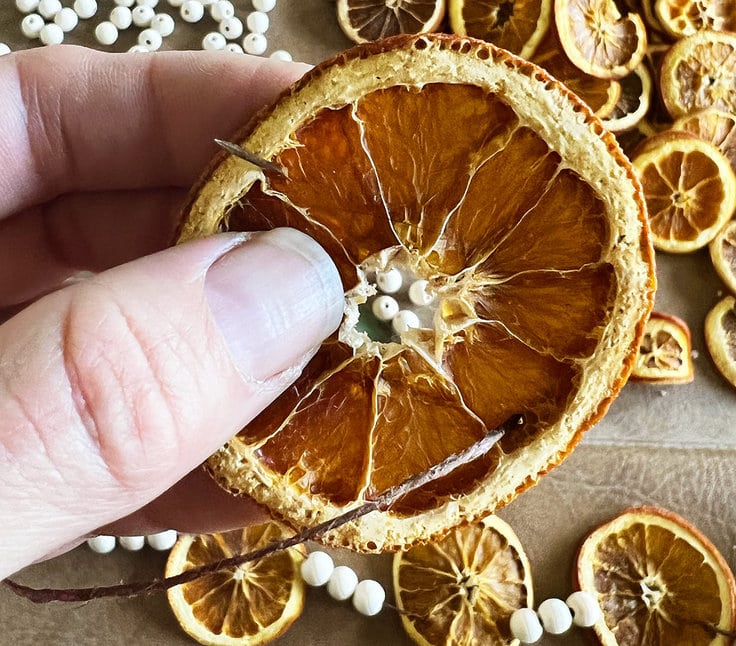
Threading through the dried orange slices twice helps keep the slices displayed and from shifting along the garland once it’s finished.
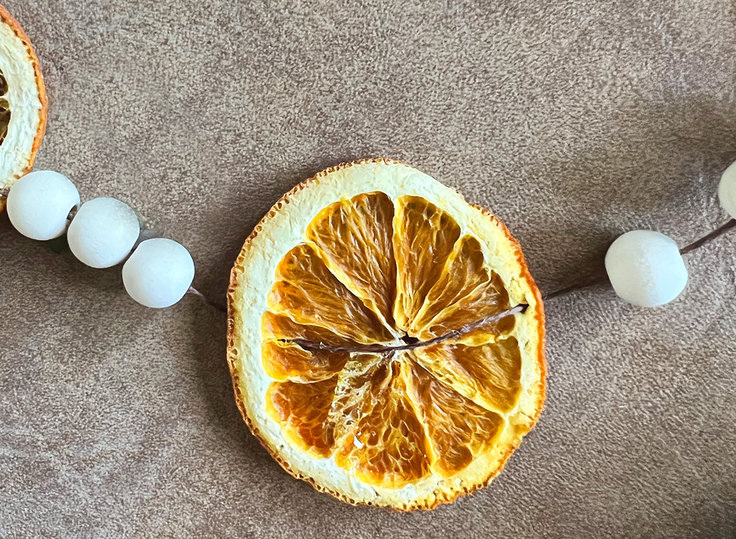
Make sure to thread across the center of the orange slice so that it doesn’t flip over from being too top or bottom heavy.
After you get the dried orange slice on, repeat the three wood beads. Continue the pattern 3 wood beads, 1 dried orange slice, until you reach the length of garland you’d like. Make sure to end with 3 wood beads.
Step 4: Final touches the Silver Blue Eucalyptus Leaves
Separate the eucalyptus leaves into groupings of three or four.
Turn the first dried orange slice on the garland over and glue a leaf grouping to the back. Skip two orange slices and repeat across the entire garland.
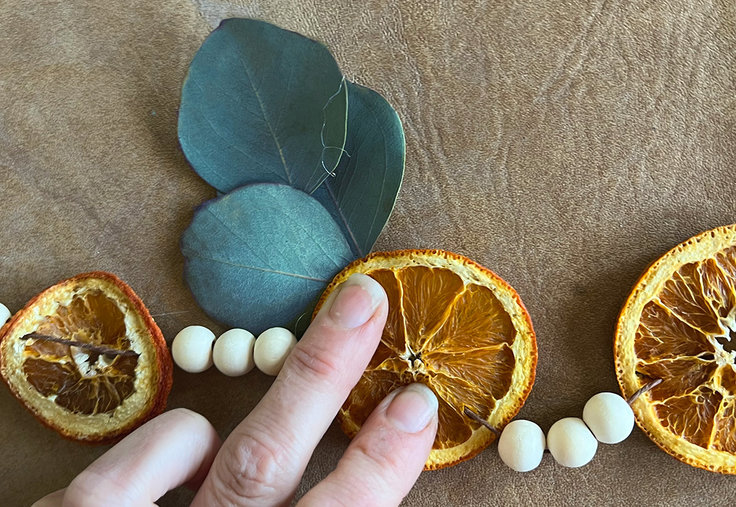
To make your garland feel more organic, mix up how you arrange the silvery blue eucalyptus leaf groupings on the back.
Dried Orange and Blue Garland
Equipment
- 1 Pair of scissors or wire cutters
- 1 Hot Glue Gun
- 1 Extension cord for glue gun optional
- 1 Oven or dehydrator
- 1 Knife and cutting board to cut oranges into slices
- 1 Tapestry needle
- 3-5 Perforated baking or cookie sheets
- 2 Bowls one for the wood beads and one for the orange slices
Supplies
- 3 lbs Oranges Navel or Valencia
- 3-12 feet #20 Hemp Cord
- 1 stick Hot Glue Stick
- 2-4 branches Eucalyptus You need 3 leaves every third orange
- 2 bags Craft/Wood Beads 12 mm 2.8 ounce bags
- 1 roll Paper towels
- 1 roll Parchment Paper only if using regular cookie sheets and not perforated sheets
Instructions
- Cut your oranges into slices. I kept mine 1/8 – 1/4" thick. As you cut them place them on paper towels to dry off the excess moisture. Arrange them on your baking sheets. The orange slices can touch but not overlap. If you are using regular cookie sheets make sure to line them with parchment paper first.
- Place baking sheets into oven.Check on them every few hours. If you are using a dehydrateor you can be less aggressive with checking on them since I slept most of the time my orange slices were drying. My slices took 12 hours on the dehydrate setting. Measure out your hemp cord to the length you'd like your garland to be and then add an extra foot. Cut your cord.
- Place all of your dried orange slices and wood beads into separate bowls.
- Measure out your hemp cord to the length you'd like the garland to be and then add an extra foot. Cut your cord.
- Thread your hemp cords through your tapestry needle with 3" of extra hanging from the needle. This cord is waxed and holds in the needle really well, however those 3" will make sure if you drop it the needles doesn't separate from your cord.
- Thread three wood beads onto your cord and then follow with an orange slice. After you get the orange slice on, repeat the three wood beads. Continue the pattern 3 wood beads, 1 orange slice, until you reach the length of garland you'd like. Make sure to end with 3 wood beads.
- Tie the garland off on either side by double stringing the last bead and tying a knot. You could also end with a tassel to avoid the garland from coming undone.
- Separate your eucalyptus leaves into groupings of three or four.
- Turn the first orange slice over on your garland and glue a leaf grouping to the back. Skip two orange slices and repeat across the entire garland.
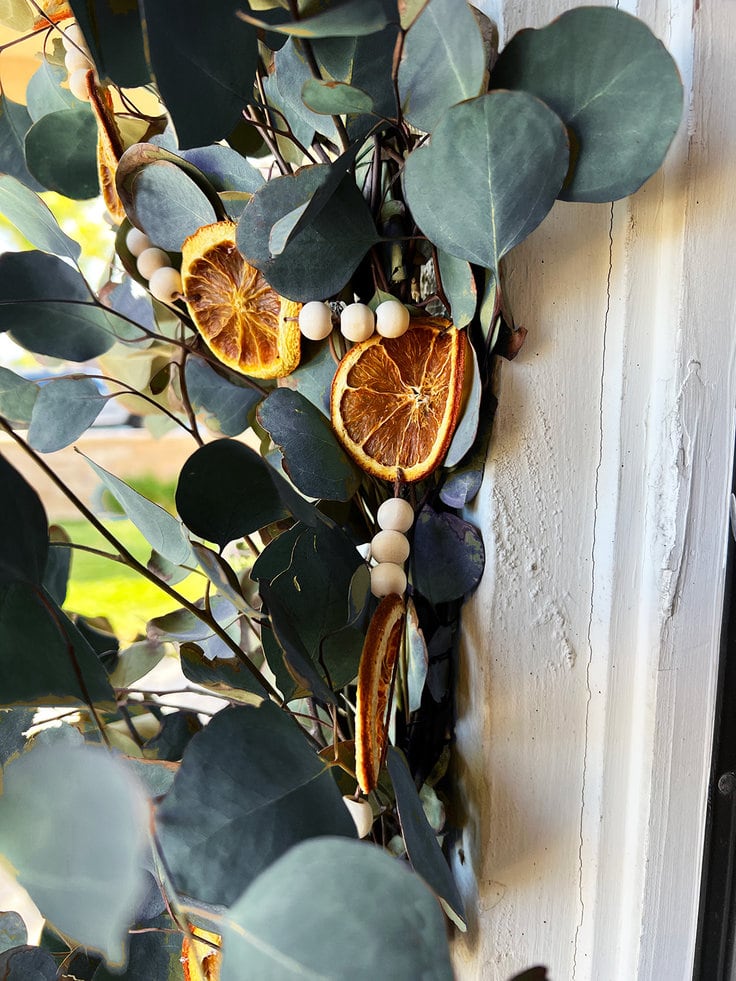
- Hang it where ever you'd like. I layered mine over a eucalyptus garland I wrapped around my front door.
Love the ideas you see here on Ideas for the Home by Kenarry®? Subscribe today to get our FREE DIY & Craft Planning Calendar, plus our weekly Ideas in Your Inbox newsletter filled with creative tips and exclusive offers!
What’s Next?
If you enjoyed this Dried Orange and Blue Garland then you’ll enjoy this Advent Calendar Garland. This is easily assembled with hot glue and looks like something you would find in a specialty Christmas shop. Every year, at the beginning of November, I unpack this holiday garland and stock it with small treats for my children to find. I zig zag it through my Christmas tree branches and decorate around it with care. It’s a beautiful keepsake with vintage prints that amplify the homey charm the holidays bring.
DIY Holiday Advent Calendar Garland
You may also enjoy these fall ideas on Ideas for the Home by Kenarry® –