Jewelry Organizer DIY Dollar Store Hack
THIS POST MAY CONTAIN AFFILIATE LINKS. PLEASE SEE OUR FULL DISCLOSURE POLICY FOR DETAILS.
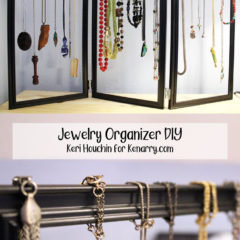
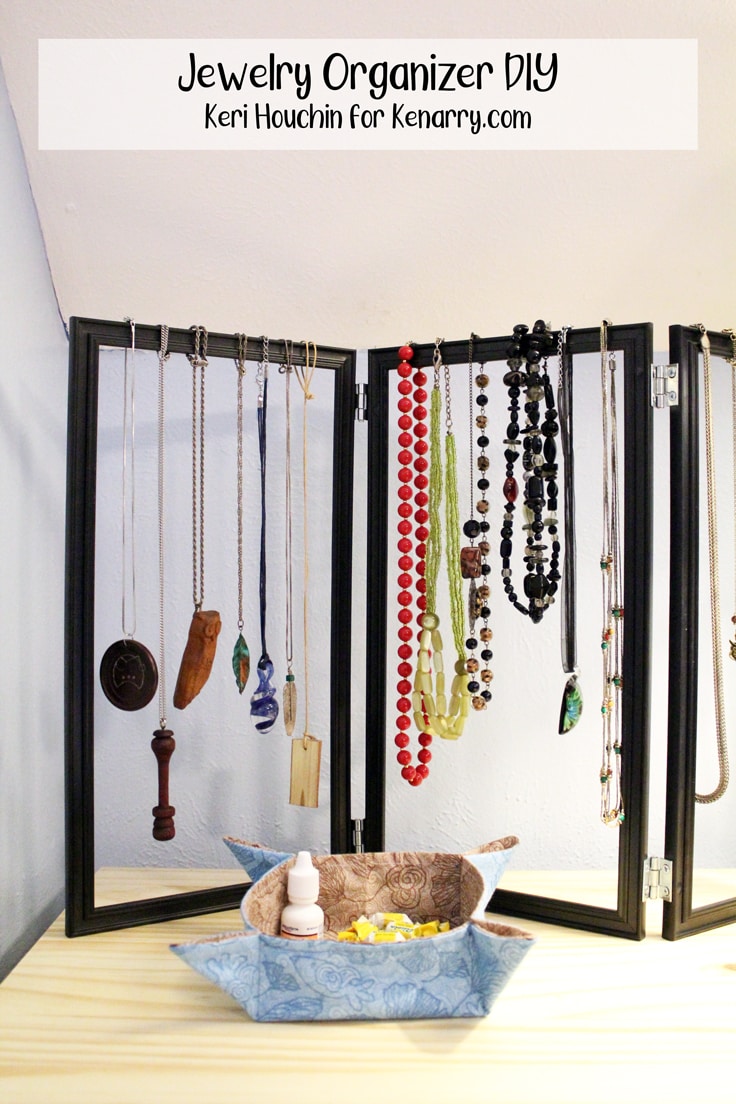
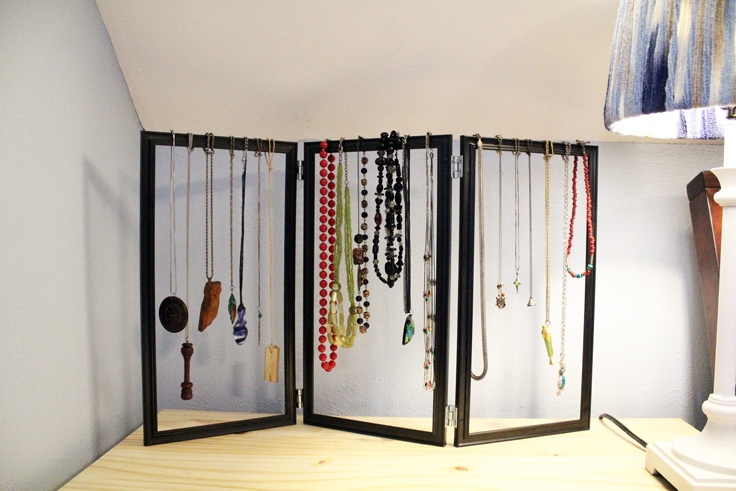
Make a simple jewelry organizer with a trio of picture frames for a pretty and practical way to display your necklaces and other jewelry.
I’m Keri from One Mama’s Daily Drama. I love a good dollar store hack and this year I’m focusing on easy DIY craft projects. I’ve been looking for a good way to store my necklaces, but don’t have a lot of storage space in my bedroom. I saw a lovely (but expensive) stand and decided I could easily make my own version.
This tutorial is pretty simple, which is the type of project I really love. Don’t get me wrong, a bedroom makeover is tons of fun. But sometimes the small projects can be just as rewarding.
If you need a budget-friendly jewelry organizer, you’ll love this one. I made it for less than $10.
How to Make a jewelry organizer
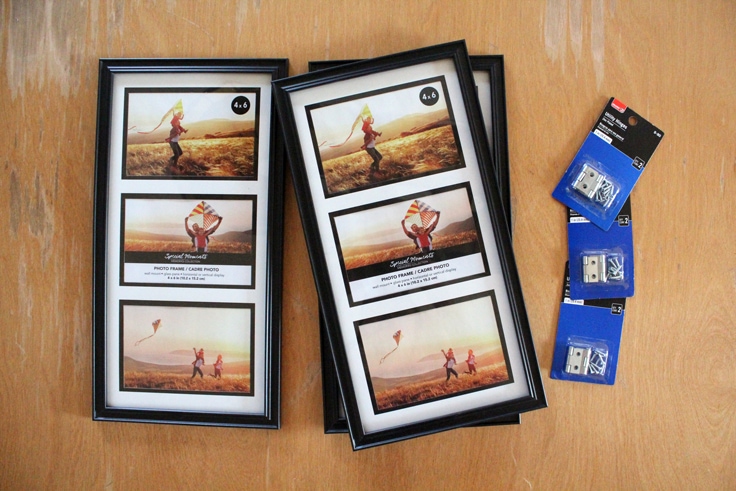
I purchased my frames at Dollar Tree, but just about any type will do. These were intended to hold three 4×6 photos each.
What you need:
Want more ideas like this? Subscribe today to get our weekly Ideas in Your Inbox newsletter plus other exclusive gifts and offers — all for FREE!
Craft/DIY Tools Needed:
Supplies Needed:
- Three picture frames – mine measure 8×15 inches
- Four 1-inch hinges with screws
Instructions:
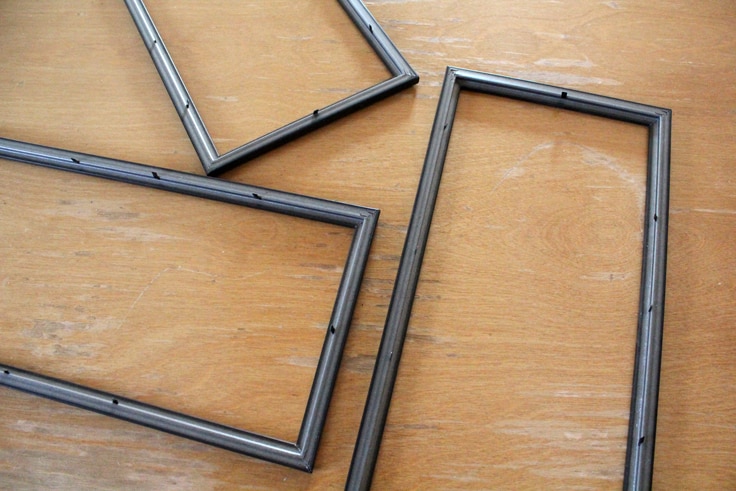
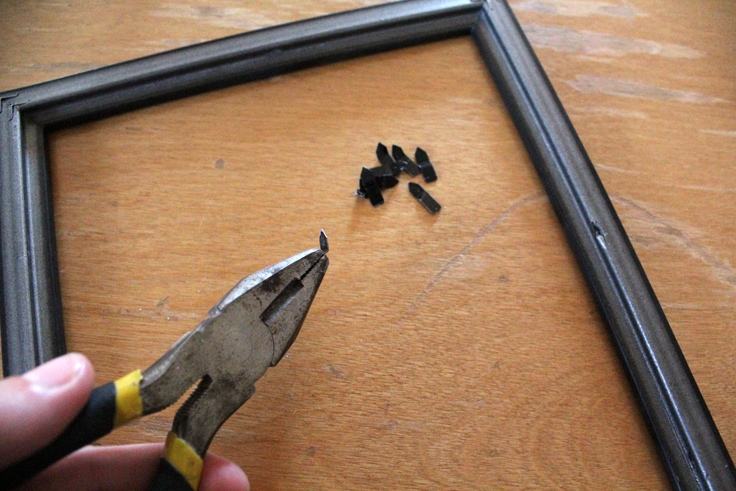
1. Disassemble the frames.
Start by opening the frames and removing the glass, backing, and paper. Use a pair of pliers to carefully remove the metal points.
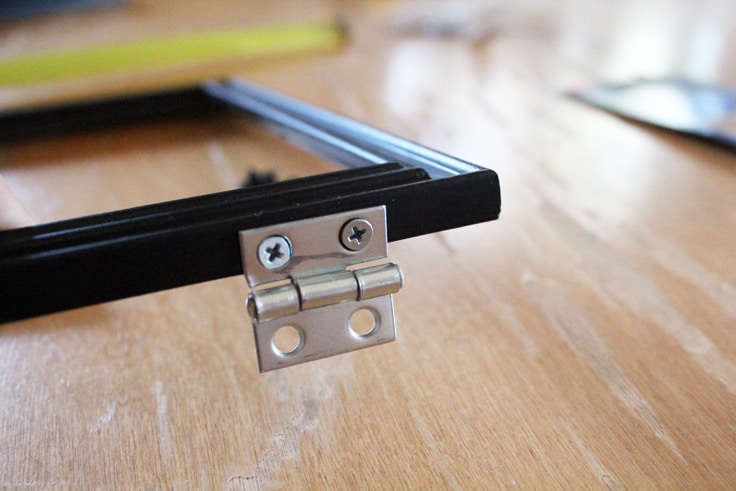
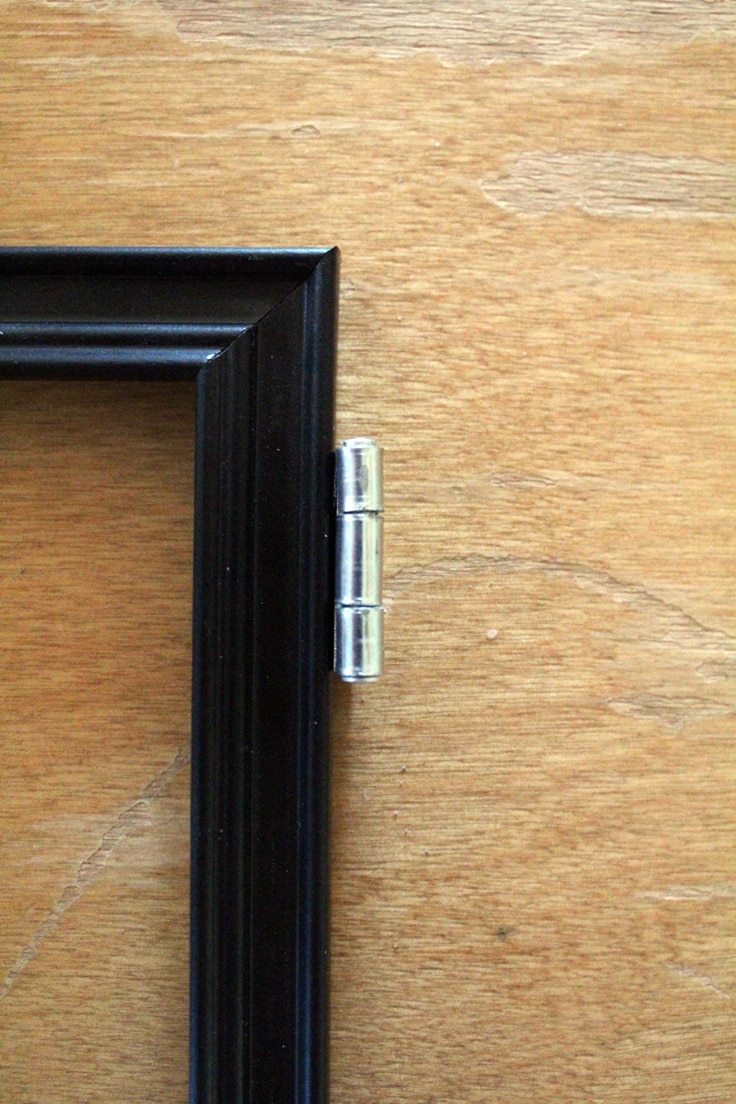
2. Attach hinges to the first frame.
Measure one inch from the top of the frame and use a pencil to mark the spot. Line up a hinge at the 1-inch mark with the pin toward the back.
Using some pressure, screw the screws through the holes in the hinge and carefully into the back of the first frame. Repeat the process at the bottom to attach a second hinge.
Note: The frames I used for my jewelry organizer were a heavy MDF material. If you are using wooden photo frames, you should pre-drill the holes so the wood doesn’t splinter when you insert the screws.
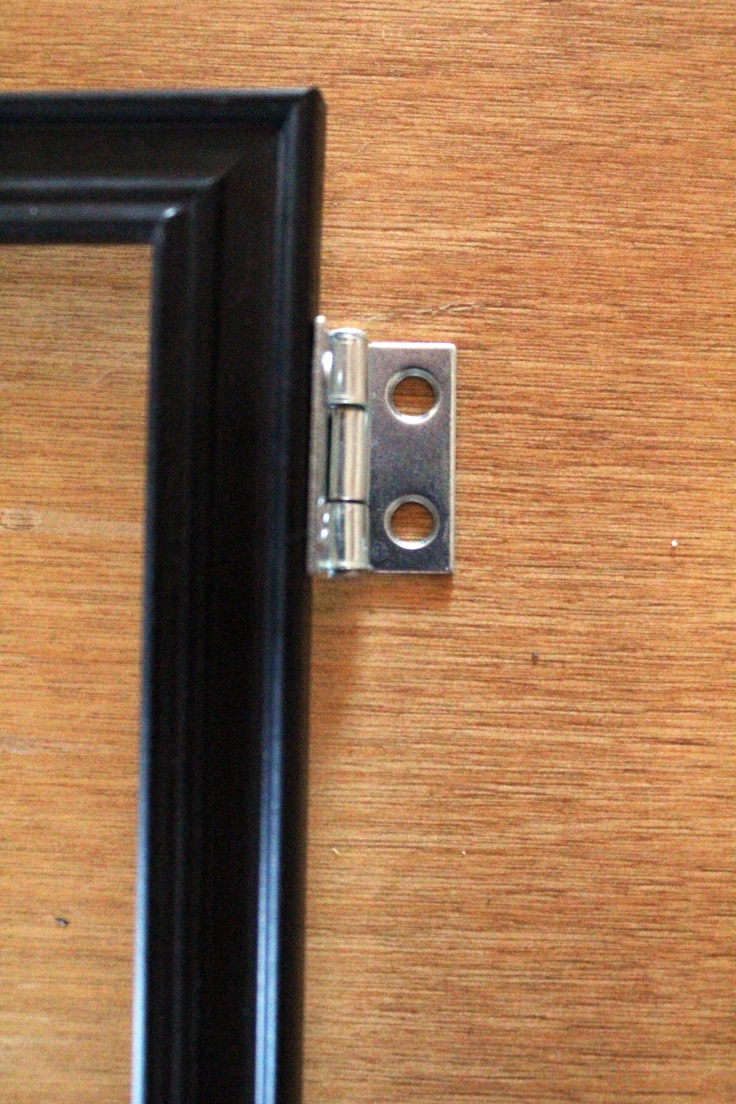
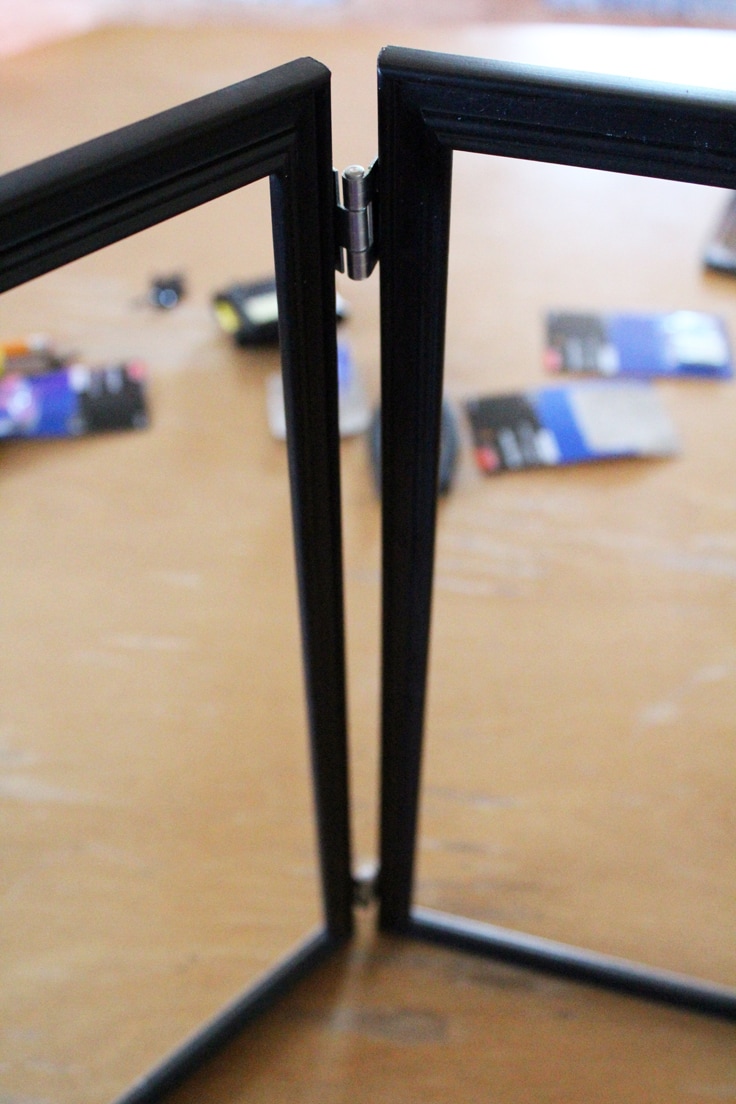
3. Attach the first frame to the second frame.
Mark 1-inch measurements from either end of the second frame. Line it up with the first one and screw the hinges into the frame at the top and bottom. Now two of the frames are attached and they will fold together at the backs.
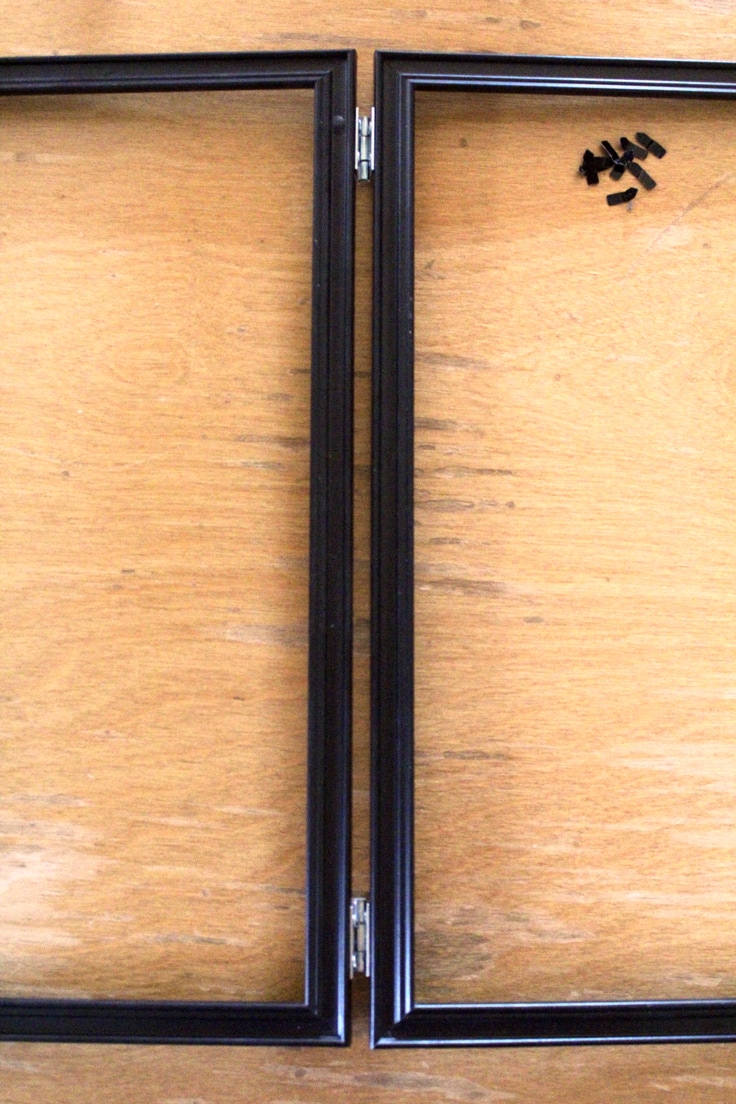
At this point, two-thirds of the jewelry organizer can stand alone.

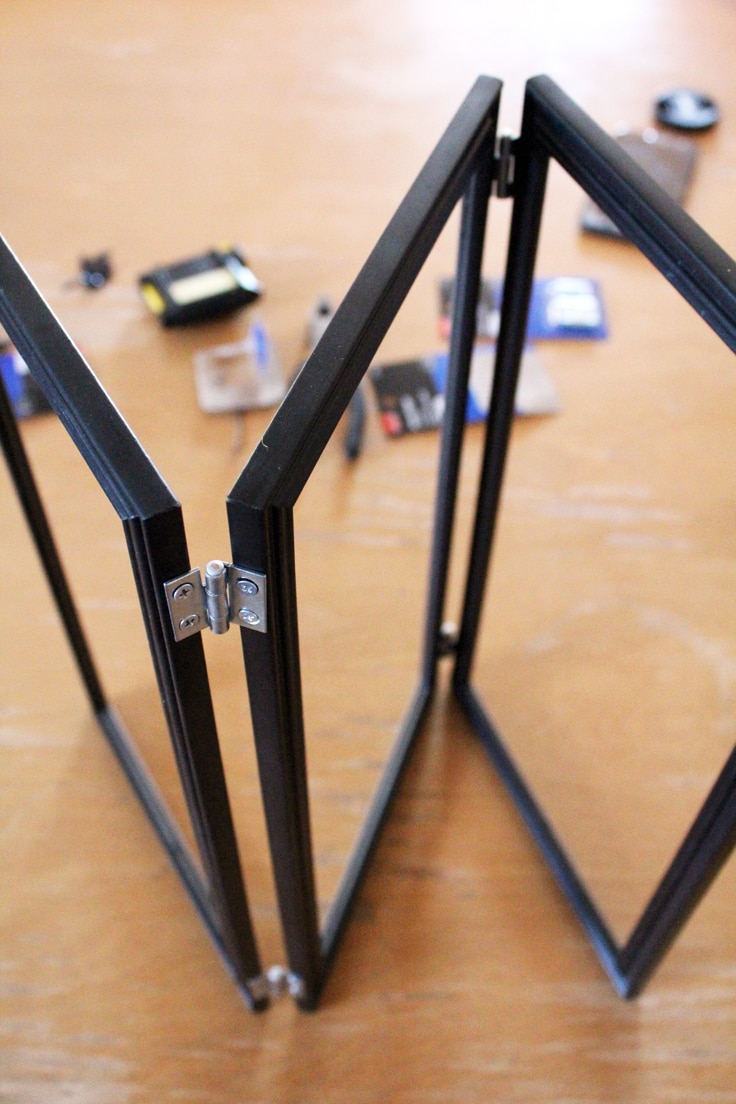
4. Attach the third frame.
Measure and mark an inch from the ends on the last frame. Attach the top and bottom hinges with the pin facing forward this time (opposite the way it was between the first two). Line the frame up with one of the other frames and screw the hinges in place.
This frame will fold together with its neighbor at the front, making the whole thing able to fold in a Z shape.
Stand up the jewelry organizer frame. It should be sturdy and level sitting on a table. At this point, it’s ready for your jewelry, but there are a few variations below if you want to add more details.
jewelry organizer Variations
This is a pretty simple tutorial and there are lots of ways to customize your jewelry organizer. Here are a few ideas:
- Spray paint the finished jewelry stand in any color paint. Make sure you choose one that is designed for the material your frames are made from.
- Attach decorative pushpins at the top of the frames to hang necklaces. Use clothespins for farmhouse style decor.
- Use jewelry wire to fashion hooks at the top of each frame, or to string across a frame to hang fishhook-type earrings.
- Attach burlap or mesh to one of the frames to hang stud-type earrings.
- Leave the photo hardware in the center frame and print photos. This would make a beautiful gift with a vintage photo and heirloom jewelry.
- Looking for other inspiring ways to hang up your necklaces? Check out these 16 DIY jewelry organizer ideas.


What’s Next?
If you enjoyed making this jewelry organizer then you’ll enjoy these home decor crafts too.

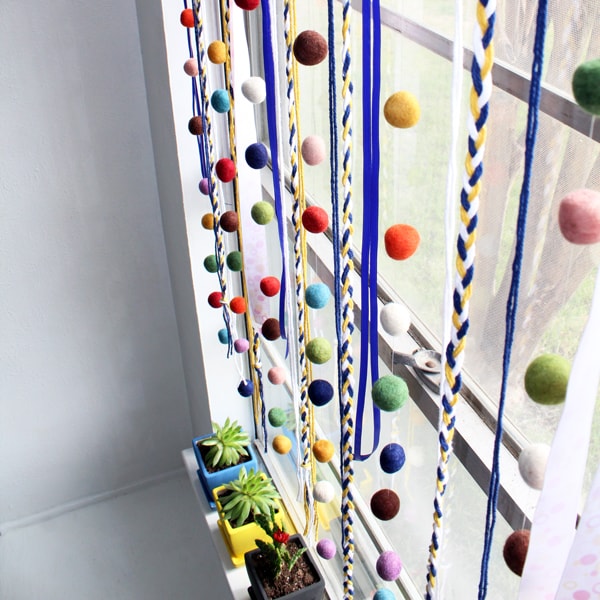
Simple Yarn and Felt Window Hanging
You may also enjoy these home organization ideas on Ideas for the Home by Kenarry® –