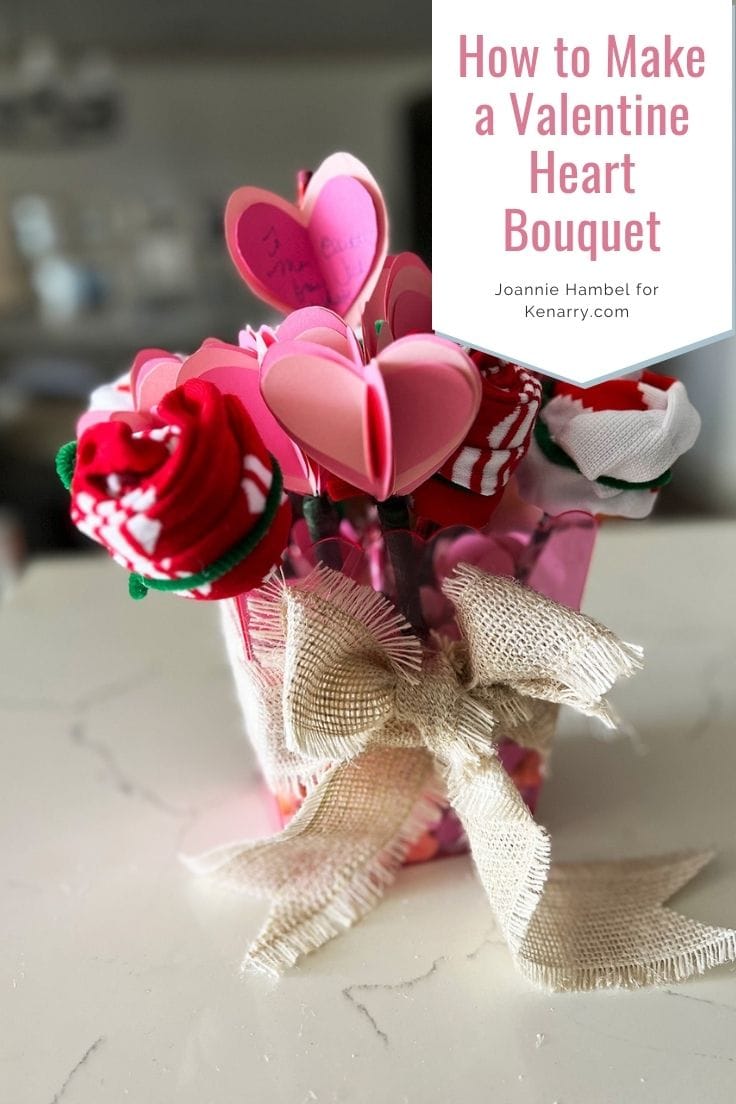
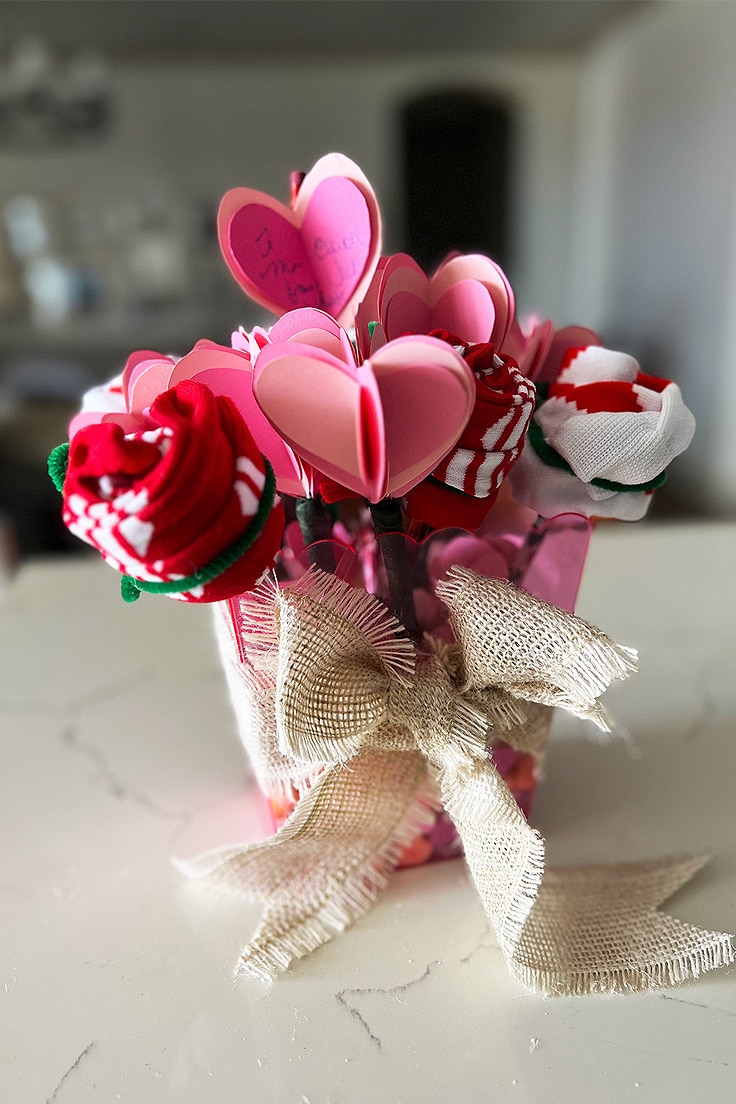
Valentine Heart Bouquet
THIS POST MAY CONTAIN AFFILIATE LINKS. PLEASE SEE OUR FULL DISCLOSURE POLICY FOR DETAILS.
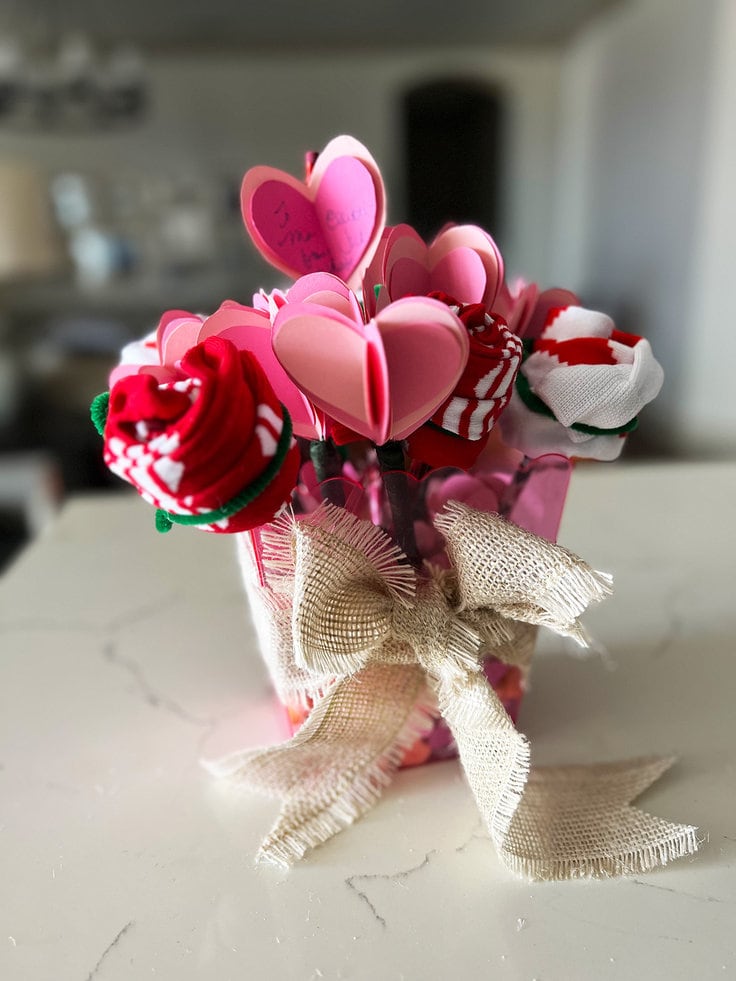
This simple DIY Valentine Heart Bouquet made with socks, pens and pencils is a great gift to make with your kids for their teacher this Valentine’s Day.
Hi my Kenarry friends; I’m Joannie Hambel from Hambels Get Real, and like you, I love making crafts. Today I am sharing a great alternative to the usual gift card or box of chocolates you give on Valentine’s Day. I made this for Jack and Kate’s teacher, but it would also be a great gift for any person in your life who loves socks and a little bit of whimsy.
This will look fantastic with our heart string craft. Decorating your home just got easier.

This is so easy my seven year old daughter was able to do most of it. We bought most of our supplies at the dollar store. Don’t think you can only make this for Valentine’s day, this would be a great gift for any holiday, just adjust the socks and colors as needed!
How to Make A Valentine Heart Bouquet
Grab some cute socks, pencils and pipe cleaners we are going to make flowers that last longer than a week. I love this heart bouquet because not only does it have socks that look like roses, it has pens that look like cupid’s arrows. So adorable!
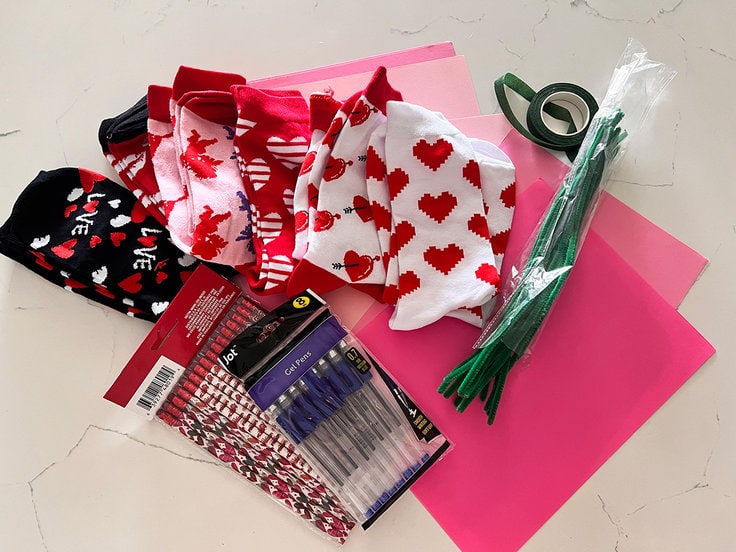
What you need:
Want more ideas like this? Subscribe today to get our weekly Ideas in Your Inbox newsletter plus other exclusive gifts and offers — all for FREE!
Tools:
- Scissors – strong enough to cut through pipe cleaner wire
- Hot glue gun
Supplies For the Heart Bouquet:
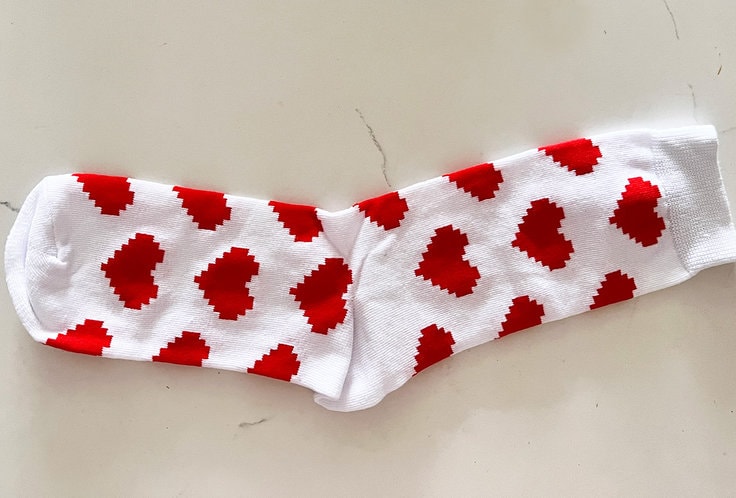
- Socks
- Cardstock
- Glue sticks
- Floral tape
- Pipe Cleaner
- Pens
- Pencils
- Candy – I used heart candy but really any type would work
- Vase
- Ribbon to wrap around the vase
Valentine Heart bouquet Tips:
Folding your socks into Roses
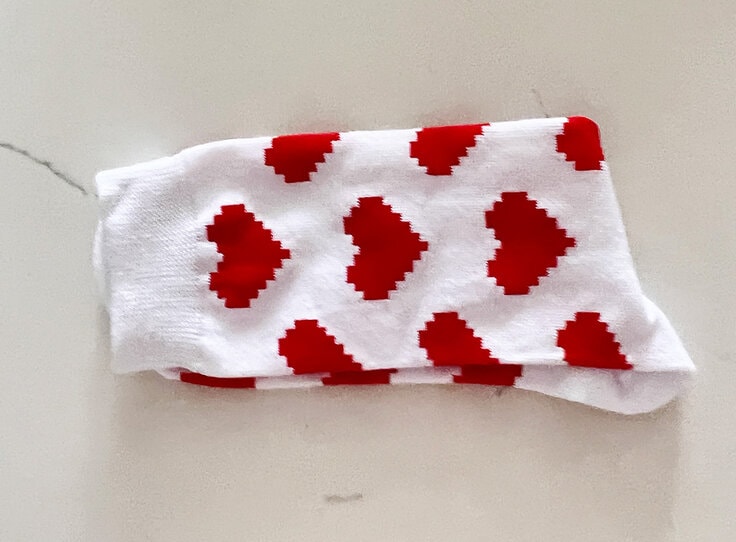
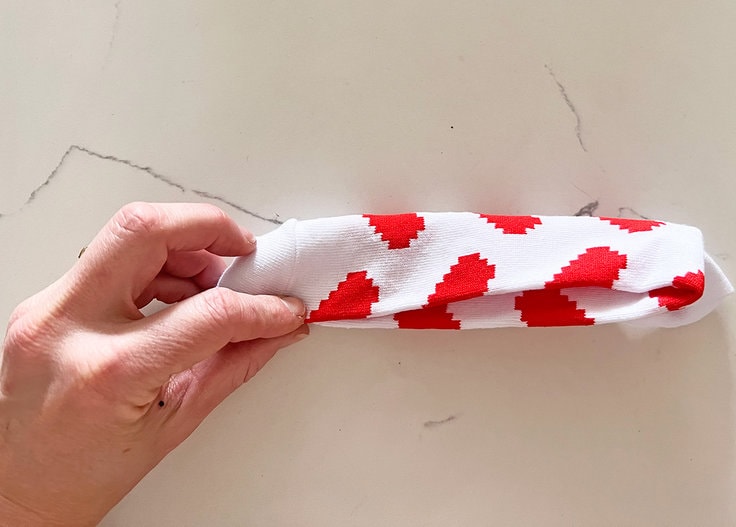
When you roll the sock it is okay if the edges aren’t perfectly flush, this will create the petals.
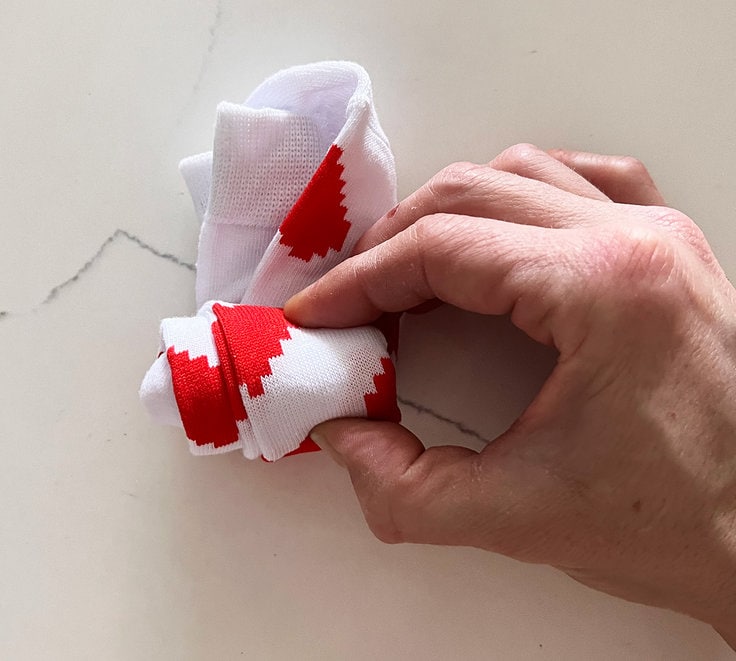
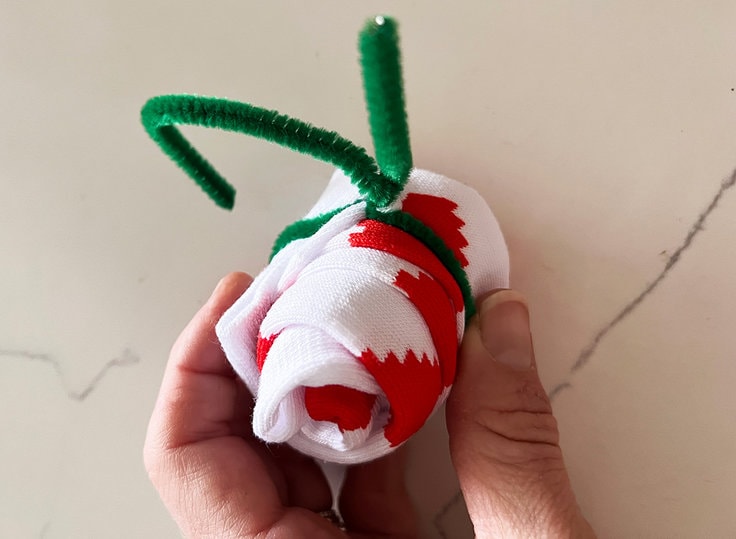
Securing your Rosebud
Cut your pipe cleaner in half, then twist it around the rose bud. Bend the ends back in and press together to look like leaves.
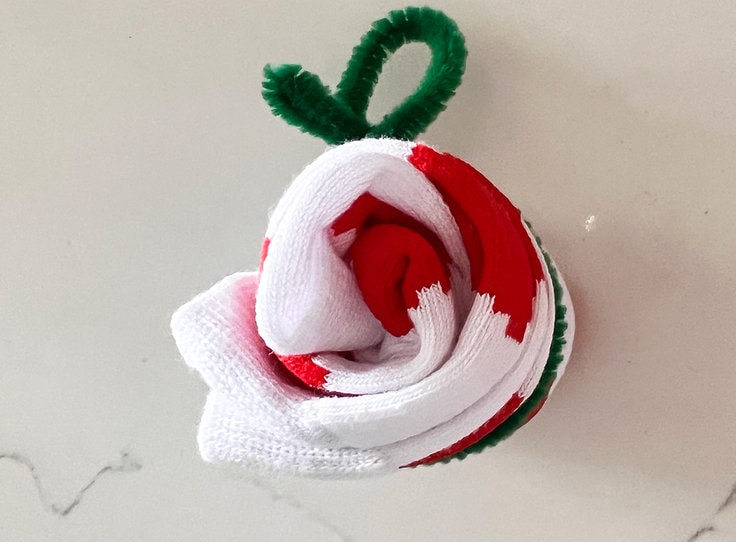
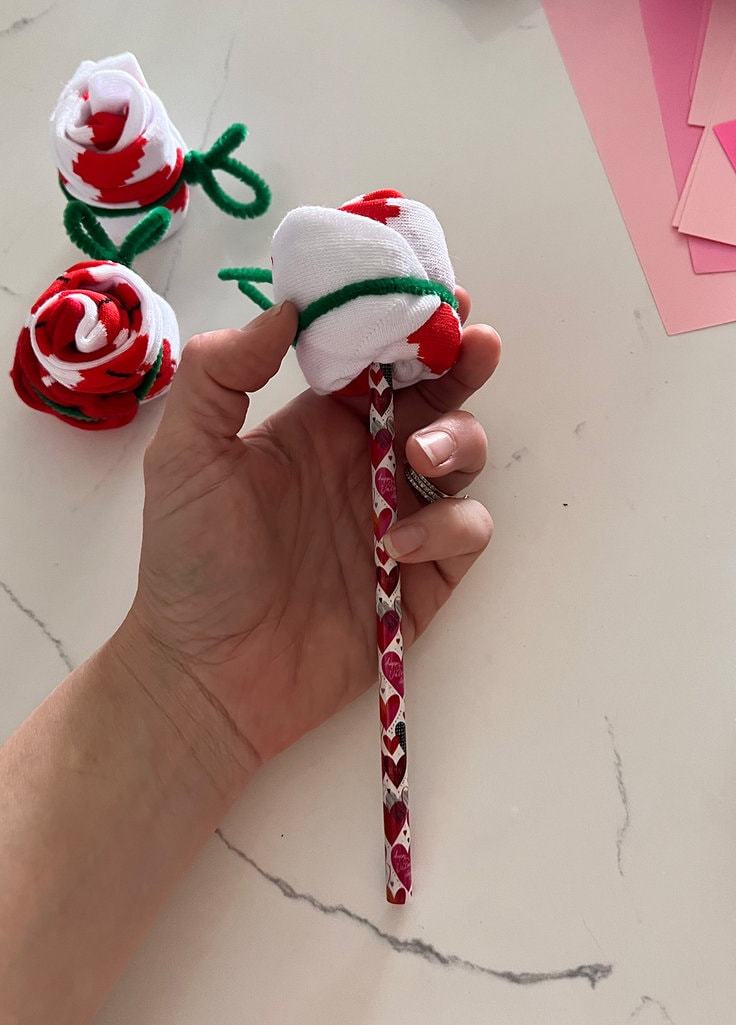
Add the pencil
Turn your rosebud over and press the eraser end into the center of the base of your rosebud. Repeat this process for as many sock rosebuds as you like.
Creating the Heart Pen Arrows
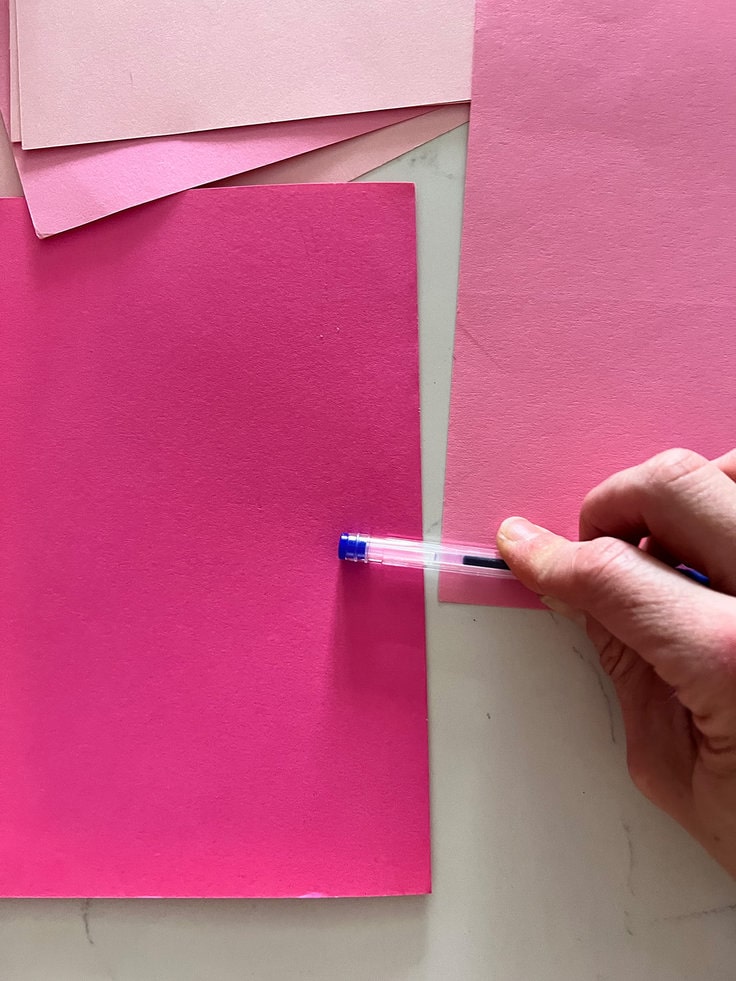
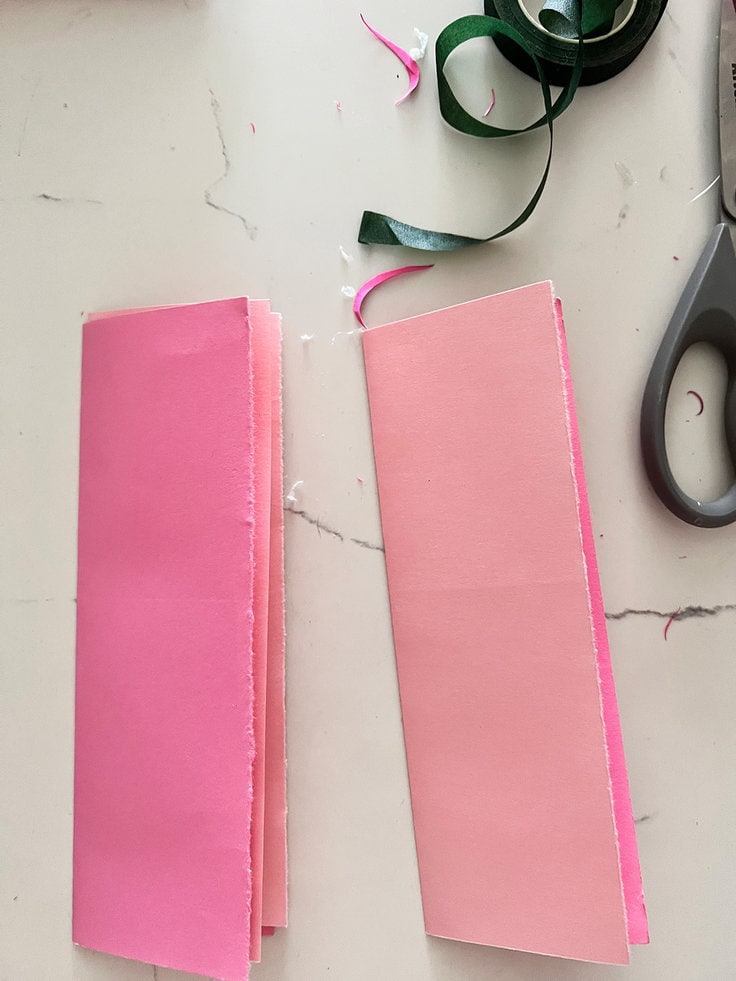
Grab your card stock and fold them all in half. I used the edge of the pen to get a strong crease down the center, if you have a bone folder that would work great too.
Once you make the first fold, open it back up and fold the other ends into the center crease, then rip or cut the paper along the first middle crease so that you end up with two separate folded pieces of paper.
Repeat this to all of your pieces of paper.
Making the hearts
Attach the hearts together but only along the crease so that the edges of the hearts stay open. Once you have all of your hearts assembled, now it is time to attach them to the pipe cleaner.

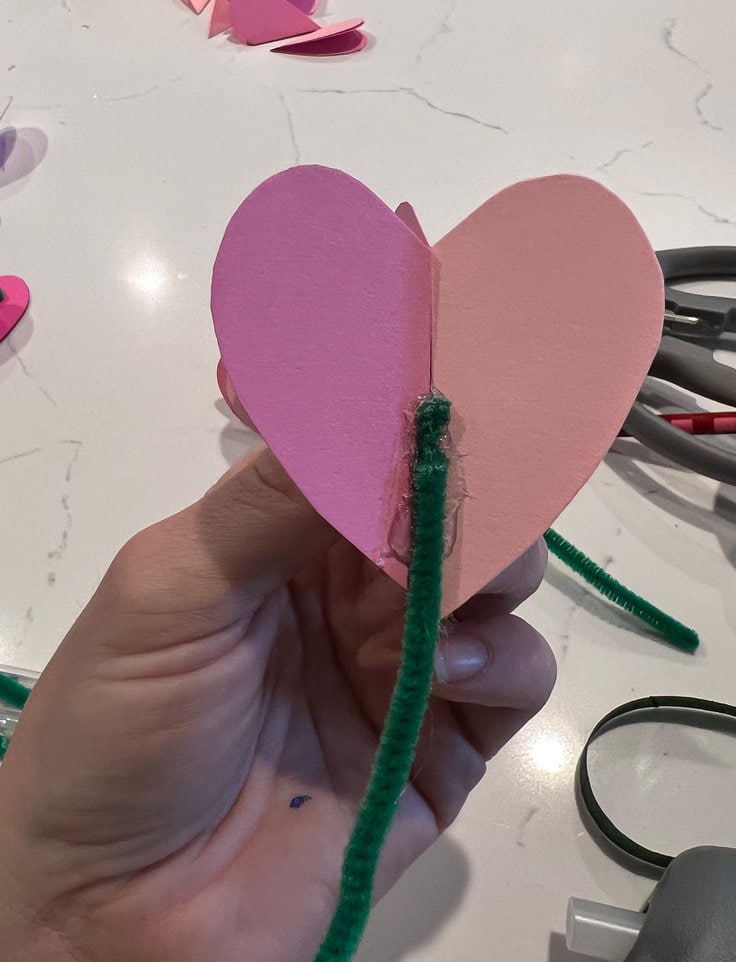
Turning the Hearts into a pen
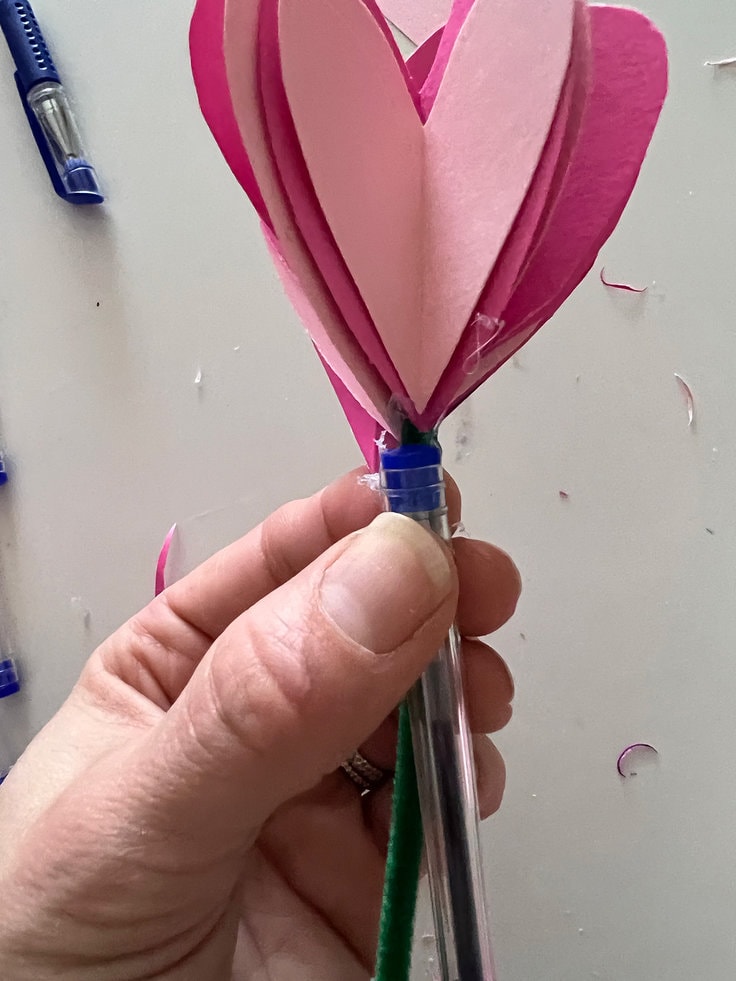
Trim the pipe cleaner so that it ends before the floral tape does.
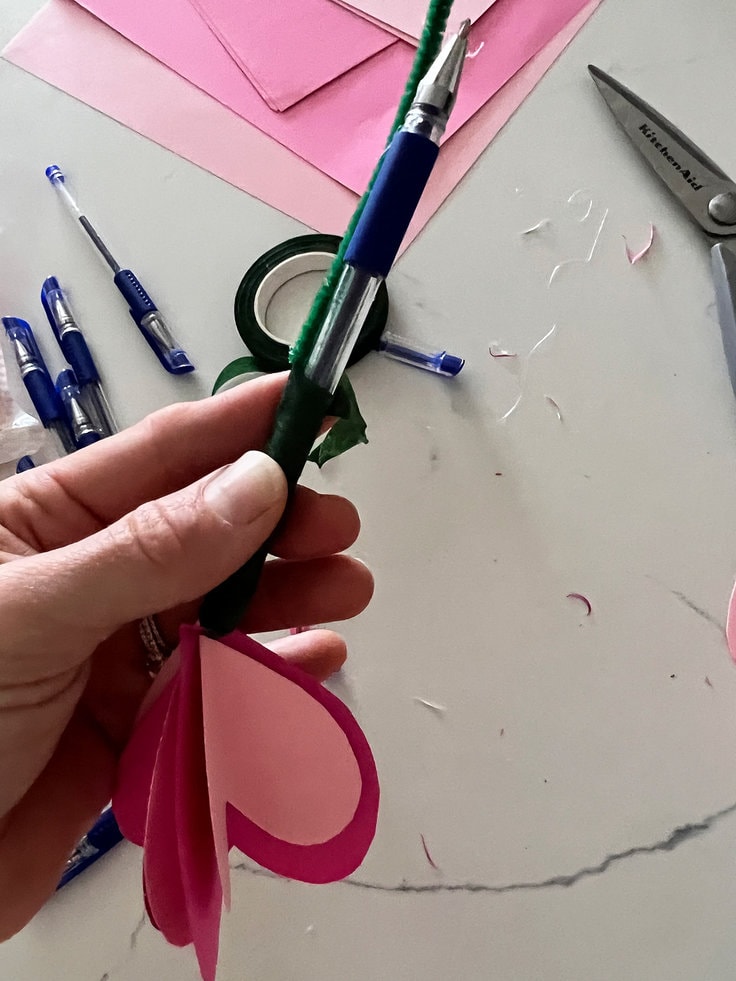
The floral tape will stick to itself, just pull it tight against the pen and tear it. Then press the torn end against the body of the pen. If there are any edges of the floral tape that isn’t pressing against the body of the pen, just press it with your fingers and the floral tape will seal against itself.
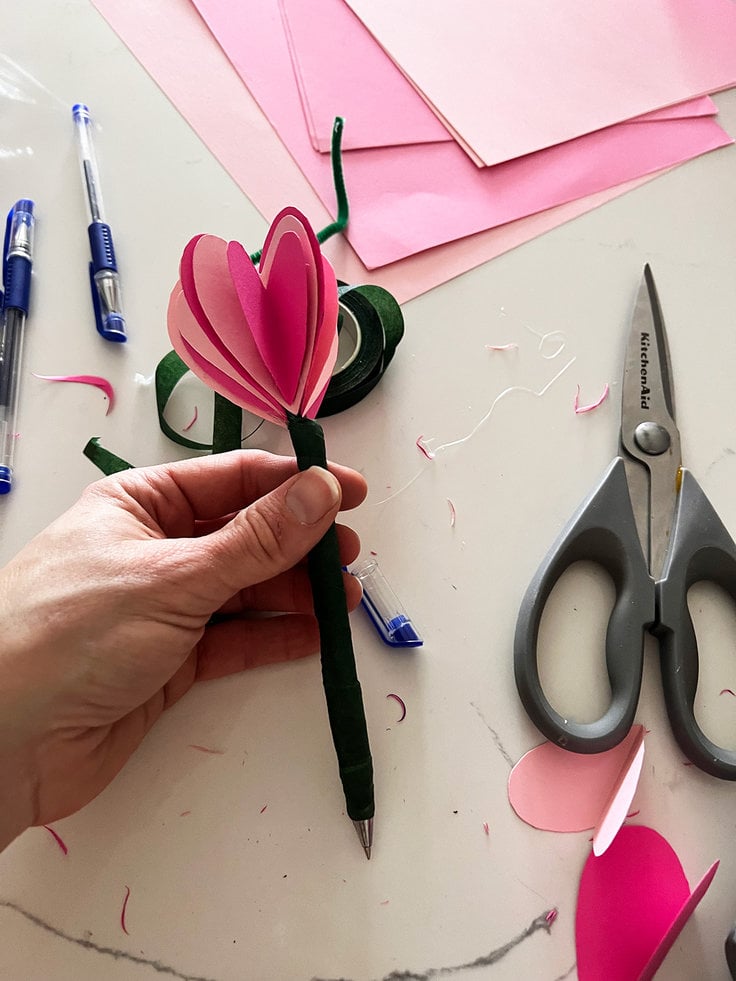
That’s it, now put your heart arrows and rose buds into the vase and add the candy. Tie a ribbon bow around the vase and add a card using an extra heart.


Valentine Heart Bouquet
Equipment
- 1 Pair of scissors Utility type to cut pipe cleaner and paper
- 1 glue gun
Supplies
- 6 sticks Pipe cleaner cut in half green
- 3 pairs Socks
- 2 sticks Glue for hot glue gun
- 3 pieces Card Stock 8.5 x 11 Light Pink
- 3 pieces Card Stock 8.5 x 11 Dark Pink
- 6 pens Gel or other type
- 1 roll Green floral tape
- 6 pencils I used Valentine themed
- 1-3 Bags Candy for vase filler
- 1 roll ribbon – enough to wrap around vase and make a bow
Instructions
Create the Sock Rosebuds
- Separate your pairs of socks so that you can make six "rosebuds".
- Fold your socks in half from the toe to the cuff.
- Then fold your socks in half again, but lengthwise.
- Roll your socks like a sleeping bag from the toe to the cuff.
- Grab your half piece of pipe cleaner, wrap it around your sock rose bud, then twist to secure. Bend the ends back into the "rosebud" to form the "leaves".
- Take a pencil and insert it into the base of your "rosebud".
- Repeat to the other five socks. Place in the vase for later.
Create the "Heart Arrows"
- Fold all of your pieces of card stock in half. Press the crease down firmly with a a pen or a bone folder.
- Open the folded paper up and fold the ends into the center crease. See the pictures in the post for a reference.
- Cut or tear the card stock along the first center fold.
- Nest two of the folded pieces of card stock together and repeat to the other pieces of card stock. You should have 6 total. I alternated the colors as I went.
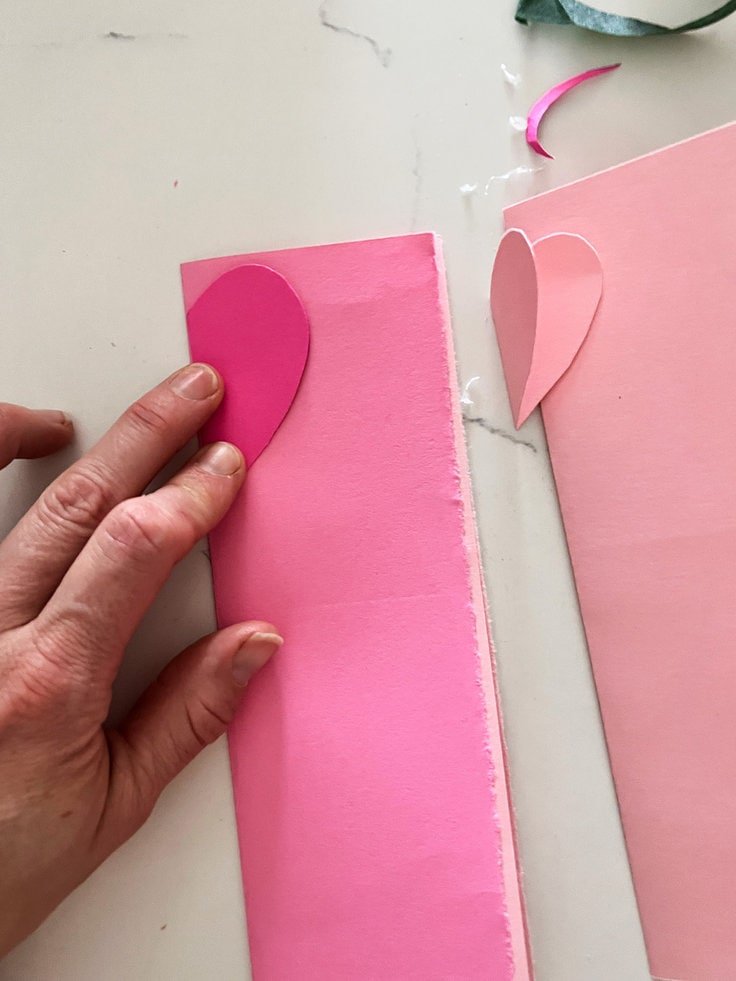
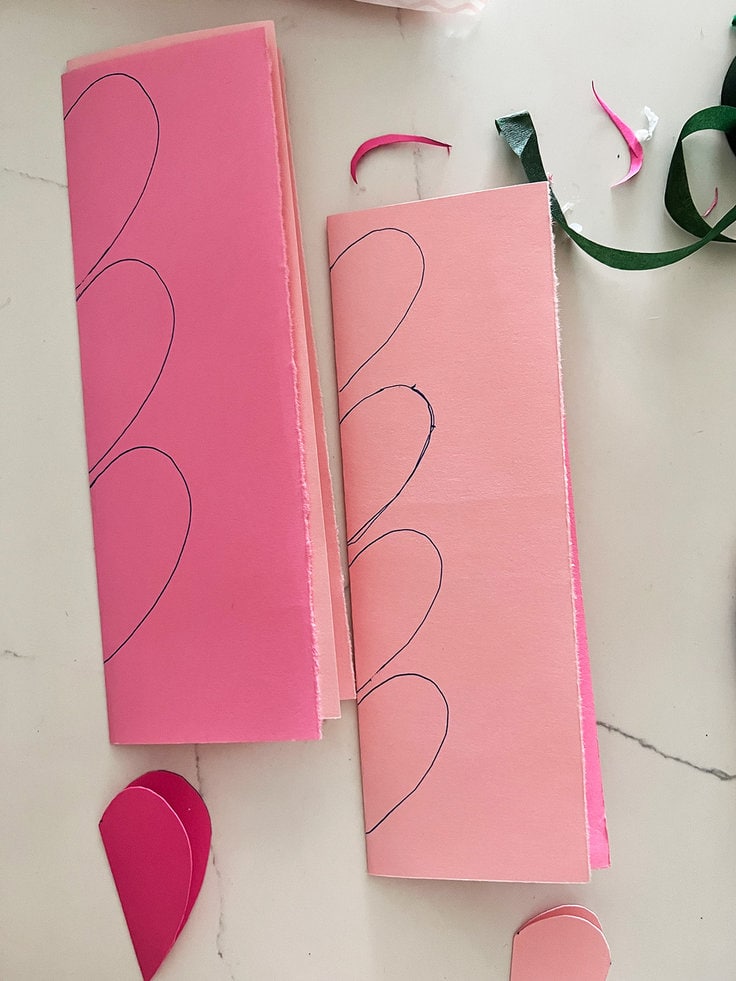
- Draw half of a heart on one of your paper assemblies, using the crease as the center of the heart and then draw a smaller heart on another assembly the same way. Cut them out. When you open the creased paper half heart you should have a perfectly shaped heart. Use these as stencils for the rest of the hearts.
- Fold the heart back up and trace the larger half heart on three of the assemblies and trace the smaller half heart on the other three assemblies.
- Cut out all of the traced hearts.
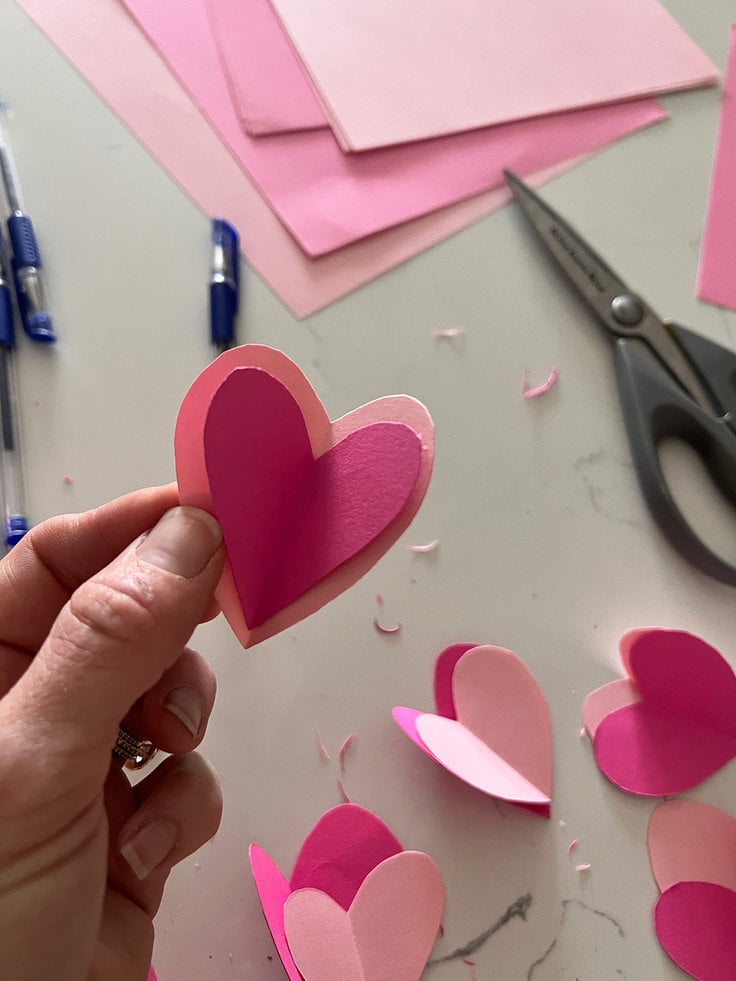
Assemble the hearts together
- Take a smaller heart, add a line of hot glue on the folded back and press it into the crease of the inside of a larger heart. I chose to alternate my colors.
- Repeat this to all of the other cut out hearts. Group assembled hearts into groups of 4. You should have 24 total heart assemblies and 6 groups.
- Take one of your pipe cleaner halves and one of your heart assemblies and place a line of hot glue along the back of the heart, press it against the end of the pipe cleaner.
- Grab the second heart assembly, I alternated my color pattern as I went, place a lien of hot glue against the back crease and then press that against the end of the pipe cleaner and the other center crease of the first heart assembly. Repeat this process so that you have four total heart assemblies on the end of every pipe cleaner.
Attach the pipe cleaner to the pen
- Place a dot of hot glue at the end of your pen and then press your pipe cleaner to the glue so that the tips of the hearts just touch the end of the pen. Let that dry and repeat to the other 5 pens.
- Take your floral tape and wrap it around the heart and pen assembly and continue to wrap it down to the tip of the pen.
- Before you get to the end, trim the pipe cleaner so that the sharp end will be covered by the floral tape.
- Pull the floral tape tight against the end to tear it. Press it against the pen to so that the floral tape seals against itself.
- Repeat to the other five pens.
Create the Heart Bouquet
- Arrange the heart arrow pens and the rosebud pencils together in the vase. Pour the candy in around the pens and pencils to keep them all in place.
- Wrap ribbon around the vase and tie a bow. Because my vase is tapered I used a small dot of hot glue behind the bow to secure it to the vase.
Love the ideas you see here on Ideas for the Home by Kenarry®? Subscribe today to get our FREE DIY & Craft Planning Calendar, plus our weekly Ideas in Your Inbox newsletter filled with creative tips and exclusive offers!
What’s Next?
If you enjoyed the Valentine Heart Bouquet then you’ll enjoy these too.

You may also enjoy these Valentine’s ideas on Ideas for the Home by Kenarry® –