Cottage Renovations: Progress Report And Next Steps
THIS POST MAY CONTAIN AFFILIATE LINKS. PLEASE SEE OUR FULL DISCLOSURE POLICY FOR DETAILS.
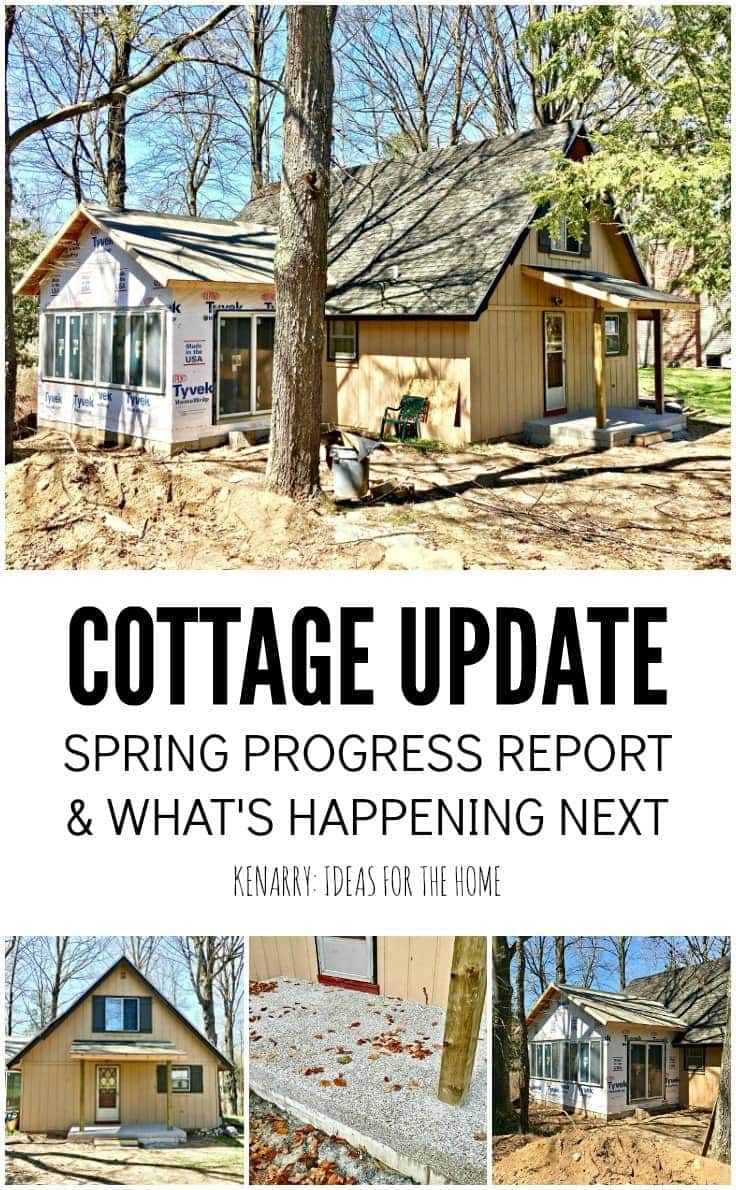
Get a spring update on our progress with the cottage renovations we started last fall and check out next steps for completing the project.
Spring is finally here and the weather is getting warmer at long last. This means we can actually get back to the cottage renovations we started last fall. Hooray! Today I wanted to bring you up to speed on the progress we’ve made so far with our new sunroom and front porch. Plus I’ll also fill you in on what’s happening next.
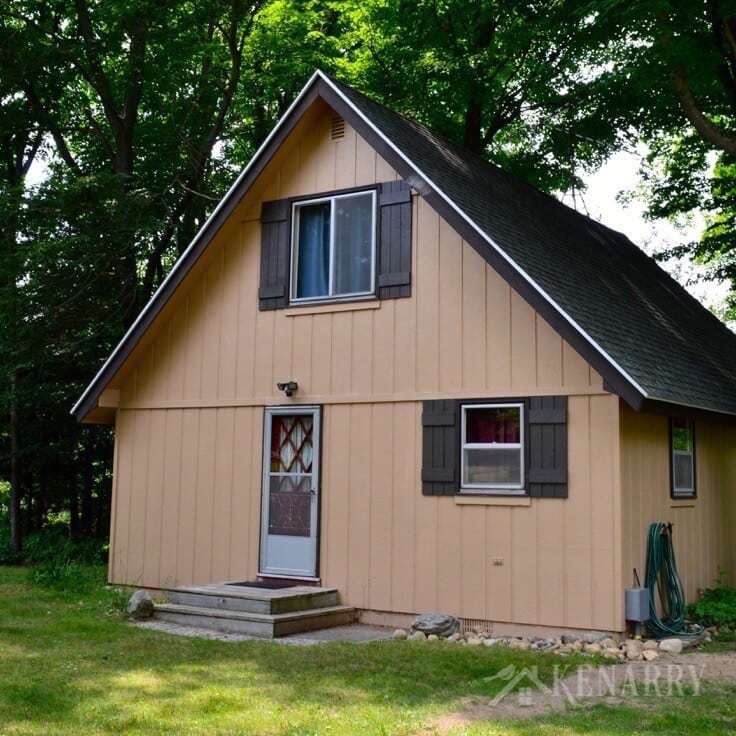
So before we go any further, let me quickly give a short refresher on the whole project for anyone who’s just joining us in our journey. In 2011, Kent and I bought a small and horribly outdated A-frame cottage next door to my parents on a wilderness river here in Michigan. Since then, we’ve given the cottage an extensive overhaul inside and out. We even added DIY board and batten shutters to make it cuter. If you love drastic before/after photos you should definitely head over to check out the full post about our cottage makeover.
Our Plan for the Cottage Renovations
Late last summer we started working with an architect and builder on plans to add a front porch and a new sunroom to the cottage. We shared the vision and drawings for where we were headed in this short video:
Now that you’re up to speed, let me share with you what’s been done so far and what’s happening next!
Front Porch Update
Disclosure: This blog post contains affiliate links for products or services we think you’ll like. This means if you make a purchase from one of these links, Ideas for the Home by Kenarry® will make a small commission at no additional cost to you so we can keep the great ideas for the home coming your way. All opinions expressed are derived from personal experience.
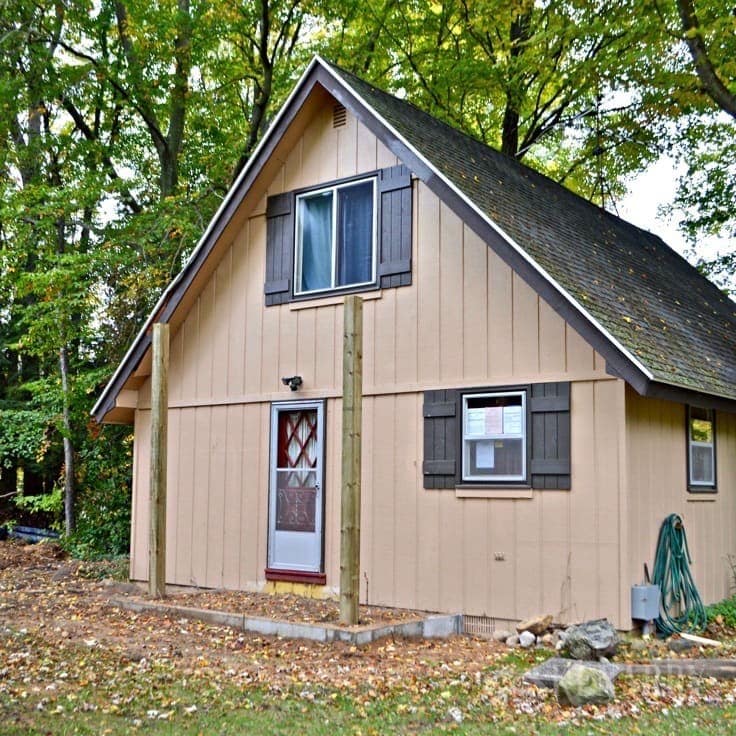
Here’s a picture of what the cottage looked like last fall when we started. We began by ripping out the existing small deck/porch and cement landing. Also, we moved all the large rocks out of the way.
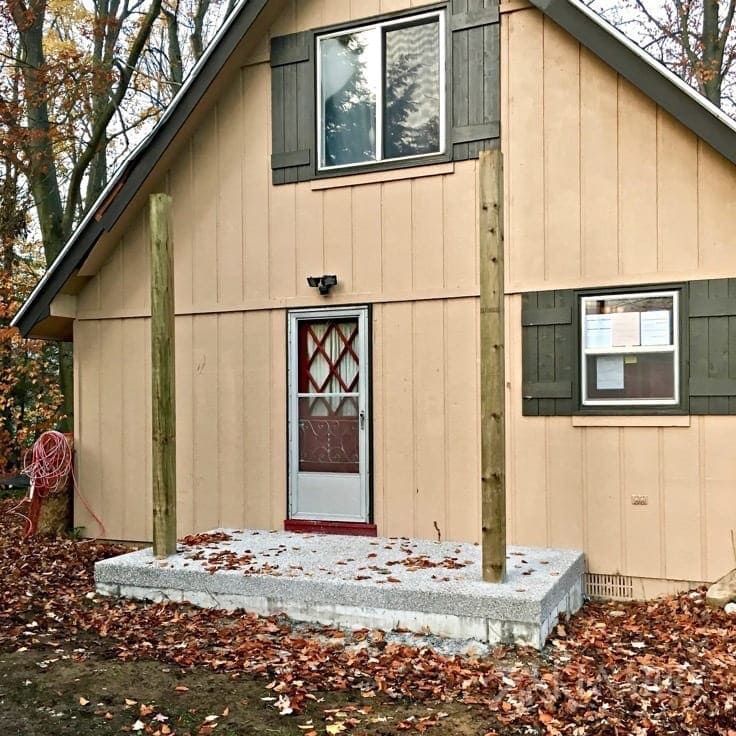
Next they poured the foundation for the new front porch and put up the large wood beams that will hold up the covered roof.
After that, they poured the cement slab floor for the new porch. We originally thought we wanted stamped concrete for the front porch.
However when my uncle who owns his own construction company in Pennsylvania was visiting last summer, he suggested we might want to consider exposed aggregate concrete instead. It’s more cost effective and might have a better “look” for our A-frame cottage. I’m so glad we listened to him. I just love the way the exposed aggregate looks.
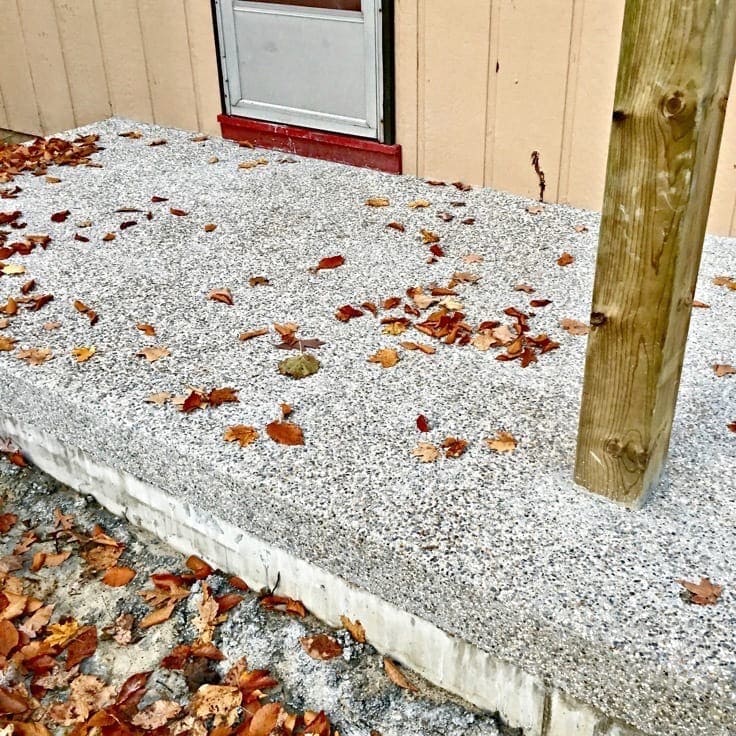
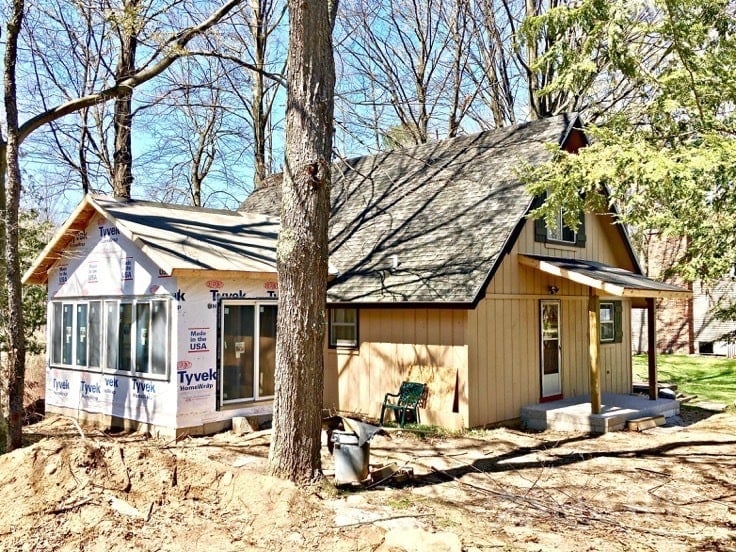
After that the front porch project went into hibernation mode for the winter months. When the builder and his team got started back up this spring, they added the roof, so this is what it looks like now:
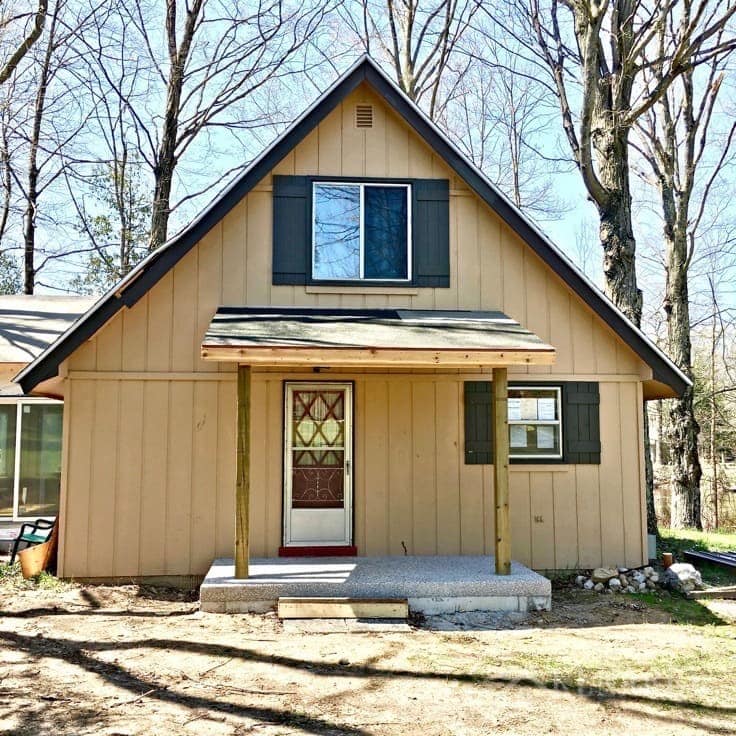
Next Steps for the Front Porch
Here is what’s happening in the next few months:
- Install a dark brown metal roof.
- Stain the woodwork.
- Wrap the posts/pillars with river rock.
- Pour more exposed aggregate concrete to create a step around all three sides of the porch. There will also be wide landing of exposed aggregate concrete at ground level. It will be about the width of a sidewalk around all three sides of the porch to help minimize the dirt we track into the cottage.
- I’m on the hunt for a four foot wide dark brown mission style bench to put on the right side of the door as you’re looking at the front porch. We spend a lot of time traversing back and forth to my parents or playing in the river, so I’d like a spot where our family can take our dirty shoes off before we head inside. I’m trying to decide whether to go with a low maintenance all weather bench made with plastic like this. Or a classic mission style Amish wood bench like this that would have to be stained periodically.
- We’re debating about whether to change out the front door as part of this project or to save it for a future year. If I was going to change it out now, I have my eye on a gorgeous craftsman style door like this one.
Sunroom Update
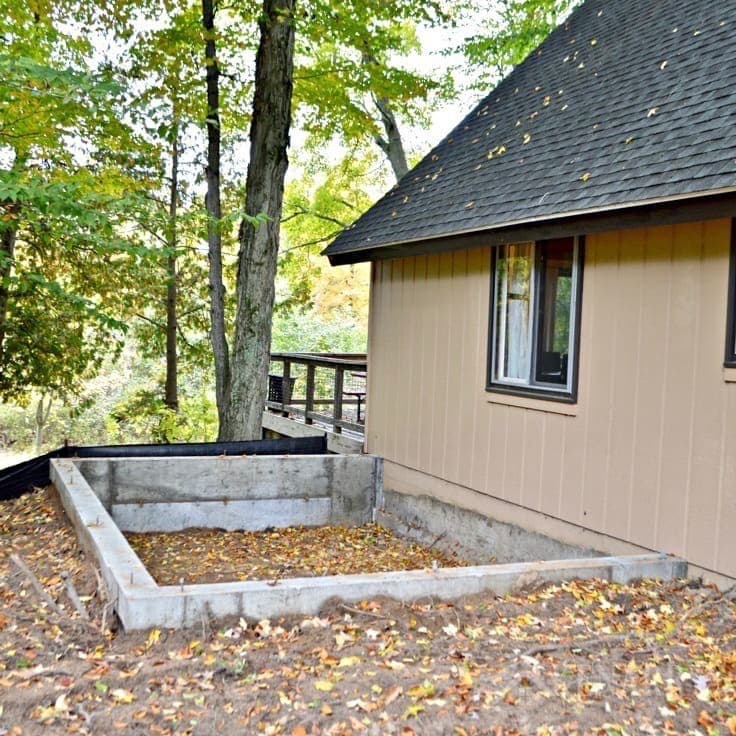
To start the sunroom last fall, the builder put up some environmental protections and had excavating work done to prepare the area.
Next the cement foundation was poured. It was exciting to see the footprint of where the new sunroom would be — and just how big a 12 foot x 18 foot room really is!
Once the cement for the foundation cured, the team of builders got to work framing the sunroom. Now it was really starting to look REAL. In this photo, you can also see where they had to cut into the existing roof line to create the addition.
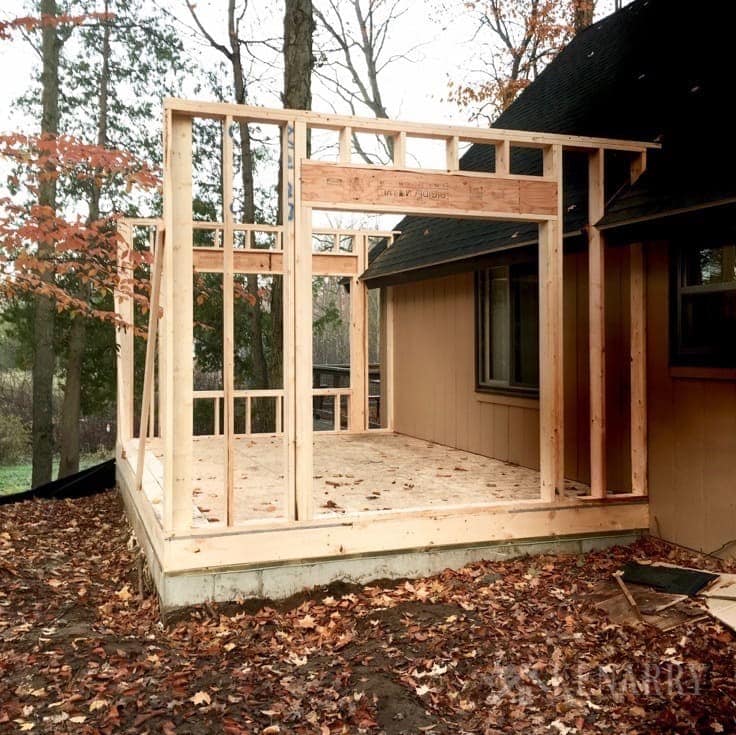
After that, it wasn’t long before they added the roof as well as tons of windows and two slider doors. One of the slider doors is in the interior of the sunroom connecting the addition to the main part of the cottage. The other slider door is on the front of the sunroom facing towards the road. They also closed up the exterior walls to button everything up for a long Michigan winter.
Oh — and I would be remiss, if I didn’t mention that my super awesome amazing dad who lives next door ran all the wiring for the electrical outlets and lights before the winter break too. It’s been such a blessing having him right next door to the project as he’s been able to pop over regularly to keep an eye on the progress for us.
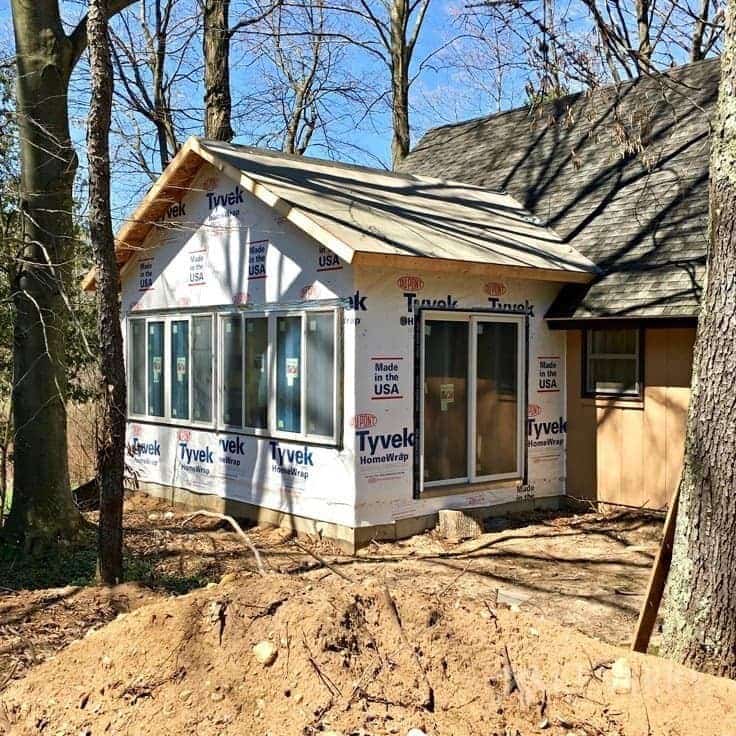
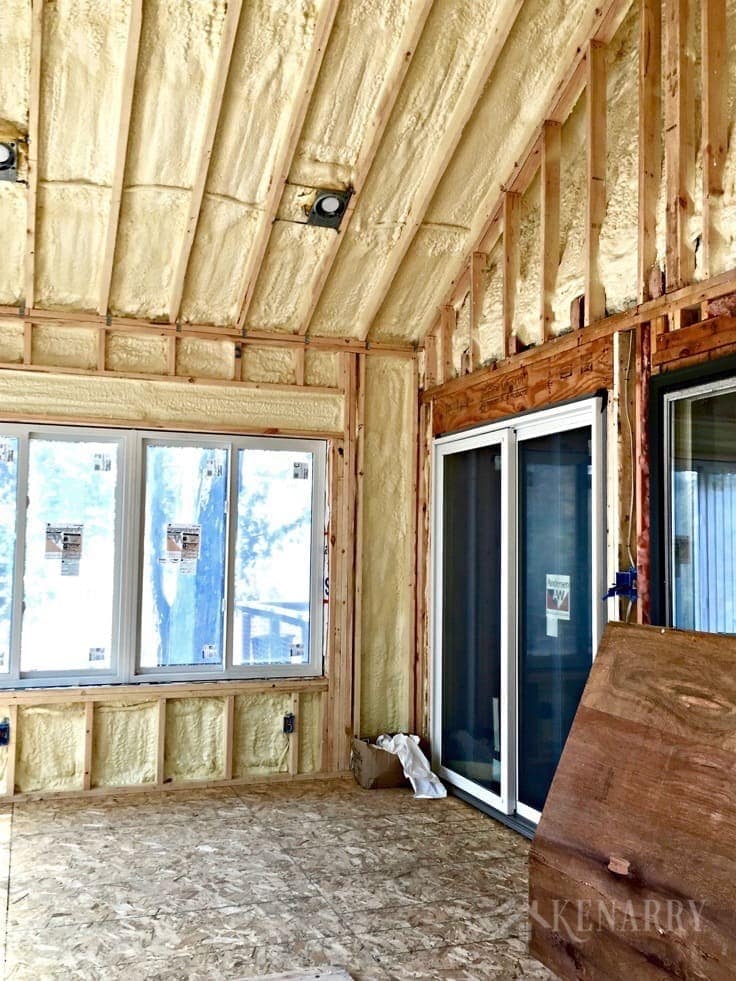
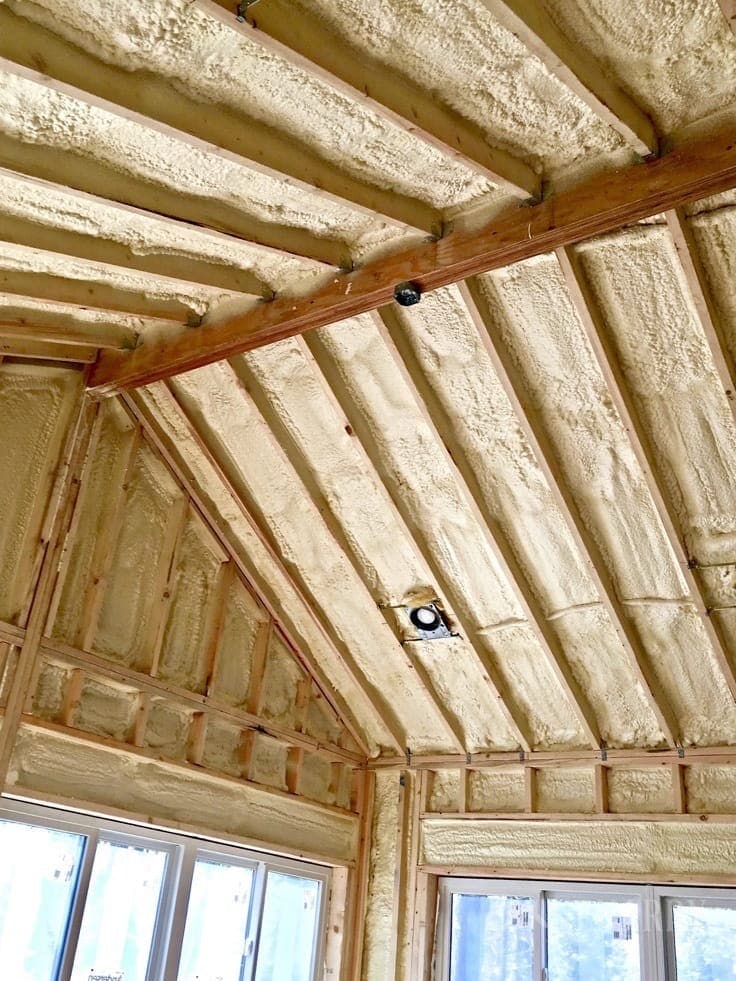
When we came back up to the cottage for the first time this spring, it was pretty much the same as it was when we left last fall. The only new thing that we could see was insulation has been blown into the walls and the ceiling. In the photo below, you can see the new interior glass sliding door I was telling you about earlier.
Next Steps for the Sunroom
Here is what’s happening in the next few months on the outside:
- This winter, the builder also painted the exterior siding for the new sunroom. It will be reverse board and batten panels to match the rest of the exterior of the cottage. That should be going up very soon.
- A dark brown metal roof will go on top of the sunroom addition to match the new roof over the front porch.
- My dad will install an oil-rubbed bronze exterior light to the left of the glass sliding door. It will have a motion detector on it to light the way for us if we’re walking up from a bon fire by the river or walking home at night from playing games next door at my parents’ house.
- Exposed aggregate concrete will be poured outside the exterior glass sliding door to create a step down to the ground. Then they will also pour a sidewalk that connects the sunroom to the new front porch.
- Then later this summer, we’ll do some basic low maintenance landscaping around the cottage.
Here is what’s happening in the next few months on the inside:
- Over the winter, the builder whitewashed pine boards to give the interior walls and ceiling that shiplap look that is very popular right now. We wanted them whitewashed so that some of the natural wood grain and knots will still show through and give the room a rustic appearance. I think it will be perfect for a woodsy riverside cottage. The building team will be putting up the boards in the next few weeks (possibly even before this post is published — **fingers crossed!**)
- After the interior walls are done, my dad will complete the electrical work, including outlets in the walls, switches and four can lights in the ceiling. He’ll also be putting up a ceiling fan along the beam that runs across the peak of the sunroom. At some point the structural beam will be encapsulated by rough cut wood and stained to look like a rustic beam.
- Kent has already run the wiring for stereo speakers, so he’ll need to install the actual speakers once the ceiling is completed. We already have one Sonos unit inside the main part of the cottage, so we’ll add a second Sonos unit to create a new zone. This will allow us to have the choice of listening to the same music or different music than what’s being played in the main part of the cottage.
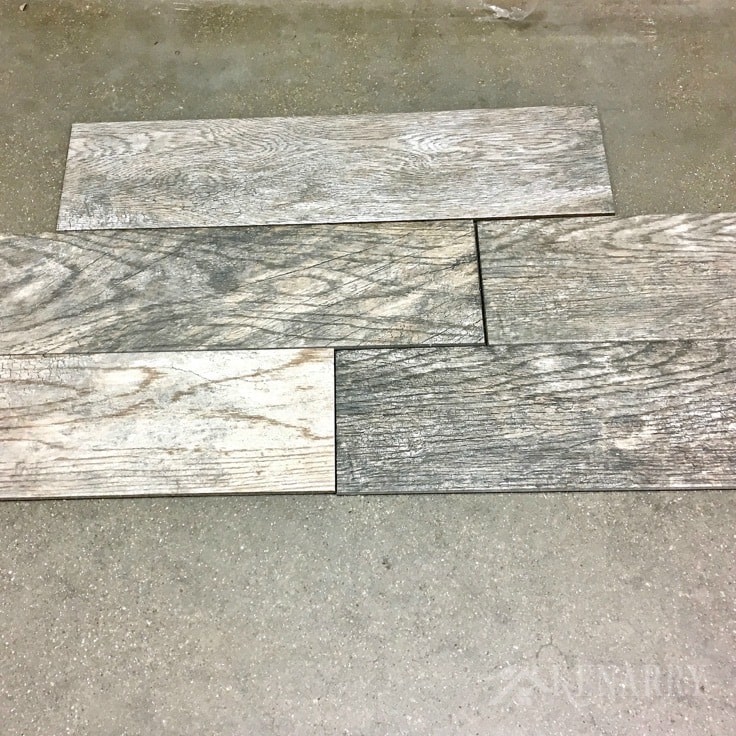
- Once all that’s done we’ll tile the floors. Kent and I have picked out rustic wood looking porcelain tiles at Home Depot. If you watched the video about our plans for this project, you heard me say we were considering either vinyl or tile flooring for the sunroom. When we talked to vinyl manufacturers, they strongly advised against using vinyl in this space. Although the sunroom is well insulated, it isn’t temperature controlled and we shutdown the whole cottage entirely during the winter. Porcelain tiles will give us a similar look and the durability needed to withstand Michigan winters and the muddy mess of our two growing boys and scruffy mutt.
And then finally, we’ll get to my very favorite part of any project — furnishing and decorating! Make sure you subscribe to get our Ideas in Your Inbox newsletter or stay tuned for next week. I’ll be sharing some of my ideas for decorating the new sunroom plus a sneak peek of the furniture we’ve ordered.
Love the ideas you see here on Ideas for the Home by Kenarry®? Subscribe today to get our FREE DIY & Craft Planning Calendar, plus our weekly Ideas in Your Inbox newsletter filled with creative tips and exclusive offers!
What’s Next?
Well, that brings you up to speed on where we are with our cottage renovations. Before you go, be sure to check out other home improvement and DIY projects on Ideas for the Home by Kenarry®.
Wonderful Post….! I like Your Home improvements all decoration tips and ideas. This is very helpful post for my living room. I love Your Post…
Thanks for sharing Your Post….!