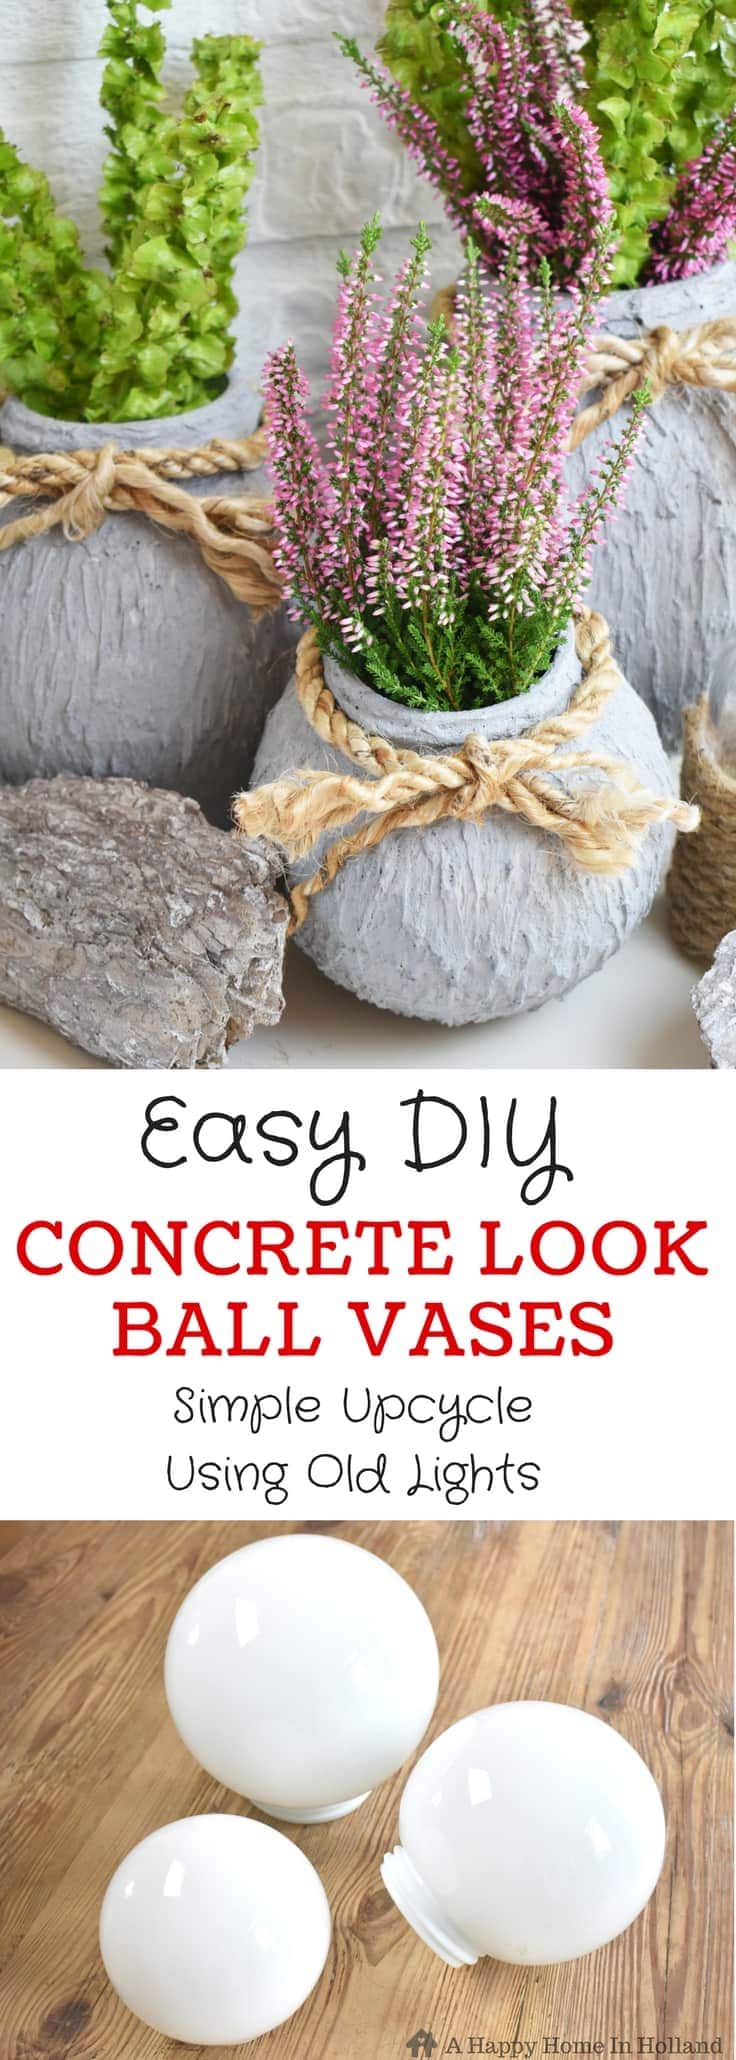
DIY Faux Cement Ball Vases: Easy Upcycle Idea
THIS POST MAY CONTAIN AFFILIATE LINKS. PLEASE SEE OUR FULL DISCLOSURE POLICY FOR DETAILS.
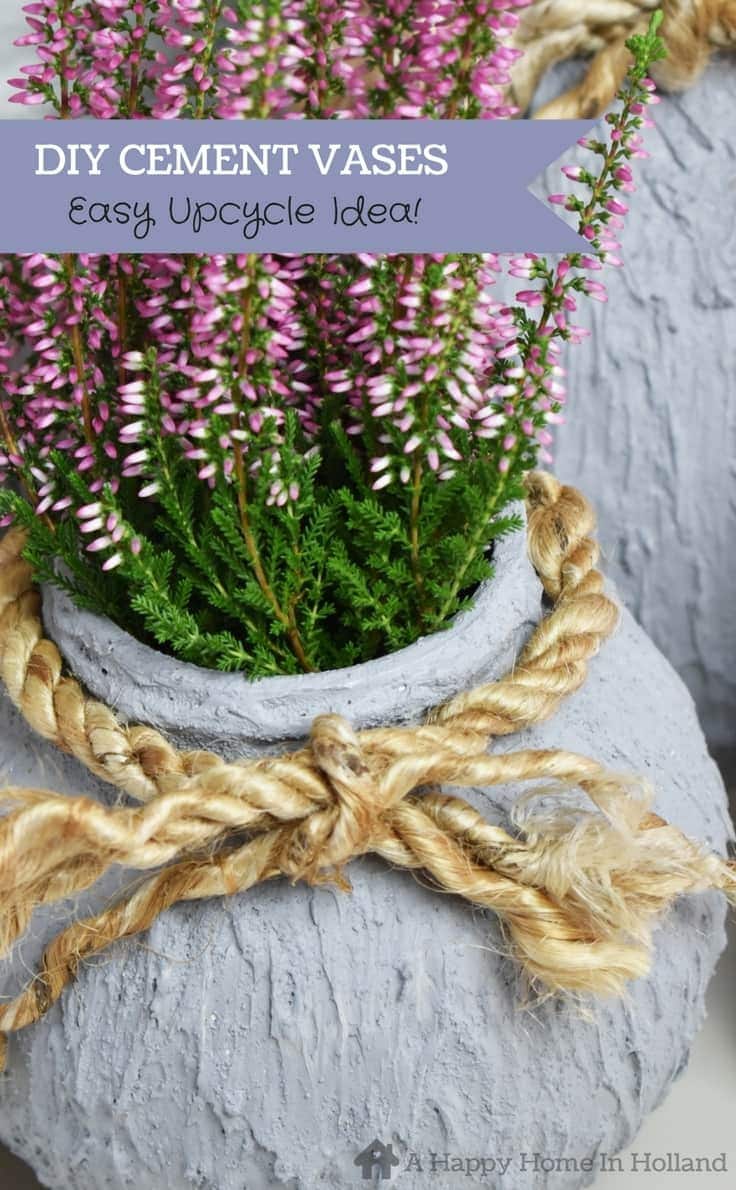
Create faux cement textured vases for your fall decor by upcycling old sphere light fittings. Using cheap discount store wall filler and gray textured paint you can easily create these trendy vases for your home.
Faux Cement Vases the Easy Way
Hi there, Kenarry readers! It’s Sam from A Happy Home In Holland and I am back this month with a fun upcycle project that is perfect for fall!
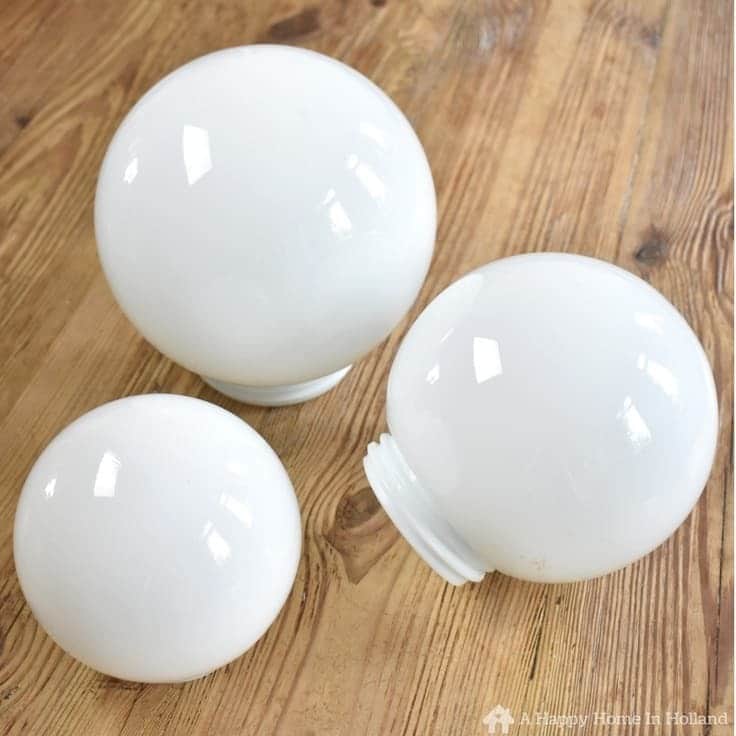
So tell me, have you seen these white glass ball light fittings lying around in thrift stores?
I have seen other people upcycling these light fittings and using them together with solar lighting fixtures to create trendy orb lighting features for their gardens.
Whilst I think these look pretty cool, I wanted to do something a bit different.
I managed to find 3 glass orbs in 3 different sizes which I knew would be perfect for what I had in mind.
At the moment here in The Netherlands, it’s very popular to use natural elements teamed up with concrete or cement look accessories.
So I thought I’d create something similar that I could incorporate into my home decor during the fall period.
These are so unbelievably simple to make and this project isn’t half as messy as you would think.
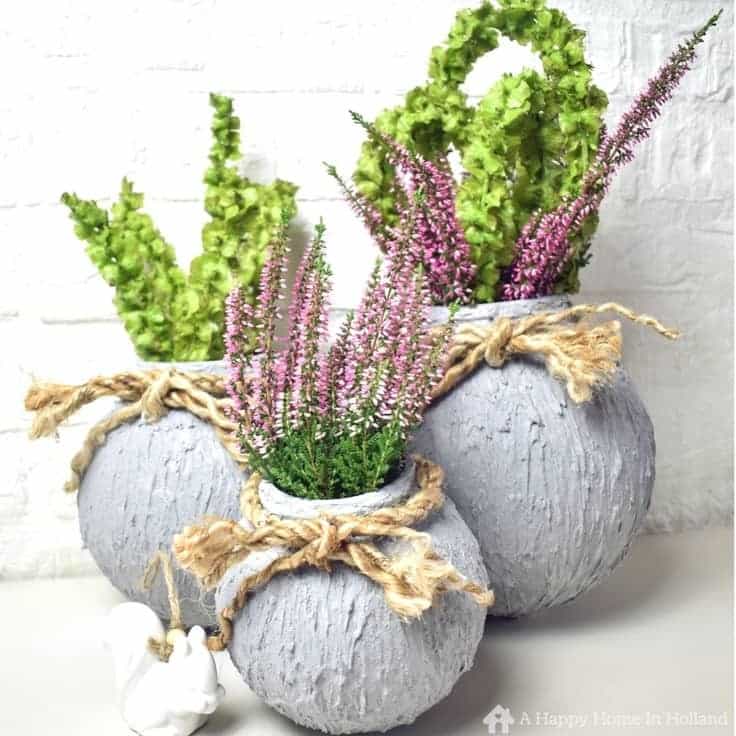
Faux Cement Ball Vases
I made these earthy vases to hold my plants. They can display all kind of greenery – like flowers or ferns. Here are the supplies you’ll need and the instructions.
Supplies
- Glass orb light fittings
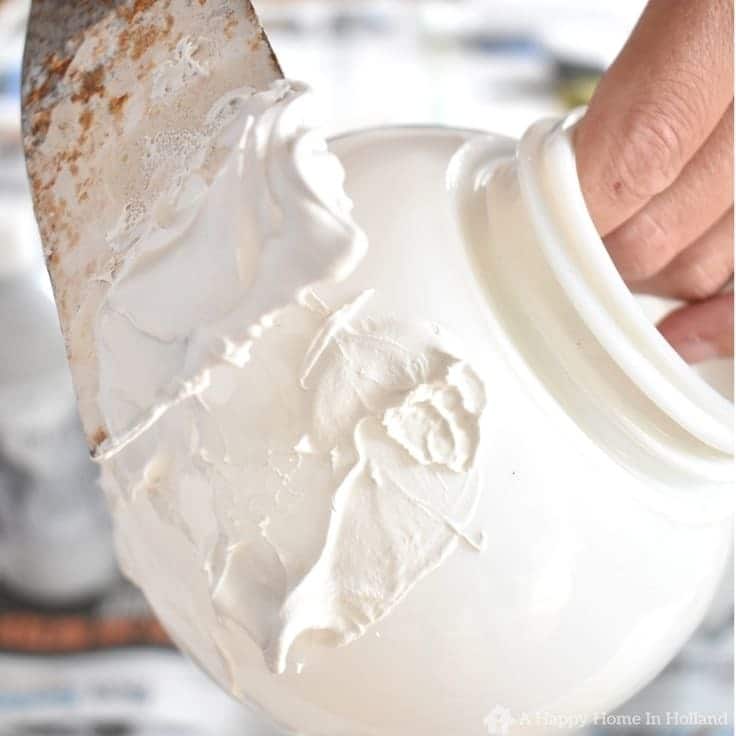
- All purpose wall filler
- Putty knife or another item to apply filler
- Newspaper or drop cloth
- Gray structure paint (this is what I used but different colored paints would also look great here – think chalk paint, metallics or high gloss. You could search Amazon for “paint with sand texture” or something like this Krylon K18202 Coarse Stone Texture Finish Spray would work well.)
Instructions:
1. Lay your newspaper out to protect the table surface.
2. Wipe dust and grime off the orbs.
Applying The Filler
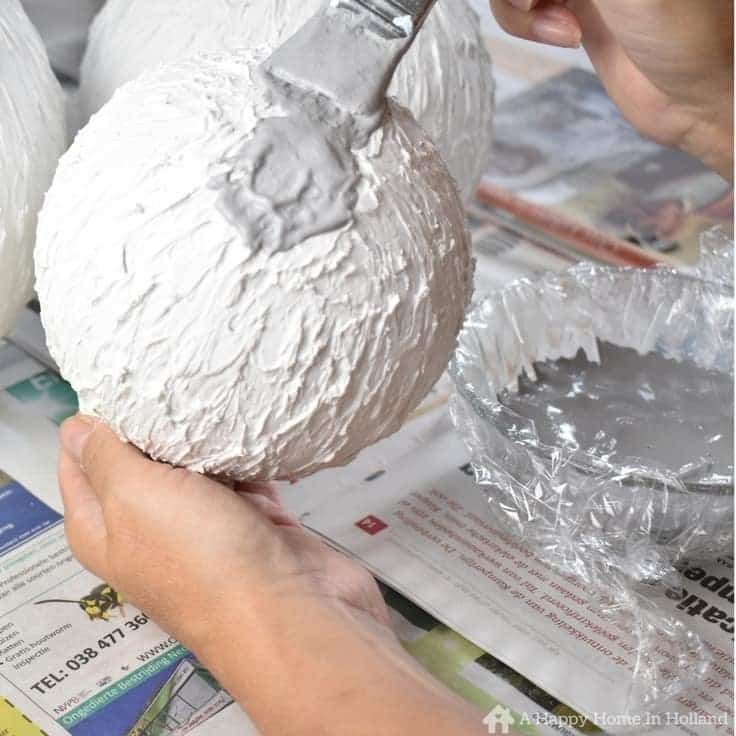
3. Hold your orb by putting your hand in the opening (this is the easiest way to hold it to avoid getting in a mess).
Start applying your wall filler with the wallpaper scraper (or other items) and play around with different motions to create different textures.
I applied mine then used rhythmic downward strokes to create an uneven spiky texture. You could also dab it with sponges, smooth it with your hands or use brushes to stipple the surface – have fun with this and play around to find an effect that you like.
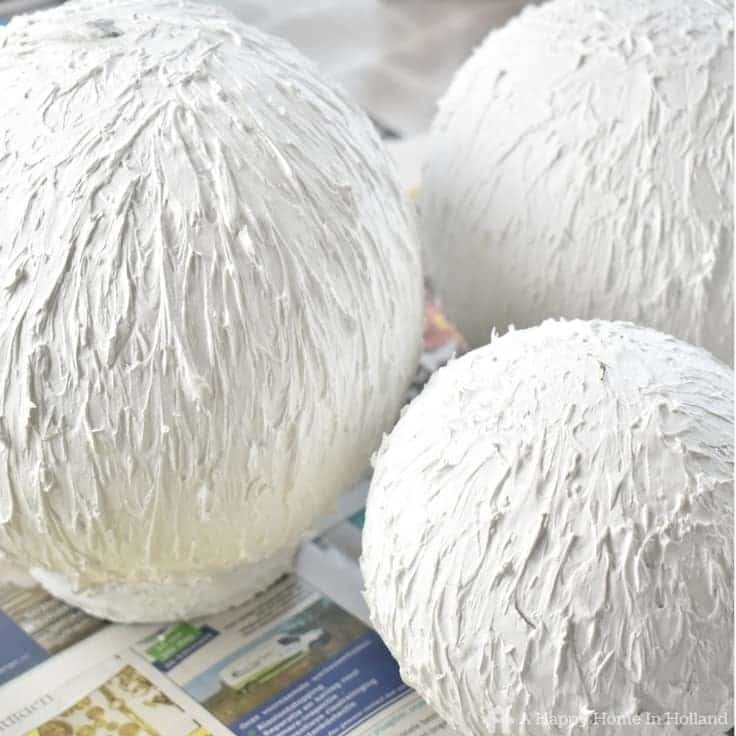
You may want to add extra filler on the bottom of the ball and create a bit of a flat bottom here to help them stand when they are dry (I didn’t but wish I had in hindsight – I have stabilized mine using a bit of blu tack).
4. Carefully place the orb upside down (with the opening facing downwards) and leave to dry over night.
*tip – don’t put filler on the very top of the ball otherwise it will stick to the newspaper (you can cover this with paint later).
Painting The Vases
5. Once the wall filler has completely dried, paint your orbs with your choice of paint and allow to dry.
You will need to do this in two sessions so you can turn it over and finish painting the top bit.
I used a textured cement look structure paint which is pretty much a sort of gray chalk paint with a bit of sand in it to give it extra texture.
Dressing The Vases Up
6. Next, I tied a piece of thin rope around the neck of the vase to dress it up.
Creating A Fall Display
7. The last and final step is another fun bit! Now you can get really creative and decide what you want to display in your vases.
My plan was actually to fill them with hydrangea flower heads but unfortunately, mine have just finished blooming.
I didn’t want to have to buy anything extra for this project so I decided to go out and about and have a look around.
It’s surprising what you can find if you go looking!
I managed to find these funky seed pods from a wingnut tree and some pretty pinky purple colored heather which I thought would be perfect to fill my faux cement vases.
More DIY Projects
Here are a few more of my easy DIY projects that you may like
Mod Podge Wooden Tray Makeover
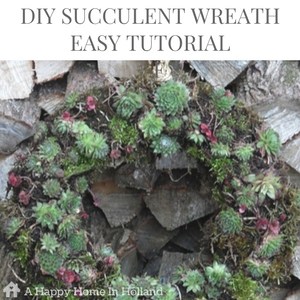
How To Make A Living Succulents Wreath
Love the ideas you see here on Ideas for the Home by Kenarry®? Subscribe today to get our FREE DIY & Craft Planning Calendar, plus our weekly Ideas in Your Inbox newsletter filled with creative tips and exclusive offers!
What’s Next?
While you’re here, be sure to check out DIY projects on Ideas for the Home by Kenarry® –
- How to Paint Beautiful Stepping Stones with Stencils
- Painted Wood Crate Storage Idea
- DIY Painted Glass Vases for Fall
- Flower Pot Makeover with Sunflowers and Bumblebees
Originally published September 2017. Updated September 2018.