How to Make a Menu Board
THIS POST MAY CONTAIN AFFILIATE LINKS. PLEASE SEE OUR FULL DISCLOSURE POLICY FOR DETAILS.
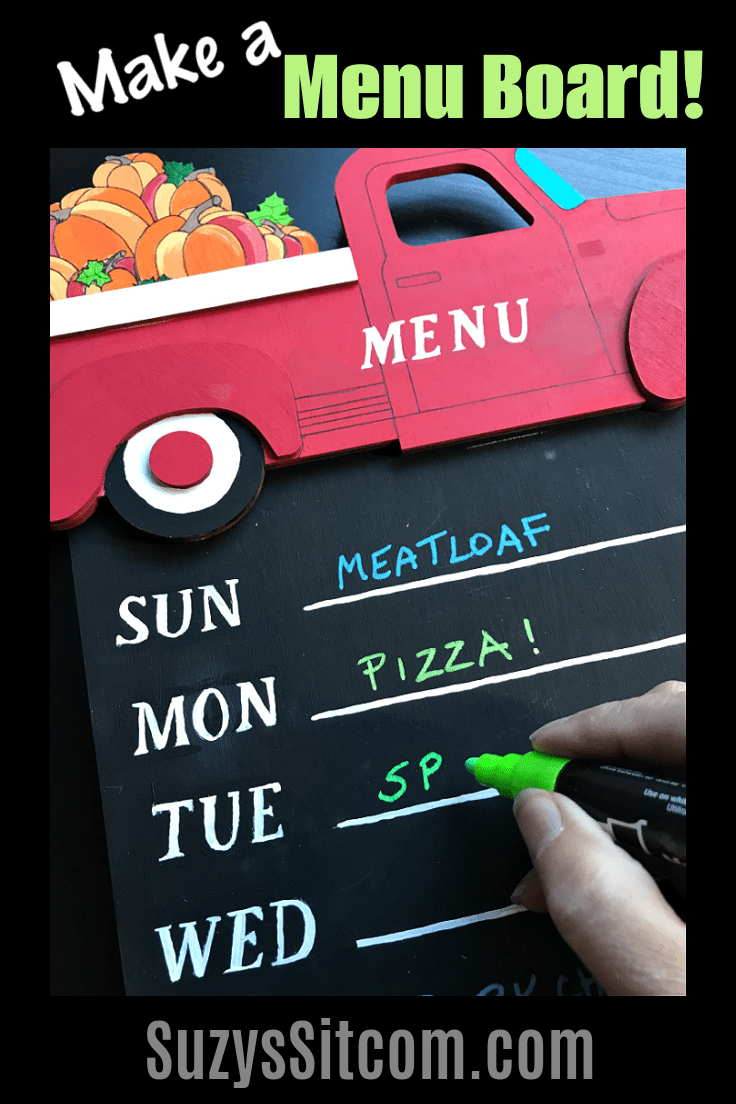
Keep track of your weekly menu plan with this fun to make menu board. Made with wood pieces, chalk paint and acrylic paint, you can change out this colorful menu for the seasons. Stay organized and add a whimsical touch to your kitchen at the same time!
Create a fun menu board that you can change out with the seasons! This easy craft idea is fun to put together and adds a cute touch to your kitchen decor. The board is created with the use of chalk paint and easily erases so that you can update your new menu board each week!
Use this menu board with our Clutter Keeper Meal Planner. It has printable grocery lists, a way to track favorite recipes, and inventory pages (and more!).
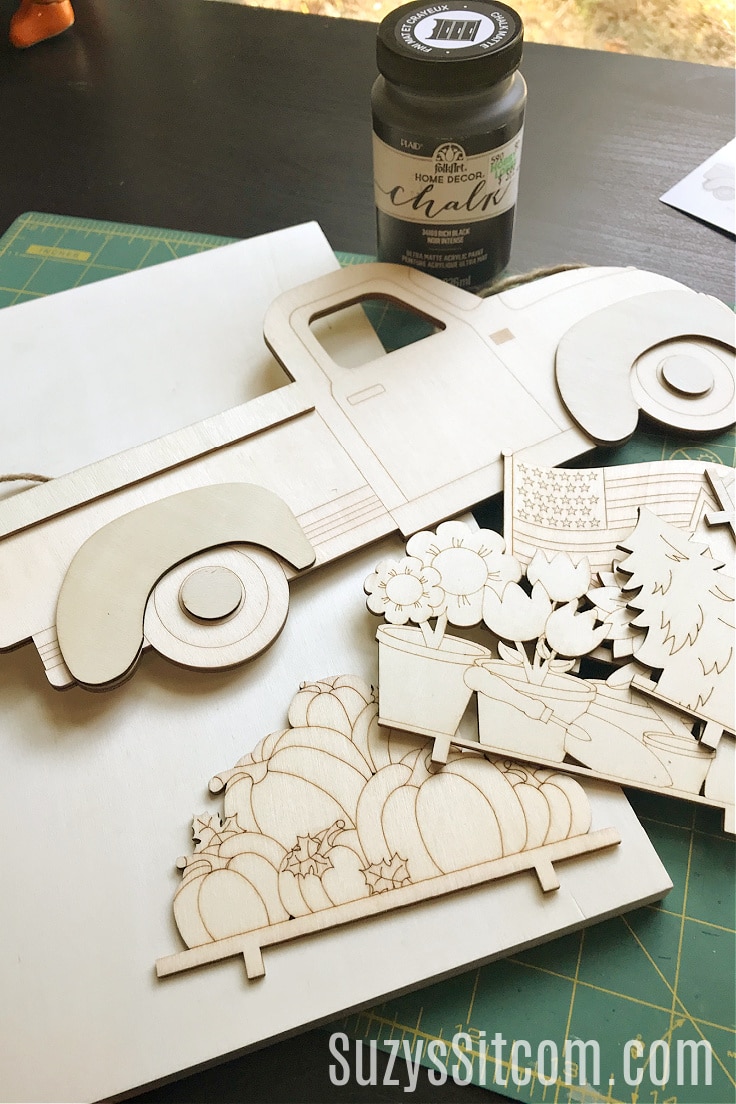
This is Suzy from Suzys Sitcom, and I’d love to share my latest project with you! Unfinished wood pieces are a huge inspiration to me and while perusing my local craft store last week, I ran across a cute set of unfinished laser cut pieces that included a wooden pick up truck and four seasonal pieces to add to the back. It was just what I needed to top off a menu board idea that had been swimming around in my brain.
Staying organized can be a bit of a chore sometimes. Creating a menu board takes some of that work and makes it fun!
If you like this little wooden truck, you’ll adore the DIY bookends that contributor Amy made!
How to Make a menu board
This project utilizes an unfinished wooden truck set that I found. I’ve included the link to that set, but you can always choose to add any other laser cut decoration to the top of the board to make it your own! The entire tutorial is in a printable card at the bottom of this post. But first, here is a little bit of info about the tools and supplies you’ll need.
What you need:
Want more ideas like this? Subscribe today to get our weekly Ideas in Your Inbox newsletter plus other exclusive gifts and offers — all for FREE!
- Unfinished Wooden Plaque 11″ x 14″
- Unfinished Wood Truck with Interchangeable Pieces (you can also get it at Hobby Lobby)
- Black Chalk Paint
- White Colored Pencil
- Sharpie Fine Point Marker
- Stencils
- Acrylic Paint
- Chalk Markers
- Hot Glue
Tips to Create Your Menu Board:
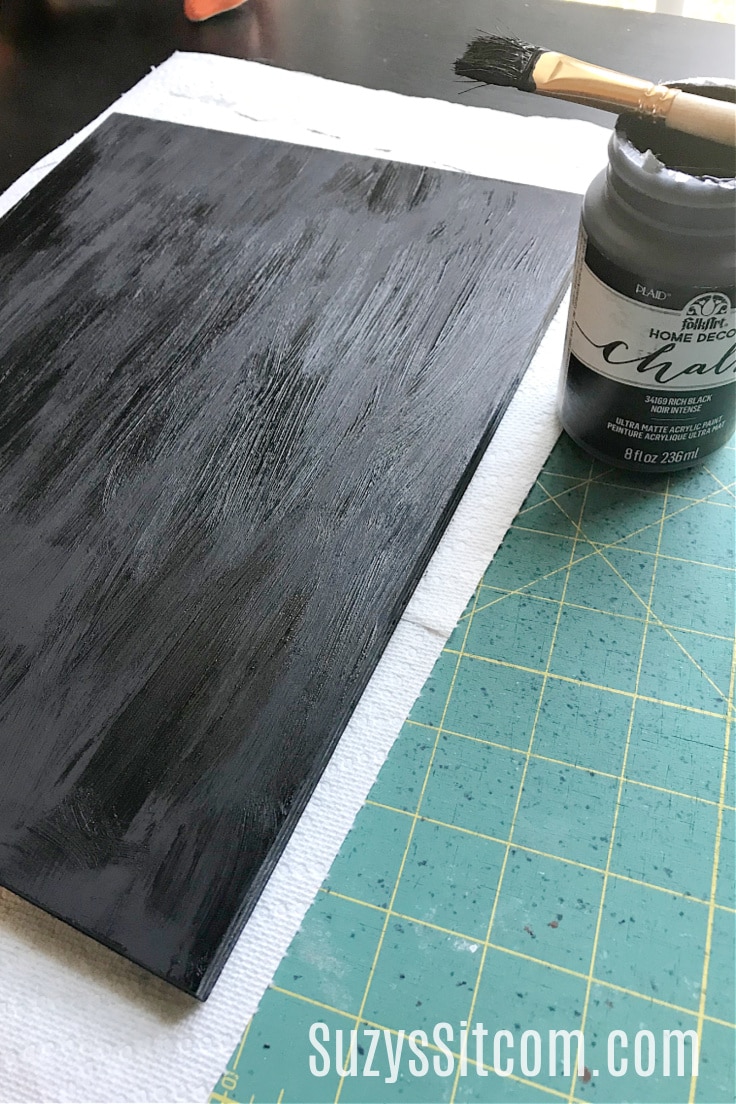
Paint the board with Chalk paint
Use chalk paint to paint the 11″ x 14″ wooden plaque. Paint in an even coat, allow it to fully dry, and then paint a second coat. Do not add any type of sealant or clear coat on top.
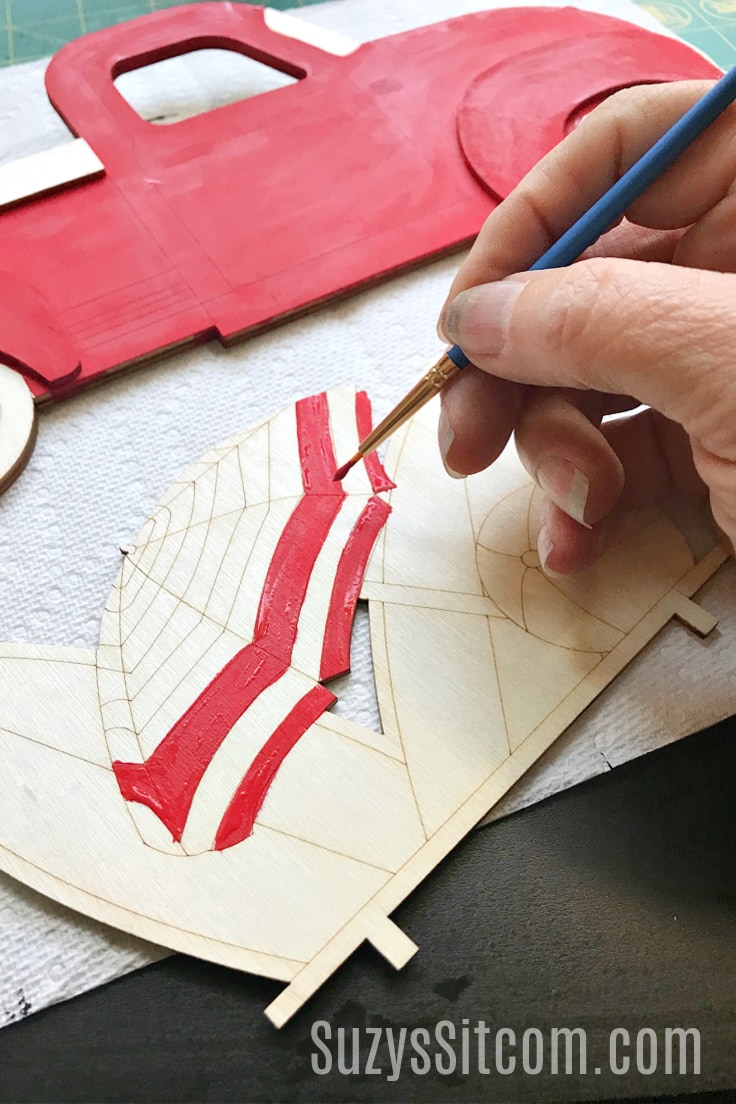
Paint the Wooden pieces
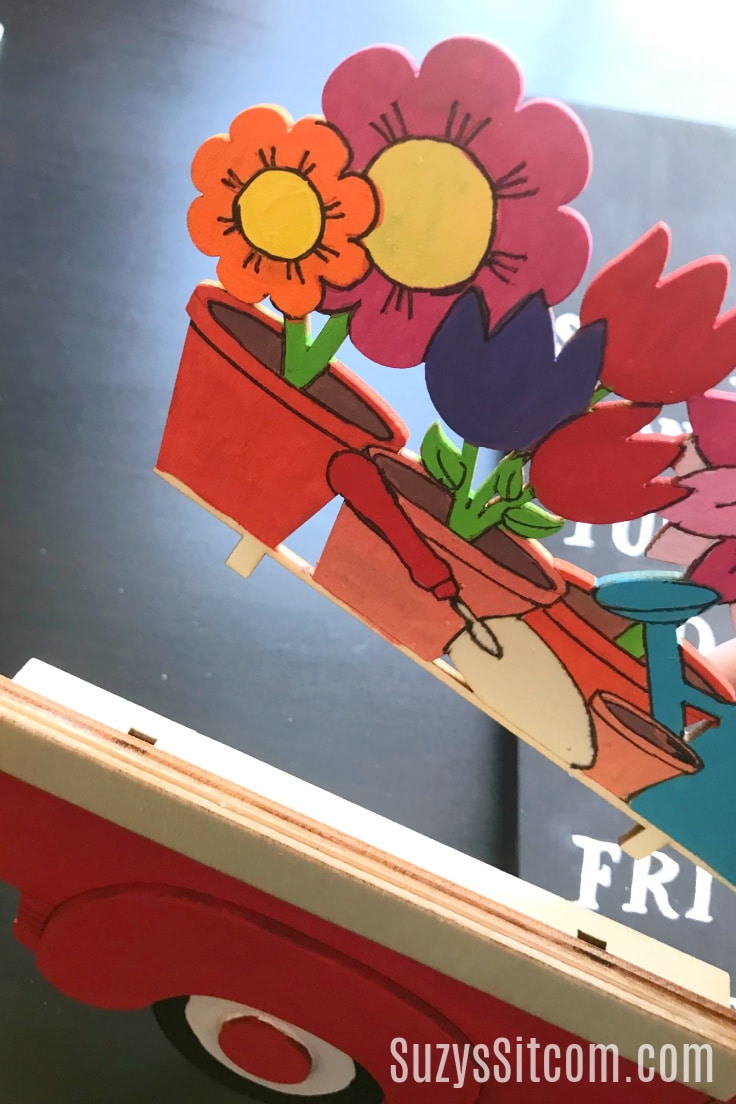
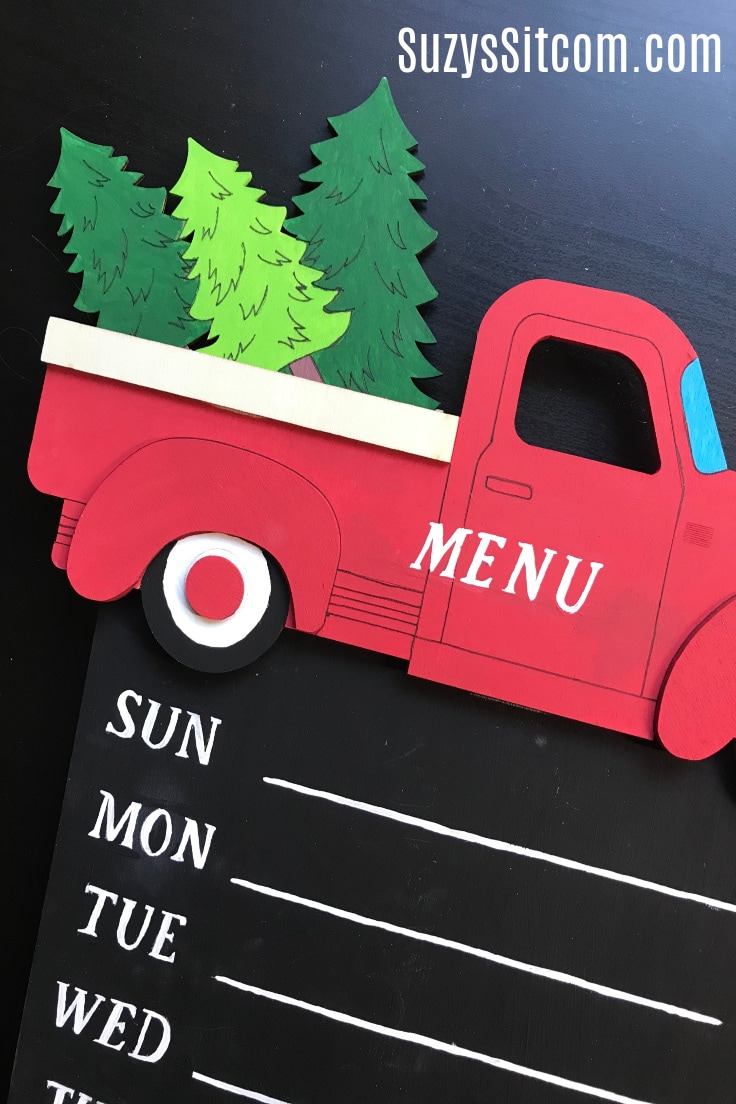
Use colorful acrylic paints to add color to the wooden pieces. Each piece is laser cut and includes little outlines to follow. Simply wait for each color to dry, before adding the next. It is a little like coloring in a coloring book. Choose the colors that you love!
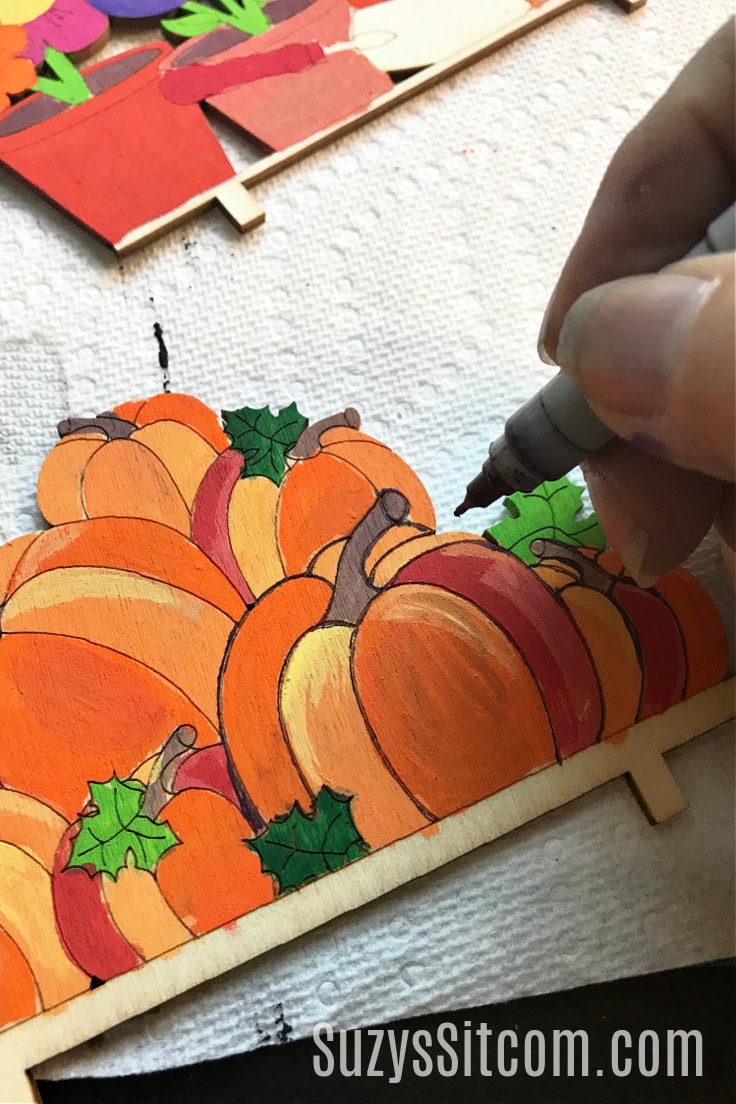
Add outlines to the wood pieces
Once the acrylic paint is entirely dry, use a fine point black Sharpie pen to add small details on the painted wood pieces. Follow the laser lines on the wood, or add your own details.
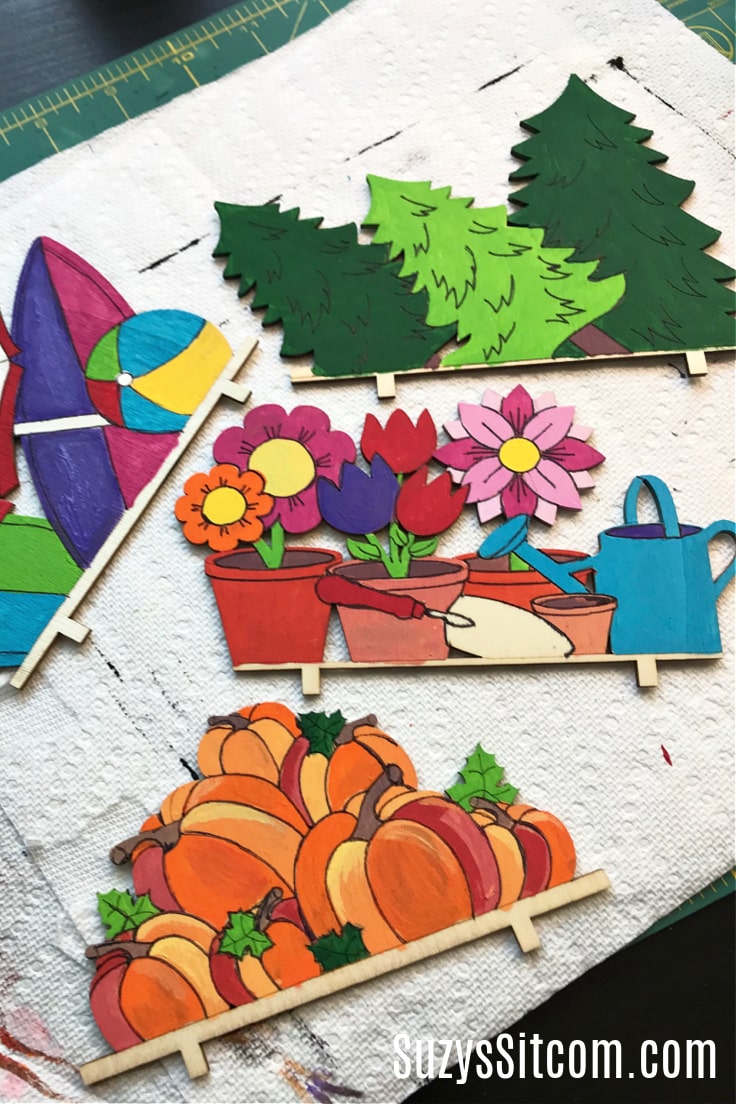
Here you can see all of my wooden pieces once they were complete.
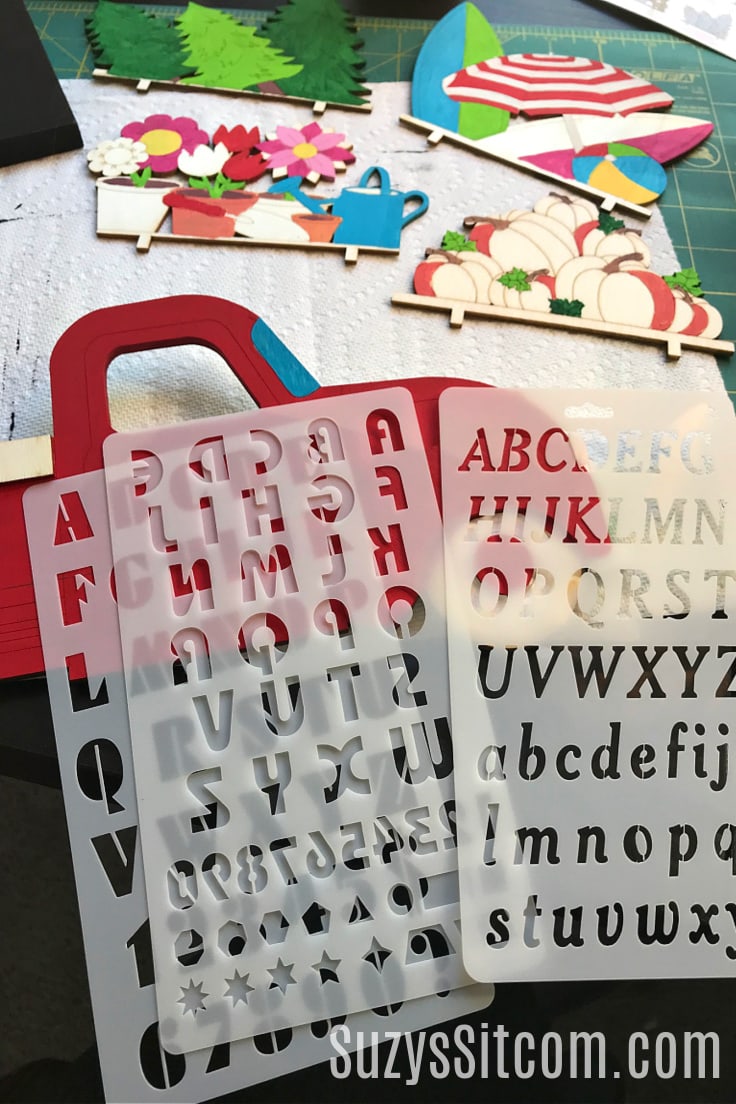
Use Stencils to add lettering
Choose a stencil font that you like and add the word “MENU” to the truck with a white colored pencil. Then use white acrylic paint to fill in the letters.
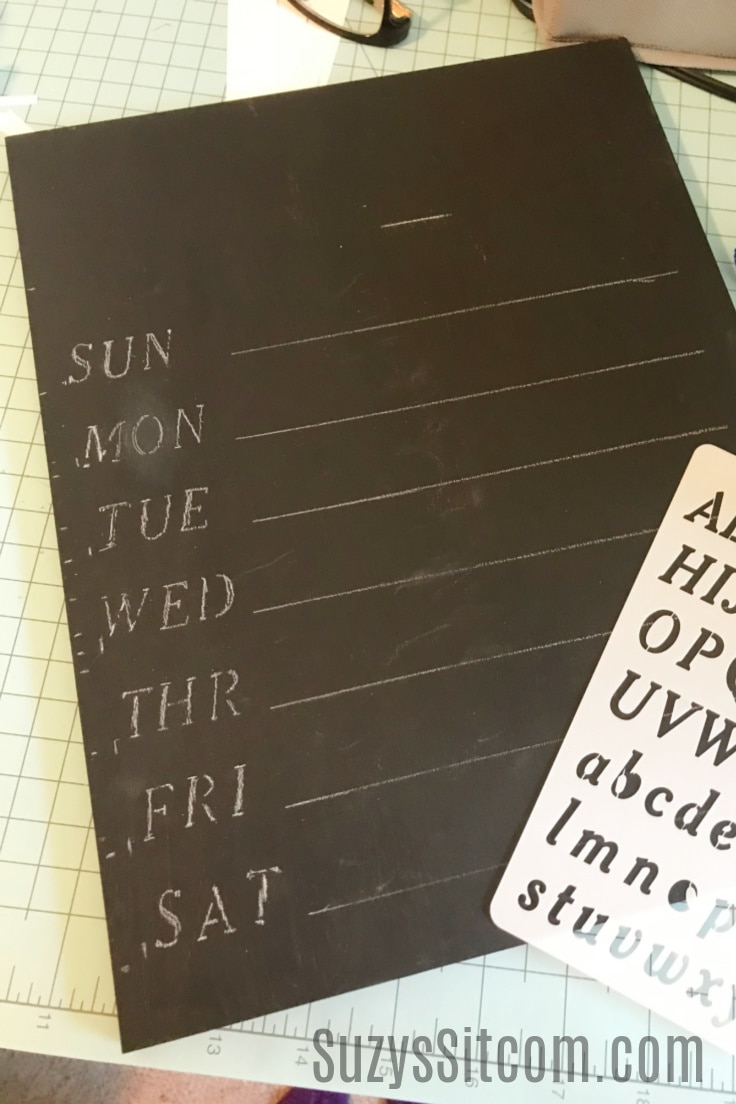
Be sure that the chalk paint is entirely dry before stenciling on the letters for the days of the week. Leave space at the top of the board for placement of the truck, then measure out lines with a ruler for each day of the week. Use the stencils and a white colored pencil to write in the days of the week. Make a mistake? No problem! A damp towel will remove the colored pencil easily.
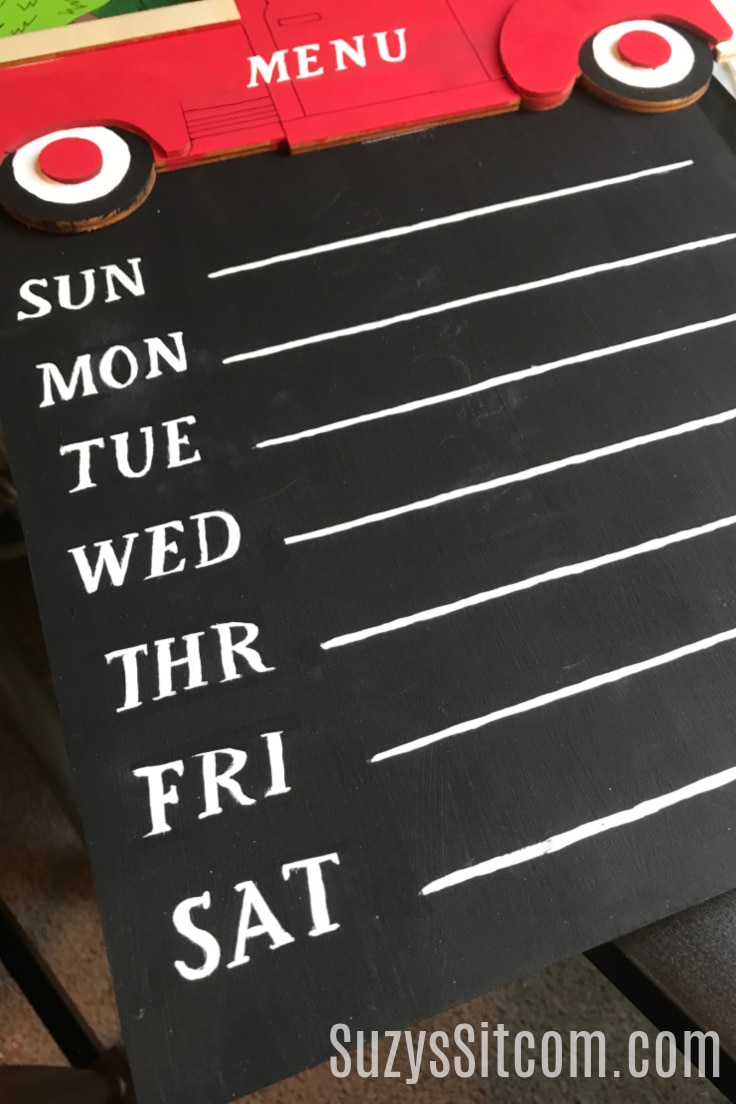
Paint in Letters with Acrylic Paint
Use white acrylic paint to fill in the letters and lines.
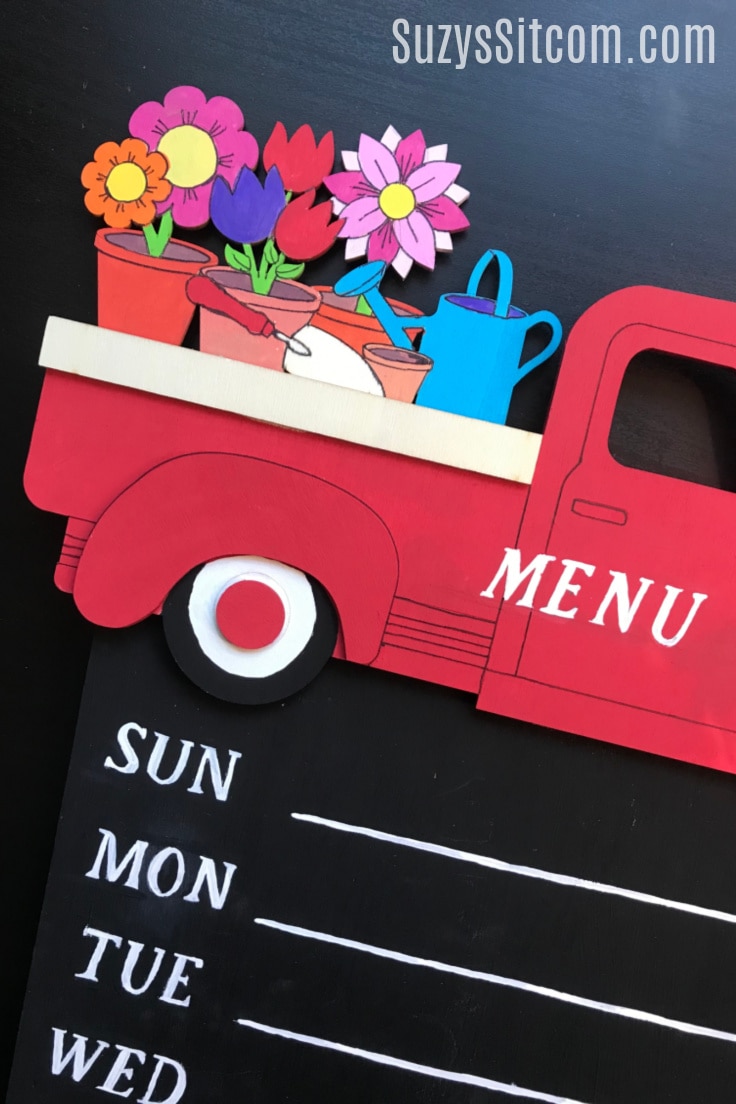
Glue the Truck to top of Menu
Use hot glue to glue the truck to the top of the menu board, centering it and overlapping over the menu board as shown.
Change out the seasons!
Each wooden piece represents a different season. Change out the seasons simply by placing a new wooden piece into the notches on the back of the truck!
Your menu board can look different all year long.
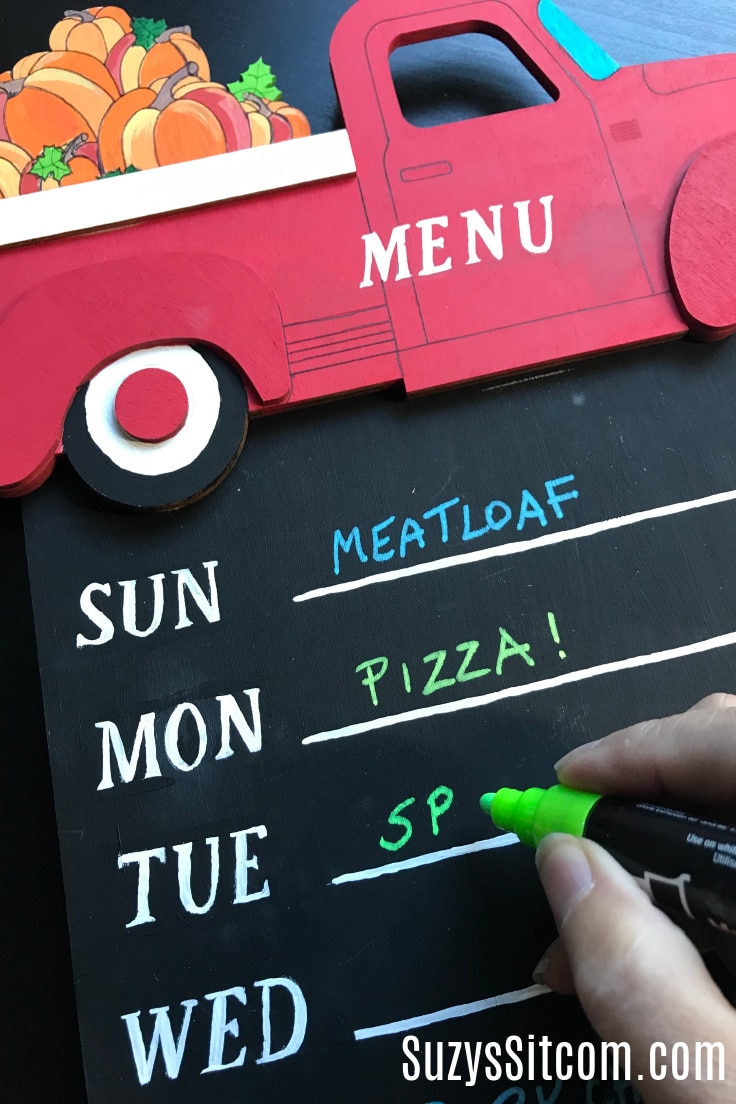
Use Chalk Markers to add in menu items
Colorful chalk markers are perfect for adding in your menu items! Simply add in your week of menus and when you want to change them out, wipe off with a damp cloth. It is a fun way to be organized and add a bit of fun to your decor at the same time!

Here’s the printable card with everything you need to know about how to make a Menu Board!
And if you want to share any of the recipes from the week with your family/friends/ use our free printable recipe card templates.

How to Make a Menu Board
Supplies
- 1 ea 11" x 14" Unfinished Wooden Plaque
- 1 set Unfinished wood truck with interchangeable pieces Any fun laser cut wood piece would work for this project!
- 1 ea Black Chalk Paint
- 1 ea White colored pencil
- 1 ea Fine Point black Sharpie marker
- 1 set Letter Stencils If you do not have a steady hand, vinyl stickers work well too!
- 1 set Acrylic Paints
- 1 set Chalk Markers
- 1 ea Hot glue gun and glue
Instructions
- Paint the 11" x 14" plaque with chalk paint and allow to dry.
- Paint the individual wooden pieces with acrylic paint.
- Once the paint had dried, use the fine point marker to add details.
- Use stencils and white colored pencil to add lettering to the chalk board and the word MENU to the truck.
- Fill in the lettering with white acrylic paint and allow to dry.
- Use hot glue to adhere the wooden truck to the top of the chalk board menu.
- Change out seasons as you would like.
- Add menu items with a chalk marker. Easily erase menu items with a damp towel.
Love the ideas you see here on Ideas for the Home by Kenarry®? Subscribe today to get our FREE DIY & Craft Planning Calendar, plus our weekly Ideas in Your Inbox newsletter filled with creative tips and exclusive offers!
Love to Paint?
If you love to paint, I have lots more fun ideas on SuzysSitcom! Here are just few!
3 Free Folk Art Patterns to Paint!
Create Painted Paisley Stones!
How to Make Faux Stained Glass
You may also enjoy these 3 painting ideas on Ideas for the Home by Kenarry® –