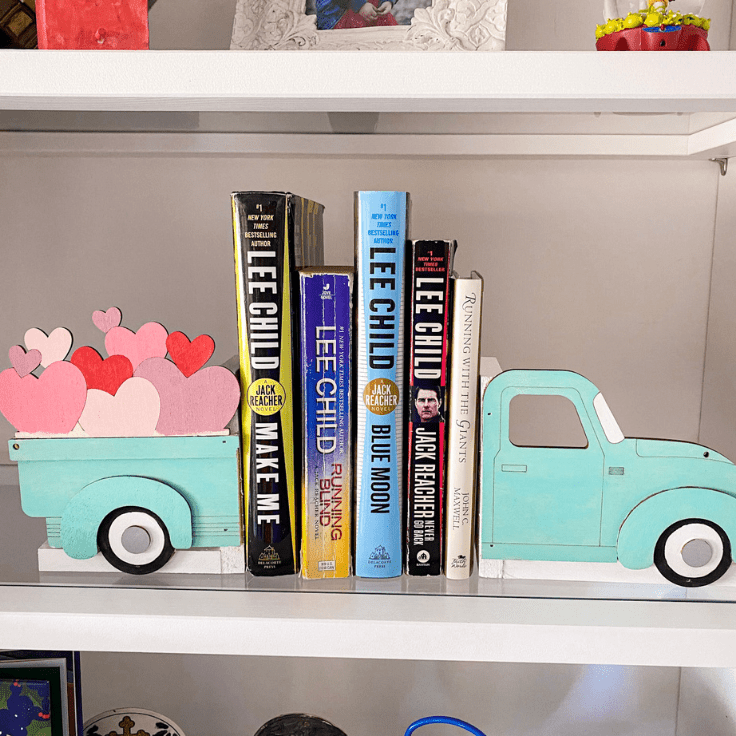
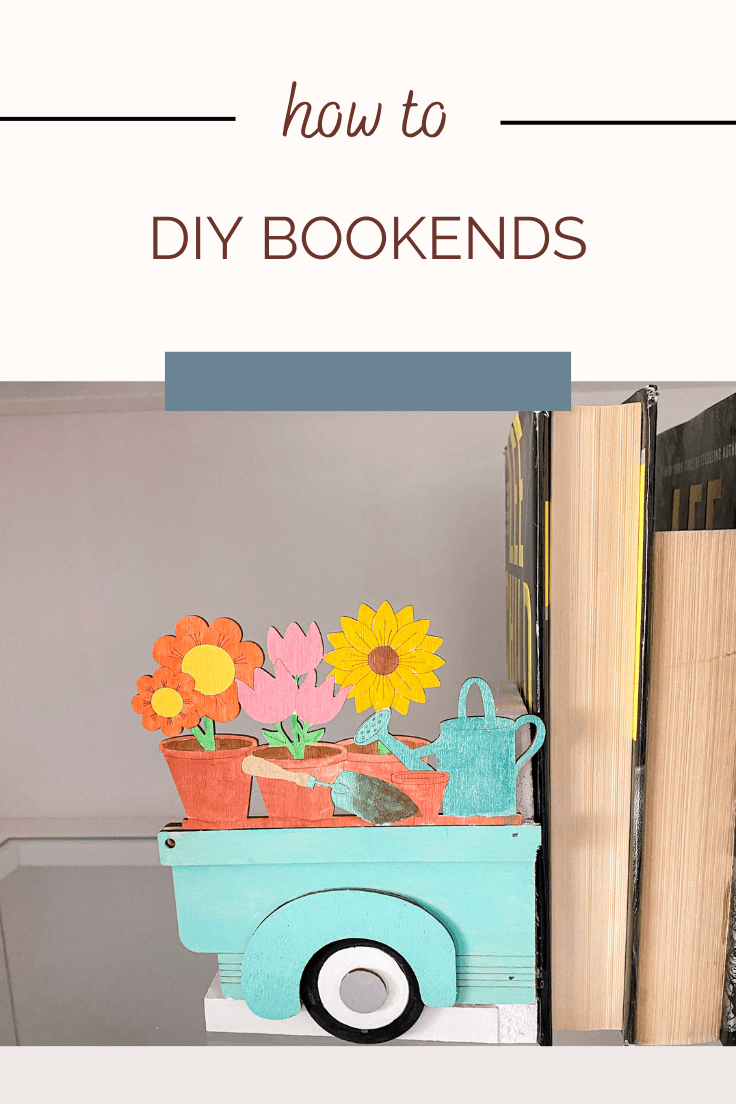
DIY Bookends: How To Make Truck Bookshelf Decor
THIS POST MAY CONTAIN AFFILIATE LINKS. PLEASE SEE OUR FULL DISCLOSURE POLICY FOR DETAILS.
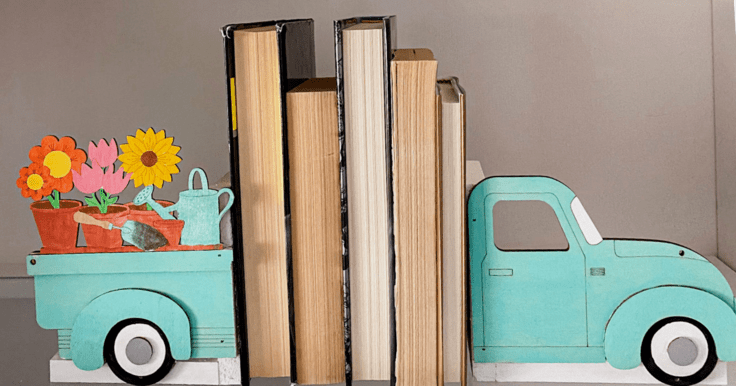
DIY Bookends should be fun and stand out among your books, but they don’t need to be expensive! Use a few tools to quickly make these cute, interchangeable bookends..
Hello! I’m Amy and I blog over at amylanham.com. I love to have seasonal decor throughout my house. I used to be really good about changing out my decor. But then I had kids, and I don’t have all the time, or space, for lots of individual seasonal decor.
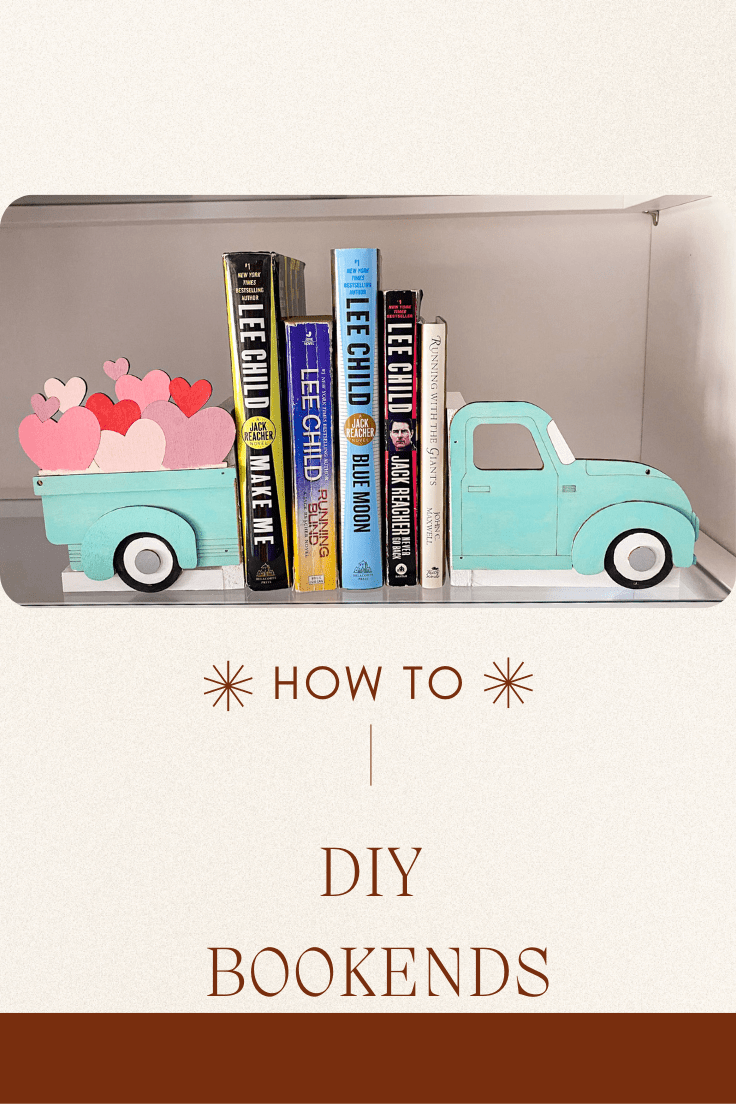
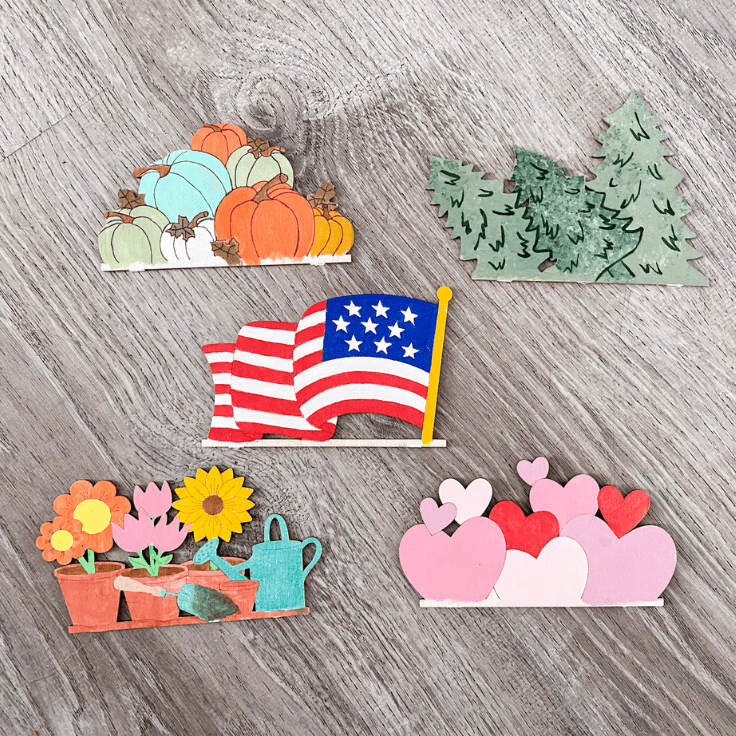
But I still enjoy having some decor that can change with the seasons. When I saw these trucks trucks with interchangeable seasonal decor, I knew I had to have them!
How to Make DIY Bookends
These bookends are super simple to make and can use scrap wood or supplies you already have. And I love a project that can help me use up some scrap wood!
What you need:
Want more ideas like this? Subscribe today to get our weekly Ideas in Your Inbox newsletter plus other exclusive gifts and offers — all for FREE!
DIY Tools Needed:
Supplies Needed:
These are the ingredients you’ll need. All the exact amounts are in the printable card at the bottom of this post.
- Wood Glue
- Interchangeable Truck
- 1/2″ thick by 3″ wide by 5″ tall wood
- Velcro (optional)
DIY Bookends Tips:
What if I don’t have access to a Miter saw?
No problem!
It makes the project easier if you do, but if not no problem. Use an exacto knife to cut the truck in half, instead of using the miter saw.
You can also use a hand saw to cut the wood to size, or if you go to a home improvement store, you can cut the wood to size there.
What if I don’t have a nail gun?
Again, this isn’t really that big of a problem. If you don’t have access to these tools, don’t think you can’t do this project!
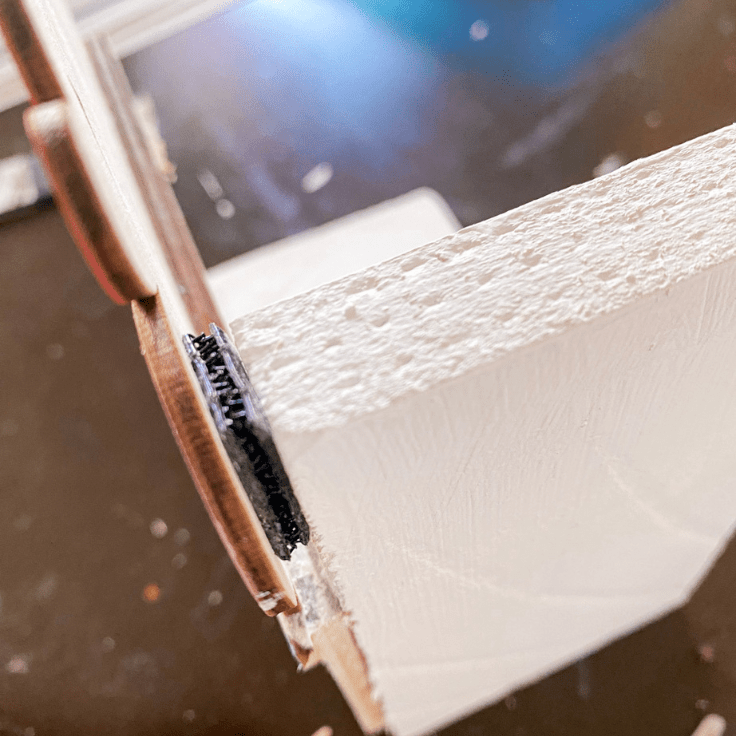
Did you know wood glue is actually stronger than the nails? The nails are mainly used to help hold the pieces in place so the glue can dry.

So if you don’t have a nail gun, use the glue to hold the pieces together, and find a way to keep everything tight until the glue dries. Books or clamps work well.

DIY Bookends
Equipment
- Miter Saw
- Exacto Knife
- Nail Gun
Supplies
- Acrylic Paint
- Wood Glue
- Truck with Interchangeable pieces
- 4 pieces 1/2" wood cut down to 3" wide by 5" long
- Velcro
Instructions
- Paint all of the individual pieces of the truck and decor
- Cut down 1/2" wood to 3" wide by 5" long. Need 4 pieces.
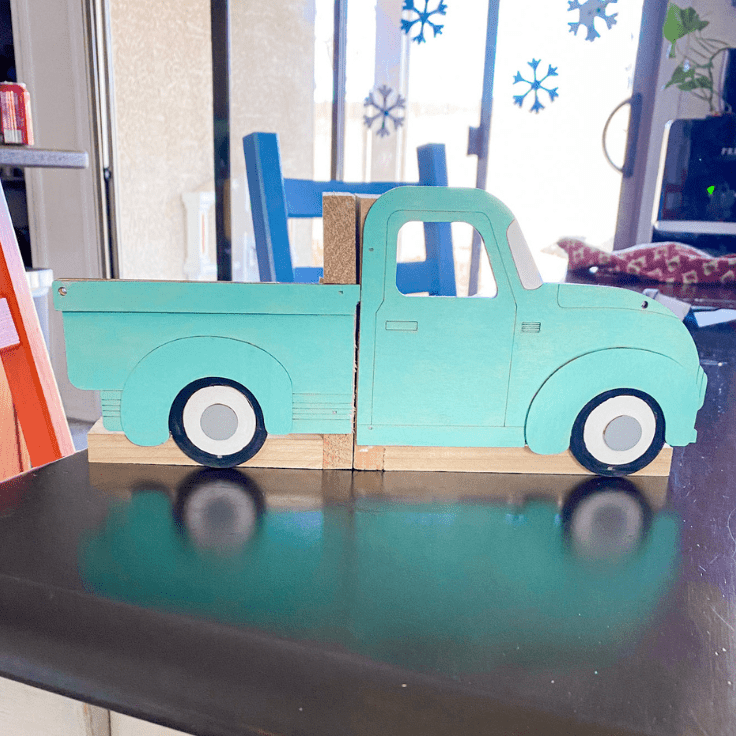
- Glue 2 pieces of wood together to make an L, then nail the pieces together. Repeat with the other 2 pieces.
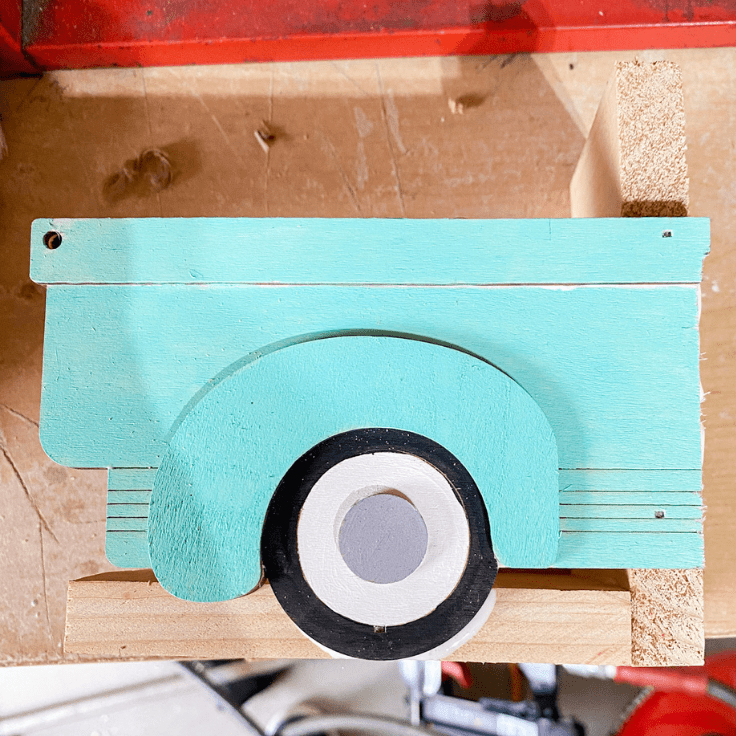
- Cut down the truck from the middle, separate the trunk from the front.
- Cut off the spot to attach the interchangeable pieces from the back of the truck bed.
- Attach the truck to the wood pieces using glue and nails.
- Using an exacto knife, cut the tabs off the bottom of the wood decor.
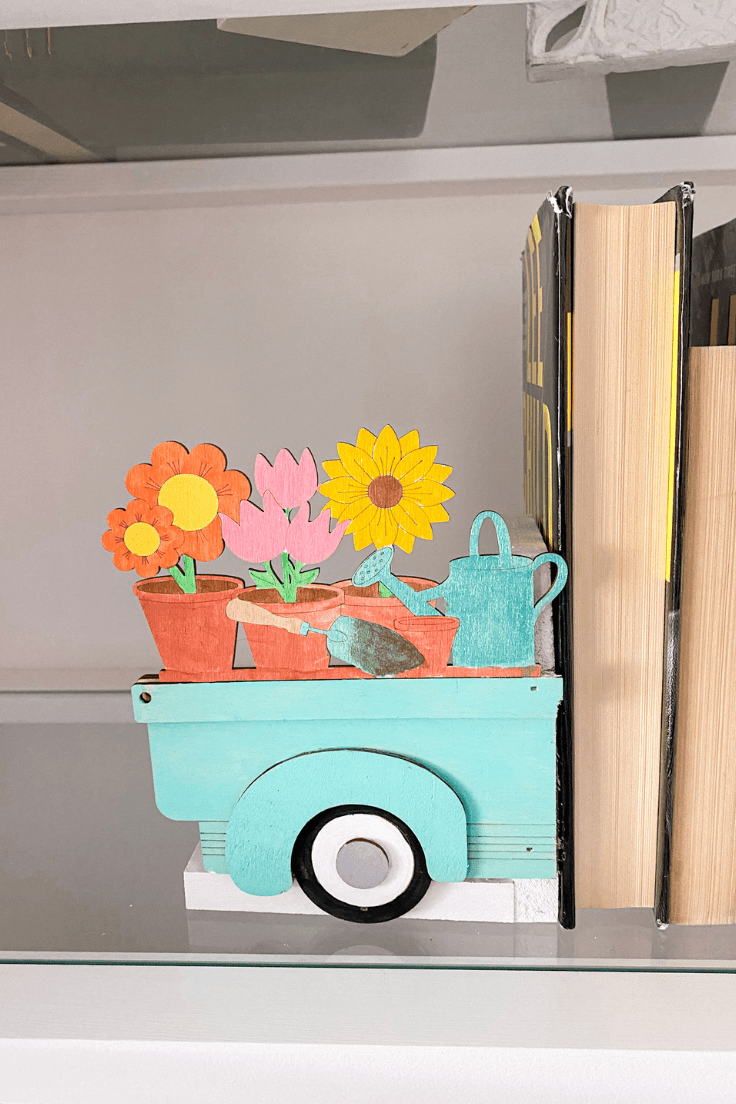
- Use a small velcro piece to attach the wood decor to the top of the 1/2" wood and balance it on the bed of the truck.
- Display your new bookends!
Love the ideas you see here on Ideas for the Home by Kenarry®? Subscribe today to get our FREE DIY & Craft Planning Calendar, plus our weekly Ideas in Your Inbox newsletter filled with creative tips and exclusive offers!
How do I attach the interchangeable decor?
So, if you attach the truck like this, in front of the wood, so that you mainly only see the truck, the decor will need to be attached to the top and front of the wood, instead of on the back in the place that was provided.
You can choose not to use the decor at all, or to glue one on. But because part of the reason I wanted to do this was to have the interchangeable decor, I decided to place a little piece of sticky velcro on to keep the decor attached but easy to change.
What’s Next?
If you enjoyed DIY bookends then you’ll enjoy these other wood projects too.
Scrap Wood Propagation Station
How to Hide an Air Conditioner
You may also enjoy these wood crafts on Ideas for the Home by Kenarry® –