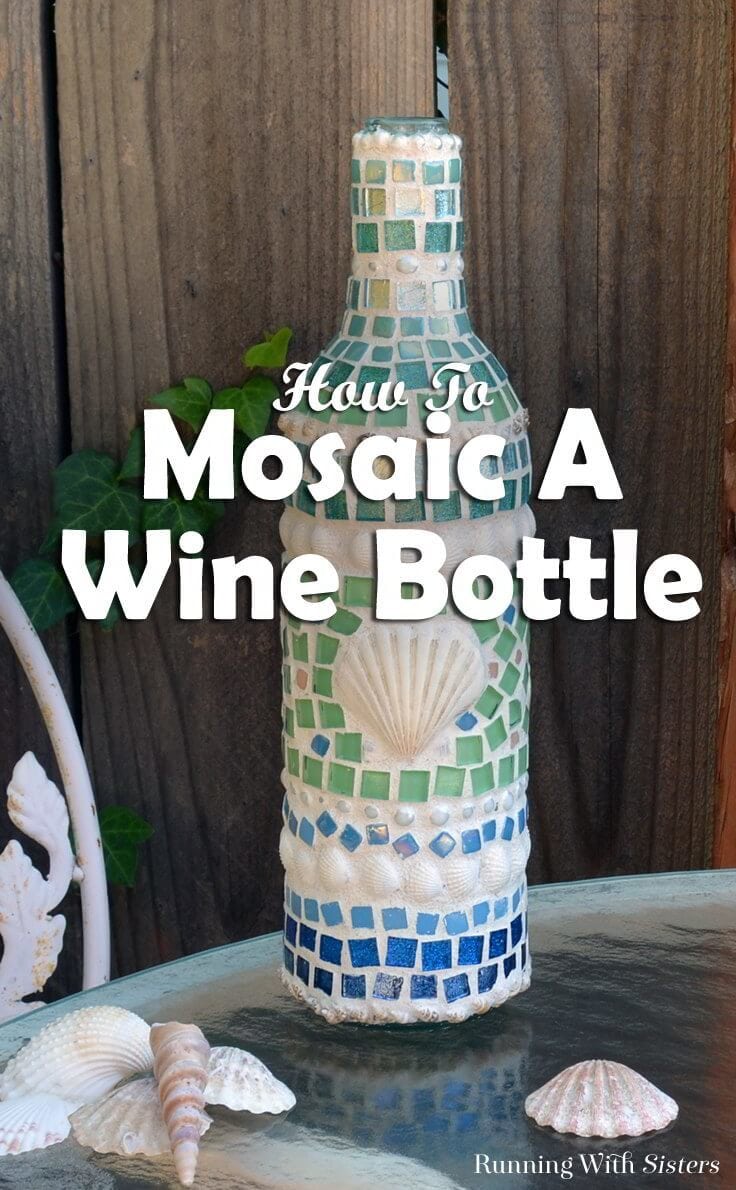
Mosaic Wine Bottle: How To Mosaic With Tiles & Shells
THIS POST MAY CONTAIN AFFILIATE LINKS. PLEASE SEE OUR FULL DISCLOSURE POLICY FOR DETAILS.
Learn how to make a mosaic wine bottle with shells and tiles! We’ll show how to glue the tiles and mix the grout with a video and written steps!
Hi Kenarry Readers! We’re Jennifer and Kitty from RunningWithSisters.com, and we are thrilled to share one of our favorite upcycling projects with you — a Mosaic Wine Bottle! In our mosaic wine bottle, we decided to feature seashells from our summer vacation in Florida — that way we can remember warm beach days well into winter! We mixed in pretty sea-glass colors and some tiny shells from the craft store, too. (They have lots of shells, so you don’t have to live near the beach to do this!)
We’ll show you everything you need to know to make your own mosaic wine bottle. We’ll take you step by step through the mosaic process, starting with how to create your design and glue your tiles down. Then we’ll show you exactly how we mix the grout, what the right consistency is for the grout, and how to use the grout right on your mosaic. We’ll also show you how to buff your mosaic wine bottle and how to seal it to weather the outdoors. (This won’t make it waterproof, but will help it stand up to some elements.)
We even made a video to show you how to do the mosaic. Follow along as we make the mosaic wine bottle, then use the steps below to make your own!
You won’t believe how much fun it is to upcycle a throw-away bottle into a gorgeous mosaic wine bottle!
Disclosure: This blog post contains affiliate links for products or services we think you’ll like. This means if you make a purchase from one of these links, Ideas for the Home by Kenarry® will make a small commission at no additional cost to you so we can keep the great ideas for the home coming your way. All opinions expressed are derived from personal experience.
Materials To Make The Mosaic Wine Bottle
Wine bottle
Tiles, 3/8” to 1/4” square (blues and greens and peaches)
Large scallop shell
Small and medium sized shells
White sanded grout
Mosaic grout sealer
100% Clear silicone adhesive
Other Supplies
Plastic disposable container to mix the grout in
Putty knife or wooden paint stirring stick
Sponge
Gloves
Measuring spoon
Plastic cup for water
Paper towels
Steps To Make The Mosaic Wine Bottle
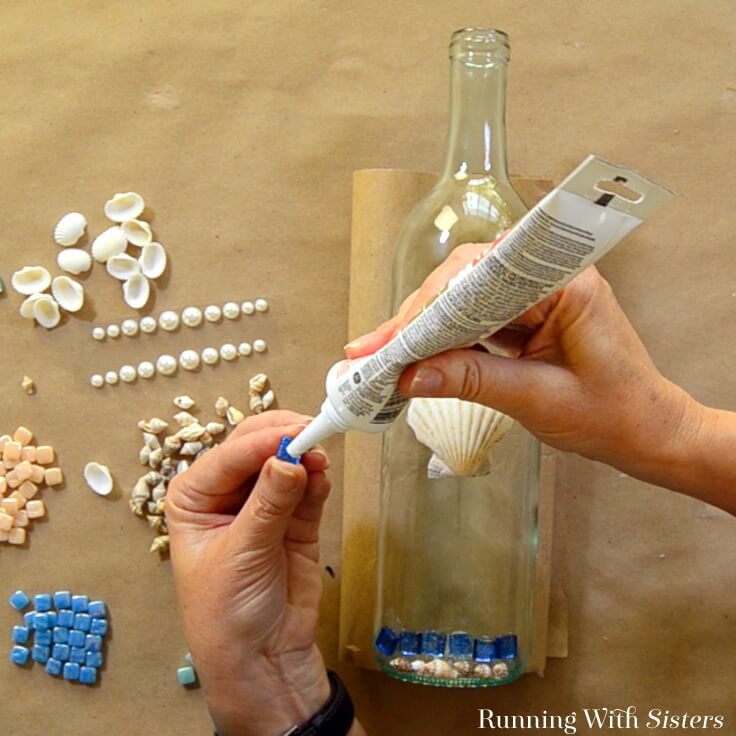
1. Pick out the shells and tiles you’d like to use. We chose mostly small shells and tiles so they will curve around the bottle. Glue the tiles and shells to the bottle. When you place your shells and tiles, aim to keep your grout lines (the spaces between your tiles) pretty slim, about 1/8 inch. This is the fun and creative step, so take your time to create a mosaic you will love!
2. Once the glue has dried, mix up the grout. We suggest you follow the instructions on your package. Our grout says to mix 1 part water to 7 parts grout. But in our experience, it always needs more water. Stir and adjust the ratio until the grout is the consistency of natural peanut butter. Once the grout is mixed you have 15 minutes to use it.
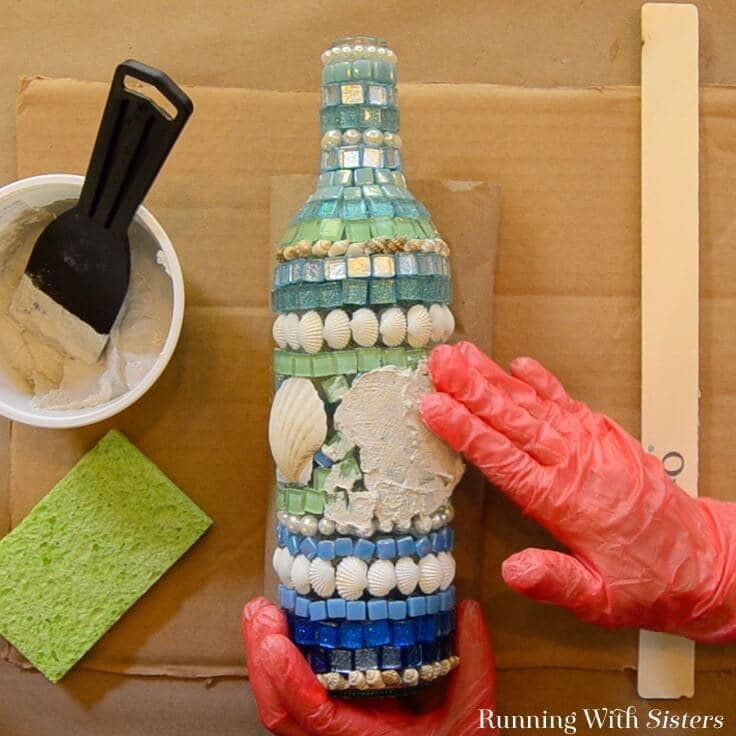
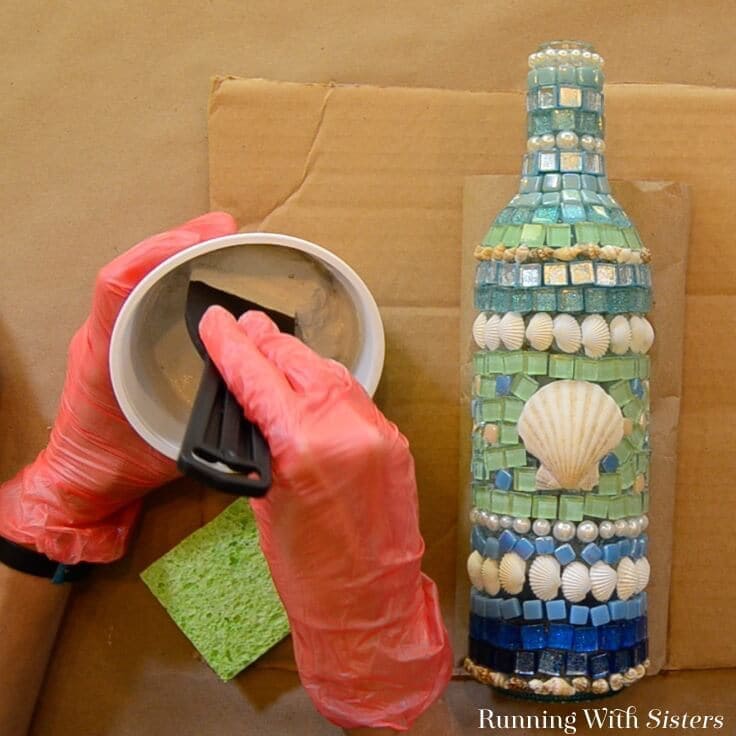
3. Spread the grout right over the tiles and up to the edges of the shells. (This sounds scary, but we promise you won’t ruin your mosaic!) You can use a putty knife to get the grout onto the surface, but we think gloved fingers work best to spread the grout around. We also use a craft stick to push the grout in between the shells. Wipe any excess grout from the surface of the tiles.
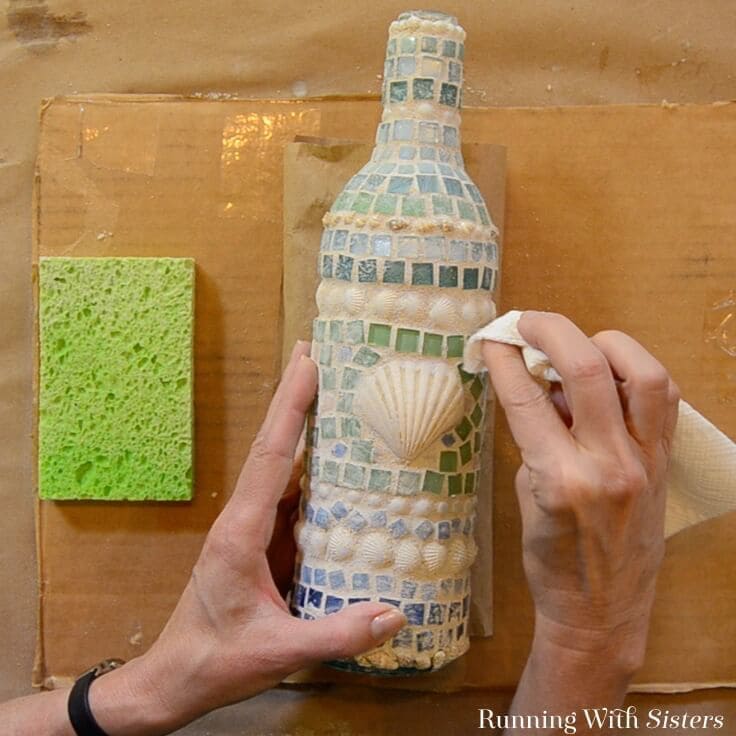
4. Wait 30 minutes for the grout to start setting up. You’ll see that a haze has formed on your tiles from the grout. Use a dry paper towel to buff the haze off the surfaces of the tiles. Repeat in 30 minutes if a haze forms again.
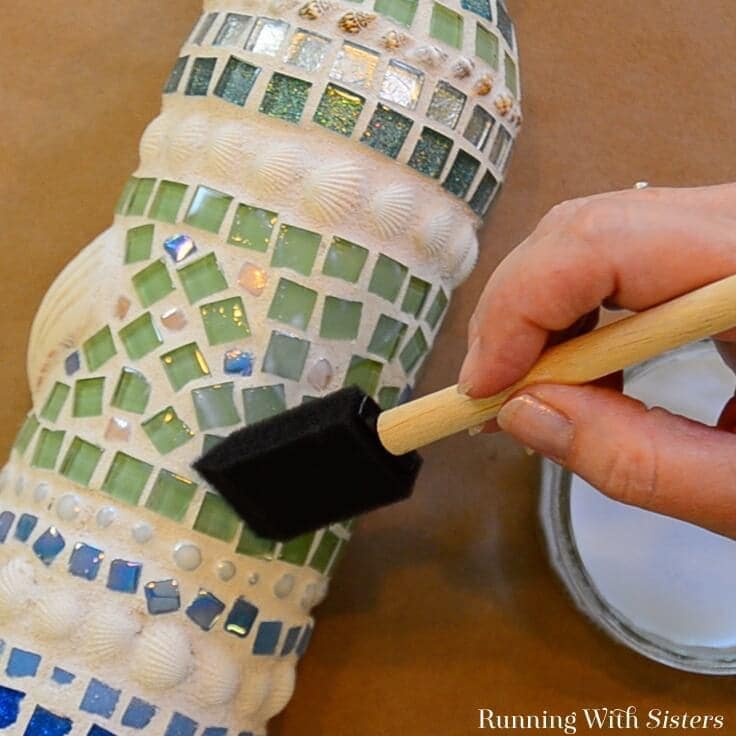
5. Let the mosaic dry for 24 hours then paint it with a thin layer of mosaic sealer. This won’t make your mosaic wine bottle completely waterproof, but it will protect it some. Now take a step back and admire your artistry!
We hope you have as much fun doing your mosaic as we did doing ours! And if you have any questions while you’re working on your mosaic wine bottle, just leave us a comment and we’ll reply. We’d love to hear from you and are happy to help!
Happy Crafting,
Jennifer & Kitty
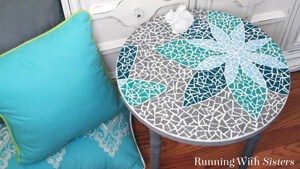
Here are a few more mosaic projects from The O’Neil Sisters:


Mosaic A Birdhouse With Broken China
Love the ideas you see here on Ideas for the Home by Kenarry®? Subscribe today to get our FREE DIY & Craft Planning Calendar, plus our weekly Ideas in Your Inbox newsletter filled with creative tips and exclusive offers!
What’s Next?
While you’re here, be sure to check out these other craft projects on Ideas for the Home by Kenarry® –