DIY White Chalk Painted Pumpkin Teapot: An Easy Fall Craft
THIS POST MAY CONTAIN AFFILIATE LINKS. PLEASE SEE OUR FULL DISCLOSURE POLICY FOR DETAILS.
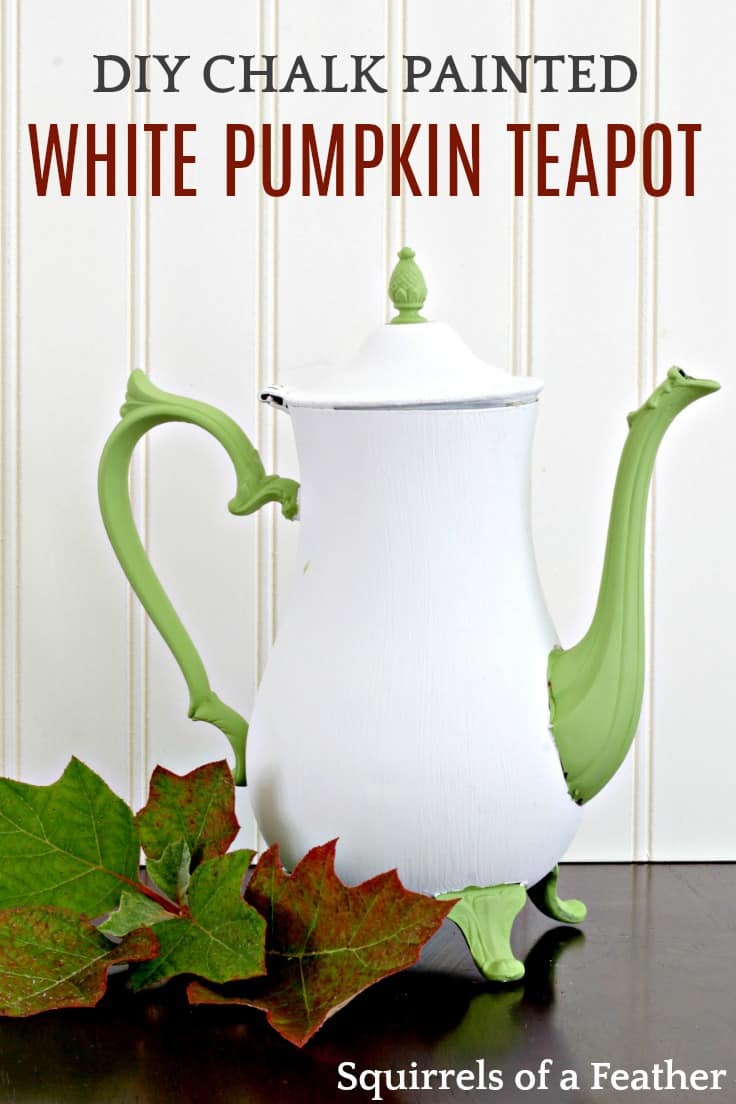
Upcycle an old teapot by painting it like a pumpkin! This easy DIY chalk painted pumpkin teapot is a great fall craft. It also works well for non-spooky Halloween decor. Give in to the fall neutrals trend and find a teapot to paint, pronto!
Hello Kenarry readers, this is Marissa from Squirrels of a Feather bringing you an easy way to use chalk paint to turn an old teapot into a gorgeous painted pumpkin in lovely fall neutrals! I’m SO EXCITED to be sharing my very first project here on Kenarry with you today. 🙂
To be honest, this is the project that almost wasn’t!
What do I mean, you may ask? Well, it all has to do with Murphy.
Murphy who? Why Murphy’s law of course! The old adage, “Anything that can go wrong will go wrong.” Boy oh boy, did things ever go wrong with this project.
When I was notified that I had been accepted to be part of the Kenarry Creative Team, I was thrilled. You would have thought I just won the Miss America pageant…there was crying, waving, perfectly coifed hair, the whole bit (okay, joking about the perfect hair, I can only dream).
I was going to be AWESOME! I was going to be punctual and my posts would be so amazing they would make people drip tears of joy right onto their (hopefully) waterproof iPhones.
And then — along came Murphy.
You see, Murphy doesn’t care about deadlines, or schedules, or amazing crafts. He just exists to make things go wrong.
Anything that could go wrong did…in a big way. We started kindergarten and getting the new schedule down was tough. My husband was called away on a business trip and my 5-year-old ended up with a fever of 104 F and pain in his legs so bad he couldn’t even walk. For three days I carried him up and down the stairs, to the car, to the bathroom (it’s called viral myositis, and it sounds worse than it is). We missed our entire second week of kindergarten…then Little Brother got sick as well.
Husband came back and everyone recovered and went back to school. I sat down (finally!) to start working on my pumpkin, which was originally supposed to be orange.
Guess what? I had mistaken chalkBOARD paint for chalk paint! So careless, so embarrassing! Luckily, it washed off pretty well. (Here is photographic evidence of me washing off the orange paint in the sink — luckily, you can’t see my tears mixed in the water.)
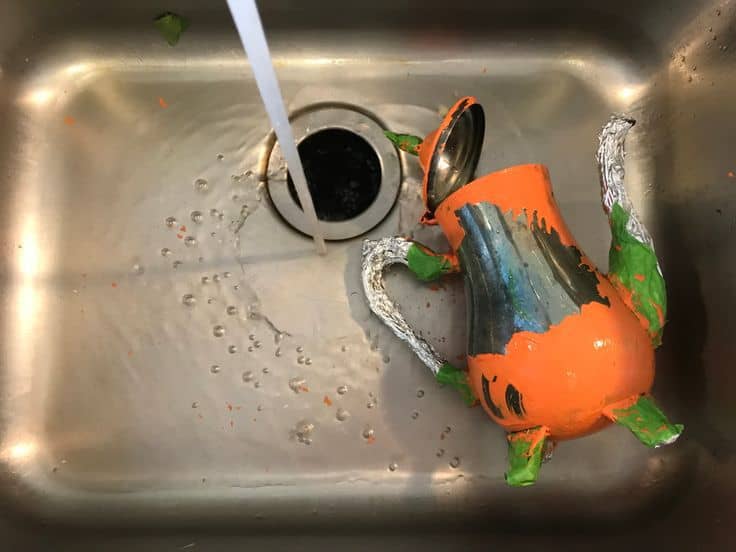
Finally, after washing away orange paint and tears, my teapot was ready to get painted in my trusty Annie Sloan chalk paint in Old White.
Let’s go through step by step — and you can have confidence that I have already made ALL THE MISTAKES so that YOU won’t. 🙂
How to make a chalk painted pumpkin
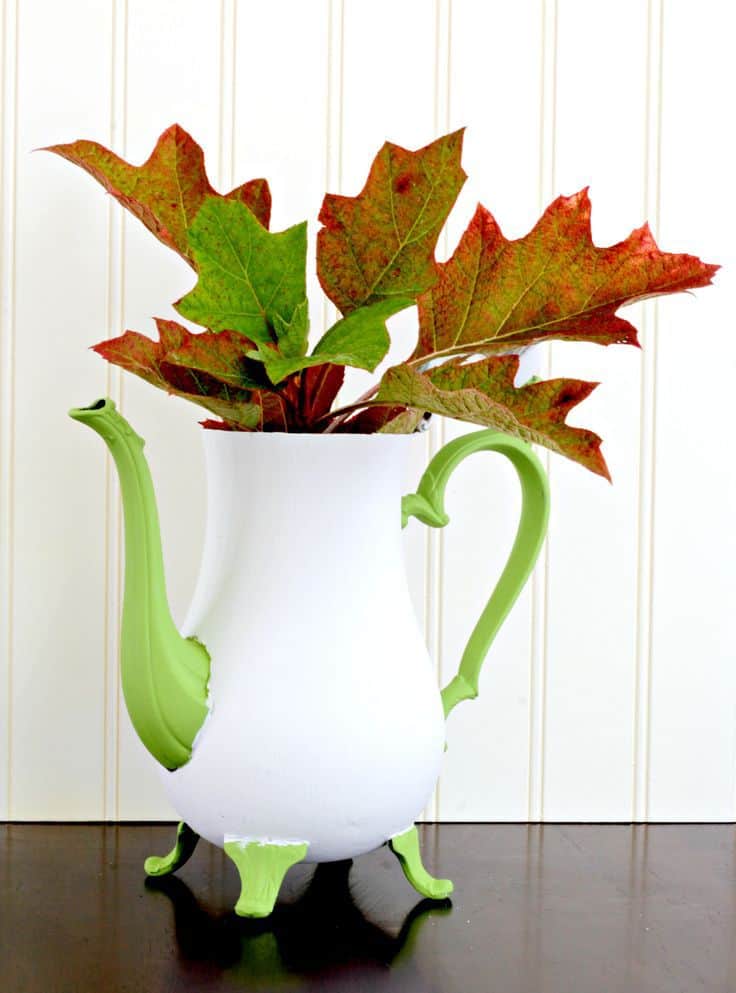
I love the way that this painted pumpkin turned out in white, but you could use any color you like…I do highly recommend the Annie Sloane chalk paints, it’s quality and coverage is top notch. I was also very impressed by the green paint from Michael’s, which I was using for the first time.
If you want your teapot to look like this, think of the body as the gourd and the handle, spout, feet, etc as the “vines” sprouting off of the gourd! We will be painting the body white and the vines green.
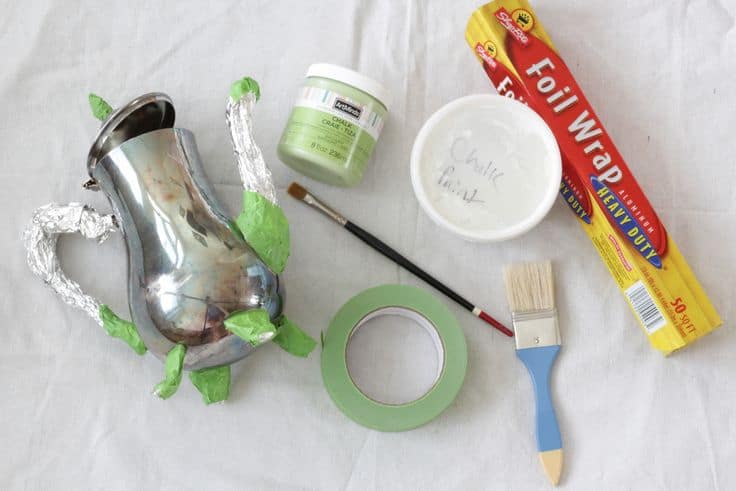
What you need:
Want more ideas like this? Subscribe today to get our weekly Ideas in Your Inbox newsletter plus other exclusive gifts and offers — all for FREE!
Kitchen or Craft/DIY Tools Needed:
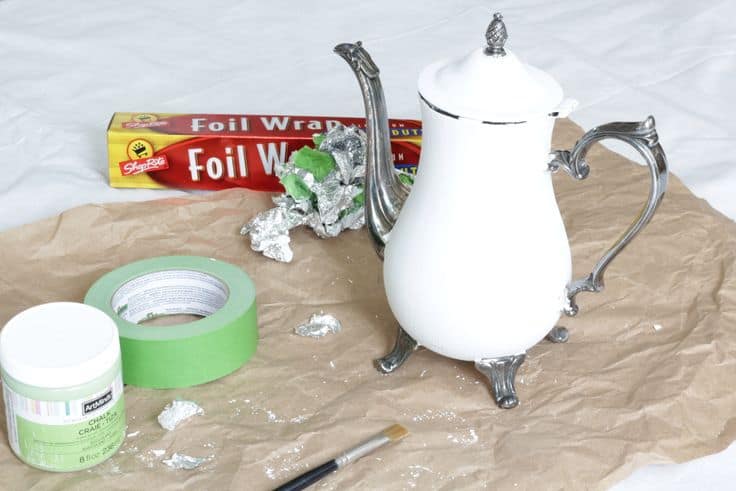
- An old teapot (mine was silver)
- Chalk paint for pumpkin body (I used Annie Sloane, Old White)
- Chalk paint for pumpkin “vines” (I used Art Minds in Succulent)
- Brushes (one large and one small)
- Painter’s tape
- Aluminum foil
Other supplies:
- Newspapers or a drop cloth to contain any paint spills
- A cookie sheet (if you need to place high to dry away from kids)
- 2 Ziploc plastic sandwich bags (to store paintbrush in the fridge while not in use)
Instructions:
Painting the pumpkins body
Before beginning to paint, wipe off any dust or dirt from the teapot, wash if needed and allow to fully dry.
Once the teapot is clean and dry, take the foil and wrap it around the large sections of the teapot, such as the spout, the handle, and the feet to cover most of them. Use the painter’s tape to tape off the edges, using your fingernail to push the tape right against the edges where it meets the pumpkin’s body to ensure a fine line.
Once you have foiled and taped off the vine sections, using the large paintbrush, begin to paint the body of the teapot. Paint in long strokes, up and down from the top to the bottom.
Allow the first coat of paint to dry fully before applying the second coat (about 30-45 minutes). Place the paintbrush inside a Ziploc bag and put it in the refrigerator while each coat is drying. Apply as many coats as you need until you are satisfied with the coverage (mine took three coats of white chalk paint).
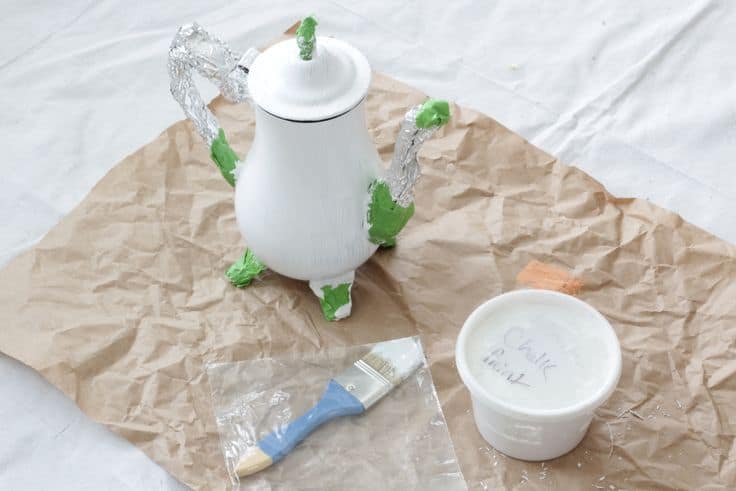
Painting the pumpkin vines
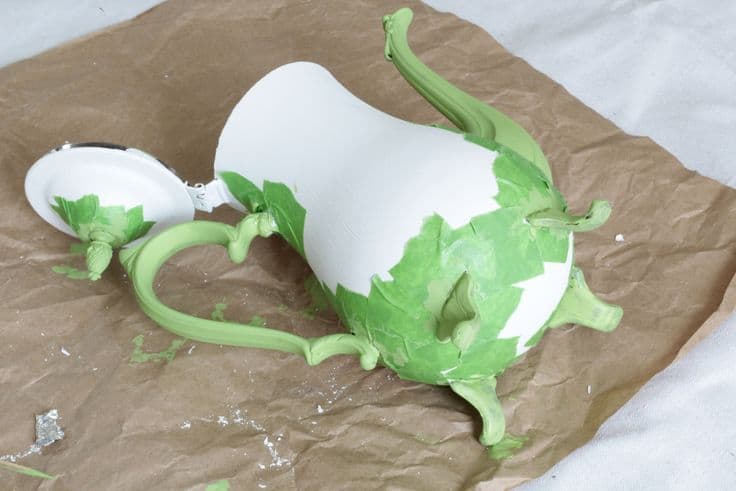
Once the body is dry, we are going to begin to paint the pumpkin vines, consisting of the handle, spout, and feet.
Carefully remove the tape and the foil from the handle, spout, and other areas and discard.
Take the painters tape and tear off small sections, which you will use to cover the white paint of the body where it meets with the vine portions. You may be tempted to skip this step…DON’T! Remember Murphy and his law. 😉
Use tiny pieces of painter’s tape to surround all of the vine portions. It will look like paper mache around the edges.
Once everything is covered nicely, paint with the green chalk paint and the small paintbrush for the vine sections. Take your time, you don’t want the paintbrush to flick around small corners and throw paint around. Allow the first layer to dry before applying the second coat (30-45 minutes). Store the paintbrush in a new Ziploc bag in the refrigerator in between coats.
Once you are satisfied with the green coats of paint on your vines you can CAREFULLY remove the painter’s tape.
Marvel at your gorgeous chalk painted pumpkin; use it in your fall decor accordingly.
What do you guys think about the spout, by the way?
After finishing it I can’t decide if it would have looked better in white or not. Leave me your thoughts in the comment section below to tell me if you think you’d prefer a white spout or green spout!
I want more!
If you liked this post, make sure you check out these other cool DIYs from Squirrels of a Feather!
DIY Minimalist Ceramic Chalk Painted Vase
DIY Upcycled Galvanized Spinning Craft Caddy


You may also enjoy these Halloween ideas on Ideas for the Home by Kenarry® –
Love this DIY and tutorial! Great inspiration for actually doing the body in orange… even a muted orange! Both the white and other colors would be great! Love the post, too! Marissa is a superb and humorous writer! Pinned!
I love how your teapot came out and I am so glad Murphy didn’t keep you down. Congratulations on being a Kenarry contributor.
Fun idea Marissa! Don’t let the man get you down!
Such a happy little teapot now! I love the green vine handles!
Oh gosh, whenever my husband goes out of town everything seems to go crazy. One time our cat got sick from eating leaves off a silk plant that resulted in 3 days of being at the vet (NOT fun) and my son coming down with strep. LOL. So, I FEEL YOUR PAIN! Ha! But, wow, this vase turned out just GORG and I love the paint colors you selected! I haven’t used chalk paint before.
Carrie
curlycraftymom.com