How to Make a Bottle Cap Wind Chime
THIS POST MAY CONTAIN AFFILIATE LINKS. PLEASE SEE OUR FULL DISCLOSURE POLICY FOR DETAILS.
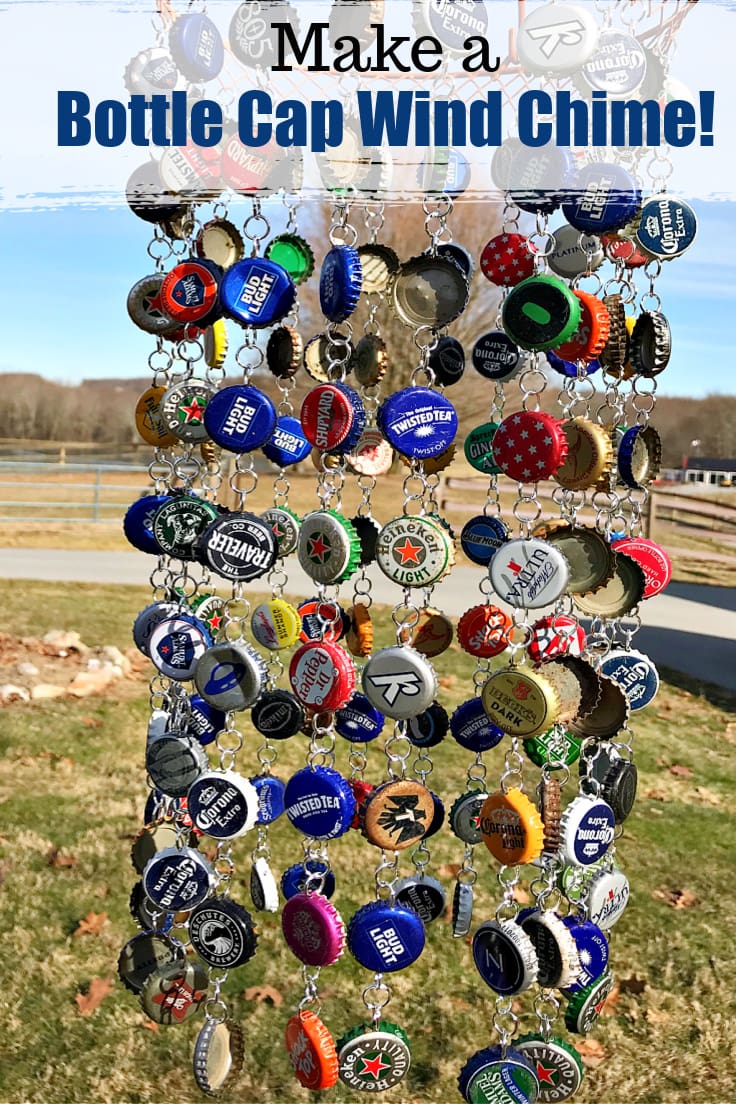
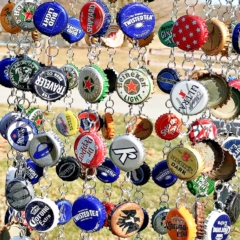
How to make a wind chime out of recycled bottle caps. This is a great way to create a colorful vintage look wind chime that can be used indoor or out. A fun trash to treasure project!
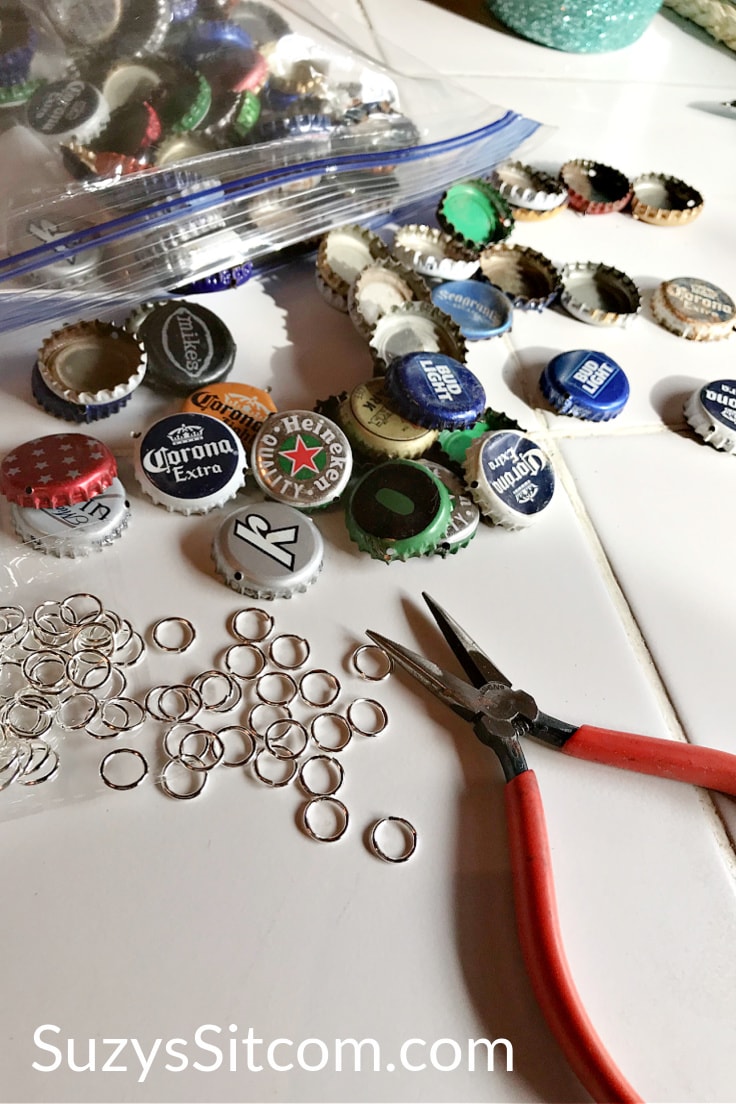
Creating from recycled items can result in amazing things. This week, I created a wind chime made from metal bottle caps, jewelry jump rings, and an old metal basket. Junk never looked so good!
This is Suzy from SuzysSitcom. My husband and I have been living full time in our RV and traveling the country since 2015. Currently, we are working on a farm in New York, but in the past, we have worked many different campgrounds across the United States. That said, a few years ago we found ourselves in a campground in the Boston area.
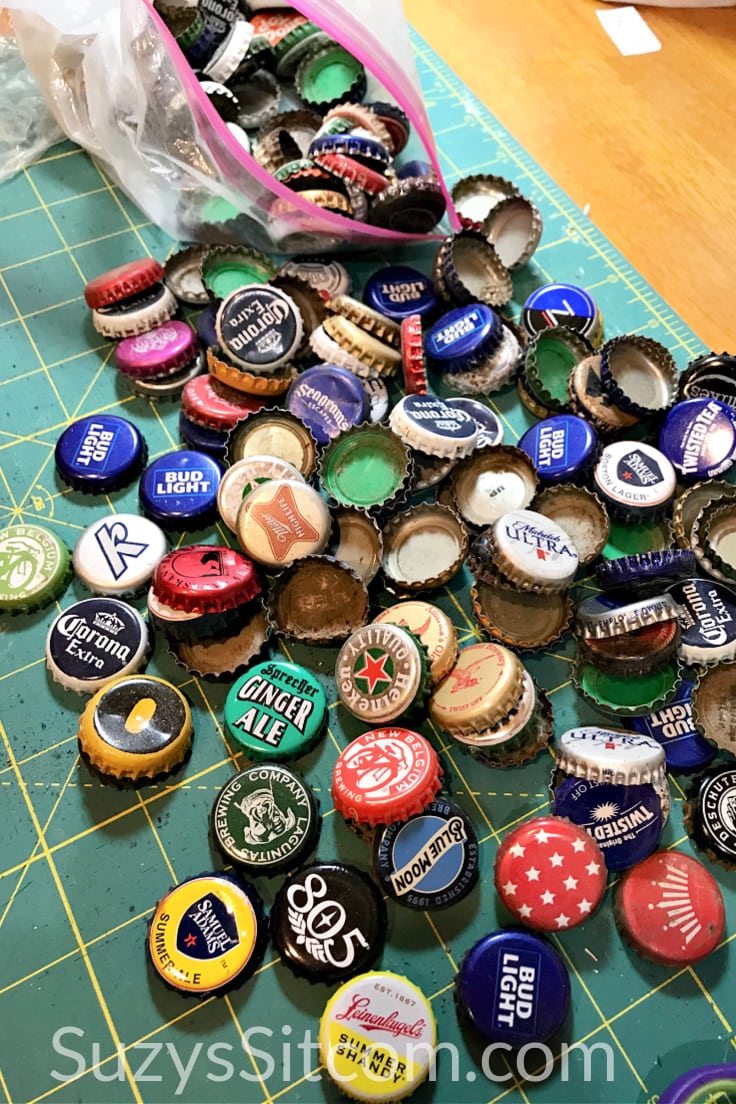
It was a beautiful campground, but full of folks that loved to toss their bottle caps everywhere. We hadn’t seen that before and frankly haven’t seen it since. During our summer stay there, I collected nearly 200 bottle caps, knowing that a project would eventually come to mind. And now it has!
How to Make a bottle cap wind chime
This project has amazing results but takes a bit of preparation. The number one thing is to collect a bunch of bottle caps! The more colors, the better. If you don’t have the time or inclination to collect them, you can find collections of them available on Etsy or even Amazon. My personal preferred method is to find them. It quickly became a fun treasure hunt.
The entire tutorial is in a printable card at the bottom of this post. But first, here is a little bit of info about the tools and supplies you’ll need.
Want more ideas like this? Subscribe today to get our weekly Ideas in Your Inbox newsletter plus other exclusive gifts and offers — all for FREE!
What you need:
- Bottle caps (For this project I used 180 bottle caps)
- Jump rings (10 mm) about 500
- Recycle metal basket (or any other round container)
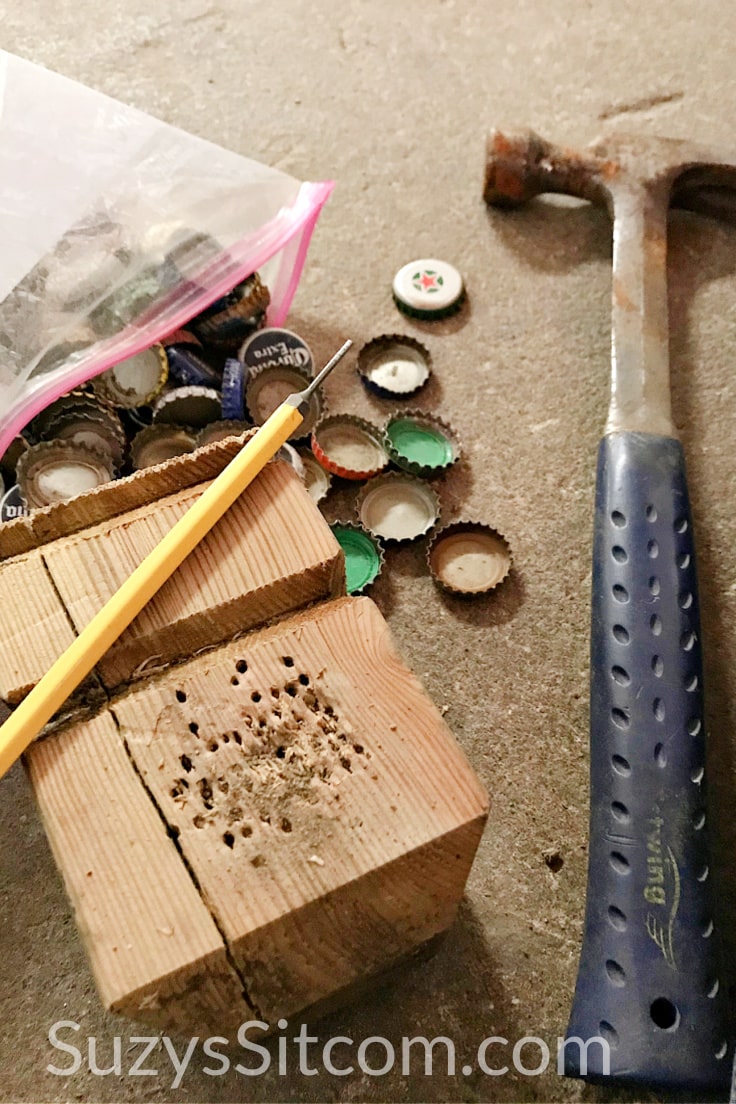
- Metal punch
- Hammer
- Pliers
- Wire cutters
tips for making a bottle cap wind chime:
punching holes in the bottle caps
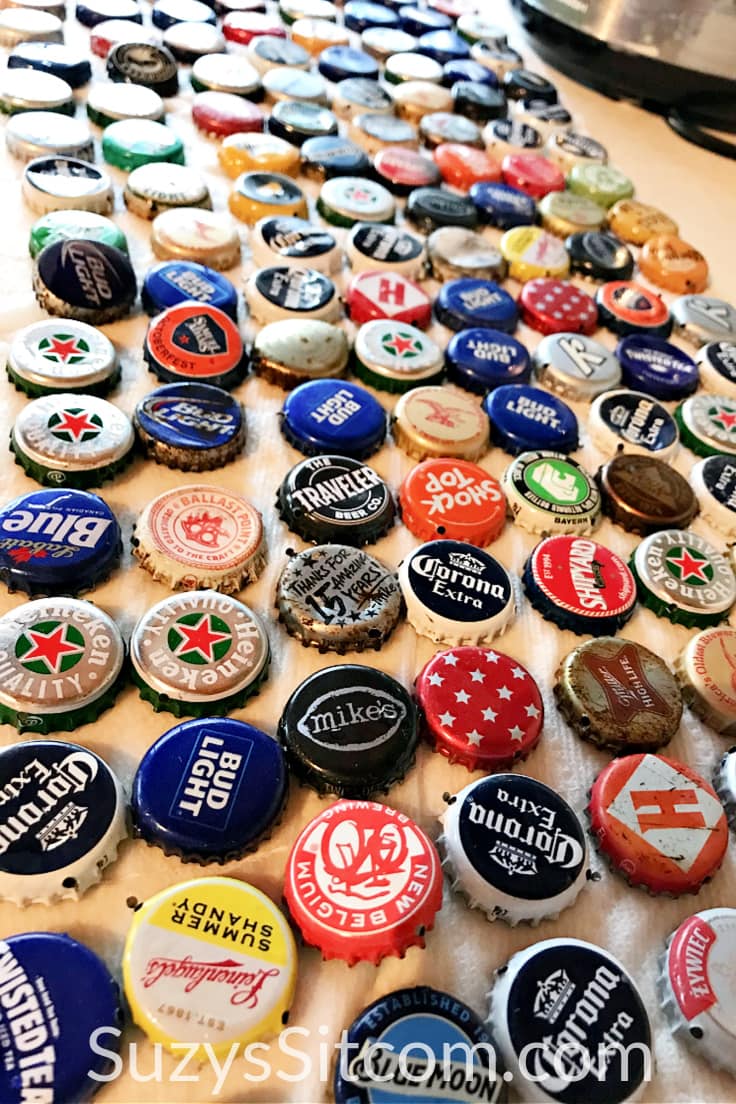
Use a small metal punch and a hammer to punch two holes in each bottle cap. I used a block of wood underneath the cap to support it and give the punch something to go into. Punch a hole in each side of the bottle cap on the metal edge.
Simply hold the cap on its side on the block of wood and using the metal punch and hammer, hammer the punch through the metal side of the cap.
Punching two holes in each bottle cap took a bit of time, but the process became quick and easy once I got the hang of it.
attaching the jump rings to the bottle caps
Jump rings are basically just a piece of wire in a loop. Each loop can easily be twisted open with a pair of pliers.
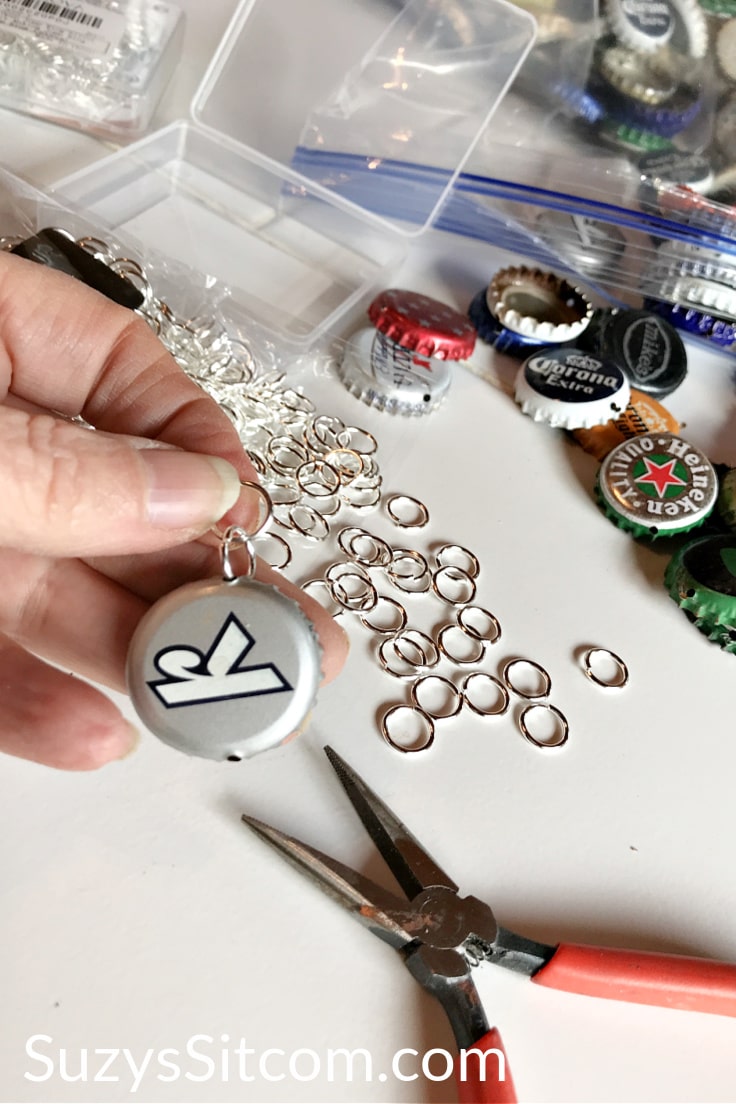
Open the jump ring with the pliers and then insert the ring into the punched hole in the side of the bottle cap. Use the pliers to then close the ring back to its circular form. Be sure to get the ring entirely closed before moving to the next ring.

For my wind chime, I chose to add three jump rings between each bottle cap. With 180 bottle caps, I created 20 rows of 9 bottle caps attached together by three jump rings between each cap. Try to vary the colors as best as you can as you go.
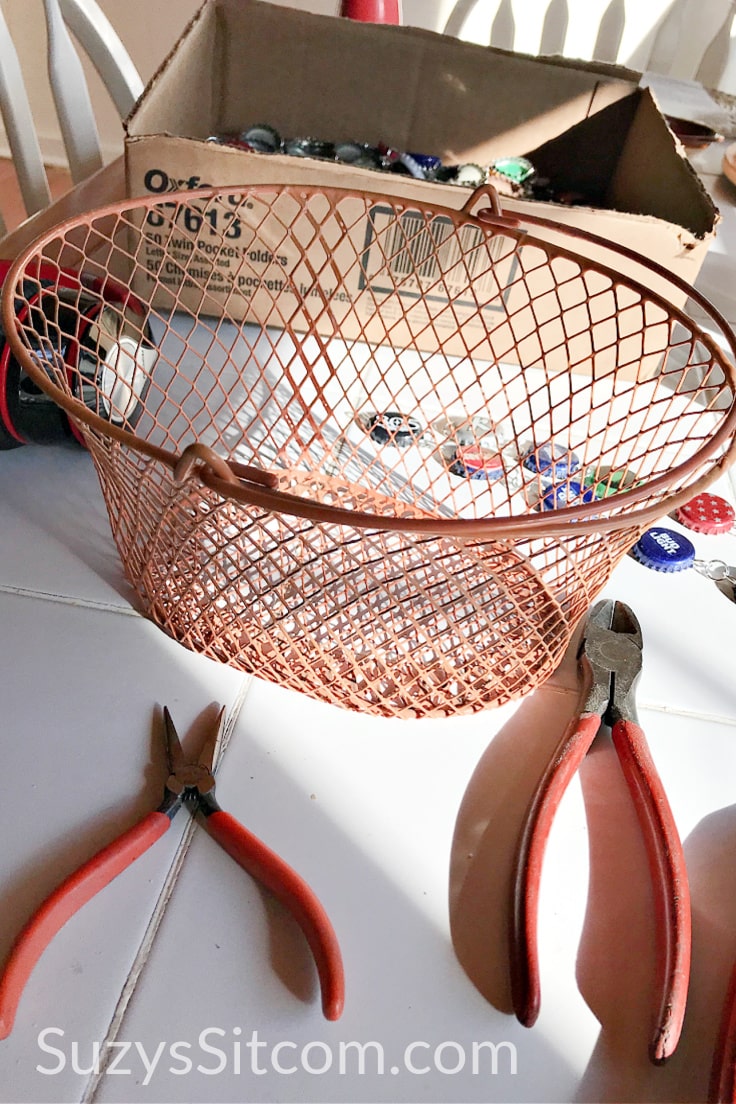
creating the base for the bottle cap wind chime
The base can be made from any recycled item. I have seen things like large metal cans, strainers, bicycle gears, or other random pieces of metal trash used for wind chime bases. In my case, I found a metal basket. I liked this because it already had a handle to hang the wind chime from and there would be no need to punch more holes. I simply used a pair of wire cutters to cut the base off of the wire basket.
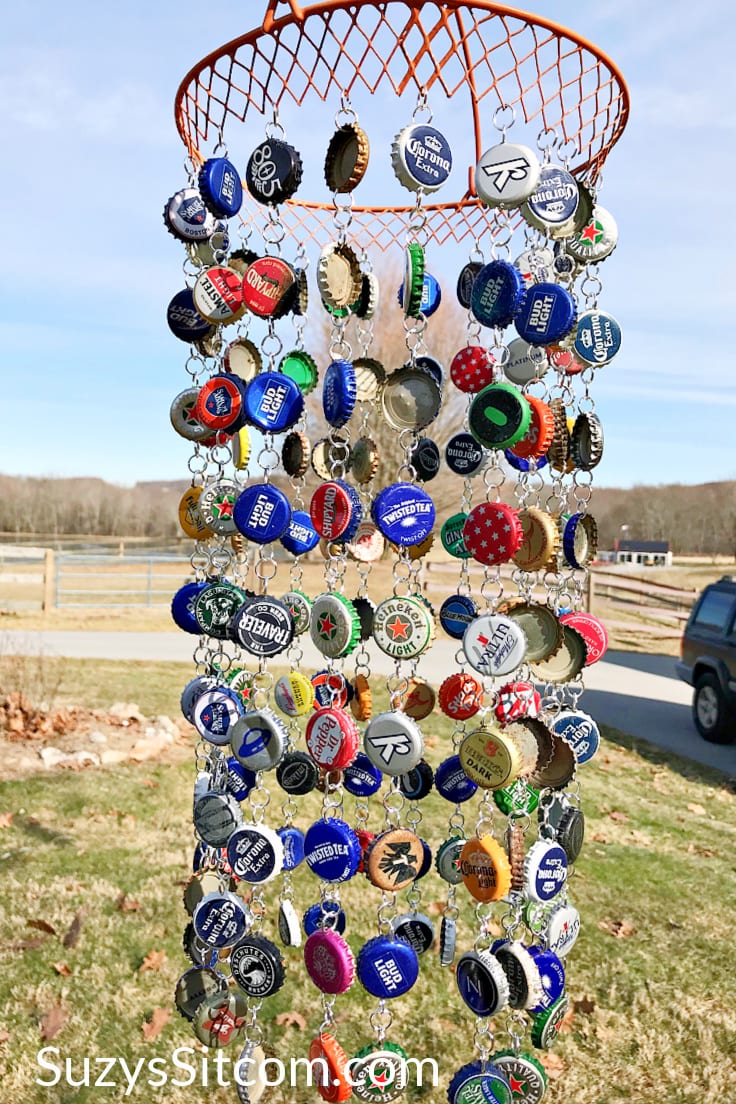
attach the rows of bottle caps to the base
Using jump rings and pliers, attach the rows of bottle caps to the base, spreading the rows evenly around the base.
Hang your finished Bottle Cap Wind Chime anywhere that you would love to add a bit of vintage charm. This project can be used inside or outside!

I love the sound a wind chime makes and this one adds some fun color to my day. Not to mention a lot of fun memories. Collecting these pretty caps was half the fun!
Here’s the printable card with everything you need to know about how to create your own Bottle Cap Wind Chime!
Fun to make Bottle Cap Wind Chime
Equipment
- Metal Punch
- Hammer
- Pliers
- Wire Cutter
Supplies
- 180 ea Bottle Caps
- 500 ea 10 mm Jump Rings
- 1 ea Recycled Metal Basket Or anything that can be used as a base
Instructions
- Punch two holes in each side of each bottle cap with the metal punch and hammer.
- Connect the bottle caps using jump rings. Use three jump rings between each bottle cap. Create 20 rows of 9 ea. bottle caps using the jump rings.
- Prepare the base to add the rows of bottle caps. If you need to, punch holes in the base to add the jump rings to.
- Add the rows of bottle caps to the base using jump rings. Be sure to add them evenly around the base.
Do you love creating from recycled finds?
Here are some more unique projects featured on SuzysSitcom created from recycled material!
Create Art with Recycled Magazines (Free Patterns!)

Recycled Paper Butterfly Wreath made from Junk Mail!

4 Fun Projects made with Recycled Toilet Paper Tubes

You may also enjoy these 3 Recycled Craft on Ideas for the Home by Kenarry® –
It looks like more than 9 bottle caps long on the20 rows. Guess it can be whatever you choose
I am making one and I was searching for guidance on the jump rings, they are so hard to close perfect. I’ve determined it just takes patience. Thank you
Thanks for the instruction…
However, I think your metal basket would be great left whole, attach the jump rings to the bottom outside edge and place a boston fern or a plant of your choice in the basket.
Hi Lee!
We love this feedback – thank you so much! This is exactly why we love our community so much. We come together, giving each other such great tips and advice… we love the talent out there!
Have you tried making this wind chime yet? We’d love to see pics!
Best wishes,
Lisa, Ideas for the Home by Kenarry Customer Care