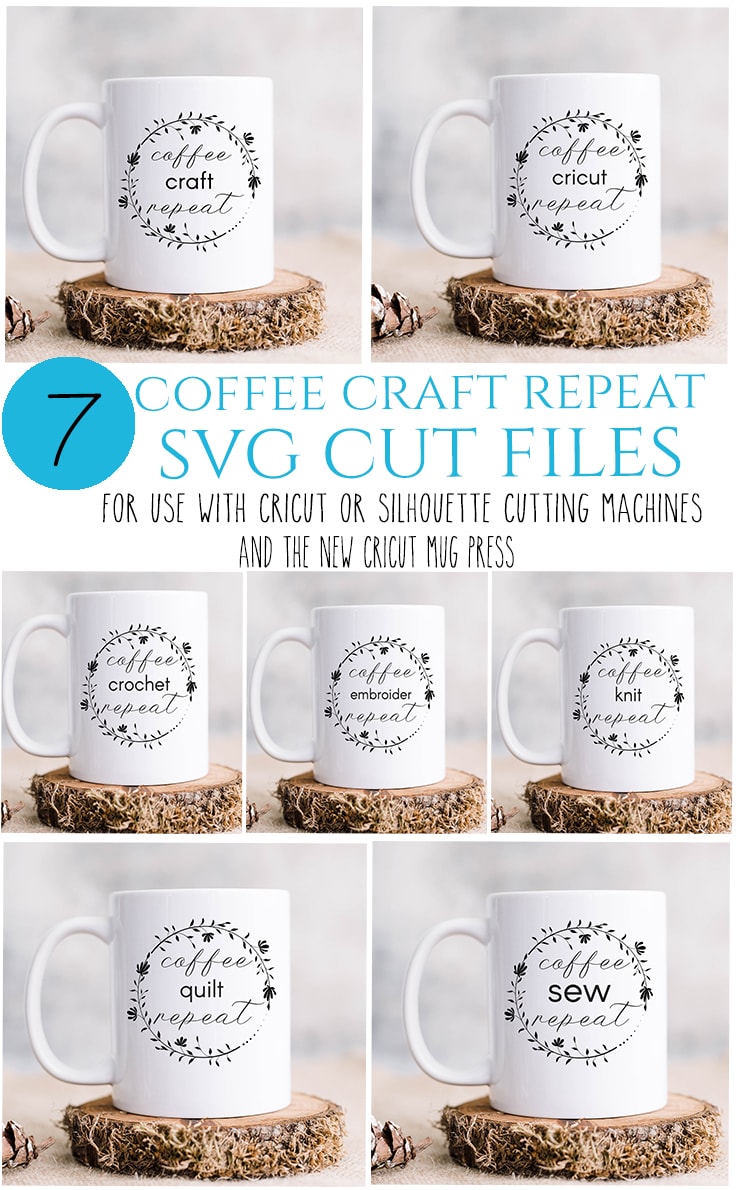
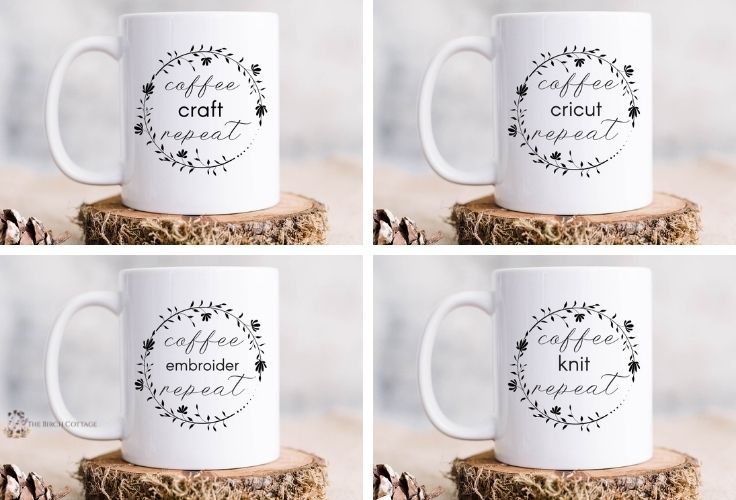
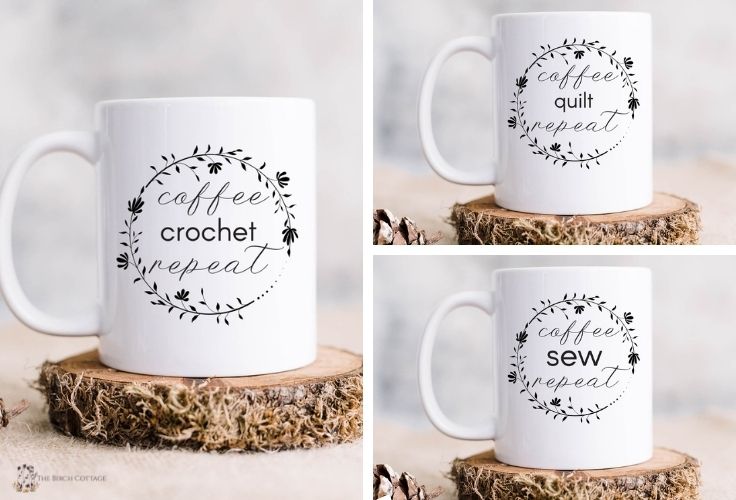
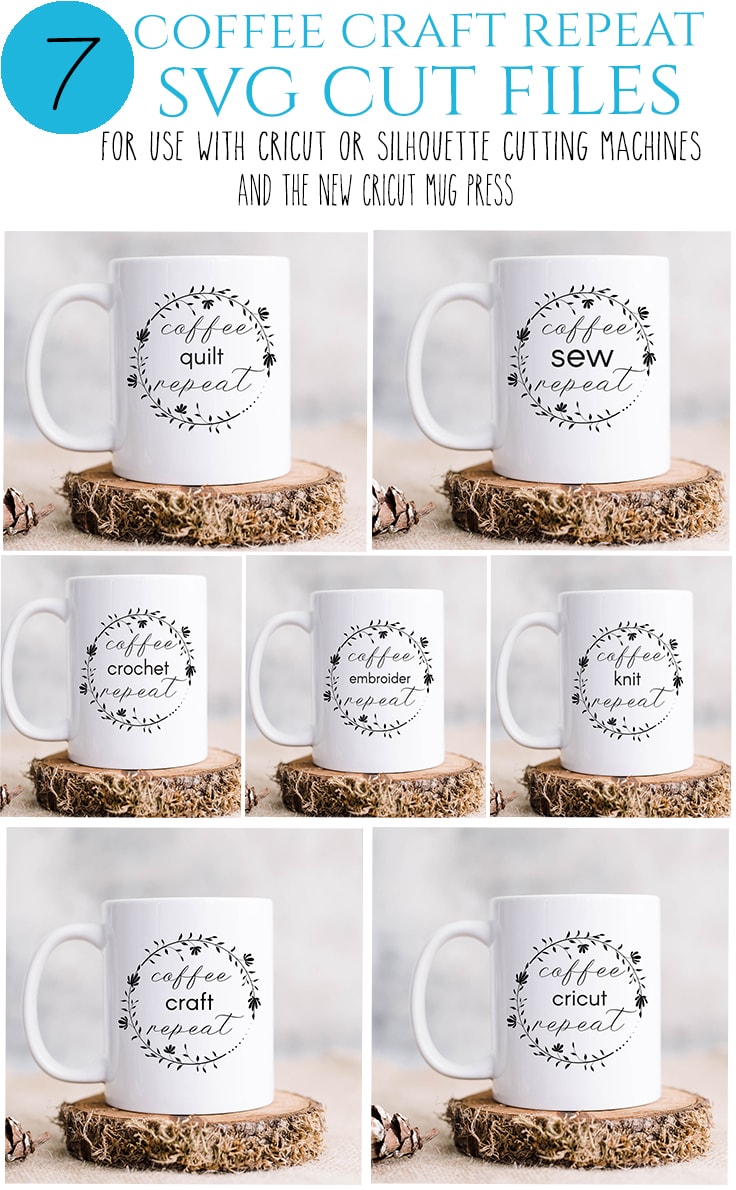
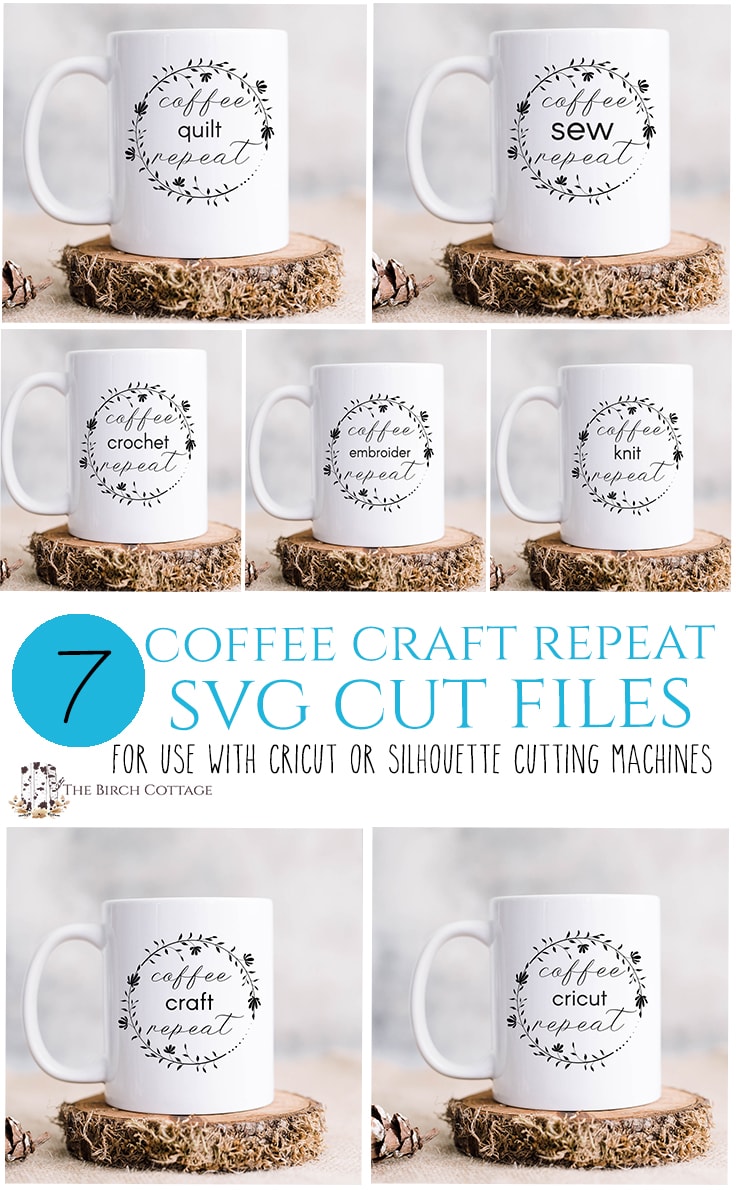
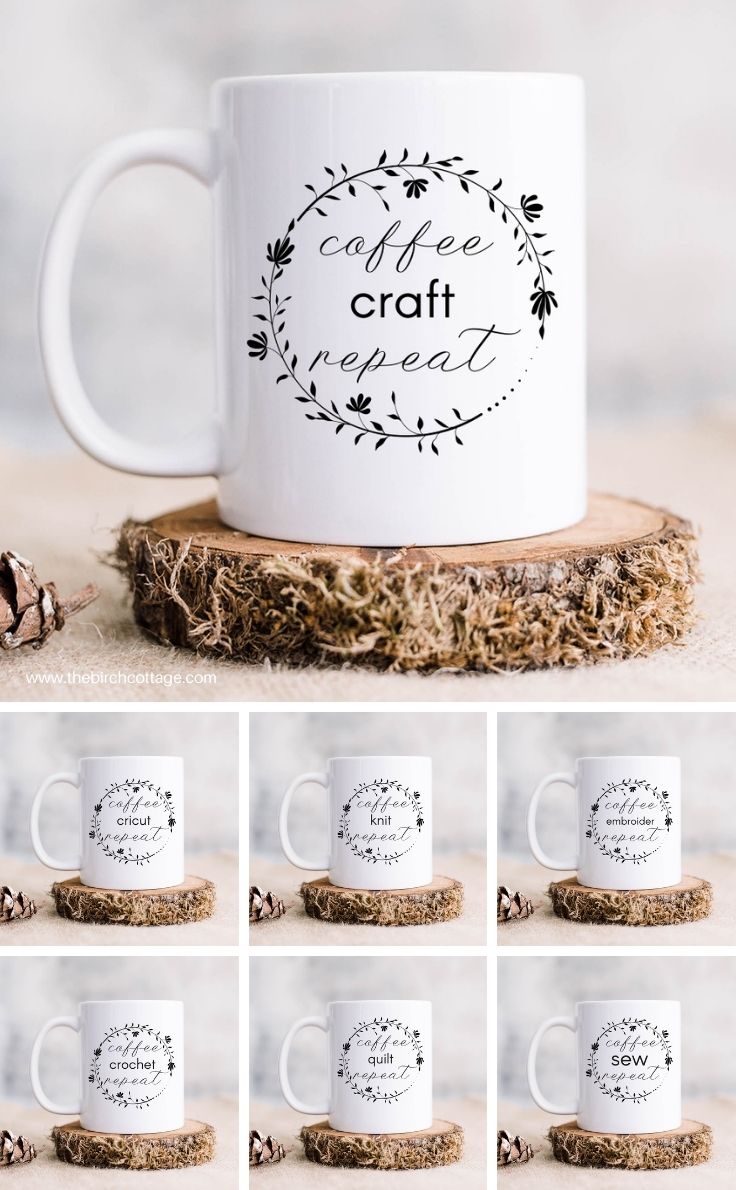
7 Coffee Craft Repeat SVG Cut Files
THIS POST MAY CONTAIN AFFILIATE LINKS. PLEASE SEE OUR FULL DISCLOSURE POLICY FOR DETAILS.
You can easily make your own custom mug with these free coffee craft repeat SVG cut files for Cricut and Silhouette cutting machines.
Hello, Kenarry readers! I’m Pam from The Birch Cottage, and I’m back again this month sharing with you a collection of 7 Coffee Craft Repeat SVG Cut File designs so you can make your own craft-themed coffee mug.
Want more ideas like this? Subscribe today to get our weekly Ideas in Your Inbox newsletter plus other exclusive gifts and offers — all for FREE!
Do you enjoy crafting and coffee? I sure do! Well, maybe not at the same time. But, I do enjoy a good cup of coffee and a fun craft project.
Cricut Mug press
Cricut just released its newest machine to the Cricut family – the Cricut Mug Press! You can read my first impression of the Mug Press here. I was so excited when I received notification from Cricut that they were going to release this new machine on March 11, 2021.
The problem with vinyl
Not to dissuade you, but let me talk to you a moment about the problem with using adhesive vinyl on ceramic mugs. Although you can have good results with vinyl, it’s been my experience that usually two un-wanted things occur:
- the vinyl eventually peels.
- the mug with your beautiful vinyl design simply is not waterproof or dishwasher safe.
Having said that, there is a way to make your mug with its beautiful vinyl design waterproof and dishwasher safe. That method involves using Mod Podge for Dishwashers. No matter how lightly I apply the Mod Podge, it seems to always leave some streaks behind. Although I have noticed that they become less noticeable with time.
And here’s another BIG issue with using the Mod Podge method to protect your mugs. There is a super long curing time of 28 days. I don’t know about you, but I rarely make gifts 30 days ahead of time! So when I do make a mug (or tumbler or travel mug, etc.) using adhesive vinyl, I have to tell the recipient how to care for their new mug.
So, what choice do you have? Good question!
You could decide to use sublimation or what Cricut calls infusible ink with the new Cricut Mug Press.
Why Use a Cricut Mug Press?
First, Cricut Mug Press makes it easy to make custom, quality mugs in literally minutes. Plus, the machine is super user-friendly and has safety-conscious design features, one-touch settings, just-right temperature control, and an auto-off feature for peace of mind. No manual adjustments needed!
And you don’t have to guess what temperature – the Mug Press takes the ambient room temperature and even the temperature of your mug blank into consideration and it emits a gentle beep to let you know when it’s through working its magic.
The Cricut Mug Press works with infusible ink (sublimation) transfer sheets and pens. The infusible ink works amazingly well. However, you can’t use just any mug. In order to use the infusible ink transfer sheets, pens, or markers, you must use special mug blanks. You can purchase 12 oz and 15 oz mug blanks from Cricut or use other brands that are specifically designed for use with sublimation.
Do I have to use the Cricut Mug Press?
No, you do not have to use the Cricut Mug Press with these designs. However, I highly recommend the use of the Mug Press if having professional-looking results is important to you.
However, you can simply use adhesive vinyl. I do recommend the use of outdoor adhesive vinyl. Just remember the mugs will not be dishwasher safe. And, with time, you will experience the vinyl peeling away from the mug.
7 Coffee Craft Repeat SVG Cut Files
So, whatever method you choose to apply the SVG coffee craft repeat designs onto your mug, there are a few supplies you’ll want to have readily available.
First, let’s take a look at what you’ll need to get started.
What you need:
craft Tools Needed:
I think it goes without saying that you will need a computer and a way to download and unzip the SVG files.
- Cutting machine, such as: Cricut Joy, Explore Air 2, Cricut Maker, Silhouette Cameo, or Brother ScanNCut2
- Cricut Mug Press (optional)
- StandardGrip Cutting Mat
- Heat Resistant Pad
- Brayer
- Weeding tools
Supplies Needed:
The supplies you need will depend on whether you plan to use adhesive vinyl, want your mug to be dishwasher safe, and whether or not you’ll be using a Cricut Mug Press.
Supplies Needed If Using The Cricut Mug Press:
- Mug Blank – 12 oz or 15 oz (can also use non-Cricut sublimation mugs)
- Infusible Ink Transfer Sheets
- Heat resistant tape
- Lint roller
- Rubbing alcohol
Supplies Needed If Using Adhesive vinyl:
- Ceramic mug (you’ll want to avoid textured or powder coated)
- Outdoor permanent adhesive vinyl
- Rubbing alcohol
- Mod Podge for Dishwasher
- Foam paint brush
tips for working with the coffee craft repeat svg cut files:
Snip the Transfer Tape
If you have ever tried applying transfer tape to a mug, especially a curved mug, you know what a challenge it can be to keep the vinyl design straight and neat. To help with this, simply make small snips around the edges of the transfer tape on your vinyl decal. These snips allow your transfer tape to bend with the curve of the mug and allow you to apply it on that curve without any creases.
Clean The Surface
Before you begin your project, be sure to clean the surface of ceramic mugs, tumblers, or other hard surfaces with rubbing alcohol and a lint-free cloth before applying the vinyl. Once you clean the surface, try not to touch the cleaned surface until after the vinyl has been applied.
Cricut also recommends using a lint roller on their mug blanks before applying the infusible ink transfer sheets.
Start in the middle
When you go to apply the decal or design onto your mug, start by placing the middle of the design against the mug first and work your way out from there.
make your mug dishwasher safe and waterproof
If you want to make your mug dishwasher safe and waterproof and you are not using sublimation or the infusible ink with the Cricut Mug Press, then you’ll want to apply a very thin coat of Modge Podge for Dishwasher to the entire mug face – just omit the handle.
You will also have to allow the Mod Podge for Dishwasher to cure for 28 days before it can be used in the dishwasher.
for best results – use the Cricut Mug Press!
If you want the absolute best results, longevity, and a custom mug you can be proud of, you’ll want to use the Cricut Mug Press. I have read reviews and researched numerous mug press and sublimation machines. Nothing gives the consistent professional-looking results that you get with the Cricut Mug Press.
It really is super easy to use:
- Select a design and size it appropriately.
- Load the infusible ink sheets on your cutting mat and cut out your decals.
- Clean the mug with a lint brush.
- Apply the decal to the mug, securing in place with heat resistant tape.
- Place the mug in the mug press, wait about 6 minutes.
- Remove the mug to cool then reveal your amazing design.
How to Get the free coffee craft repeat svg files
Step One: Subscribe
This collection of Coffee Craft Repeat SVG files is exclusive for Kenarry subscribers. Receive the FREE collection of SVG files by signing up below. You’ll get the download link sent directly to your inbox.
Your privacy is important to us. We promise not to spam you or share your information. You can opt-out at any time. See our privacy policy for more information.
All printables from Ideas for the Home by Kenarry® are for your own PERSONAL USE ONLY.
After you’ve signed up, watch for an e-mail to confirm your e-mail address and download the free digital printable. Plus you’ll have the opportunity to get the weekly Kenarry Ideas In Your Inbox newsletter, as well as product discounts, special offers and other content that is EXCLUSIVE for Kenarry subscribers only.
You can also join our Idea Insider VIP Club to get unlimited access to the full vault of unique and beautiful printables we offer to make gift giving, holidays and everyday life more special. A lifetime membership in our Idea Insider VIP Club is a great way to save time and money with easy access to hundreds of printable cards, tags, wall art and more right at your fingertips.
Step Two: Download & UnZip
After you subscribe, you’ll want to download the SVG files, which will be contained in one ZIP file. Once downloaded, you’ll need to unzip the files (usually by double-clicking on the file and selecting Extract All). If you don’t have a zip utility on your computer, you can download a free one like 7-Zip (please use at your own discretion).
Step Three: Upload
Then once you have subscribed, downloaded and unzipped the ZIP file that contains the SVG files, you’ll want to upload the designs to Cricut Design Space or into your preferred software. Then you are ready to customize your designs to fit your project.

How to Create Custom Mugs with Coffee Craft Repeat SVG Files
Equipment
- Cutting machine, such as: Cricut Joy,Cricut Explore Air 2, Cricut Maker, Silhouette Cameo 4, Brother ScanNCut2
- Cricut Mug Press (optional)
- StandardGrip Cutting Mat
- Heat Resistant Mat
- brayer
- weeding tools
Supplies
Materials if Using Cricut Mug Press
Instructions
Step One: Select Your Design
- If you haven't already, you'll want to download, unzip and upload your design to Cricut Design Space. If you're not sure how to upload an SVG file to Cricut Design Space, you can watch this video for additional help.
Step Two: Cut Out Your Vinyl
- Be sure to select Permanent Adhesive Vinyl as your material type. Place your permanent adhesive vinyl shiny color side UP (right side up) on your cutting mat. Insert the fine-point blade into your Cricut cutting machine, then load the mat.
- Press the flashing button to GO! Your machine will begin cutting out your design. It should only take a minute or two.
- When the machine is done cutting, unload the mat, flip the mat over onto your work surface and peel it away from the vinyl carefully.
Step Three: Weed Your Vinyl
- Once you cut out your vinyl and remove it from the mat, you will need to weed your cut design. Weeding simply means you are going to remove all the extra pieces of vinyl that you do NOT want to transfer to your mug. I find a weeding tool to be most helpful with weeding.
Step Four: Prepare Design For Transfer
- After you have weeded the vinyl, you will need a piece of transfer tape to transfer your design to your mug. Simply cut a piece of transfer tape that is the same size as your design.
- Remove the backing off of the transfer tape and place it onto the front of your vinyl design. Start in the middle or center of the design and move outwards so that you don’t get creases or bubbles in your transfer tape.
Step Five: Transfer The Design
- Before you apply or transfer the design onto your mug, you'll want to make sure the surface of the mug is clean and dry. Use a lint free cloth and clean the surface of the mug with rubbing alcohol. Then try not to touch the cleaned surface.
- If your coffee mug surface is curved, you'll want to make small snips around the edges of the transfer tape on your vinyl design. These snips allow your transfer tape to bend with the curve of the mug and allow you to apply it on that curve without any creases.If you're using a straight mug, you can skip this step.
- Apply the vinyl to the mug, starting in the center and allow the vinyl to sort of go where it wants to go naturally. Don’t force it into a position. Smooth it all down onto the mug surface.
- Then gently remove the transfer tape.
Step Six: Apply Sealer
- If you are not using the Cricut Mug Press with infusible ink and you want your mug to be dishwasher safe, you'll want to apply a sealer. I recommend using Mod Podge Dishwasher Safe Sealant. Although permanent adhesive vinyl will hold up when hand-washed and you can even run it through the dishwasher, over time and after repeated washings, your vinyl may start to peel.
- To seal your mug, first clean your mug all over again using rubbing alcohol.
- Now, you will apply a thin coat of Mod Podge to the entire mug (except the handle) because you'll want the mug to have the same texture all over. For best results, be sure to brush a VERY THIN coat all over the mug using short strokes in the same direction using a soft and clean foam brush. Let the mug dry for about an hour before adding a second coat. Repeat for a third layer.
- The sealer will look very streaky when it is wet. It will dry less streaky. If you don't like the streaky look of the sealant, then I HIGHLY recommend using the Cricut Mug Press.
Step Seven: Cure The Mug
- The Mod Podge sealant must be cured for 28 days to be effective. So, after you apply the last coat of sealer, set your mug in a clean, dry location to cure for 28 days before using. Although it will appear completely dry in a couple of days, you do not want to use the mug or expose it to water for 28 days.
Love the ideas you see here on Ideas for the Home by Kenarry®? Subscribe today to get our FREE DIY & Craft Planning Calendar, plus our weekly Ideas in Your Inbox newsletter filled with creative tips and exclusive offers!
more cricut craft ideas
If you enjoyed this collection of 7 Coffee Craft Repeat SVG files, you might also like these ideas from The Birch Cottage blog:
NEW Cricut Mug Press – A First Look


How to Combine Projects in Cricut Design Space
You may also enjoy these craft ideas on Ideas for the Home by Kenarry® –