• About Us
    • Contact Us
    • Work With Us
    • The Creative Team
    • Disclosures
  • Subscribe
  • Shop Our Products
  • My Account
  • Cart
  • Nav Social Menu

    • Facebook
    • Instagram
    • Pinterest
    • Twitter
  • DIY & Decor ▾
    • Crafts
    • Home Decor
    • Home Improvement
    • Technology
  • Recipes ▾
    • Breakfast
    • Appetizers
    • Side Dishes
    • Easy Dinner Ideas
    • Slow Cooker
    • Fun Food
    • Desserts
  • Clean/Organize
  • Kid Ideas ▾
    • Birthdays
    • Castle Playroom
    • Outer Space Bedroom
    • Teacher Appreciation
    • Travel Tips
  • Free Printables
  • Holidays ▾
    • Valentine’s Day
    • St. Patrick’s Day
    • Easter
    • Cinco de Mayo
    • Mother’s Day
    • Memorial Day
    • Father’s Day
    • Independence Day
    • Halloween
    • Thanksgiving
    • Christmas
    • New Year’s
    • Gift Ideas

Ideas for the Home

You are here: Home / Craft Ideas / Monogram Wall Art – DIY Cut Paper Initial Craft

By Lori Greco on July 6, 2018 2 Comments

Monogram Wall Art – DIY Cut Paper Initial Craft

Craft Ideas

  • Share
  • Tweet

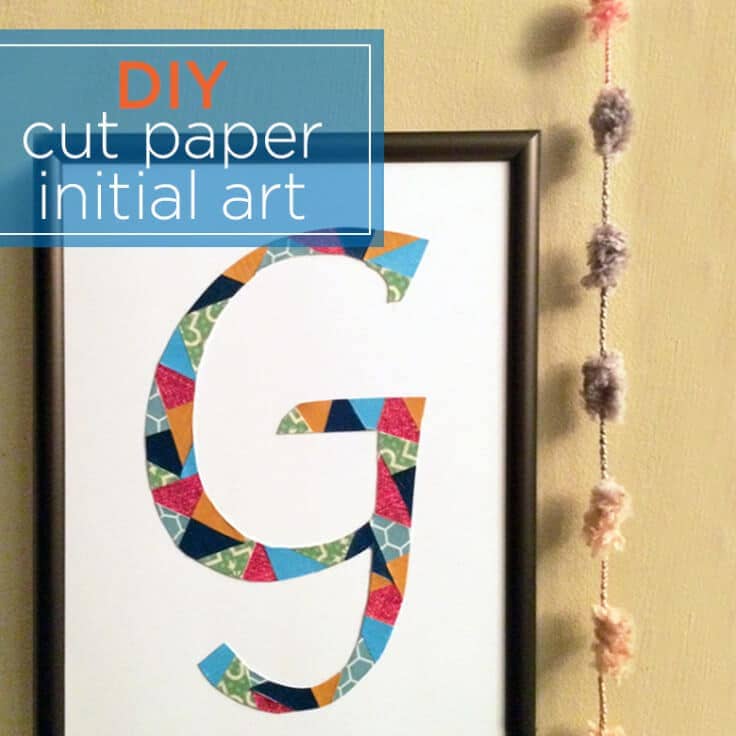
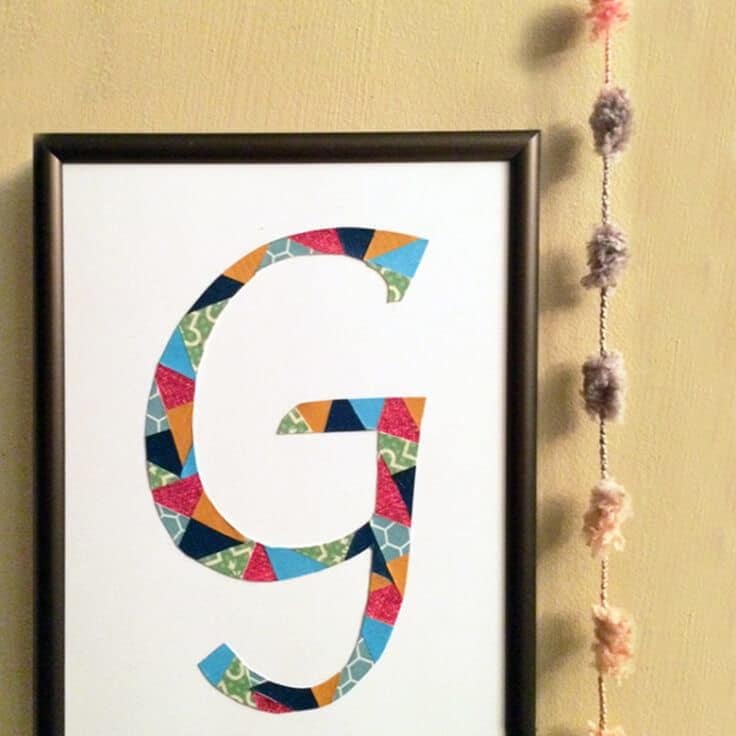
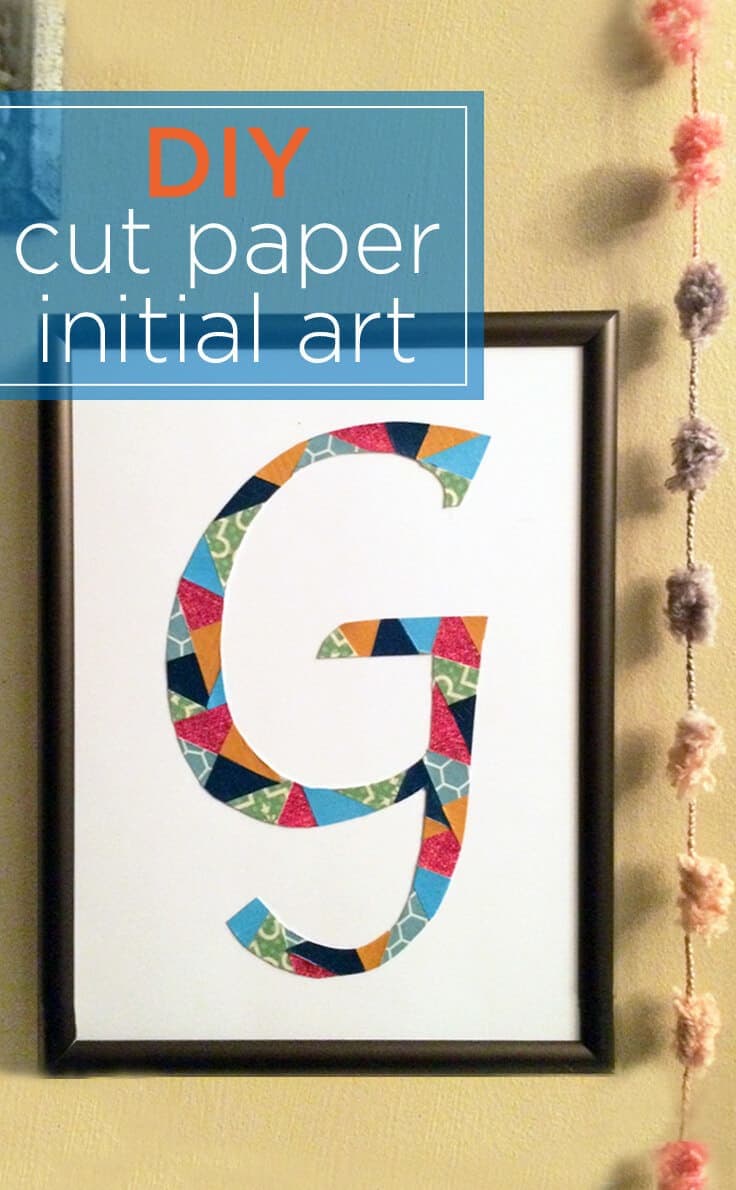
Create easy and unique home decor with this DIY Cut Paper Initial Art tutorial. Learn how to craft with scrapbook paper to make beautiful monogram wall art.

Hi all, it’s Lori from Greco Design Company. I’m thrilled to be back again today at Ideas for the Home by Kenarry® to share with you a great DIY project for creating monogram wall art. This project is super easy and you’ll only need some different colored paper and a few craft supplies you probably have already. Monograms and initials are super hot right now and this is an easy way to personalize your walls and be on-trend!

DIY initial art created with cut paper

I’m a graphic designer so I love typography and fonts. I’ve used initials and even symbols, like the ampersand, in random places throughout my home. I had the idea to make this initial art out of cut paper when I decided to group all my initials and create a statement wall between my kitchen and hallway. 

Check out my post on this initial wall grouping here. I needed some artwork and I didn’t want to spend a lot of money or make a trip to the art supply store. So I used what I had for supplies and created a fun piece of art!

How to Make Your own monogram wall art
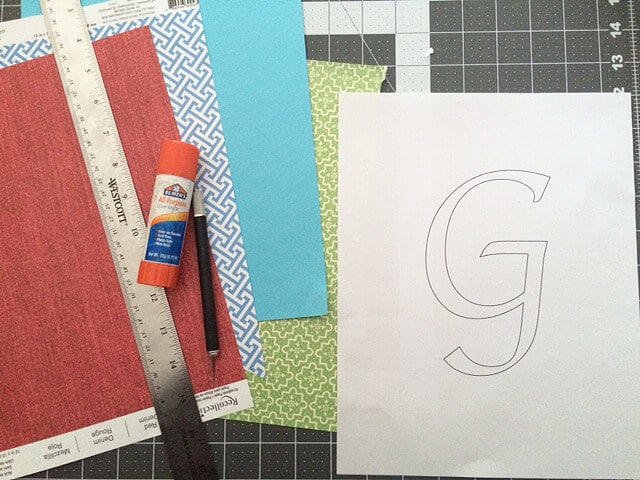
Supplies needed for monogram wall art

Supplies Needed:

  • Old paper
  • Scissors
  • Glue stick
  • Decoupage glue

Instructions

Here’s how to make your personalized wall art.

DIY initial art paper pieces

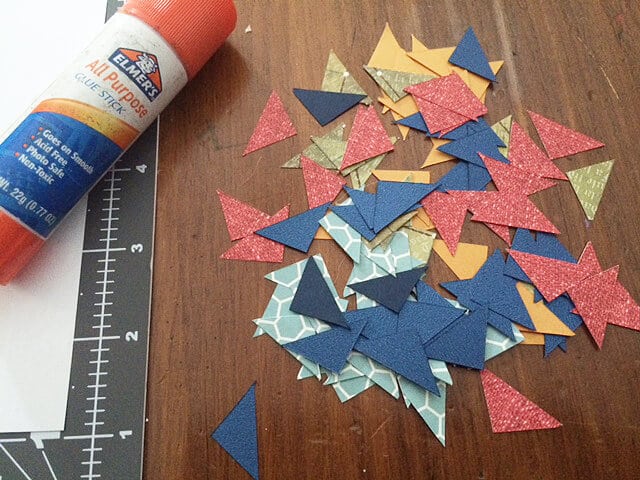
1. Cut the paper into triangles

I did this by cutting 1″ squares and then I cut the squares into 4 triangles {like an X}

DIY initial art tracing letter

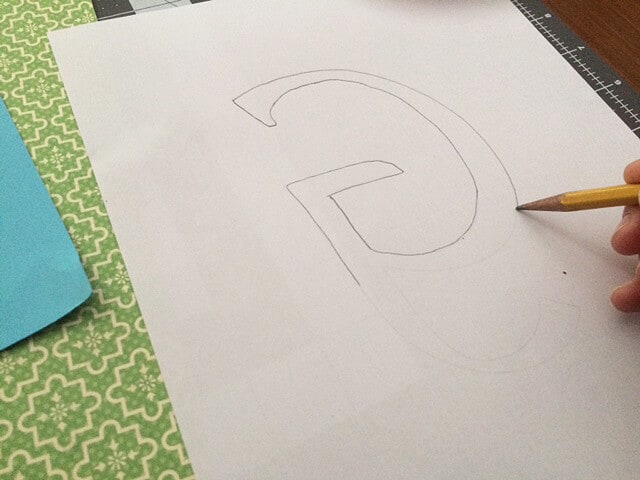
2. Trace your letter

Print out your initial from your computer in the size you want and as an outline. Turn the paper over and trace the outline of the initial onto the back. This will serve as a guide when you cut the letter out.

DIY initial art created with cut paper

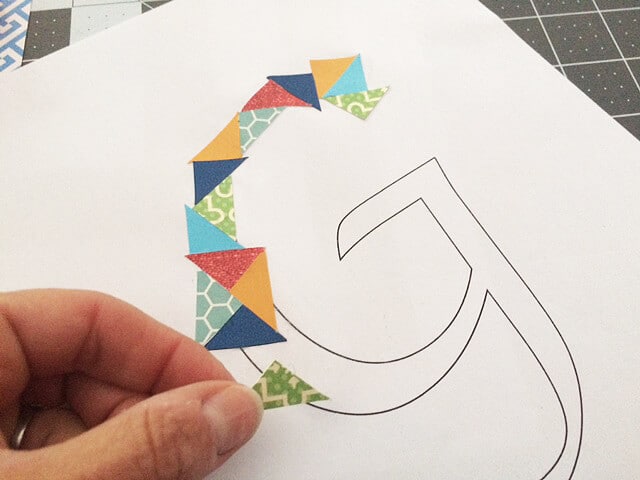
3. Glue the triangles on your letter

Flip the paper over so the initial is reading the correct way. With your glue stick, attach the triangles so that they fill the initial shape. I recommend gluing the triangles so that they go outside the lines too. You don’t have to be too precise because you’ll be trimming the initial at the end.

DIY initial art created with cut paper and decoupage glue

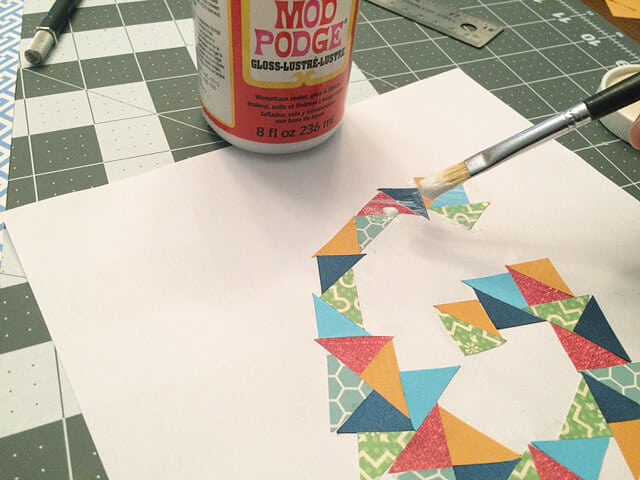
4. Seal with decoupage glue

When all the areas of your initial are filled with the paper triangles, paint a coat of the decoupage glue over the entire initial to seal the paper pieces.
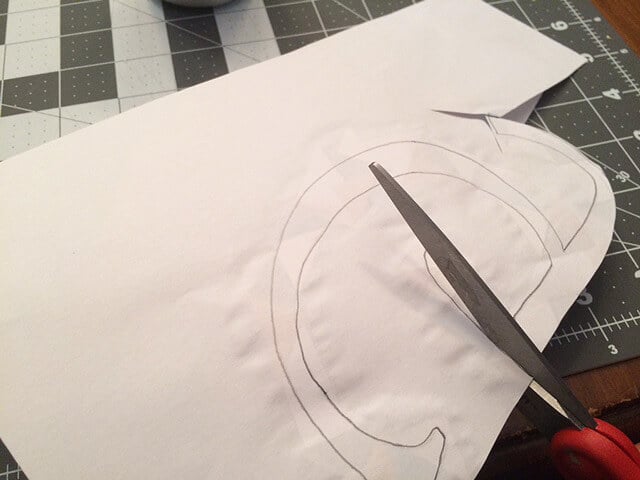
DIY initial art trimming

5. Trim the letter

When the glue is dry, turn the paper over and trim the initial out along the lines you traced on the back.

DIY initial art created with cut paper

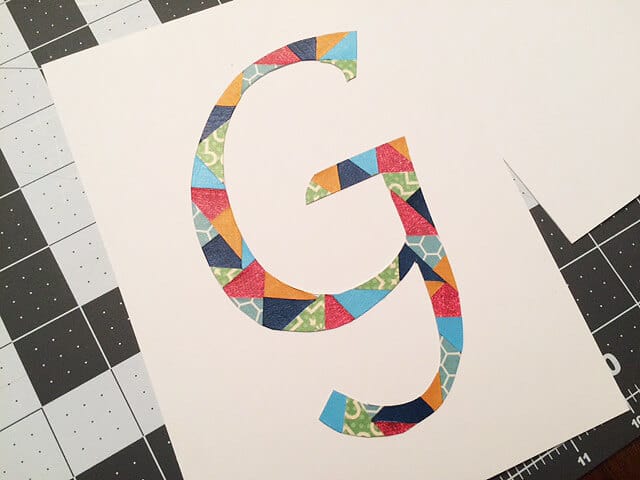
6. Frame and display your art

There are several options for what you could do with your cut paper initial. I glued my “G” onto a piece of ivory paper and framed it. You could also glue it onto a thick piece of paper, punch a hole in it and hang it like an ornament, or tape it on the wall with washi tape.

DIY initial art created with cut paper

Your new art would look great in any room but if you’re feeling like making a statement, group it with other initials and make an entire personalized wall.

DIY initial art created with cut paper

Thank you SO much for having me here to share my DIY cut paper initial project with you all – enjoy!

Looking for more DIY art ideas? Check out some of my related posts below!

gallery wall

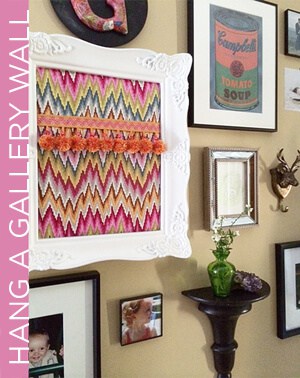
how to hang a gallery wall
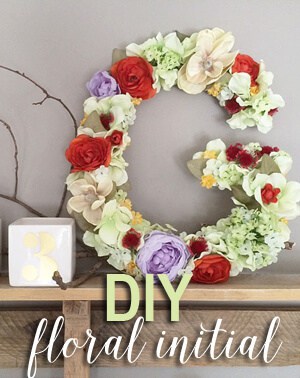
DIY floral initial

DIY floral initial

What’s Next?

While you’re here be sure to check out other craft projects on Ideas for the Home by Kenarry® –

  • DIY Monogrammed Wooden Stovetop Cover and Tray
  • DIY Decorated Shadow Box Initial Art
  • DIY Star Die-cut and Washi Tape Note Cards

Originally published July 2015. Updated July 2018.

  • Share
  • Tweet

Craft Ideas

About Lori Greco

Lori is a freelance graphic designer living in the Boston area with her husband, their three kids and a yellow lab puppy. She started Greco Design Company in 2014 when she realized that her love for design was extending beyond the corporate advertising world and into all areas of her life. She shows us some unique but simple DIY projects, gives some great ideas for home design, provides her outlook on current fashion trends, and loves to do beauty and product reviews. She incorporates her graphic design background through her free printables, paintings, signs, art prints, invitations and stationery on her blog and in her Etsy shop. Lori believes in the importance of surrounding ourselves with good, purposeful design that can help streamline our lives and still be affordable. Her tutorials are easy to follow as she shows how you can make anything you set your mind to!

Lori shared her great ideas on Ideas for the Home by Kenarry® from June 2015 - September 2019. Follow Lori on Facebook, Twitter, Pinterest, and Instagram.

In this ultimate guide, you'll learn how to make a burlap wreath with ribbon for your home. The FREE eBook includes easy step-by-step instructions plus inspiring craft and decor ideas to make wreaths for fall, Christmas, Easter and other holidays.

Subscribe today to get ideas in your inbox plus FREE exclusives only for Idea Insiders!

Almost there! Now just check your email to confirm your e-mail address and get your free eBook.

There was an error submitting your subscription. Please try again.

You're already signed up! YAY! As an Idea Insider you have instant access to our Kenarry Idea Insider Resource Library with exclusive printables, offers and other freebies as soon as you confirm your subscription.
Previous Post: « Chic and Fun DIY House Number Wall Planter
Next Post: Lemonade Scented Lemon Sugar Scrub »

Reader Interactions

Trackbacks

  1. a few fun things | greco design company says:
    July 7, 2015 at 10:29 am

    […] And I’m being featured over at Ideas for the Home by Kenarry® where I show you how to make inexpensive initial artwork with just some paper scraps, scissors and glue. Check it out here. […]

    Reply
  2. July wrap-up | greco design company says:
    August 4, 2015 at 7:40 am

    […] My second post as a contributor at Ideas for the Home by Kenarry® was on July 6th. I shared my DIY cut paper initial art. Such an easy […]

    Reply

Leave a Reply Cancel reply

Your email address will not be published. Required fields are marked *

Recipe Rating


This site uses Akismet to reduce spam. Learn how your comment data is processed.

Primary Sidebar

Welcome

Carrie Ypma from Ideas for the Home by Kenarry®Hello, I'm Carrie! Welcome to Ideas for the Home by Kenarry® where we want to help you create a home you love. We're glad you're here! Read more...

Sign Up and Get a Free Gift

Subscribe to become an Idea Insider. You'll get our weekly newsletter plus special deals and other resources that are only for subscribers -- all for FREE!

Almost there! Now just check your email to confirm your e-mail address and get your free eBook.

There was an error submitting your subscription. Please try again.

You're already signed up! YAY! As an Idea Insider you have instant access to our Kenarry Idea Insider Resource Library with exclusive printables, offers and other freebies as soon as you confirm your subscription.
In this ultimate guide, you'll learn how to make a burlap wreath with ribbon for your home. The FREE eBook includes easy step-by-step instructions plus inspiring craft and decor ideas to make wreaths for fall, Christmas, Easter and other holidays.
  • About Us
  • Subscribe
  • Shop Our Products
  • My Account
  • Cart

Footer

Disclosure: Posts may include affiliate links for your convenience. As an Amazon Associate I earn from qualifying purchases. All opinions are our own. You are reading and following advice from Kenarry, LLC at your own risk. Always use safety precautions. You should read and follow manufacturer’s directions for the products and tools you use. Read more.


Privacy Policy: The privacy of your personal information is important. We make every effort to safeguard your information and will never sell it to third parties. Read more.

Terms of Use: You are welcome to link to this site or use a single image and brief description to link back to any post. Republishing posts in their entirety is prohibited without permission. All images are property of Kenarry, LLC. Do not crop or remove watermark. Do not reproduce without link back or permission. If you do link to this site, please contact us to let us know. All free printables offered are for personal use only. Pinning is always welcome and appreciated. Thank you!

As it relates to comments and content posted on this blog by those other than the owners, any such content that contains the copyrighted and/or proprietary work of others is expressly prohibited and will be removed. Repeated posting of such content by the same user may result in that user being banned from this site.

Copyright © 2021 Kenarry LLC Powered by Captivating Theme on Genesis Framework WordPress Log in