• About Us
    • Contact Us
    • Work With Us
    • The Creative Team
    • Disclosures
  • Subscribe
  • Shop Our Products
  • My Account
  • Cart
  • Nav Social Menu

    • Facebook
    • Instagram
    • Pinterest
    • Twitter
  • DIY & Decor â–¾
    • Crafts
    • Home Decor
    • Home Improvement
    • Technology
  • Recipes â–¾
    • Breakfast
    • Appetizers
    • Side Dishes
    • Easy Dinner Ideas
    • Slow Cooker
    • Fun Food
    • Desserts
  • Clean/Organize
  • Kid Ideas â–¾
    • Birthdays
    • Castle Playroom
    • Outer Space Bedroom
    • Teacher Appreciation
    • Travel Tips
  • Free Printables
  • Holidays â–¾
    • Valentine’s Day
    • St. Patrick’s Day
    • Easter
    • Cinco de Mayo
    • Mother’s Day
    • Memorial Day
    • Father’s Day
    • Independence Day
    • Halloween
    • Thanksgiving
    • Christmas
    • New Year’s
    • Gift Ideas

Ideas for the Home

You are here: Home / Craft Ideas / Fall Burlap Wreath Tutorial: An Easy Craft Decor Idea

By Carrie Ypma on September 8, 2016 9 Comments

Fall Burlap Wreath Tutorial: An Easy Craft Decor Idea

Craft Ideas· Home Decor Ideas· Seasonal Ideas

  • Share
  • Tweet

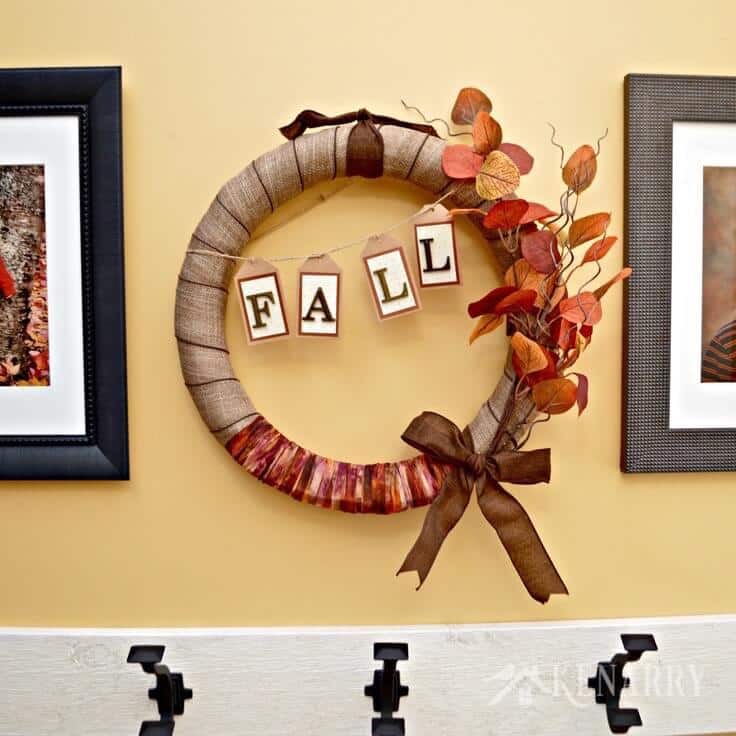
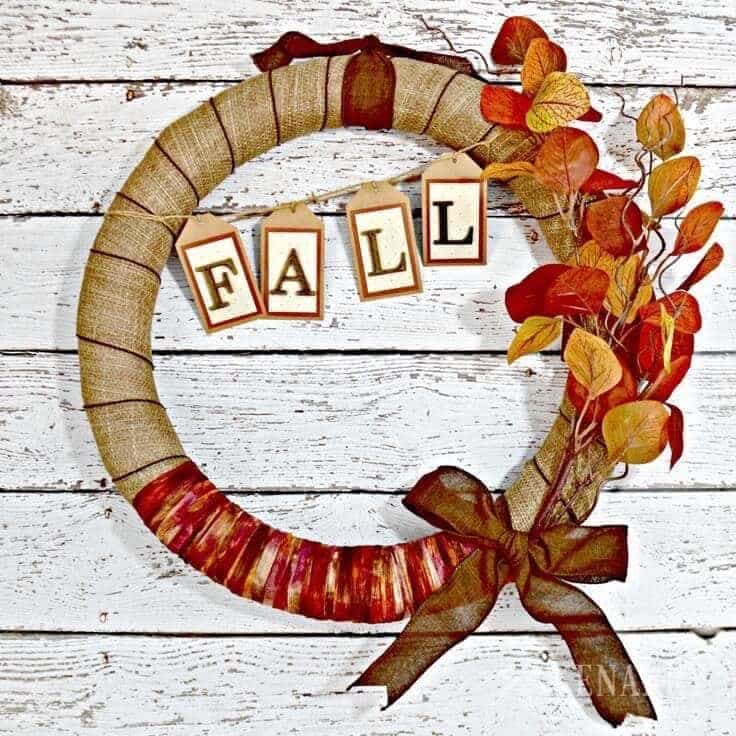
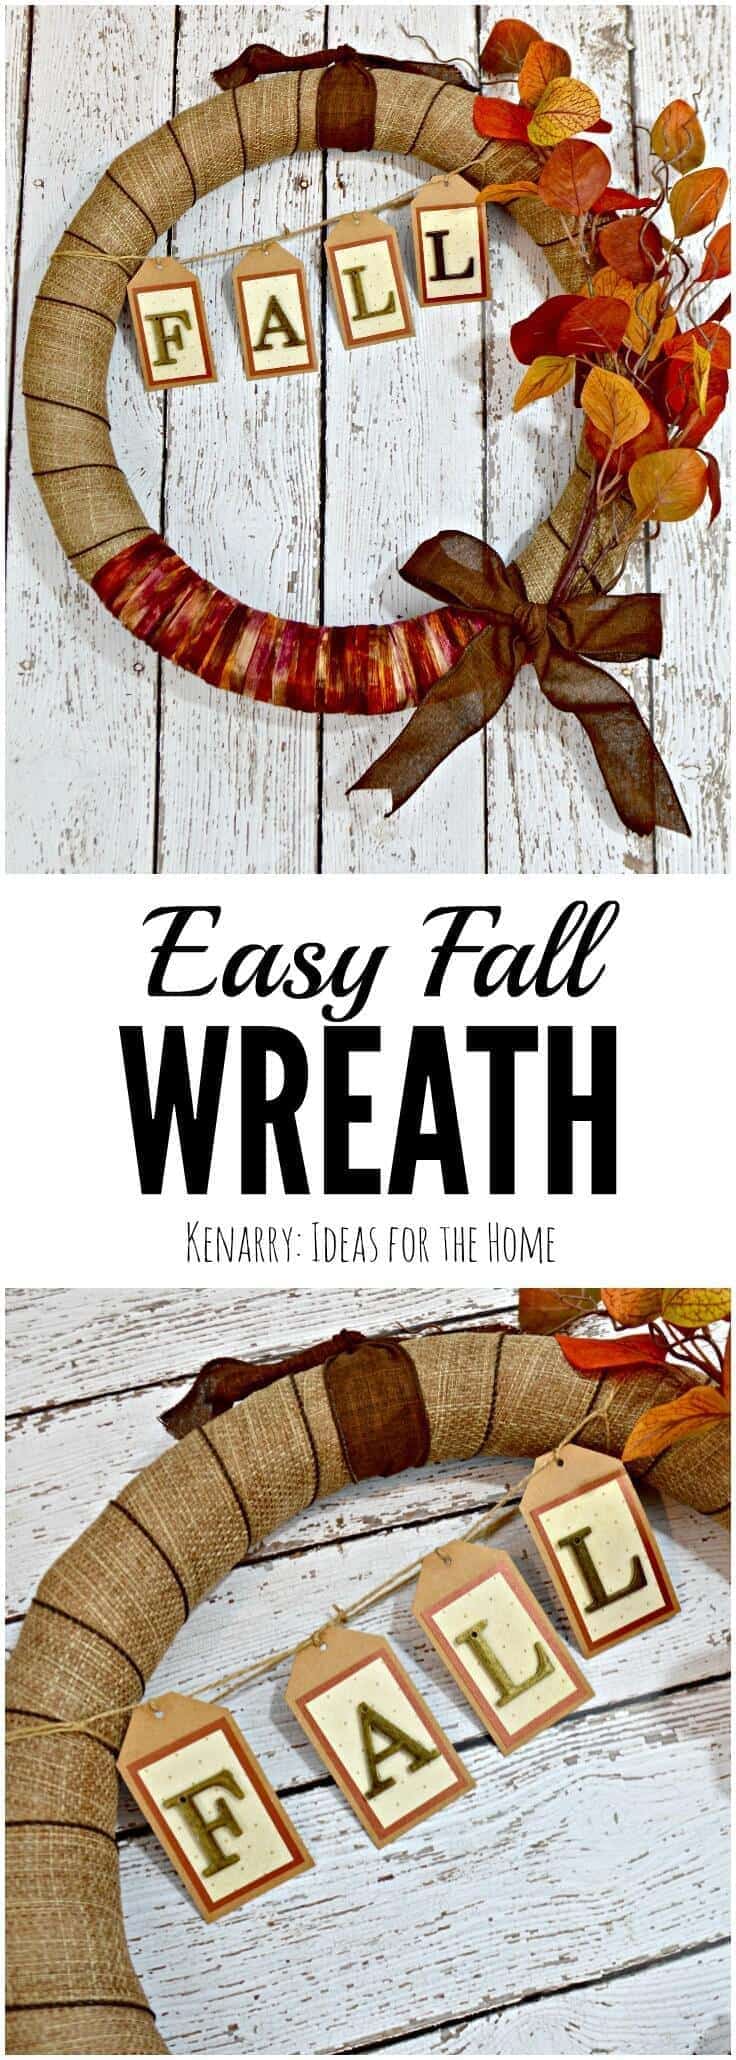
Decorate your house for autumn with this easy craft idea. Follow this fall burlap wreath tutorial to create beautiful DIY home decor in just a few hours.

Are you starting to decorate your house for autumn? Today, we’re sharing an easy craft idea we think you’ll really like. Just follow this Fall Burlap Wreath Tutorial to make your own beautiful DIY home decor for the season.

This autumn wreath is a beautiful craft idea! I love how easy it is to follow this step-by-step fall burlap wreath tutorial to make one for my own home decor.

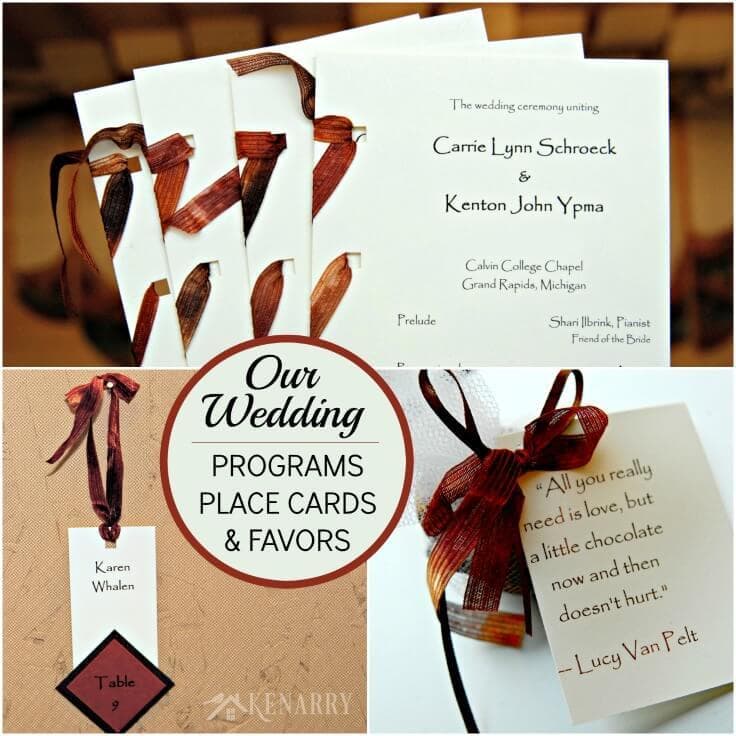
Making wreaths is one of my favorite craft projects. I love to change the wreaths and decor in our home and outside our front door to match the seasons. To me, fall decorating means burlap, colorful leaves and rich warm reds, oranges and golden yellows. My husband, Kent and I were actually married in the fall. We had leftover ribbon from the wedding programs, reception place cards party favors. I wanted to come up with a clever way to incorporate it into a craft so our home decor could have a little extra sentimental value too.

The same ribbon was used to decorate fall wedding programs, place cards and party favors

Over the past several years I’ve made dozens of bubbly burlap wreaths with accent ribbons, including three fall burlap wreaths that my mother, sister and I made a few years ago. If that’s the kind of wreath you were actually looking for today, I have an entirely separate tutorial for how to make a burlap wreath. It will show you step-by-step how to make one of those big burlap wreaths that are so popular right now. Unfortunately the leftover wedding ribbon is really thin and would not be a good fit for that type of burlap wreath.

Besides I’ve done so many of those that for this fall burlap wreath tutorial I wanted to do something entirely different. Rather than using a wire wreath frame, I chose a styrofoam wreath form and wrapped it with both wired burlap ribbon and the leftover wedding ribbon. If you want to make a similar one, here’s our detailed Fall Burlap Wreath Tutorial.

This autumn wreath is a beautiful craft idea! I love how easy it is to follow this step-by-step fall burlap wreath tutorial to make one for my own home decor.
In this ultimate guide, you'll learn how to make a burlap wreath with ribbon for your home. The FREE eBook includes easy step-by-step instructions plus inspiring craft and decor ideas to make wreaths for fall, Christmas, Easter and other holidays.

Get our e-book The Ultimate Guide to Making a Burlap Wreath plus a special limited time offer for 25% off Kenarry burlap ribbon when you sign up below. It’s totally FREE!

Almost there! Now just check your email to confirm your e-mail address and get your free eBook.

There was an error submitting your subscription. Please try again.

You're already signed up! YAY! As an Idea Insider you have instant access to our Kenarry Idea Insider Resource Library with exclusive printables, offers and other freebies as soon as you confirm your subscription.

Your privacy is important to us. We promise not to spam you or share your information. You can opt-out at any time. See our privacy policy for more information. 

Once you’ve confirmed your e-mail address, we’ll send you the free digital eBook in addition to the coupon code. Plus you’ll have the opportunity to get our weekly Ideas In Your Inbox newsletter as well as access to our resource library stocked with free printables, product discounts and other content that is EXCLUSIVE for Idea Insiders only.


Fall Burlap Wreath Tutorial 

Disclosure: This blog post contains affiliate links for products or services we think you’ll like. This means if you make a purchase from one of these links, we’ll make a small commission at no additional cost to you so we can keep the great ideas for the home coming your way. All opinions expressed are our own, derived from personal experience.

With just a few hours of your time and this fall burlap wreath tutorial, you can create a beautiful wreath for your home using a styrofoam form, wired ribbon, artificial leaves, scrapbook paper and a few other craft supplies.

This autumn wreath is a beautiful craft idea! I love how easy it is to follow this step-by-step fall burlap wreath tutorial to make one for my own home decor.

What You Need:

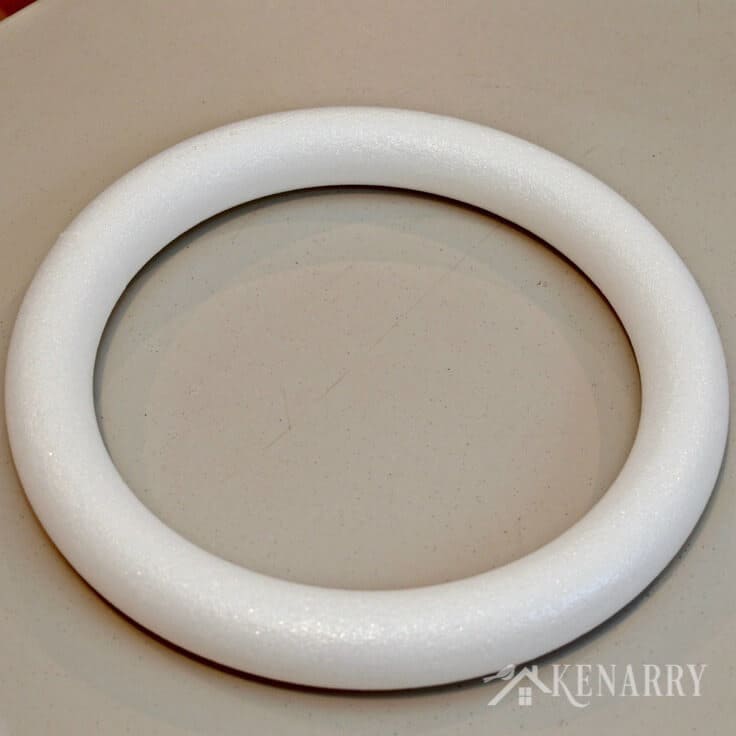
  • 16″ styrofoam extruded wreath form
  • Burlap wired ribbon
  • Brown wired ribbon (This one is similar.)
  • Accent ribbon (It’s been years since I bought the ribbon for our wedding at a craft store so I don’t know where you’d find it anymore. Any of these Filati Europa Ribbons on Amazon would give your wreath a similar look.
  • Artificial fall branch or pick
  • Fall scrapbook paper
  • Craft paper tags
  • Metal accent letters (I found ours at Hobby Lobby. I looked there and on Amazon, but could not find the same or similar letters to recommend. If you can’t find them, you could use small chipboard letters and paint them with a bronze metallic craft paint.)
  • Twine
  • Spray adhesive
  • High temperature glue gun
  • Glue sticks
  • Scissors

Instructions:

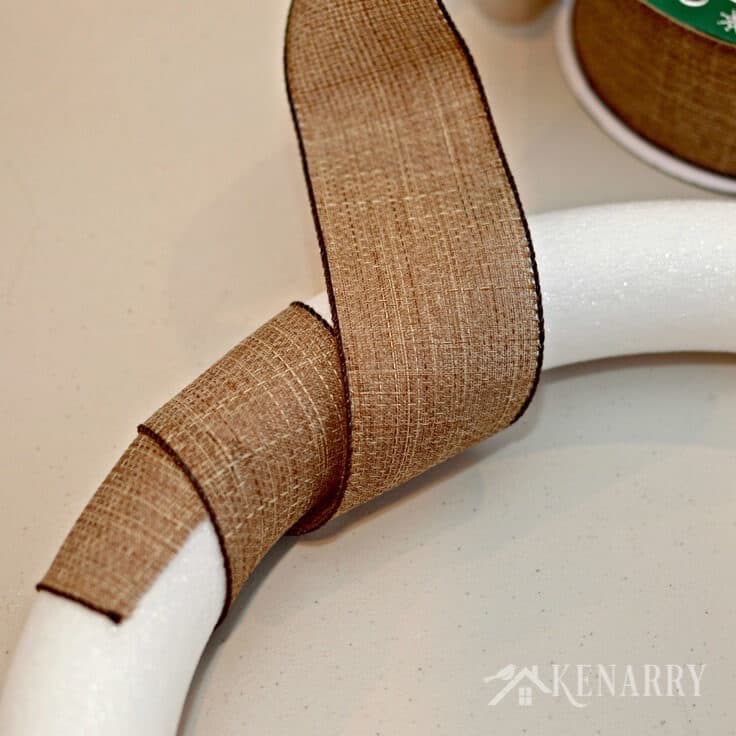
1. Wrap the Styrofoam Wreath Form

Use the high temperature glue gun to attach one end of the wired burlap ribbon to the styrofoam wreath form.

This autumn wreath is a beautiful craft idea! I love how easy it is to follow this step-by-step fall burlap wreath tutorial to make one for my own home decor.

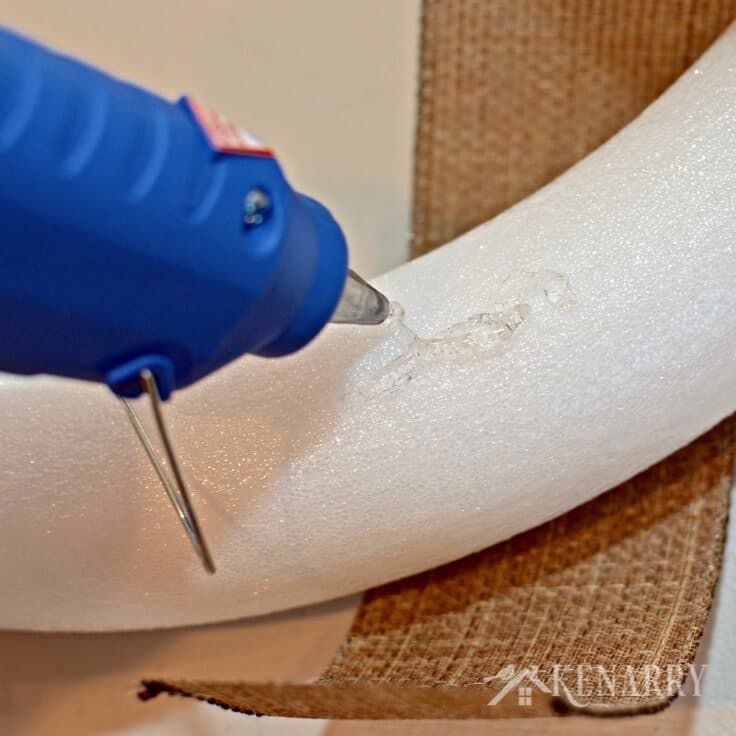
Begin wrapping the spool of wired burlap ribbon around the styrofoam wreath form. Make sure you overlap the burlap ribbon slightly each time you wrap it so that none of the white styrofoam is showing.

This autumn wreath is a beautiful craft idea! I love how easy it is to follow this step-by-step fall burlap wreath tutorial to make one for my own home decor.

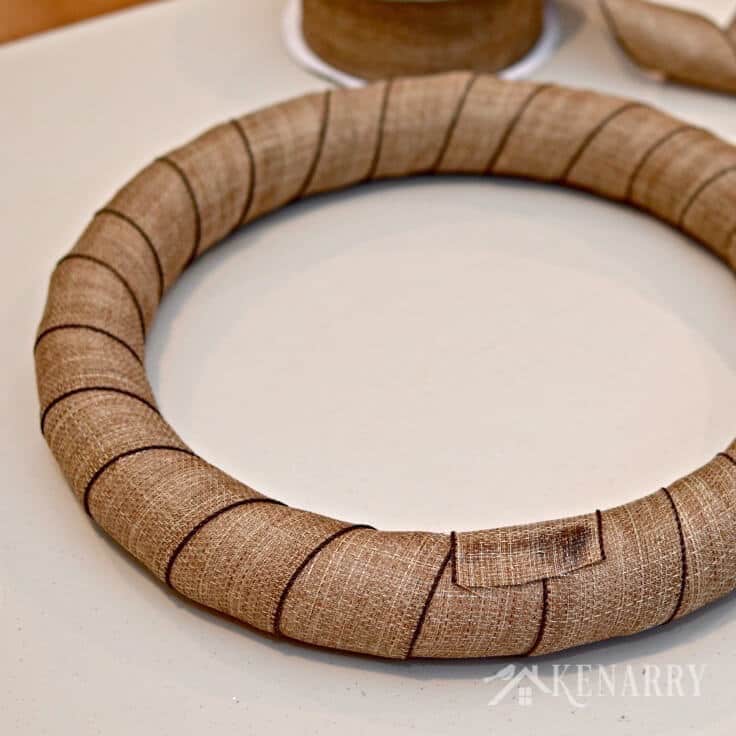
Once you’ve wrapped the entire wreath with burlap ribbon, cut the end with scissors. Use your hot glue gun to attach the end of the ribbon to the wreath so it doesn’t unravel.

This autumn wreath is a beautiful craft idea! I love how easy it is to follow this step-by-step fall burlap wreath tutorial to make one for my own home decor.

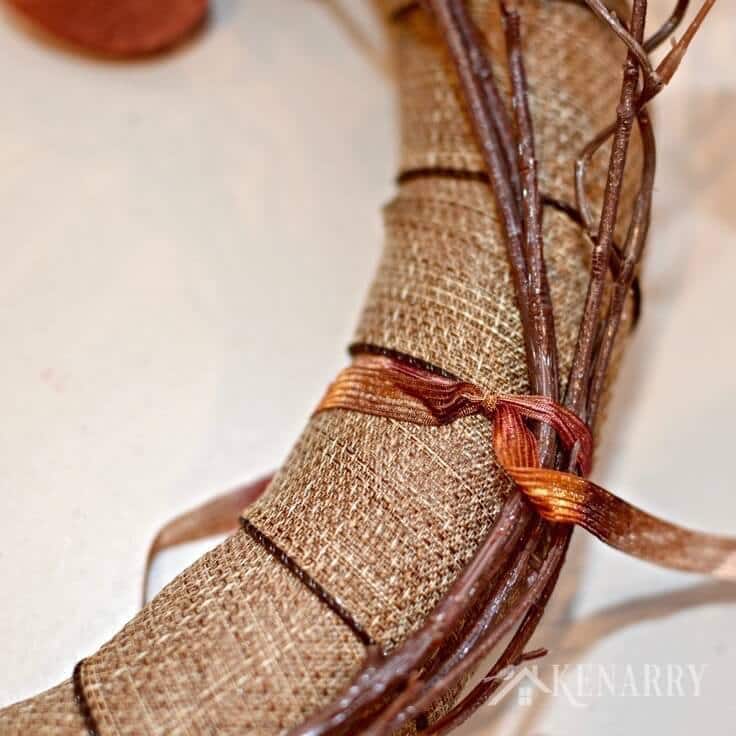
2. Attach the Artificial Branches

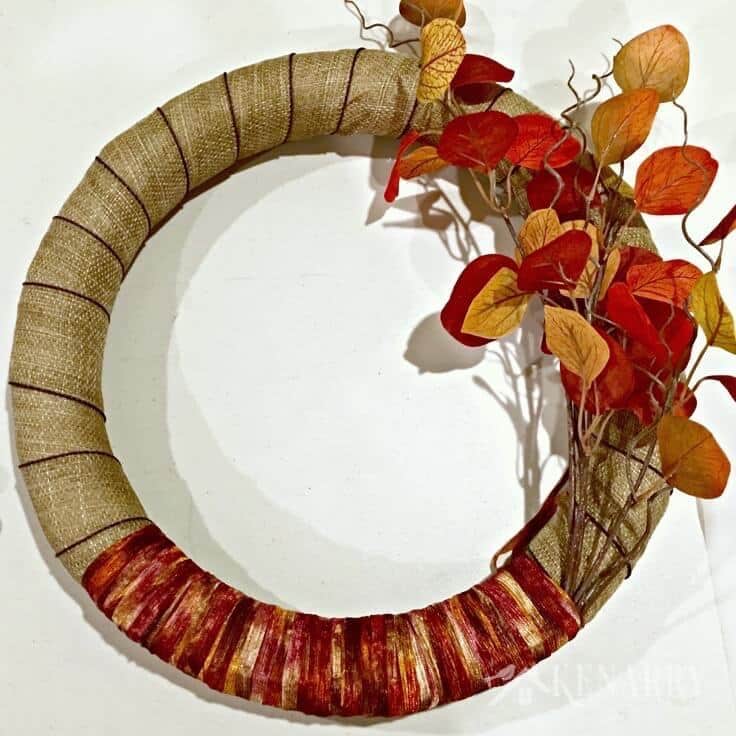
Bend the branches or stems of your artificial fall branches so it curves in line with the burlap wreath. Tie your accent ribbon securely around the branches to hold them in place. Leave the loose end of the ribbon free so you can use it to tie off at the end.

This autumn wreath is a beautiful craft idea! I love how easy it is to follow this step-by-step fall burlap wreath tutorial to make one for my own home decor.

Wrap the accent ribbon around the burlap wreath over and over again to cover the end of the fall branches. Overlap the accent ribbon so that none of the burlap shows through on that section. For mine I actually wrapped all the way out to the end of the branches and then wrapped it all the way back to where I started.

This autumn wreath is a beautiful craft idea! I love how easy it is to follow this step-by-step fall burlap wreath tutorial to make one for my own home decor.

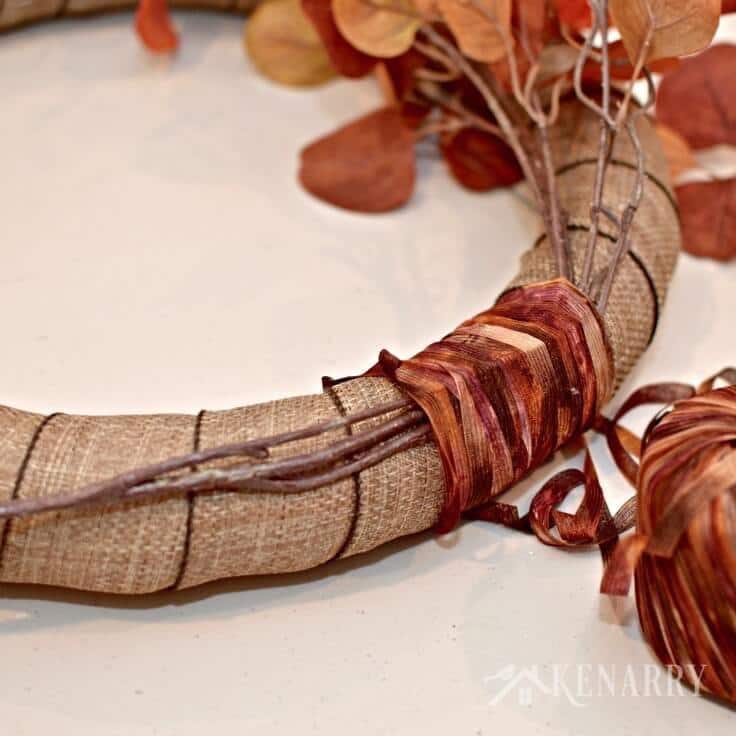
Use scissors to cut the end of the accent ribbon and then tie it to the loose end that you left when you started. At this stage of our fall burlap wreath tutorial, your craft project should now look something like this:

This autumn wreath is a beautiful craft idea! I love how easy it is to follow this step-by-step fall burlap wreath tutorial to make one for my own home decor.

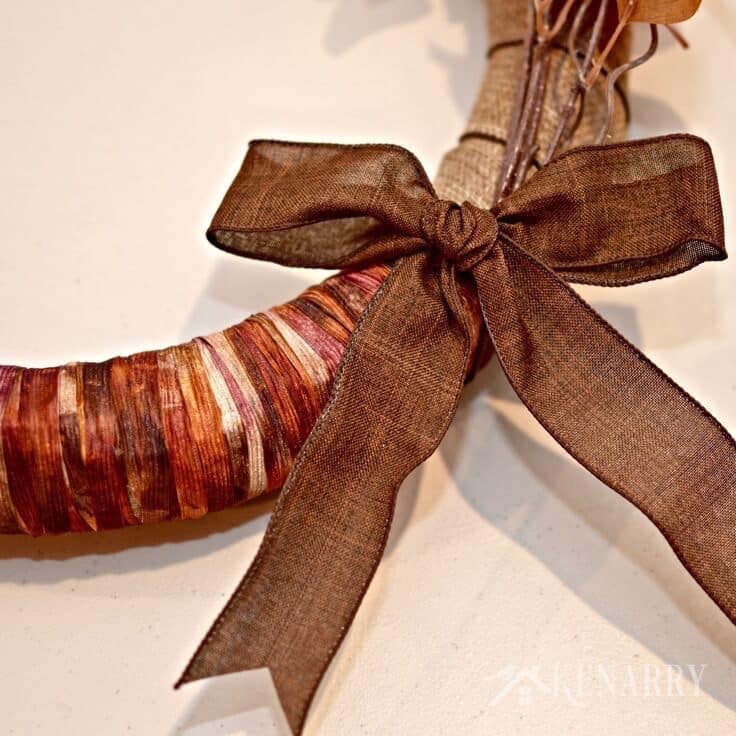
3. Tie the Accent Bow

Once I got to this spot in our fall burlap wreath tutorial, I wanted to dress up the project a bit more. I had a few pieces of thick brown ribbon in my craft stash. I used one of the brown pieces to tie a bow around the end of the accent ribbon where the branches come out. I tied the other end at the top of the wreath as an option for hanging it on the wall.

This autumn wreath is a beautiful craft idea! I love how easy it is to follow this step-by-step fall burlap wreath tutorial to make one for my own home decor.

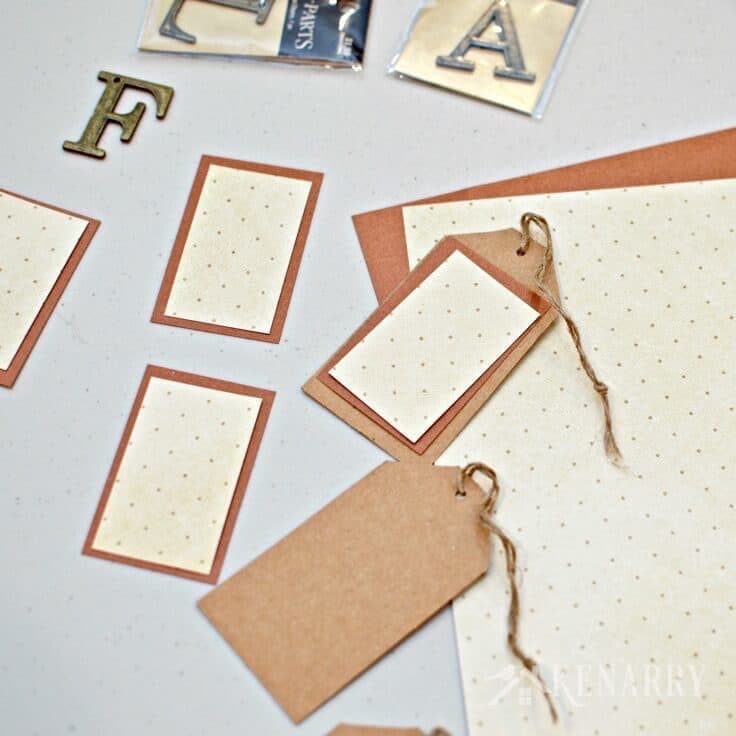
4. Layer the Scrapbook Paper and Tags

Use scissors or a paper cutter to trim two different fall colored scrapbook papers to fit on the brown craft tags. I used one paper that was a metallic copper color and another that was a matte cream colored paper with gold polka dots for our fall burlap wreath.

This autumn wreath is a beautiful craft idea! I love how easy it is to follow this step-by-step fall burlap wreath tutorial to make one for my own home decor.

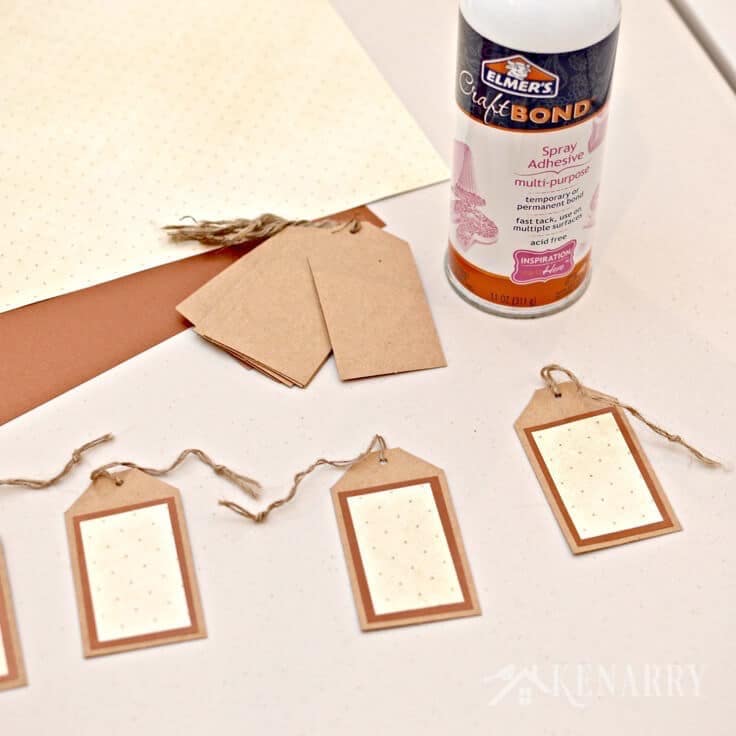
Use spray adhesive in a well ventilated area to attach one paper layer to another. Make sure you put a drop cloth or cardboard under the tags to protect your work surface from overspray.

I found it easiest to attach my layers from the top down. So first, I attached the cream colored paper to the metallic copper paper. Then I attached those two to the craft paper tags.

One of the benefits to using spray adhesive is that you don’t have a gloppy glue mess that bleeds through your paper layers. A second benefit is that you have a few minutes to realign your layers if you didn’t get it right the first time. Just make sure you move the tags to a new surface immediately after you’ve sprayed the layers so they don’t stick permanently to your drop cloth or cardboard.

This autumn wreath is a beautiful craft idea! I love how easy it is to follow this step-by-step fall burlap wreath tutorial to make one for my own home decor.

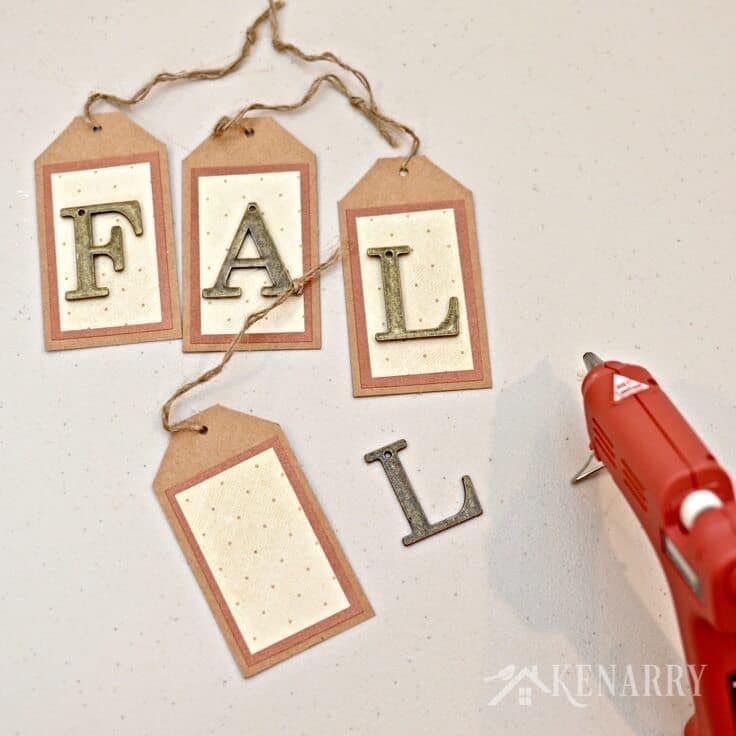
5. Glue the Letters to the Tags

Use your hot glue gun to put a small line of glue on the back of each of the letters. Try not to be too sloppy. You don’t want the glue to ooze out the sides when you attach the letter to the paper tags. If you accidentally put too much glue on, just let it dry for a few minutes and you should be able to peel the hot glue right off the back of the letter.

If you use metal letters like I did, you’ll want to hold the letter firmly in place on the tag for a minute or two so the letter adheres well.

This autumn wreath is a beautiful craft idea! I love how easy it is to follow this step-by-step fall burlap wreath tutorial to make one for my own home decor.

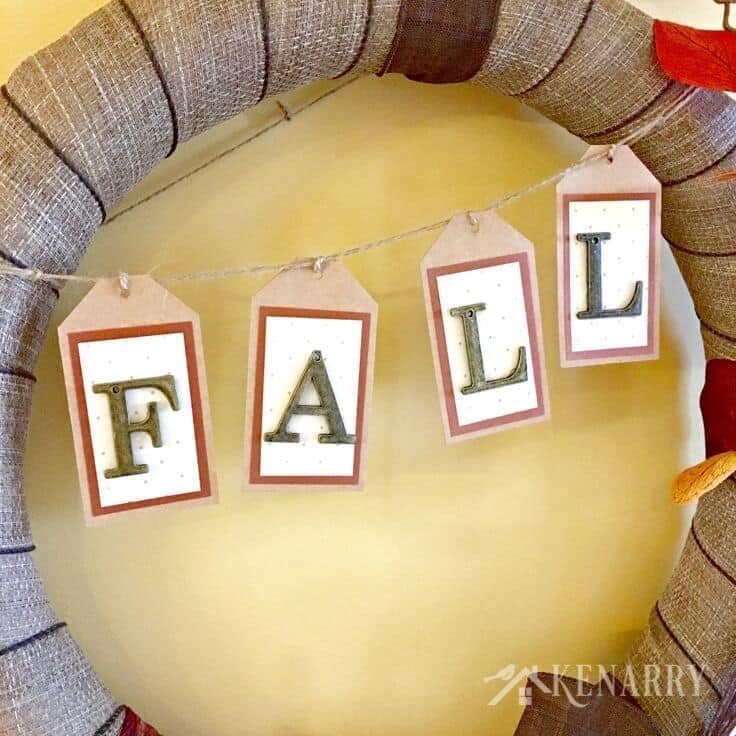
6. Attach the Fall Banner

Next for this fall burlap wreath tutorial, I removed the small loops of twine that came on each of the craft paper tags. I wanted the FALL tags to stay facing forward. Furthermore I didn’t want all of the letters to slide together when I draped the banner across the fall burlap wreath. To accomplish this, I ran one end from the spool of twine through the hole in the first tag. I looped the twine around the top of the tag and tied a small knot to hold the letter in place. I then repeated the same process with the remaining three letters, spacing them evenly apart as I went.

This autumn wreath is a beautiful craft idea! I love how easy it is to follow this step-by-step fall burlap wreath tutorial to make one for my own home decor.

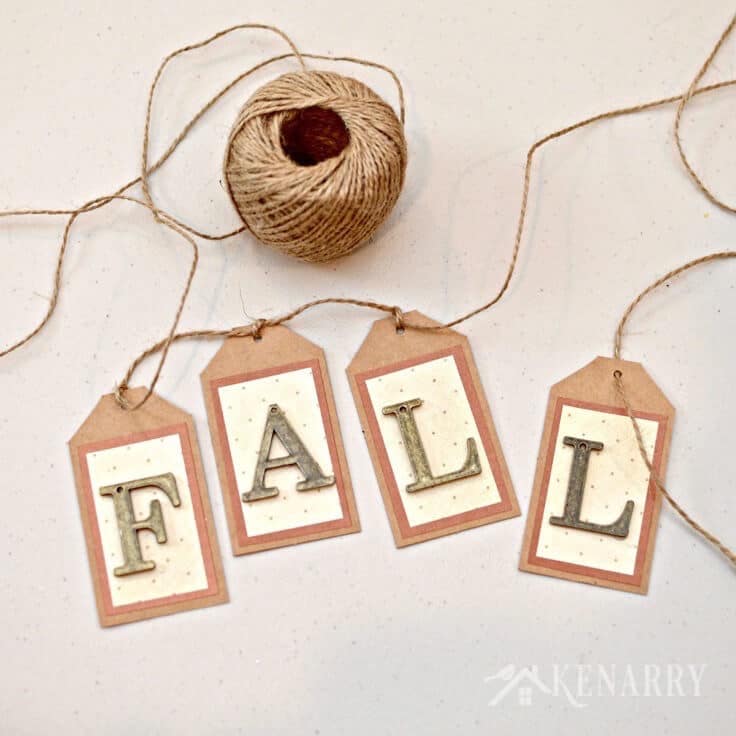
When I created the banner, I made sure to leave enough extra twine on each end of the banner so I could tie it firmly around the fall burlap wreath.

This autumn wreath is a beautiful craft idea! I love how easy it is to follow this step-by-step fall burlap wreath tutorial to make one for my own home decor.

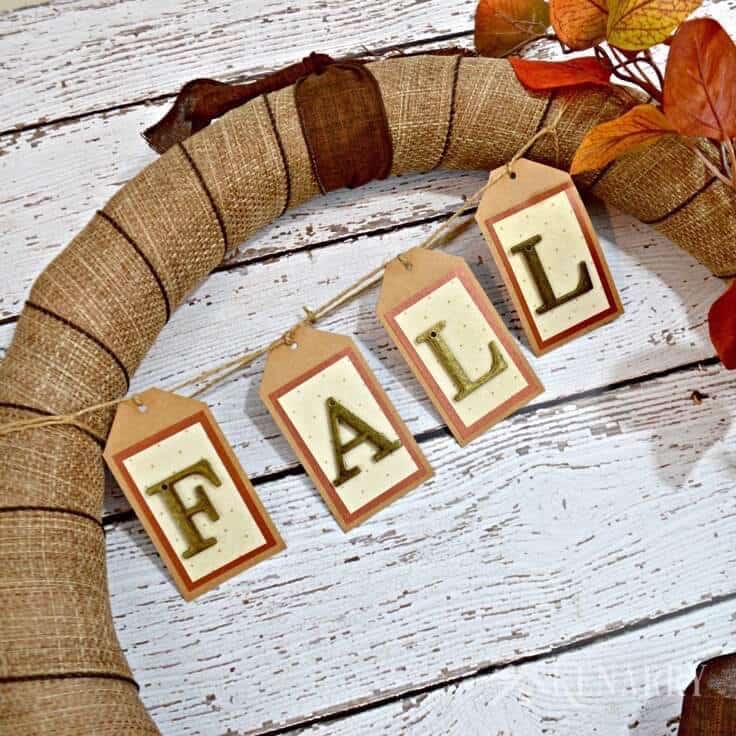
I chose to hang the fall banner at a slight diagonal on the upper left of the wreath. This makes the wreath appear more balanced since we already have the bow and fall branches on the lower right.

This autumn wreath is a beautiful craft idea! I love how easy it is to follow this step-by-step fall burlap wreath tutorial to make one for my own home decor.

7. Hang the Wreath and Enjoy

Find a nail in your wall and hang your new fall burlap wreath wherever you’d like in your home. I have a spot just inside my front door where I display our boys’ school photos above a wall-mounted coat rack where guests can hang their coats. I intentionally left a big spot between the picture frames where I could hang a wreath.

This autumn wreath is a beautiful craft idea! I love how easy it is to follow this step-by-step fall burlap wreath tutorial to make one for my own home decor.

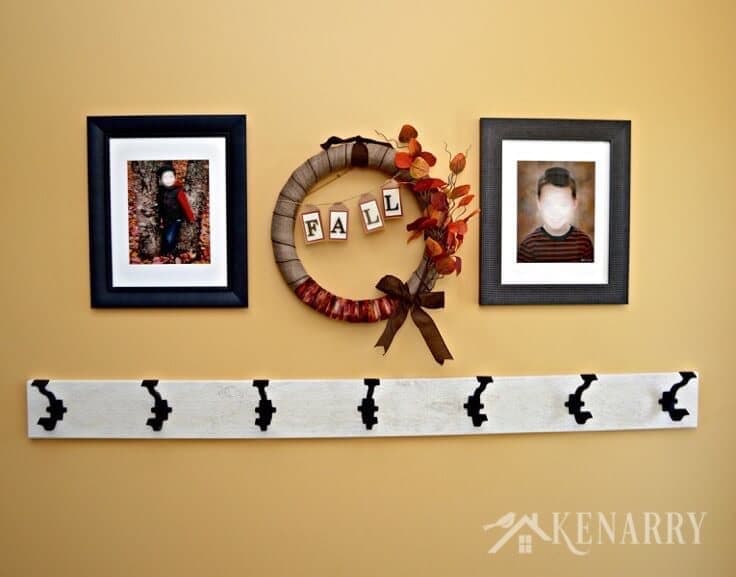
I like to change my wreath out seasonally along with my mantel decor. For example this fall burlap wreath will hang in that spot on the wall in September, October and November. Then after Thanksgiving, I’ll replace this fall burlap wreath with my Scrap Fabric Christmas Wreath made from old pajama pants.

This autumn wreath is a beautiful craft idea! I love how easy it is to follow this step-by-step fall burlap wreath tutorial to make one for my own home decor.

What do you do to change your home with the seasons? Please comment below and share. We’re always looking for new ideas. Also if you use our fall burlap wreath tutorial to make one for your home, we’d love for you to tag us @kenarryideas and share it on Facebook or Instagram so we can see how it turned out!

While you’re here, be sure to check out other wreath ideas on Ideas for the Home by Kenarry® –

  • Fall Burlap Wreaths: 3 Beautiful DIY Craft Ideas
  • Fall Mason Jar Ring Wreath
  • DIY Fall Wreath That’s Easy and Inexpensive to Make

If you enjoyed this Fall Burlap Wreath Tutorial please share it with your friends or pin it for later:

This autumn wreath is a beautiful craft idea! I love how easy it is to follow this step-by-step fall burlap wreath tutorial to make one for my own home decor.

  • Share
  • Tweet

Craft Ideas· Home Decor Ideas· Seasonal Ideas

About Carrie Ypma

Carrie is the chief writer, crafter and creator here at Ideas for the Home by Kenarry®. She's an optimist by nature and enjoys sharing recipes, trying new craft ideas, planning for parties and events as well as organizing and decorating. She and her husband, Kent live in Michigan. She also loves to hide away in a castle under the stairs reading to her two young boys and help guests plan vacations at Sunshine Villa at Glenbrook Resort, their short term vacation rental home in Orlando near Walt Disney World.

Whether you’re cooking, crafting or creating for your family, follow Carrie on Pinterest, Facebook, Twitter and Instagram to get inspiring ideas for your home. For home organization tips and ideas, check out her other website, Clutter Keeper or follow her on Pinterest, Facebook, Twitter and Instagram.

In this ultimate guide, you'll learn how to make a burlap wreath with ribbon for your home. The FREE eBook includes easy step-by-step instructions plus inspiring craft and decor ideas to make wreaths for fall, Christmas, Easter and other holidays.

Subscribe today to get ideas in your inbox plus FREE exclusives only for Idea Insiders!

Almost there! Now just check your email to confirm your e-mail address and get your free eBook.

There was an error submitting your subscription. Please try again.

You're already signed up! YAY! As an Idea Insider you have instant access to our Kenarry Idea Insider Resource Library with exclusive printables, offers and other freebies as soon as you confirm your subscription.
Previous Post: « How to Add (Temporary) Color and Style to a Cabinet
Next Post: Make Your Own Vintage Brooch Bookmarks »

Reader Interactions

Comments

  1. Beverly says

    October 3, 2016 at 10:07 pm

    Carrie, your fall wreath is lovely. I love working with burlap for wreath making. Thanks for the tips and for sharing at Snickerdoodle. Pinning.

    Reply
    • Carrie says

      October 4, 2016 at 9:32 pm

      Thank you, Beverly!

      Reply
  2. sahana says

    October 9, 2016 at 9:37 pm

    Lovely wreath. Thank you for linking up with us at #HomeMattersParty. See you again next week.

    Reply
    • Carrie says

      October 10, 2016 at 9:07 pm

      Thanks, Sahana!

      Reply
  3. Theresa @DearCreatives says

    October 12, 2016 at 5:56 pm

    I love your DIY & how your wreath turned out. Thanks for sharing your tutorial with us at the #InspirationSpotlight party. Pinned & Shared.

    Reply
    • Carrie says

      October 12, 2016 at 7:50 pm

      Thank you, Theresa! We’re so thrilled you came by to check out our fall wreath and really appreciate that you pinned and shared it too.

      Reply

Trackbacks

  1. DIY Easy Fall Wreaths: 10 Great Seasonal Decor Ideas says:
    September 19, 2016 at 6:00 am

    […] 7. Fall Burlap Wreath Tutorial – Kenarry Ideas for the Home […]

    Reply
  2. Fall Decorating at Sunday Features {98} - Denise Designed says:
    October 8, 2016 at 9:00 pm

    […] Fall Burlap Wreath Tutorial from Kenarry   |   Simple DIY Wooden Fall Woodland Banner from The Happy Housie   |   Mason Jar Fall Pumpkin from Just 2 Sisters   |   DIY Pumpkin Ribbon Wreath from DIY Inspired […]

    Reply
  3. Easy Fall Decorating and Sunday Features {98} - Tabler Party of Two says:
    October 8, 2016 at 9:20 pm

    […] Fall Burlap Wreath Tutorial from Kenarry   |   Simple DIY Wooden Fall Woodland Banner from The Happy Housie   |   Mason Jar Fall Pumpkin from Just 2 Sisters   |   DIY Pumpkin Ribbon Wreath from DIY Inspired […]

    Reply

Leave a Reply Cancel reply

Your email address will not be published. Required fields are marked *

Recipe Rating


This site uses Akismet to reduce spam. Learn how your comment data is processed.

Primary Sidebar

Welcome

Carrie Ypma from Ideas for the Home by Kenarry®Hello, I'm Carrie! Welcome to Ideas for the Home by Kenarry® where we want to help you create a home you love. We're glad you're here! Read more...

Sign Up and Get a Free Gift

Subscribe to become an Idea Insider. You'll get our weekly newsletter plus special deals and other resources that are only for subscribers -- all for FREE!

Almost there! Now just check your email to confirm your e-mail address and get your free eBook.

There was an error submitting your subscription. Please try again.

You're already signed up! YAY! As an Idea Insider you have instant access to our Kenarry Idea Insider Resource Library with exclusive printables, offers and other freebies as soon as you confirm your subscription.
In this ultimate guide, you'll learn how to make a burlap wreath with ribbon for your home. The FREE eBook includes easy step-by-step instructions plus inspiring craft and decor ideas to make wreaths for fall, Christmas, Easter and other holidays.
  • About Us
  • Subscribe
  • Shop Our Products
  • My Account
  • Cart

Footer

Disclosure: Posts may include affiliate links for your convenience. As an Amazon Associate I earn from qualifying purchases. All opinions are our own. You are reading and following advice from Kenarry, LLC at your own risk. Always use safety precautions. You should read and follow manufacturer’s directions for the products and tools you use. Read more.


Privacy Policy: The privacy of your personal information is important. We make every effort to safeguard your information and will never sell it to third parties. Read more.

Terms of Use: You are welcome to link to this site or use a single image and brief description to link back to any post. Republishing posts in their entirety is prohibited without permission. All images are property of Kenarry, LLC. Do not crop or remove watermark. Do not reproduce without link back or permission. If you do link to this site, please contact us to let us know. All free printables offered are for personal use only. Pinning is always welcome and appreciated. Thank you!

As it relates to comments and content posted on this blog by those other than the owners, any such content that contains the copyrighted and/or proprietary work of others is expressly prohibited and will be removed. Repeated posting of such content by the same user may result in that user being banned from this site.

Copyright © 2021 Kenarry LLC · Powered by Captivating Theme on Genesis Framework · WordPress · Log in