Cinnamon Stick Christmas Ornaments Tutorial
THIS POST MAY CONTAIN AFFILIATE LINKS. PLEASE SEE OUR FULL DISCLOSURE POLICY FOR DETAILS.
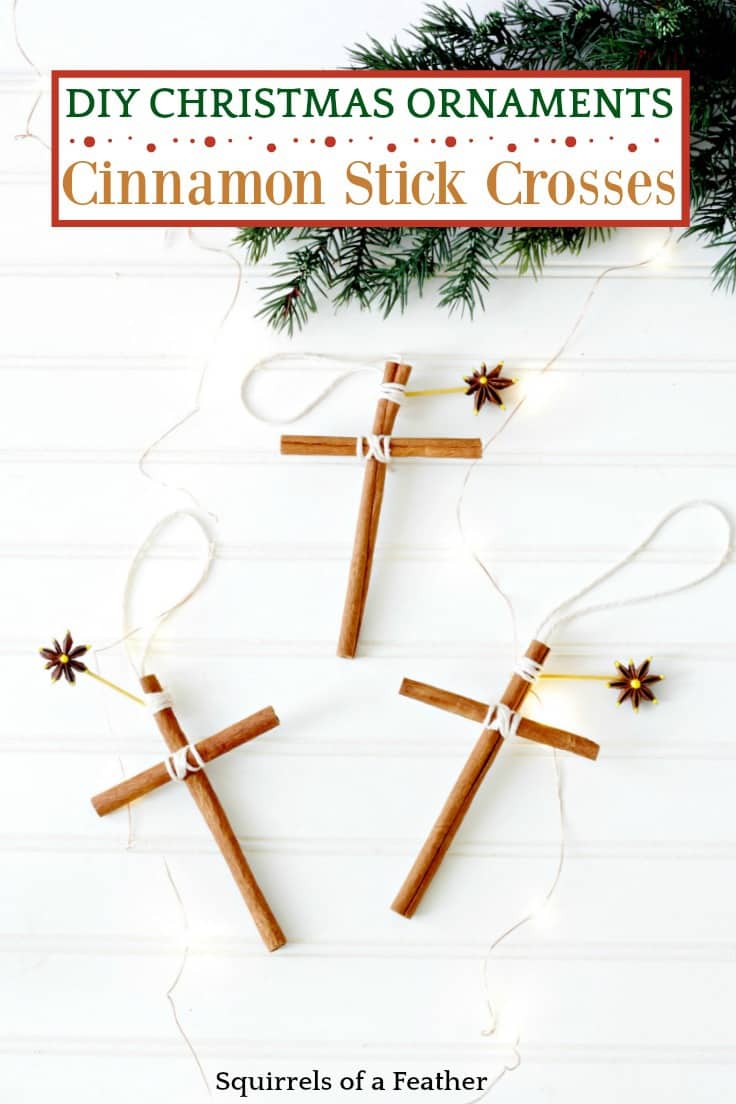
These homemade Christmas ornaments are the best cinnamon stick ornaments you will make! Find out how to make them today!
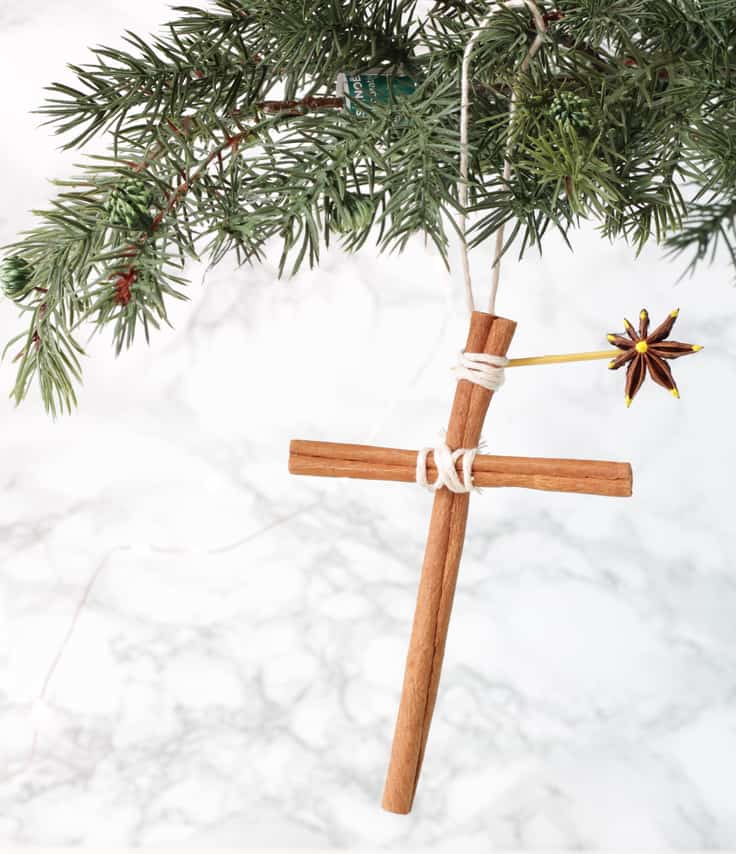
Find out how to make these beautiful homemade Christmas ornaments for your Christmas tree! These homemade ornaments are made from cinnamon stick crosses with an anise star and smell totally amazing.
Hello Kenarry readers, this is Marissa from Squirrels of a Feather with a fragrant project to beautify your Christmas tree; homemade Christmas ornaments made from cinnamon sticks and anise! These cinnamon stick crosses couldn’t be easier to make. Let me show you how to make them!
(P.S. – don’t worry — this time Murphy didn’t show up to ruin things. It might be because I tied him up and threw him in a closet. Might be. Maybe.)
(P.P.S – right after I said that I encountered HUGE issues with writing this post – doh! I jinxed it…Murphy strikes again! *Shakes fist*)
How to Make Homemade Christmas Ornaments from Cinnamon Sticks
The best Christmas ornaments are the ones you make yourself! These homemade Christmas ornaments feature crosses made from cinnamon sticks, with an anise star decorated with puff paint that will make you think of the Star of Bethleham.
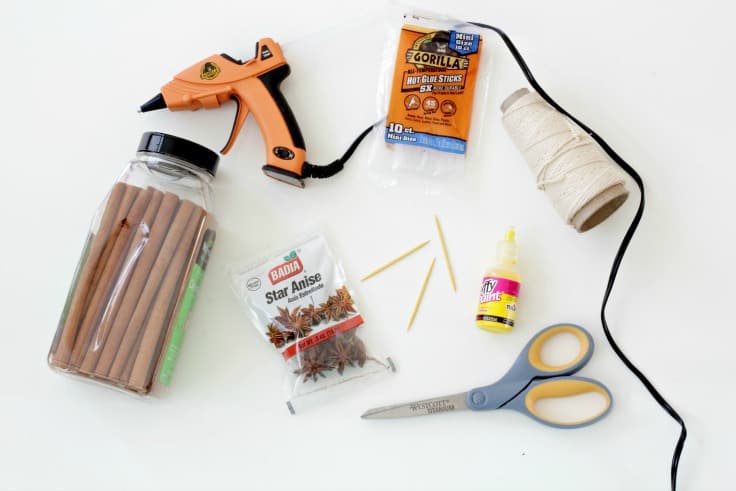
What you need:
Want more ideas like this? Subscribe today to get our weekly Ideas in Your Inbox newsletter plus other exclusive gifts and offers — all for FREE!
- Cinnamon sticks
- Whole anise stars
- Hot glue gun
- Cotton twine
- Toothpicks in desired colors
- Puff paint in desired color
- Scissors
- A sharp knife (for cutting the cinnamon)
- A cookie sheet for drying (if you have kids)
Notes about the supplies:
I like to have the color of the toothpick match the puff paint I placed on the stars, but you don’t have to use the same colors! You can choose any colors you want and mix and match, if you like.
I highly recommend that you use the cotton twine link I provided — you can use it for everything from arts and crafts to tying up your turkey for Thanksgiving! It’s very high-quality twine (no fraying like other twines) and soft as butter!
If you have kids (like me) a cookie sheet to place your ornaments on while they are drying is great to help move them quickly and store them in out-of-reach areas. Craft smart!
Questions About Cinnamon Stick Ornaments
The entire tutorial is in a printable craft card at the bottom of this post. First, I want to answer some questions about this craft that you might have.
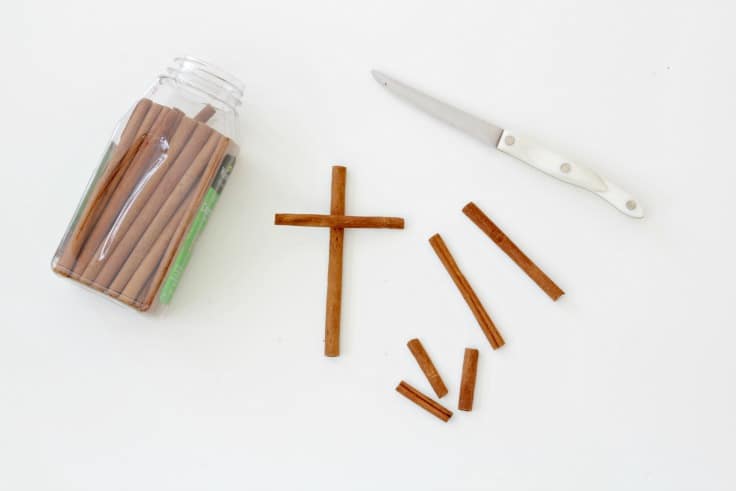
How do you cut cinnamon sticks correctly?
The best way to cut a cinnamon stick is slowly with a sharp knife.
Take a cinnamon stick and measure the length that you want the part of the cross that goes across the top to be.
You are going to cut the cinnamon sticks vertically (the long ways).
Mark and cut it CAREFULLY at the mark. Go slow, otherwise you risk cracking the cinnamon stick.
Reserve the small, cut-off cinnamon stick pieces for cooking or other crafts.
How to tie the cinnamon sticks together
There are a few things I learned as I tied them together. It doesn’t have to be perfect, as long as it keeps them together in the shape of the cross.
Here is how I did it.
Cut a length of cotton twine, about as long as your fingertips to your elbow. It is better to have too much than not enough!
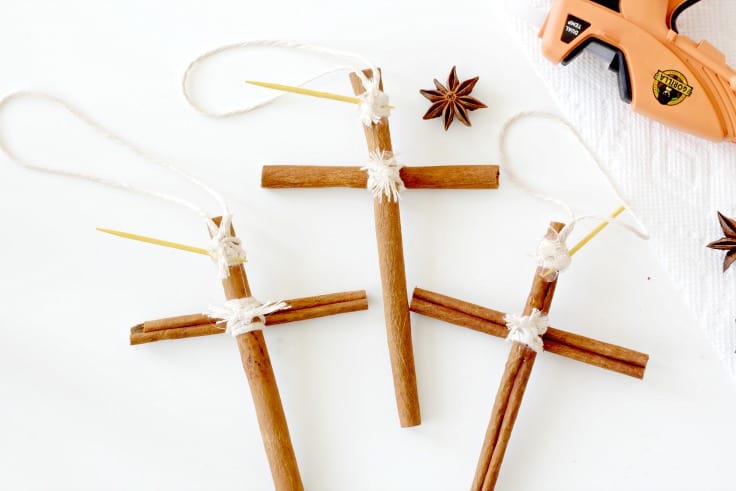
I found it easiest to tie them by placing the length of twine down first, placing the small cinnamon stick on top, then the long one on top of that. We want our twine to make a nice “|X|” in front.
To tie, cross the twine in front, loop around the back, twist once, then cross the front the the opposite direction.
Once you have made the “X” in the front, take the twine in the back and loop one side over the top of the small stick and the other bit under the other side of the cinnamon stick. That will give you the “| |” lines that you see on either side of the “X”.
Once you have the “|X|” looking correct, tie the twine at the back. (See image below for front view.)
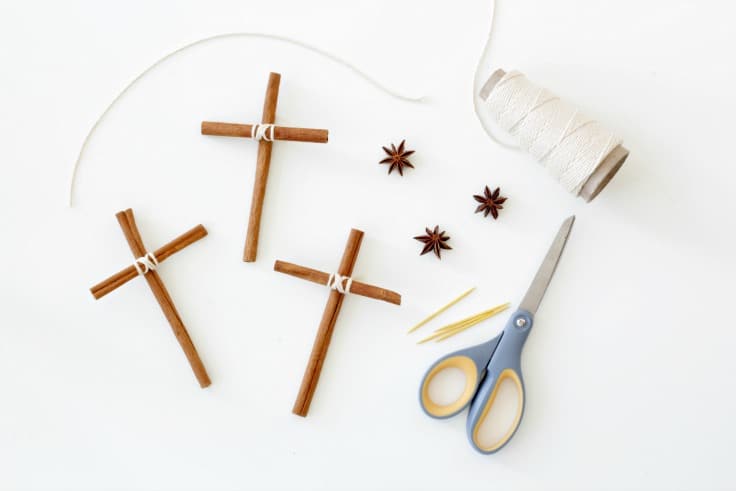
Ornament Loop Options
I chose to use twine as the ornament loop since I already had it out.
About once around the hand seems to be a good size, but you want some extra length hanging off afterward, as this will be the part that ties onto the long cinnamon stick.
Tie a knot at the length you want the ornament loops to be and then using the two extra pieces that hang off, wrap them around the very top of the ornaments, and tie at the back.
(I forgot to take a picture of this part, but you can see here how the loops look once you tie them on. The toothpick will be put through this part later.)
Other things that you can use as an ornament loop are:
- Paperclips
- Ornament Hooks
- Ribbon
- Jewelry Wire
Best Way to Glue the Toothpick TO the Ornament
I found that doing a combination of inserting the toothpick into the twin and then gluing them in place with hot glue makes them stick better.
I attached the toothpick to the top part, where the hanging loop goes.
This way, the star looks like it is shining down from high in the sky!
Hold the toothpick firmly in place and, using the hot glue gun, glue the toothpick and the twine so that it has no chance of moving or coming undone.
Hold the toothpick in place until the glue has dried. Hot glue the other twine that secures the small cinnamon stick in place as well. This will make sure your crosses stay together. (See image below.)
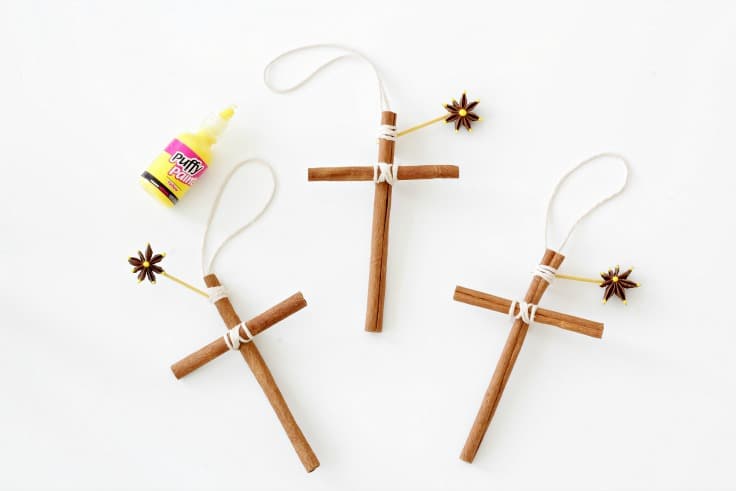
How To Glue the Anise Star To the Toothpick
Once the glue on the toothpicks and twine has dried, you are ready to glue on the anise.
Place a drop of hot glue on the BACK of the anise star and glue that star so that it is facing FORWARD towards the front of the cross. You want the front of the anise to be facing the “|X|” of the twine.
Make sure to hold the anise in place while it is drying, otherwise the hold won’t be secure. Put a little extra glue on top of the toothpick and anise if you need to, on the back.
Cinnamon Stick Ornament Decorating Ideas
The fantastic thing about these DIY cinnamon stick ornaments is how simple they are. There isn’t a lot of decorating that you need to do to it.
After the hot glue has dried, use the puff paint to decorate the anise stars. I put a large drop of yellow in the center, with little drops on each of the anise petals to make it look like a twinkling star!
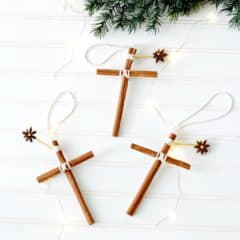
Set aside (on your cookie sheet if you have one – cover with some paper just in case) and allow to dry for 24 hours.
Now you are ready to decorate your Christmas tree using your fragrant and beautiful handmade Christmas ornaments!
I hope you loved making these homemade ornaments…leave a comment in the comment section below if you have any questions!
Easy Cinnamon Stick Ornaments – DIY Christmas Ornament Tutorial
Equipment
- Hot Glue Gun
- scissors
- Sharp Knife
- Cookie Sheet
- Puff Paint
Supplies
- 3 cinnamon sticks
- 3 whole anise stars
- 2 yards cotton twine
- 3 toothpicks in desired colors
Instructions
- Measure and cut the cinnamon sticks in half vertically.
- Arrange the two halves to form a cross.
- Tie the two cinnamon sticks together to form a cross.
- Create a loop out of twine for hanging it on your tree.
- Glue the toothpick to the twine on the top of the cross. This will be what will hold the star.
- Glue the anise star to the toothpick.
If you liked this post, here are some other great ideas from Squirrels of a Feather.
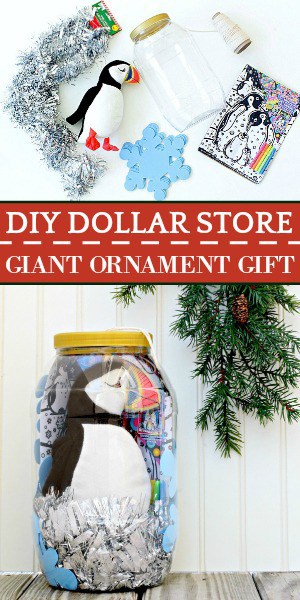
DIY Dollar Store Giant Christmas Ornament
The 31 Best Gifts for Stranger Things Fans

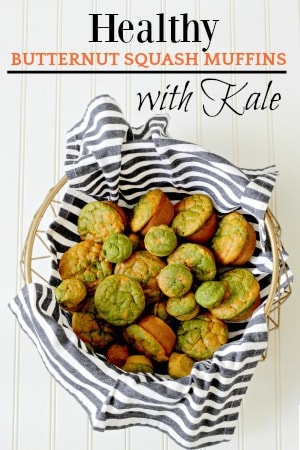
Healthy Butternut Squash and Kale Muffins
Love the ideas you see here on Ideas for the Home by Kenarry®? Subscribe today to get our FREE DIY & Craft Planning Calendar, plus our weekly Ideas in Your Inbox newsletter filled with creative tips and exclusive offers!
You may also enjoy these special Christmas ideas on Ideas for the Home by Kenarry® –
- Mini Embroidery Hoop Ornament
- The Most Wonderful Time of the Year: Free Christmas Printable
- Rustic Christmas Decor: 10 Burlap Ideas for Holiday Decor
- Christmas Decoration Ideas: From Rustic Farmhouse to Classic

Originally published November 2018. Updated October 2020.
Sweet project that is fun for the kids to make! Love the way Marissa writes, and her humor is the best! “If you’ve got a problem, yo, I’ll solve it.” LOL!
I agree! Marissa’s humor is one of my favorite things about the way she writes. She’s so engaging — and her photos are gorgeous too. Thanks for stopping by, Julie!
Beautiful photos, Marissa! I love how simple these ornaments are (and kid friendly if you help with the glue gun!) and I bet they smell FANTASTIC!
Carrie
curlycraftymom.com
Wow, such a lovely project. My kids loved this project thanks for the sharing ideas
So glad you enjoyed it, Susan! Merry Christmas!
Best wishes,
Carrie
Ideas for the Home by Kenarry