• About Us
    • Contact Us
    • Work With Us
    • The Creative Team
    • Disclosures
  • Subscribe
  • Shop Our Products
  • My Account
  • Cart
  • Nav Social Menu

    • Facebook
    • Instagram
    • Pinterest
    • Twitter
  • DIY & Decor ▾
    • Crafts
    • Home Decor
    • Home Improvement
    • Technology
  • Recipes ▾
    • Breakfast
    • Appetizers
    • Side Dishes
    • Easy Dinner Ideas
    • Slow Cooker
    • Fun Food
    • Desserts
  • Clean/Organize
  • Kid Ideas ▾
    • Birthdays
    • Castle Playroom
    • Outer Space Bedroom
    • Teacher Appreciation
    • Travel Tips
  • Free Printables
  • Holidays ▾
    • Valentine’s Day
    • St. Patrick’s Day
    • Easter
    • Cinco de Mayo
    • Mother’s Day
    • Memorial Day
    • Father’s Day
    • Independence Day
    • Halloween
    • Thanksgiving
    • Christmas
    • New Year’s
    • Gift Ideas

Ideas for the Home

You are here: Home / Craft Ideas / How to Make a Spring Butterfly Wreath

By Jennifer and Kitty O'Neil on March 6, 2019 Leave a Comment

How to Make a Spring Butterfly Wreath

Craft Ideas· Home Decor Ideas· Seasonal Ideas

  • Share
  • Tweet

Make a Spring Butterfly Wreath with colorful butterflies! We’ll show you how to decoupage wood butterflies with fabric to make your own DIY wreath.

Hi Kenarry Readers! It’s Jennifer and Kitty O’Neil (the O’Neil Sisters from RunningWithSisters.com), and we have a darling decoupage project to share with you – A Spring Butterfly Wreath! We don’t know about you, but we are ready for spring, so we thought we’d wish spring hello with a colorful wreath featuring a rainbow of butterflies! We started by shopping for calico cotton fabrics with a small print. While we were shopping, we picked out an acrylic craft paint to match each fabric. 

Spring Butterfly Wreath for your front door with colorful decoupage butterflies

We made a step-by-step video showing how to make the fabric covered butterflies. In it we share our favorite tips and tricks for decoupaging fabric onto craft wood using Mod Podge. We even show you a trick for making the butterflies look like they are flying! Follow the steps below along with the video to make your colorful butterflies. Then continue on to arrange them on a “Hello Spring” wreath. So cute!

How to Make A Spring Butterfly Wreath

What you need: 

Disclosure: This blog post contains affiliate links for products or services we think you’ll like. This means if you make a purchase from one of these links, Ideas for the Home by Kenarry® will make a small commission at no additional cost to you so we can keep the great ideas for the home coming your way. All opinions expressed are derived from personal experience.

Materials To Decoupage Butterflies: 

  • Calico cotton fabric in magenta, red, orange, yellow, green, turquoise, blue, and purple 
  • Acrylic craft paint to match each fabric color
  • 8 Wood craft butterflies, 3″
  • Mod Podge Gloss
  • Craft paintbrush
  • Ballpoint pen
  • Ruler
  • Craft knife
  • Scissors
  • Blow dryer

Materials To Make Wreath:

  • Moss wreath, 18″
  • “Hello Spring” wood die-cut, 3″ x 5″
  • Green leaf sprigs
  • Purple silk flowers
  • Hot glue gun & glue sticks

Steps To Make Butterflies:

1. Paint Wooden Butterflies

Paint one wooden butterfly in each of the colors: magenta, red, orange, yellow, green, turquoise, blue, and purple. Paint both sides and the edges of each butterfly, then let dry or use a blow dryer to speed up the drying process.

2. Cut Out Fabric

how to decoupage wood butterflies with fabric for a spring wreath

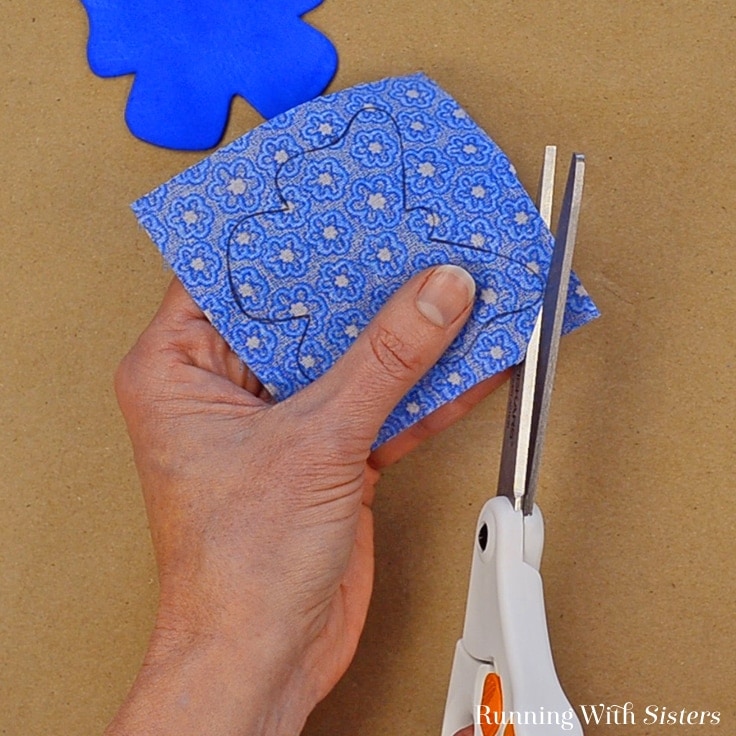
Trace a painted butterfly onto the back of its matching fabric two times so you have a piece to cover the front and the back. Cut the butterflies out of the fabric and set aside.

3. Cut Wooden Butterflies

how to decoupage wood butterflies with fabric for a spring wreath

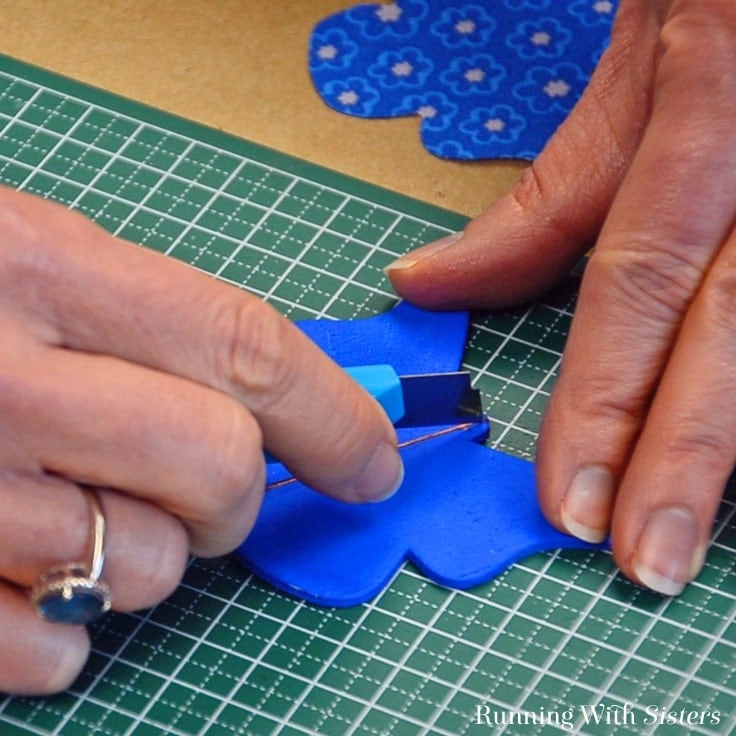
To give the butterflies dimension, cut each one in half using a craft knife. Draw a straight line down the center of the butterfly with a ballpoint pen. Press hard to create a groove to use as a score line. Hold the butterfly carefully without your fingers in the way and score the pen line with the craft knife. Use light strokes over and over rather than trying to cut through the craft wood all at once. Continue scoring the craft wood until the butterfly breaks in half.

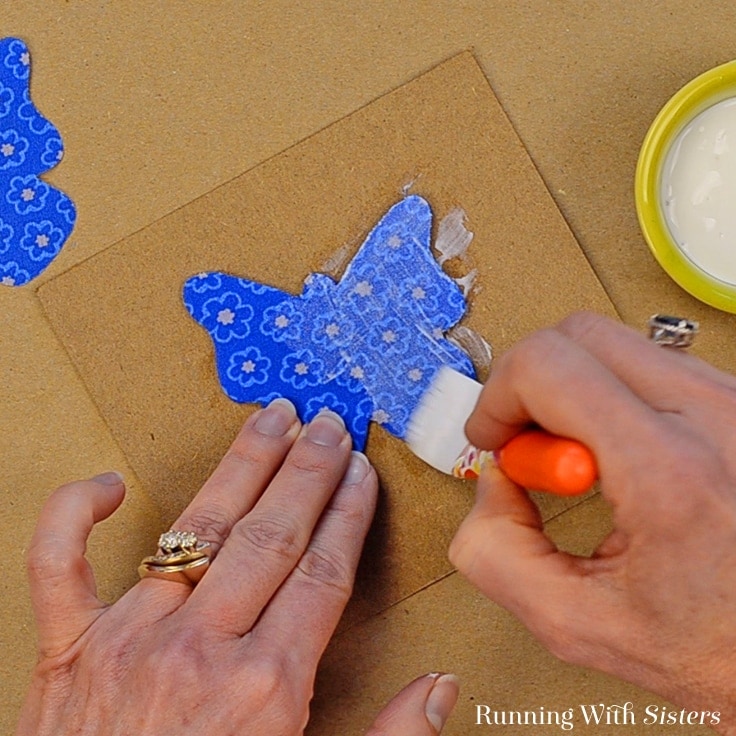
4. Decoupage The Fabric

how to decoupage wood butterflies with fabric for a spring wreath

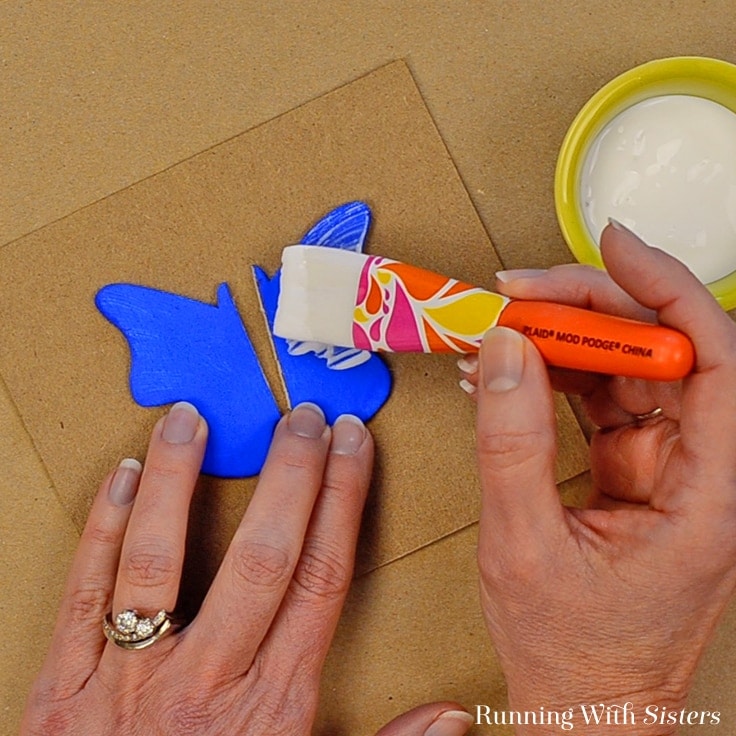
To decoupage the fabric onto the butterfly, apply a thick coat of Mod Podge on the front halves of the butterfly with a craft paintbrush.

how to decoupage wood butterflies with fabric for a spring wreath

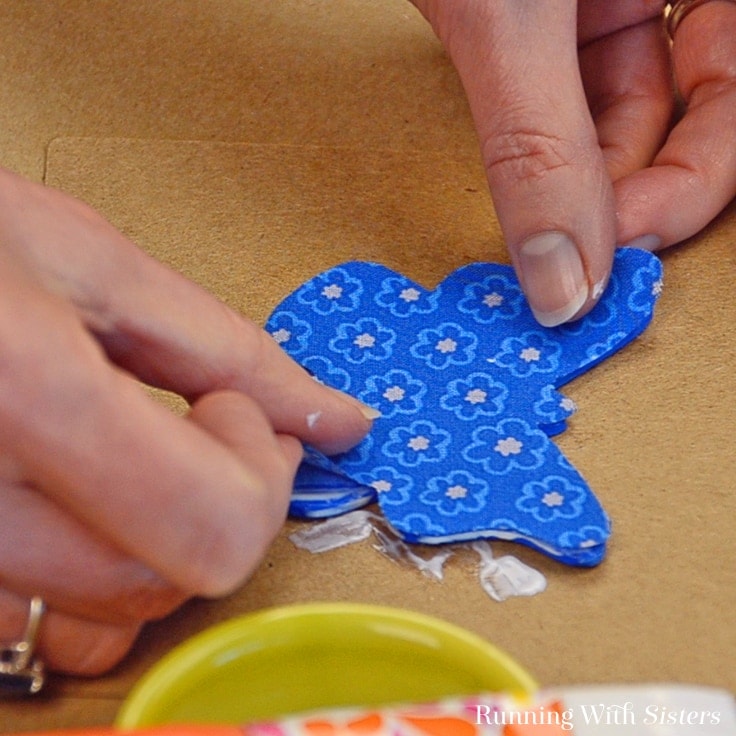
Place the fabric on top of the wet Mod Podge and smooth out any wrinkles with your finger. Press out any excess decoupage medium and wipe off the edges of the butterfly.

how to decoupage wood butterflies with fabric for a spring wreath

Apply a coat of Mod Podge directly over the top of the fabric. Use a blow dryer to dry that side of the butterfly.

how to decoupage wood butterflies with fabric for a spring wreath

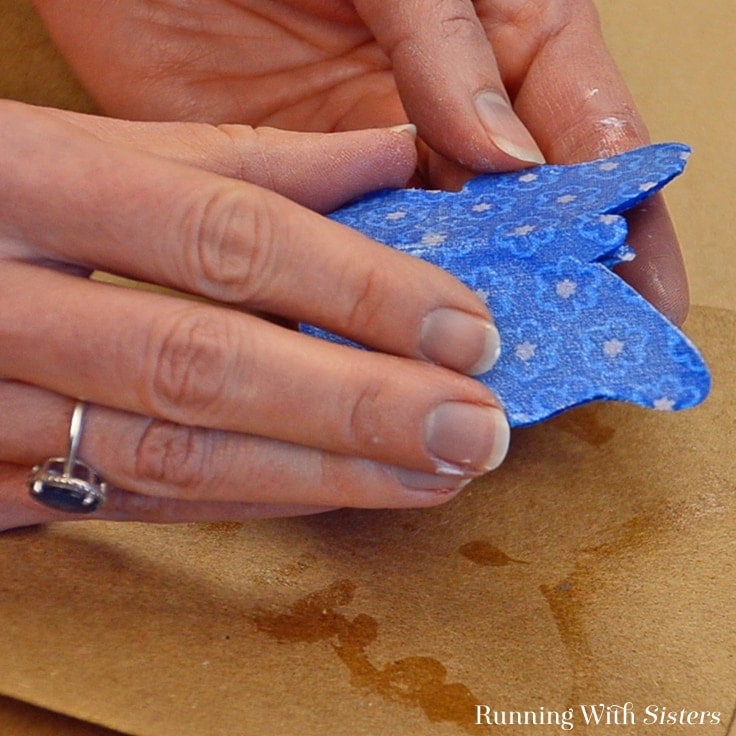
Decoupage the fabric onto the other side of the butterfly in the same way, but before you blow it dry, fold the butterfly wings downward slightly to give the appearance of flying. Use a blow dryer to dry it in that position. To do this, we placed the butterfly so it was folded over the edge of a plastic box with the wet side up, then dried it completely with a blow dryer.

Repeat To Make All Butterflies

how to decoupage wood butterflies with fabric for a spring wreath

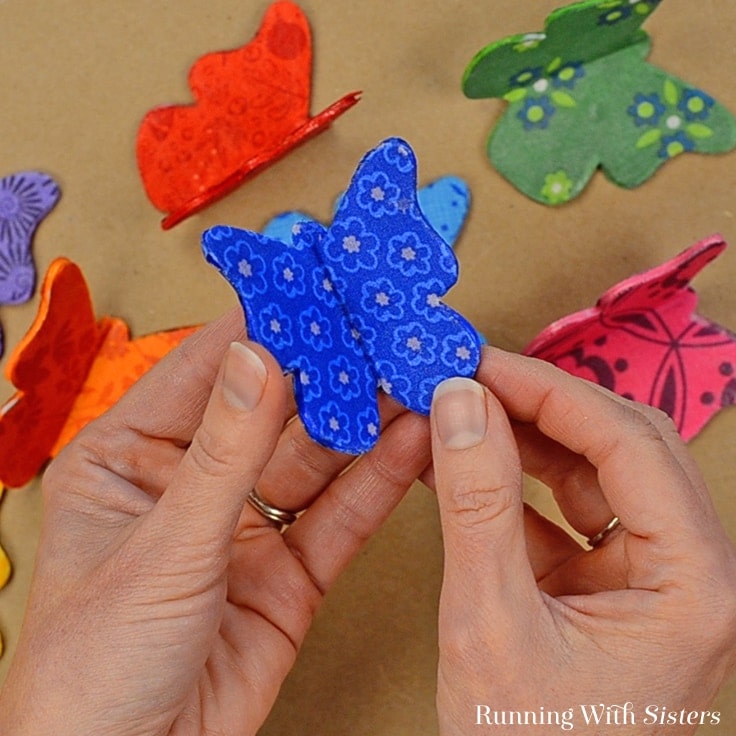
Repeat until you have a butterfly decoupaged with fabric in each of the colors: magenta, red, orange, yellow, green, turquoise, blue, and purple!

Steps To Make Butterfly Wreath:

1. Attach 7 Butterflies

Hot glue the magenta, red, orange, yellow, green, turquoise, and blue butterflies to the upper left of the wreath in rainbow order. Tilt each butterfly a slightly different way as you glue.

2. Paint Die-cut

painted hello spring wood sign for front door wreath

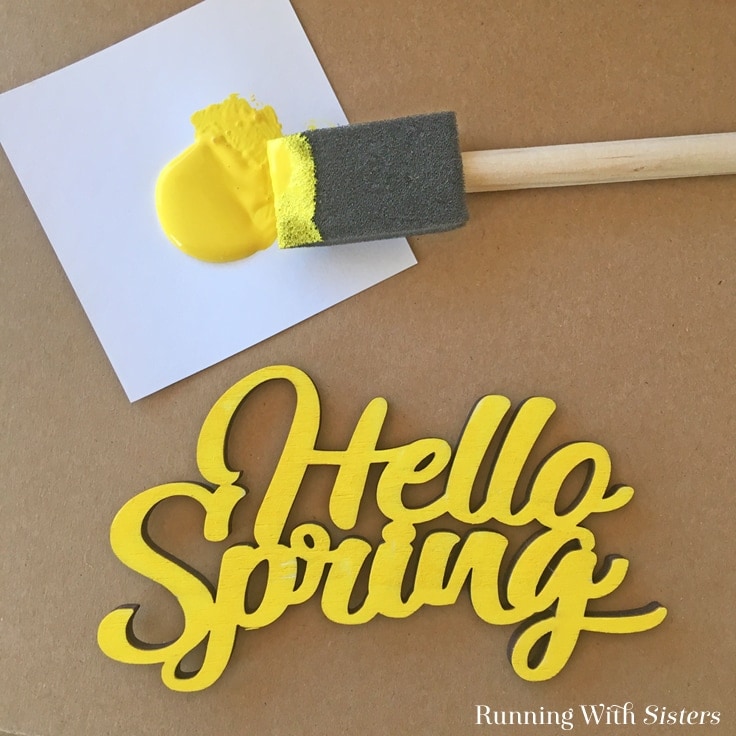
Paint the “Hello Spring” wood die-cut with the yellow craft paint and dry using the blow dryer. Glue it to the right-hand side of the wreath.

3. Arrange Greenery

Hot glue the green leaf sprigs to the bottom right of the wreath so the leaves point in different directions. Arrange and glue the purple silk flowers on top of the leaves.

4. Attach Last Butterfly

Glue the purple butterfly just to the right of the green leaf sprigs to complete your Spring Butterfly Wreath.

Make an easy Spring Butterfly Wreath for your front door with colorful butterflies! We'll show you how to decoupage wood butterflies with fabric to make your own DIY wreath. #springcrafts #spring #kenarry

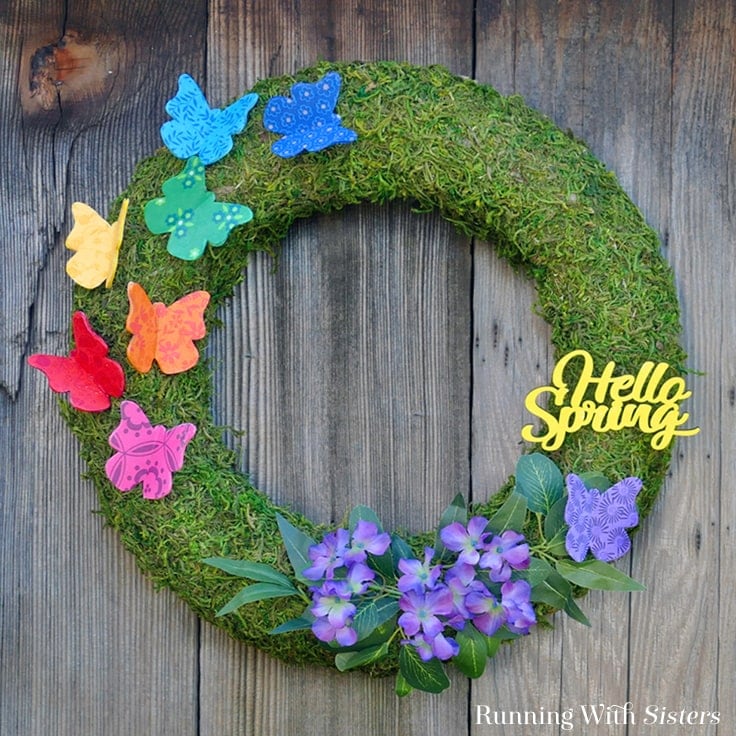
Didn’t this Spring Butterfly Wreath turn out cute?! We love the way you can transform simple craft wood shapes with a little fabric and Mod Podge. And it’s so easy! What have you decoupaged with Mod Podge? Let us know. We’d love to hear from you! 

Happy Crafting,
Jennifer & Kitty

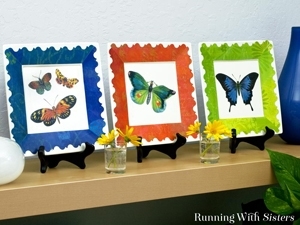
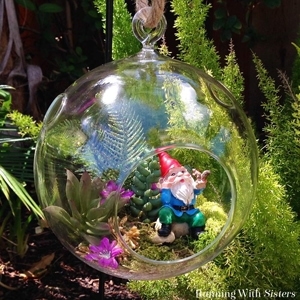
Like this project? You might also like these crafts from the O’Neil Sisters:

Decoupaged Butterfly Plates

Turn a plain white plate into a colorful decorative home accent with clip art and Mod Podge to make Decoupaged Butterfly Plates!

Summer Birdhouse Wreath

Make a colorful Summer Birdhouse Wreath featuring silk flowers of the season and a bright birdhouse! Add pretty craft birds to finish it off!

Succulent Bubble Garden

Create a succulent bubble garden with faux succulents and little garden gnome. The glass orb makes this bubble terrarium extra cute!

You may also enjoy these spring ideas on Ideas for the Home by Kenarry® –

  • Summer Burlap Wreath
  • DIY Embroidery Hoop Spring Wreath
  • Colorful Wreath Seasonal Decor made with Cupcake Liners
  • St. Patrick’s Day Wreath with Printable Shamrock Template
  • Share
  • Tweet

Craft Ideas· Home Decor Ideas· Seasonal Ideas

About Jennifer and Kitty O'Neil

Jennifer and Kitty O’Neil are sisters and authors of several books including Steampunk Chic: Vintage Flair From Recycled Finds. Their crafting, decorating, and jewelry designs have appeared in Woman’s World, Craft Ideas, and Create and Decorate magazines and on the web sites of Better Homes and Gardens, Family Circle, and HGTV. Their detailed craft videos can be found on Curious.com and on their YouTube channel, which has over 2.2 million views. The O’Neil Sisters share their enthusiasm and their fresh approach to crafting and decorating on their blog, RunningWithSisters.com.

The O'Neil Sisters shared their great ideas on Ideas for the Home by Kenarry® from June 2015 - May 2019. Follow the O’Neil Sisters on Facebook, Pinterest, and Instagram.

In this ultimate guide, you'll learn how to make a burlap wreath with ribbon for your home. The FREE eBook includes easy step-by-step instructions plus inspiring craft and decor ideas to make wreaths for fall, Christmas, Easter and other holidays.

Subscribe today to get ideas in your inbox plus FREE exclusives only for Idea Insiders!

Almost there! Now just check your email to confirm your e-mail address and get your free eBook.

There was an error submitting your subscription. Please try again.

You're already signed up! YAY! As an Idea Insider you have instant access to our Kenarry Idea Insider Resource Library with exclusive printables, offers and other freebies as soon as you confirm your subscription.
Previous Post: « Create a DIY Wood Sign with Flower Quote for Spring
Next Post: Make an Easy Embroidery Hoop Wall Art For Spring »

Reader Interactions

Leave a Reply Cancel reply

Your email address will not be published. Required fields are marked *

Recipe Rating


This site uses Akismet to reduce spam. Learn how your comment data is processed.

Primary Sidebar

Welcome

Carrie Ypma from Ideas for the Home by Kenarry®Hello, I'm Carrie! Welcome to Ideas for the Home by Kenarry® where we want to help you create a home you love. We're glad you're here! Read more...

Sign Up and Get a Free Gift

Subscribe to become an Idea Insider. You'll get our weekly newsletter plus special deals and other resources that are only for subscribers -- all for FREE!

Almost there! Now just check your email to confirm your e-mail address and get your free eBook.

There was an error submitting your subscription. Please try again.

You're already signed up! YAY! As an Idea Insider you have instant access to our Kenarry Idea Insider Resource Library with exclusive printables, offers and other freebies as soon as you confirm your subscription.
In this ultimate guide, you'll learn how to make a burlap wreath with ribbon for your home. The FREE eBook includes easy step-by-step instructions plus inspiring craft and decor ideas to make wreaths for fall, Christmas, Easter and other holidays.
  • About Us
  • Subscribe
  • Shop Our Products
  • My Account
  • Cart

Footer

Disclosure: Posts may include affiliate links for your convenience. As an Amazon Associate I earn from qualifying purchases. All opinions are our own. You are reading and following advice from Kenarry, LLC at your own risk. Always use safety precautions. You should read and follow manufacturer’s directions for the products and tools you use. Read more.


Privacy Policy: The privacy of your personal information is important. We make every effort to safeguard your information and will never sell it to third parties. Read more.

Terms of Use: You are welcome to link to this site or use a single image and brief description to link back to any post. Republishing posts in their entirety is prohibited without permission. All images are property of Kenarry, LLC. Do not crop or remove watermark. Do not reproduce without link back or permission. If you do link to this site, please contact us to let us know. All free printables offered are for personal use only. Pinning is always welcome and appreciated. Thank you!

As it relates to comments and content posted on this blog by those other than the owners, any such content that contains the copyrighted and/or proprietary work of others is expressly prohibited and will be removed. Repeated posting of such content by the same user may result in that user being banned from this site.

Copyright © 2021 Kenarry LLC Powered by Captivating Theme on Genesis Framework WordPress Log in