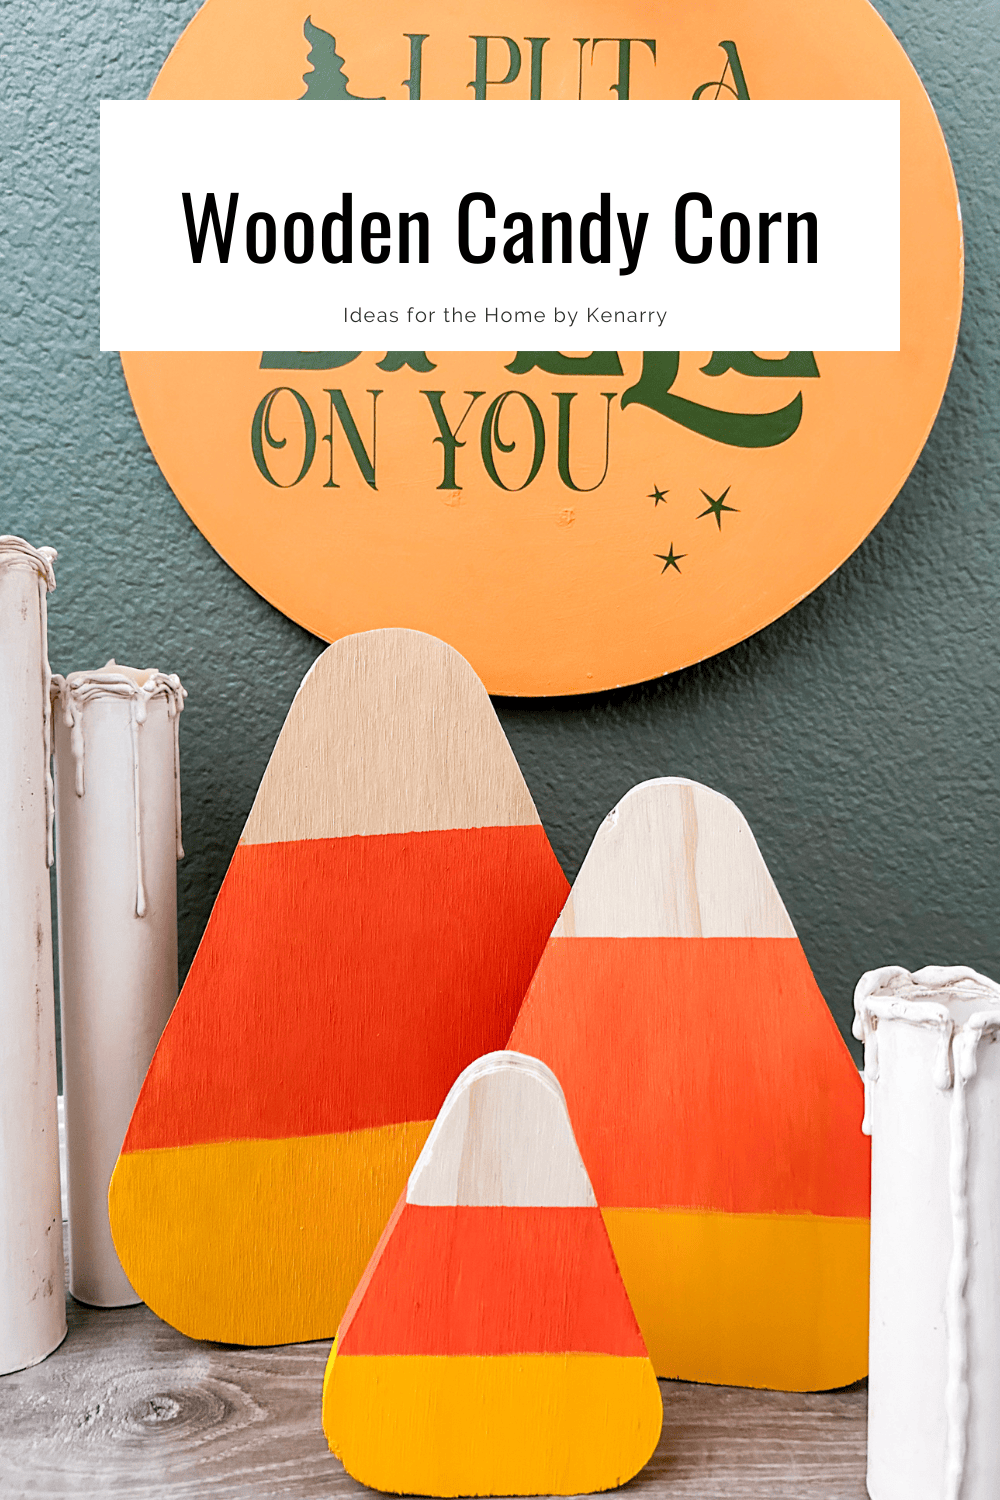
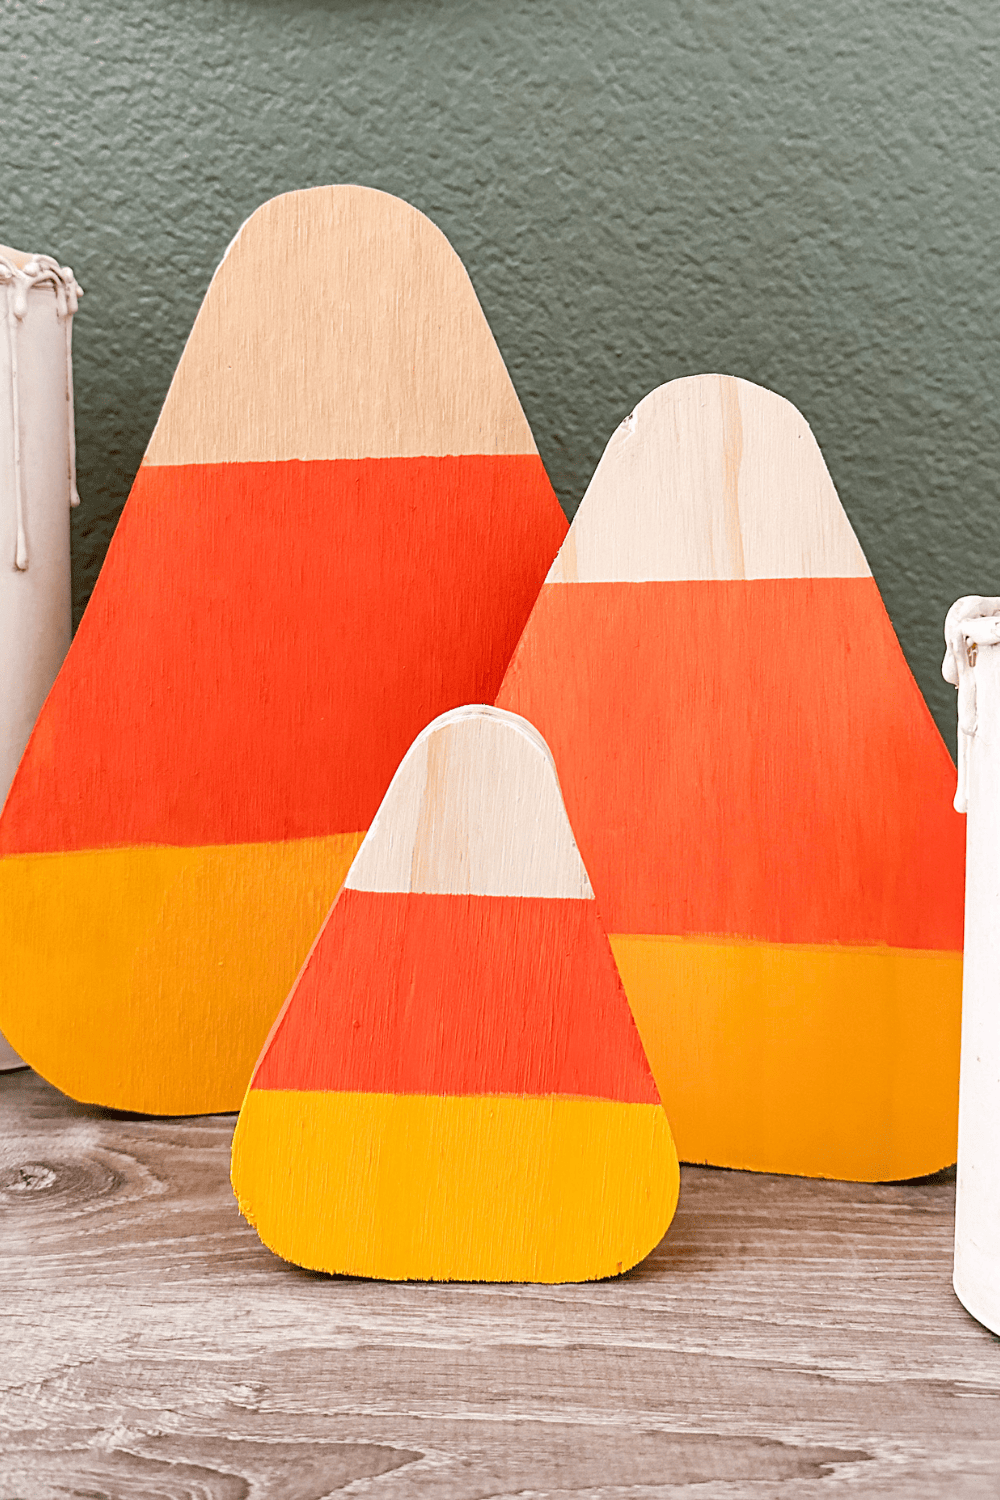
Wooden Candy Corn
THIS POST MAY CONTAIN AFFILIATE LINKS. PLEASE SEE OUR FULL DISCLOSURE POLICY FOR DETAILS.
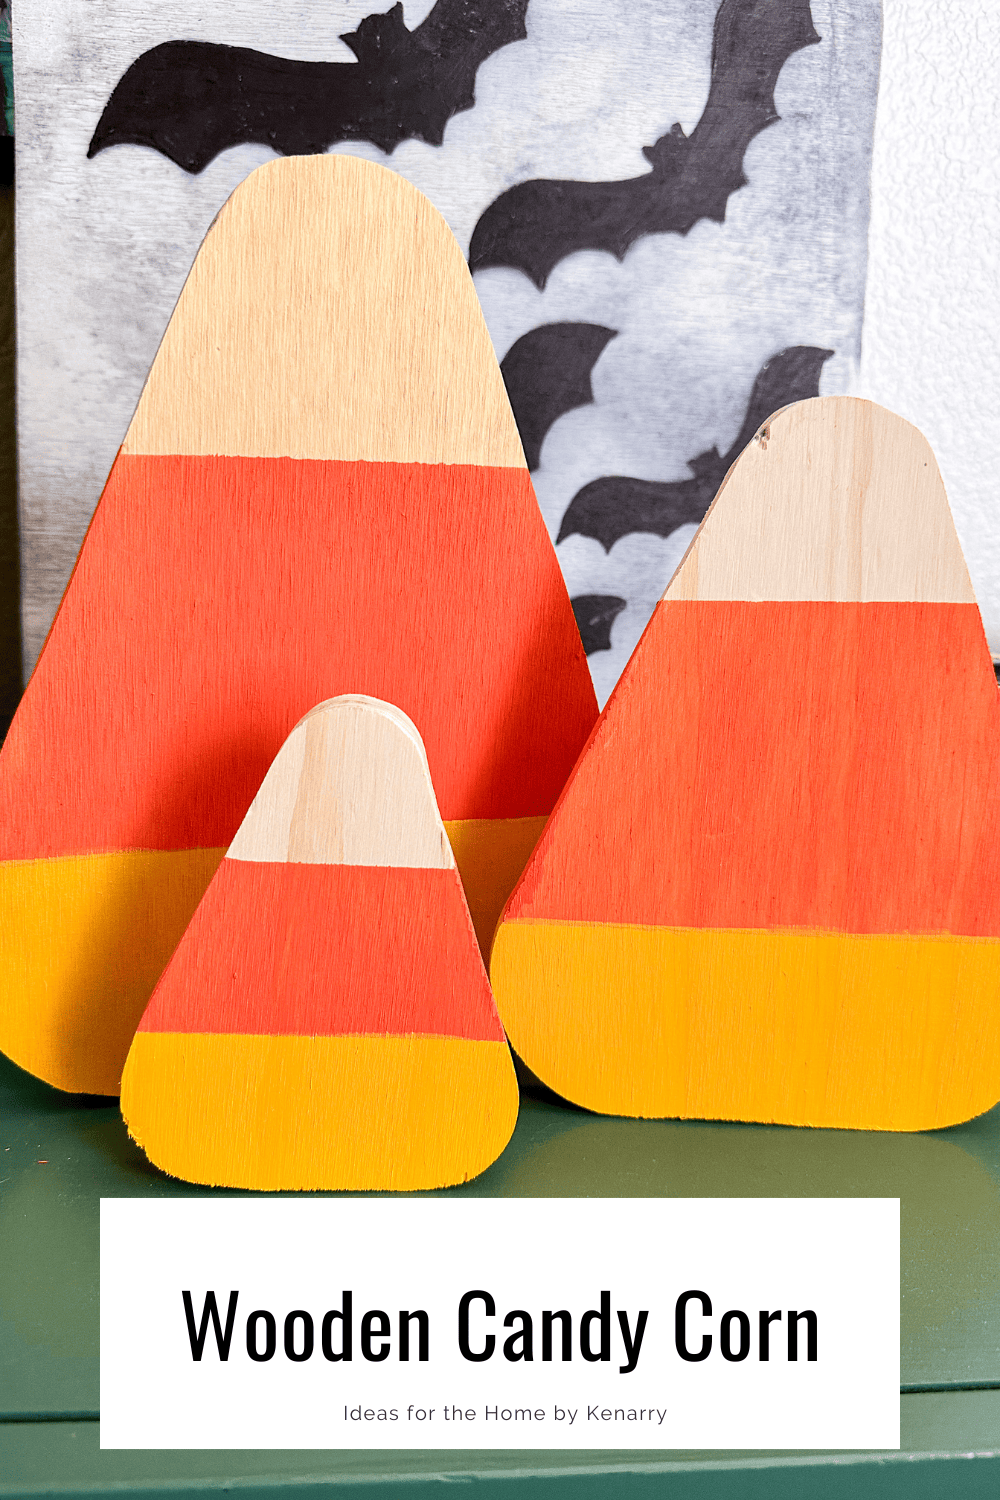
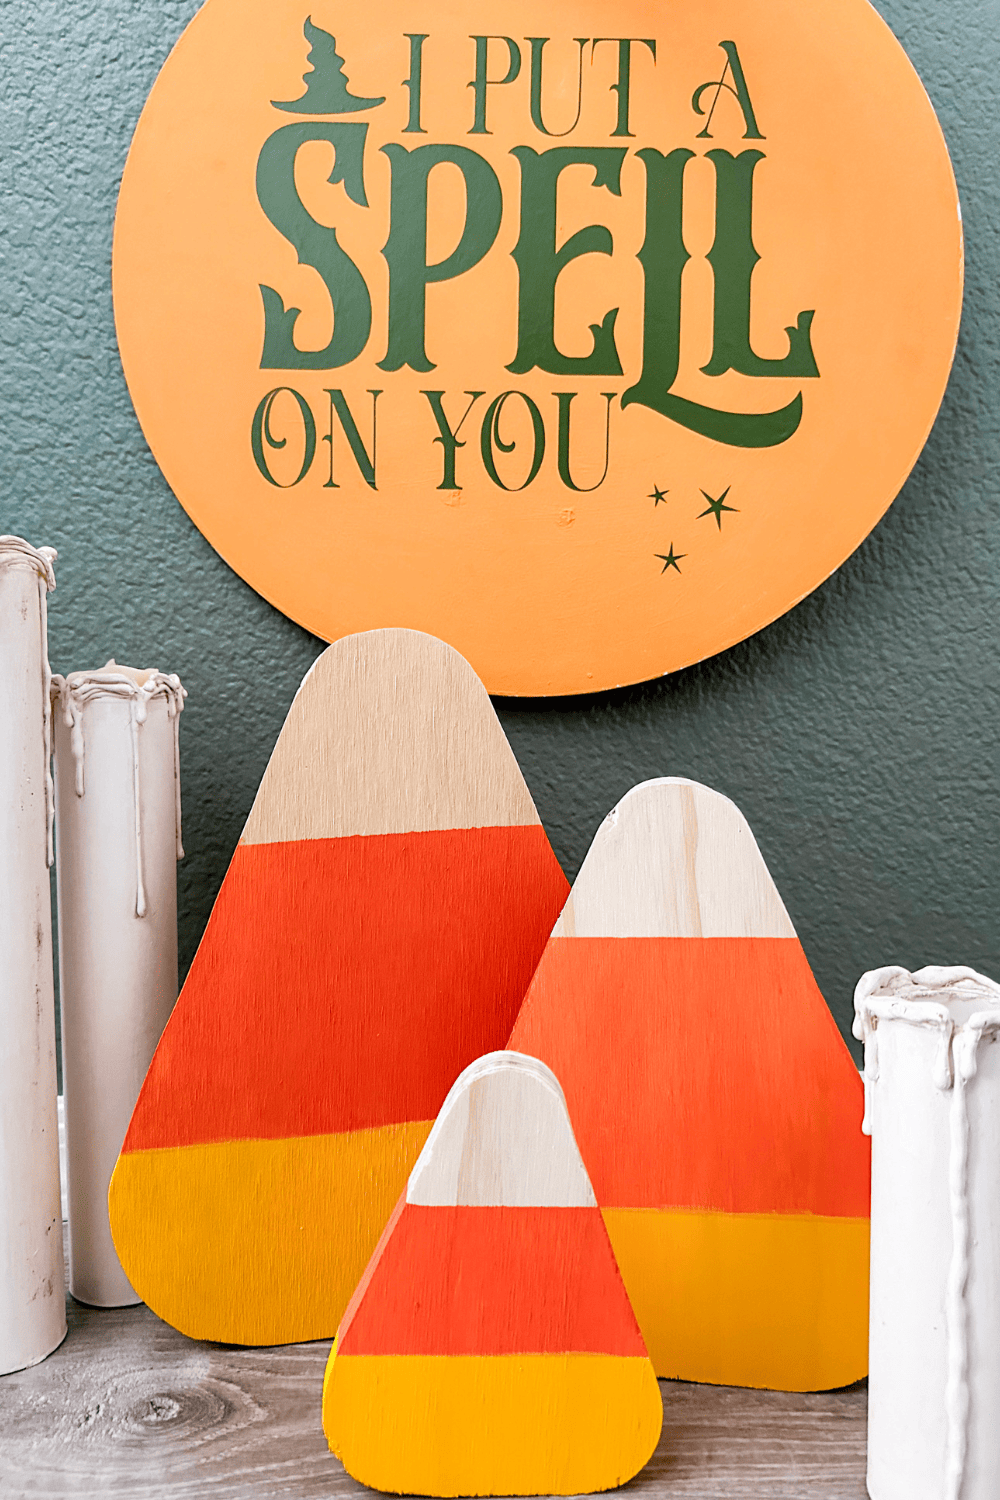
This wooden candy corn is simple to create and can be made using any scrap wood you have. It looks great on a table or a shelf!
Hello, I’m Amy and I blog over at amylanham.com. I love to decorate for holidays!
Holidays are just so much fun and I want to enjoy every moment of them. So I usually decorate early and always try to create new decor every year.
There’s something special about creating something to display in your home. And creating holiday decor is just extra special to me.
How to Make Wooden candy corn
Get the power tools out to create this simple wooden candy corn that will look great no matter where you display it.
What you need:
Want more ideas like this? Subscribe today to get our weekly Ideas in Your Inbox newsletter plus other exclusive gifts and offers — all for FREE!
DIY Tools Needed:
Supplies Needed:
These are the ingredients you’ll need. All the exact amounts are in the printable card at the bottom of this post.
- 3/4 inch plywood
- Paint
- Tape
- PNG or SVG of Candy Corn shape
Wooden Candy Corn Tips:
A Cricut or cutting machine makes it easier to cut the wood
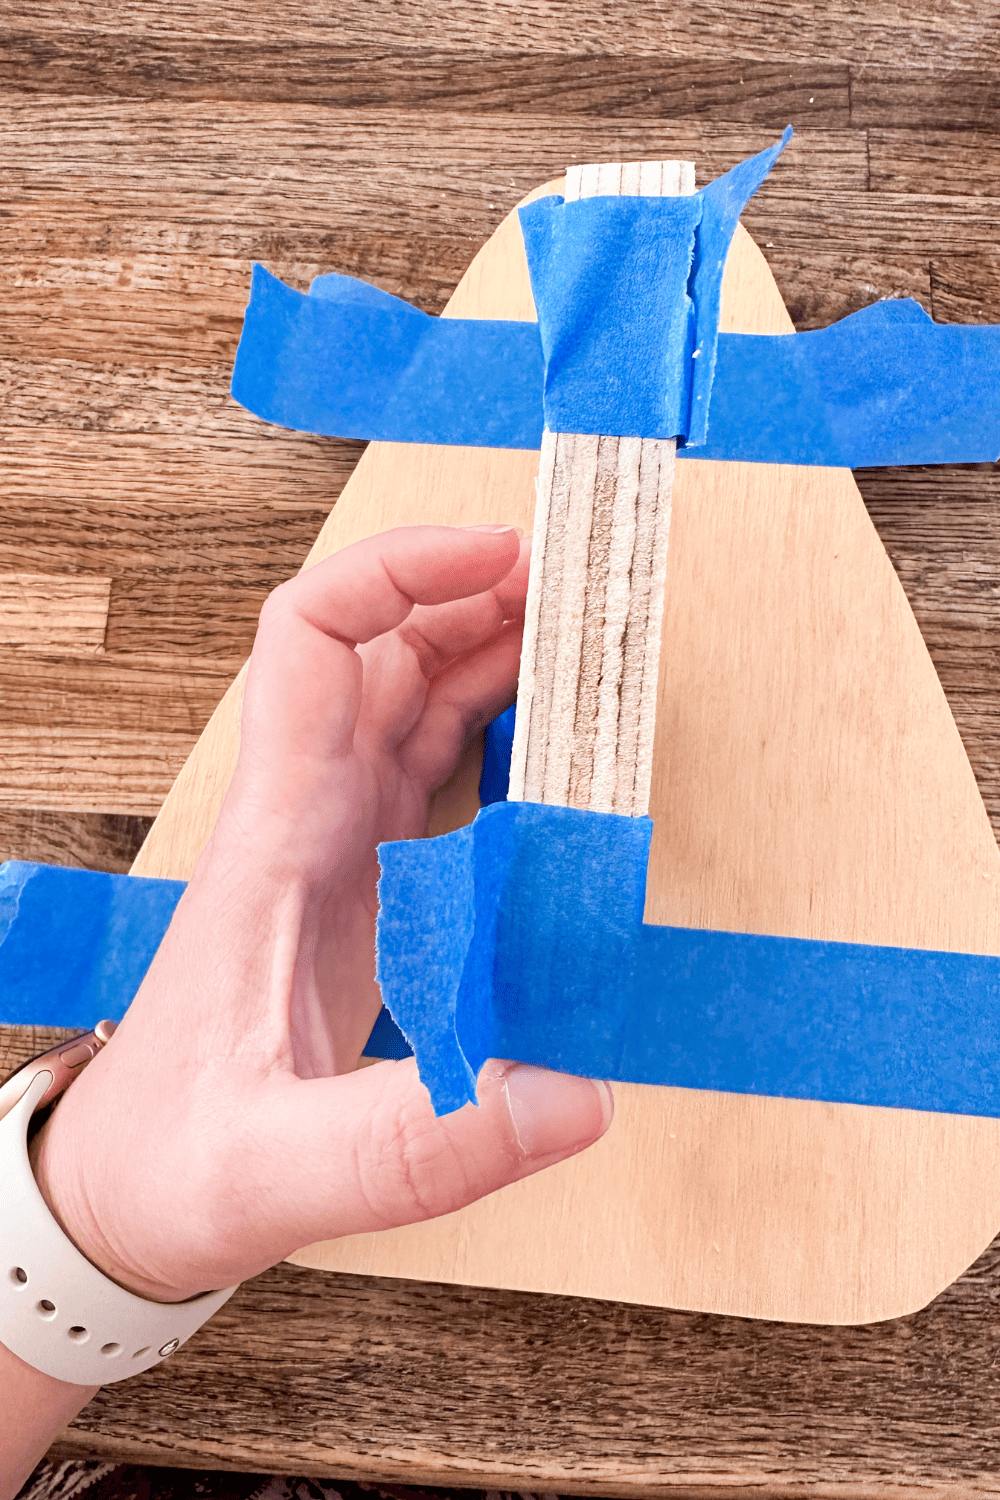
I hate drawing a stencil onto wood. Sometimes it’s the only option. But if you have a cutting machine, you can cut the shape out of vinyl and then stick it onto the wood.
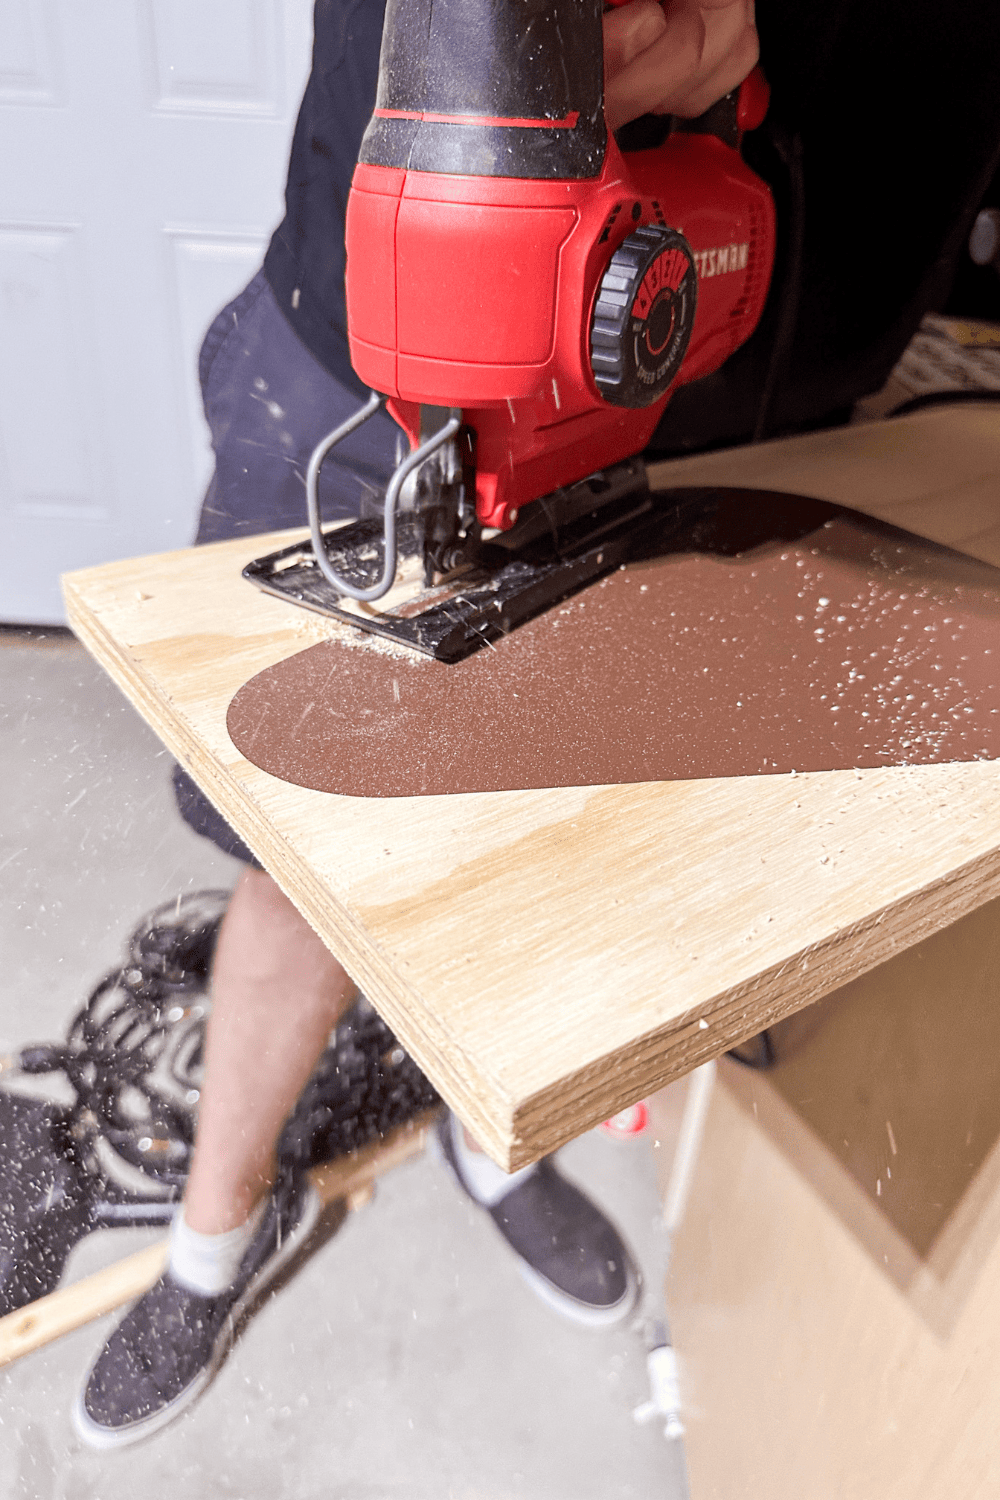
This will ensure the stencil doesn’t shift and can help create a smoother cut. If you don’t have a cutting machine, no problem! Just print out the design, cut it out and then trace or tape it onto the wood.
Will the wooden candy corn stand up by itself?
Yes! This design has a flat bottom so it will stand up by itself. This way it could be displayed on a table or shelf.
The 12″ wooden candy corn can be a little top heavy. It is more prone to falling over than the smaller ones.

If you prefer to hang the wooden candy corn on the wall, a hanger could be attached to the back of the candy corn to allow it to be hung on the wall.
Candy Corn colors
When looking at a piece of candy corn, the colors aren’t perfectly separated. The colors aren’t perfectly straight and there can be some variation. So don’t feel like your wooden candy corn has to be perfect!
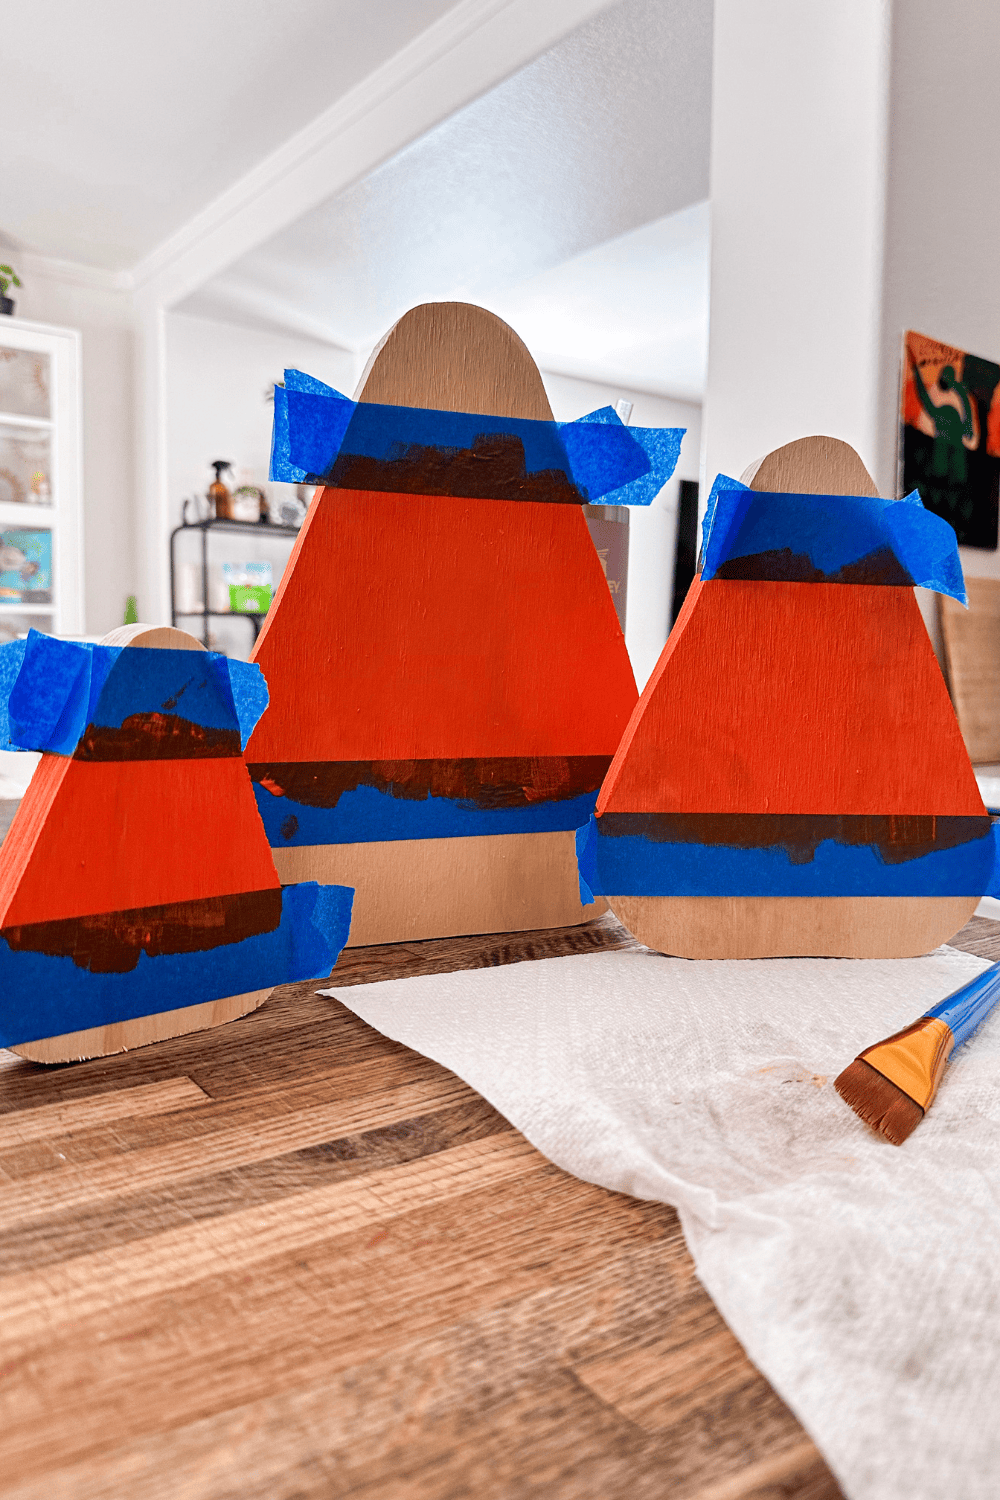
Use the tape to decide how big each section should be. But don’t feel like the tape has to be perfect or feel the need to continue to tape each section.
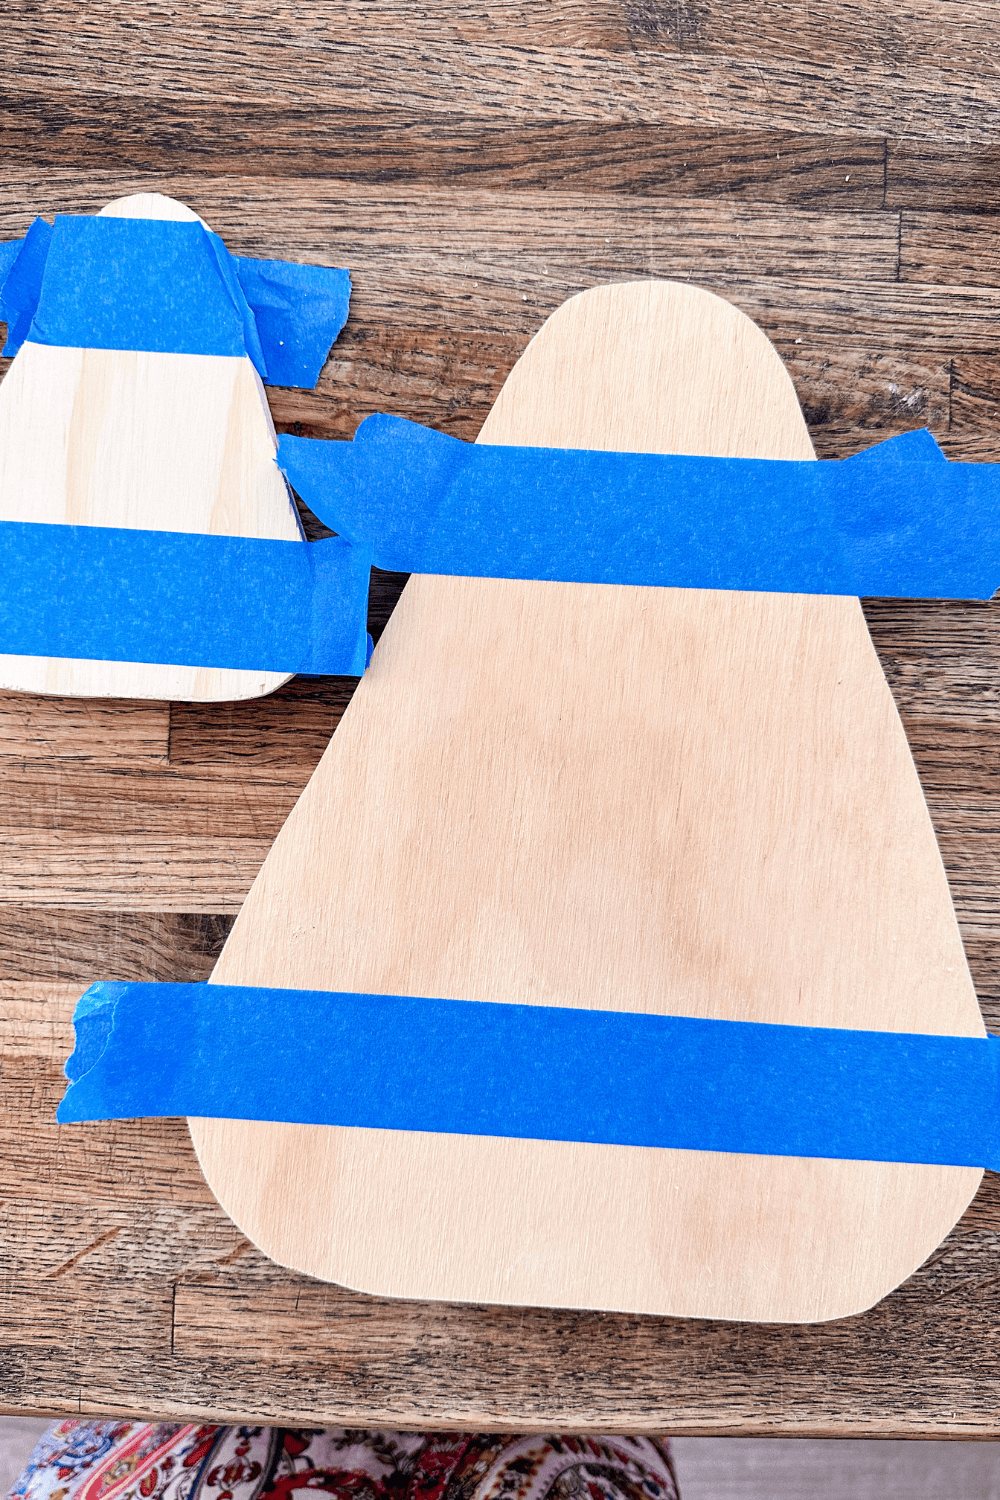
I taped off the first big orange section all the way around. This way it would be easy to have a straight line on all sides of the candy corn.
Always peel the tape while the paint is still wet. Then I painted the white and yellow sections without taping them off.
This allows for some variation, but gives a general area to paint. The tape isn’t even necessary as the first section could just be eyeballed. But I liked using the tape to make sure I liked the section layout before painting.
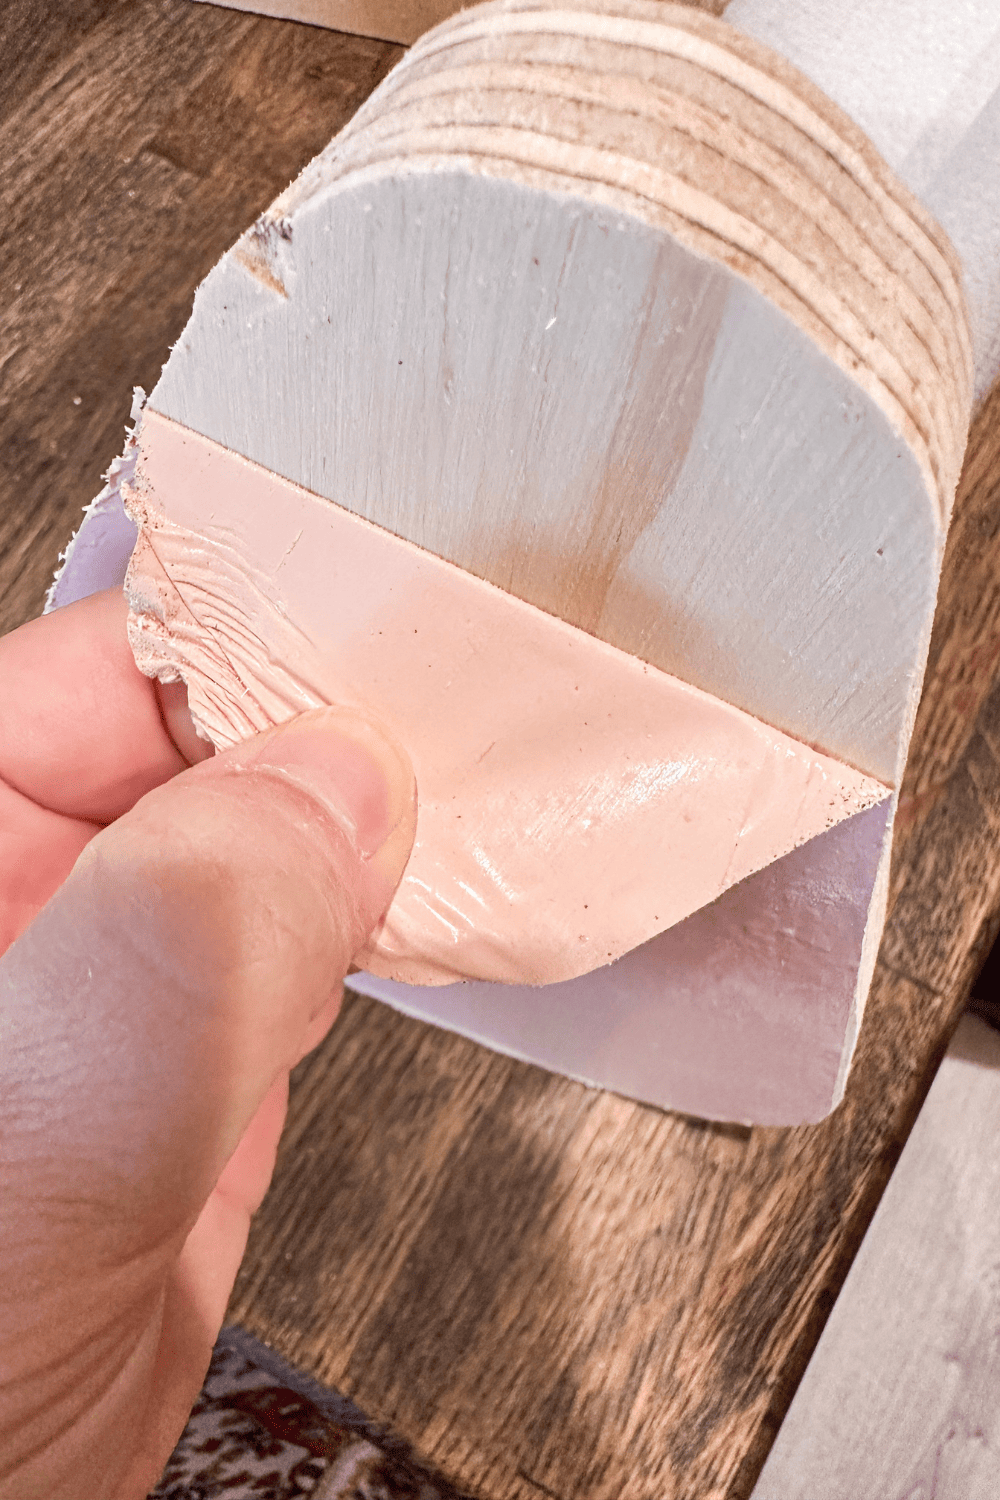
I can see the wood grain through the paint
In my opinion, that’s part of the charm of a project like this. But if the wood grain bothers you, you’ll need to prime the wood before painting.
If you don’t have primer on hand, you can paint the whole thing white first, and then paint in the candy corn colors. Using multiple coats helps to cover the wood grain too.
Wooden Candy Corn
Equipment
- 1 Cricut or printer and scissors
- 1 Jigsaw
- 1 Paint Brush
- 1 Sander with 120 grit sandpaper
Supplies
- 1 piece 3/4 inch Plywood
- 1 Apple Barrel Harvest Orange Paint or any orange paint
- 1 Apple Barrel Golden Yellow Paint or any yellow paint
- 1 White paint optional
- Tape
- PNG or SVG of Candy Corn shapes
Instructions
- Cut out the candy corn shape with a Cricut on vinyl or print on paper and cut out the shape. You should have 11.5", 9", and 6" tall shapes.
- Stick the vinyl to your wood and cut, or tape the paper and trace the shape, then cut out the shape.
- Sand down the edges of the wooden candy corns so they are smooth.
- Tape off the orange part of the candy corn and paint. Paint the edges, and the back too. Each color should be about a third of the candy corn.
- Once the orange is dry, paint the yellow. Then paint the white, or leave the top the natural wood color for a more rustic feel.
- Once dry display!
Love the ideas you see here on Ideas for the Home by Kenarry®? Subscribe today to get our FREE DIY & Craft Planning Calendar, plus our weekly Ideas in Your Inbox newsletter filled with creative tips and exclusive offers!
What’s Next?
If you enjoyed this wooden candy corn then you’ll enjoy this other Halloween decor too.
You may also enjoy these Halloween ideas on Ideas for the Home by Kenarry® –