DIY Wood Sandbox Tutorial For Backyard
THIS POST MAY CONTAIN AFFILIATE LINKS. PLEASE SEE OUR FULL DISCLOSURE POLICY FOR DETAILS.
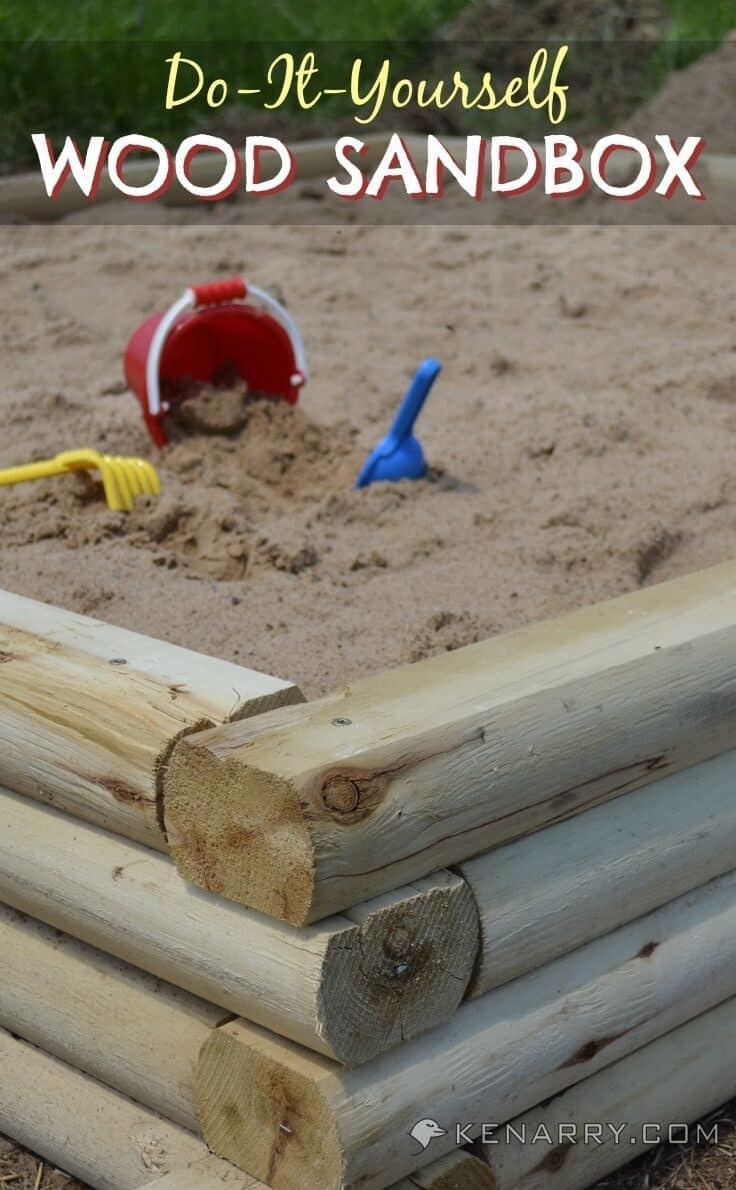
Learn how to build a simple, durable and classic DIY wood sandbox that will look good in any backyard.
Today we’ve partnered with BLACK+DECKER to bring you a simple tutorial to make a DIY Wood Sandbox for your backyard!
Disclosure: This blog post contains affiliate links for products or services we think you’ll like. This means if you make a purchase from one of these links, we’ll make a small commission at no additional cost to you so we can keep the great ideas for the home coming your way. All opinions expressed are our own, derived from personal experience.
A DIY Sandbox for Backyard Play
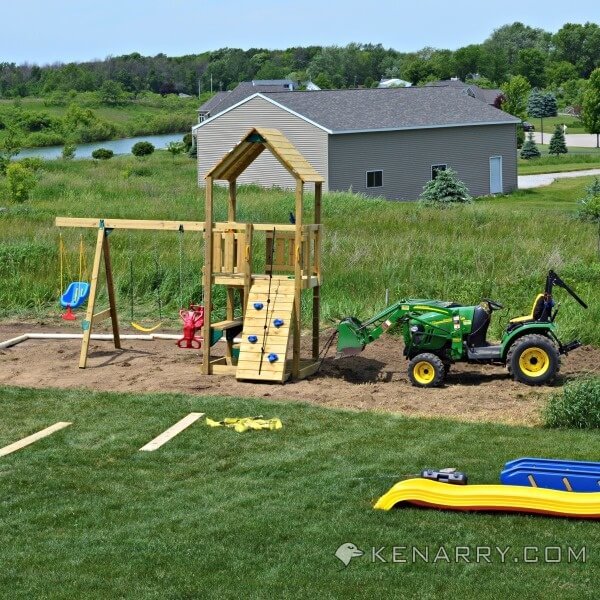
Carrie and I built a backyard playground for our kids and they loved it! Our original vision was a playset with a built in sandbox. However, as we started looking around it quickly became apparent that the playsets in our price range had only small sandboxes included, typically 3′ X 3′ or 4′ X 4′.
In our heads we had pictured something about double that size where the boys could spend hours digging and building whatever their minds could imagine. And so we began planning our 8′ X 8′ DIY Wood Sandbox.
Our Favorite Drill to use for DIY projects
This project also gave us a great opportunity to get some hands-on experience with the new BLACK+DECKER AutoSense Drill. When BLACK+DECKER approached us to sponsor a DIY post that involved their new Lithium AutoSense Drill, they immediately had my attention. Like most guys, two of my favorite things are tools and technology.
The 20V MAX Lithium Cordless Drill with AutoSense has two modes, drill and drive. In drive mode, a microprocessor continuously measures the tool’s performance and stops when it senses the screw is flush with the surface. You get excellent screw head flushness every time; just hold the trigger and let drill take control!
Needless to say I was pretty excited to see how this microprocessor controlled drill could help me complete our DIY Wood Sandbox in record time!
How to Make the DIY Wood Sandbox
What You Need:
- 16 – Landscape Timbers – 8 feet long each
- Hammer
- Framing Square
- 8 – 7″ Galvanized Pole Barn Nails
- 36 – 5″ Exterior Wood Screws – I recommend a T25 Torx head. You’ll pay a bit more, but they will save a lot of strip out frustration.
- Cordless drill/driver (We used the new BLACK+DECKER Lithium Drill, of course!)
- 70 square feet of Weed Barrier
- Utility Knife
- 2-3 yards of sand. We ordered 3 yards and had quite a bit of sand left. In retrospect I would have ordered 2 yards and not filled the sandbox quite as full.
Instructions:
Here’s how to make a sandbox for your backyard. It’s pretty simple.
1. Clear and Level the Surface for the DIY Wood Sandbox
Identify the area where you’d like the sandbox located. Choosing an area that is flat and level will make the installation significantly easier. Our plans dictated that we place the sandbox in an area that required significant clearing and leveling. Fortunately for me, I have a compact tractor that made the job significantly easier.
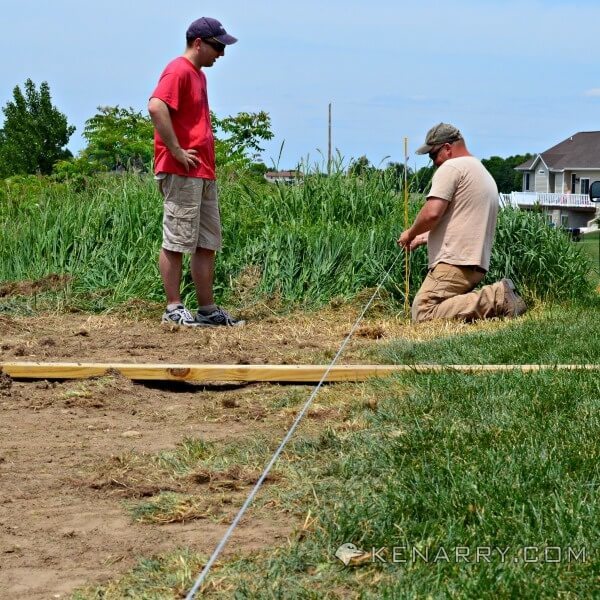
2. Use string to mark the area
After you have the area cleared and level it’s time to figure out where your first timber will go. Placing your first timber will position the sandbox.
In our case, we wanted to keep the sandbox parallel to our playset. In order to do this, we ran some string between two posts and took measurements from the string to the playset until the line was parallel and positioned where we wanted the front of the sandbox.
3. Frame the box
Once you’ve got your string set up, position your first landscape timber underneath the string. Tack each end of the timber into the ground with a galvanized pole barn nail (2 total nails).
Doing this will secure your timber to the ground. Next, take your second landscape timber and position it perpendicular to the first timber. In order to get the 90-degree angle you’ll want, you can use a framing square.
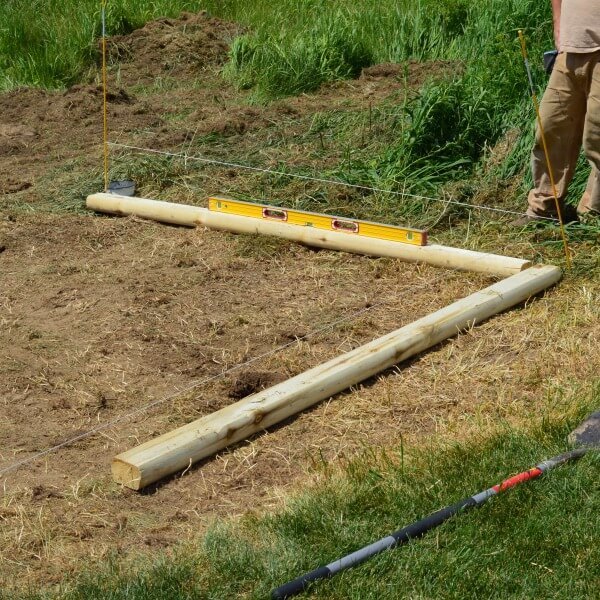
Do your best to get it squared up, but also realize that these landscape timbers are not dimensional lumber and will often have bends and bows.
Once your second timber is positioned go ahead and pin it to the ground with two pole barn nails. Repeat the process with your third and fourth timbers. Make sure you take measurements along the way to keep the bottom layer squared.
One important note is to make sure you alternate the corners. Each timber should have only one of its end surfaces exposed. In subsequent layers, you’ll shift the timbers to create an interlocking corner that makes a much stronger box.
4. Put weed barrier down
The next step is to put the weed barrier down. Weed barrier usually comes on 3′ rolls, so simply roll it out and drape it over top of your box frame. Repeat the process overlapping a few inches with the previous strip until you’ve got the entire base covered.
Don’t be afraid to have some of the weed barrier hang outside the box. We’ll trim that in a later step.
In the picture below you can see how I’ve overlapped the weed barrier on the bottom layer of the frame. You can either tack it in place with staples or simply let the second layer of timber pinch it down. Remember that in a few steps you’ll have about a ton of sand holding it in place, so you only need to hold it in place for a short while.
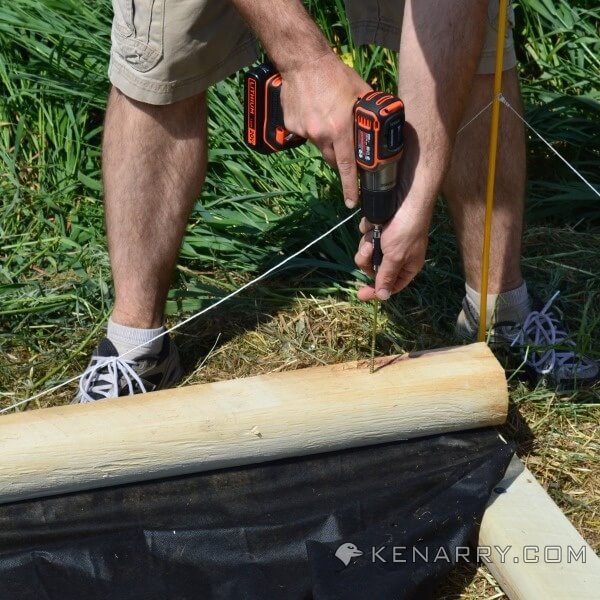
5. Build up the walls
Now that you’ve got the weed barrier down it’s time to add our second layer of timbers. This is really the quick and easy part, just remember to stagger your timbers so no timber lays entirely on the timber below it. Use your BLACK+DECKER AutoSense Drill to drive three of your 5″ screws.

Drive one screw on each end and one screw in the middle of each board. While this project isn’t exactly finished carpentry, I was impressed by the depth control on the BLACK+DECKER AutoSense Drill.
You can see from the picture below that each screw was automatically driven until it was flush with the top of the board. Continue working around the structure until the second layer is complete.

6. Continue to stack until 4-High
Now that the second layer is finished, repeat the process for the third and fourth layers. Remember to continue alternating the timber positions so the layers are offset.
If everything has gone well your four corners will have a nice repeating pattern as shown in the photo below.

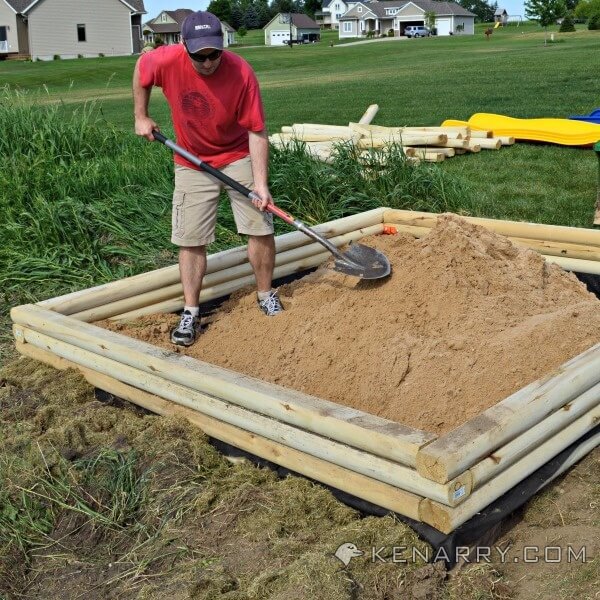
7. Fill with sand
Now that you’ve got the sandbox framed in, all we need to do is fill it with sand!

I chose to fill the box up to the level of the third timber – but you can fill it to whatever depth suits you. Spread and level the sand as you’re filling.
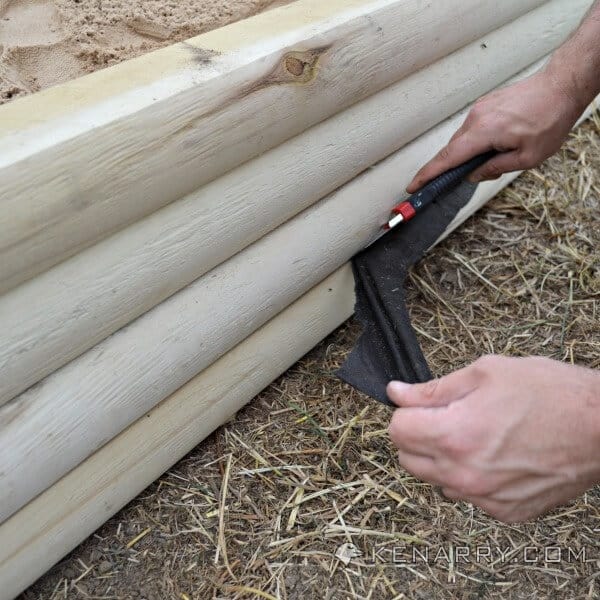
8. trim the weed barrier
Next take your utility knife and trim any of the weed barrier that overlapped outside of the sandbox.
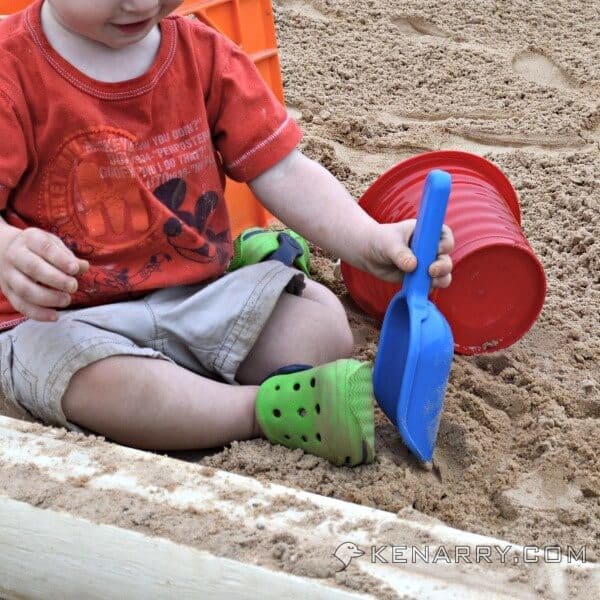
9. Enjoy the new sandbox!
You’re done with your DIY Wood Sandbox! All that’s left is to add the sand toys and let the kids at it. All you’re hard work will be worth it when you see the smiles from those little faces!
So there you have it, a DIY Wood Sandbox out of simple materials that your kids will love! The next step is for us to line the perimeter of the entire backyard playground area with landscape timbers and fill it with playground mulch. If you want to see the finished playground in a few months, be sure to subscribe to Kenarry.
The DIY Wood Sandbox was a great project that both the kids and I really enjoyed. I was especially pleased to get hands on experience with the new BLACK+DECKER 20V MAX Lithium Cordless Drill/Driver with AutoSense Technology. The automatic clutch technology is unlike anything I’ve experienced in a drill. The great news is that one of our lucky readers will win a brand new drill like the one we used to complete this project! See below for entry details.
Disclosure: We received a free BLACK+DECKER 20V MAX Lithium Cordless Drill for use on this project as well as one to give away. During the giveaway, we also receive a small commission when you click on the links to check out the new lithium drill/driver. All opinions are 100% ours. For more information, see our disclosure policy.
Love the ideas you see here on Ideas for the Home by Kenarry®? Subscribe today to get our weekly Ideas in Your Inbox newsletter plus other exclusive gifts and offers — all for FREE!
More DIY Home Project Ideas
Here are some more fantastic and fun DIY home project ideas you can try next.
Originally published June 2014. Updated June 2018.


You had me at “less frustration”!
Thanks, Carrie. I’m so glad you came by and enjoyed what you saw. I loved visiting your site today too.
Thanks for pinning, Justine!
I really enjoy the power and lightweight design they have coupled together!
love it looks really nice
come see us at http://shopannies.blogspot.com
That drill would have saved me a lot of time on my deck! I bet I put 1000 screws into the decking alone.
We’ll be constructing a combined rabbit house/chicken coop for the Farm at school–we can never have too many drills around to get our FFA kids building!
I could use it to rebuild a sandbox at our new house! I am repurposing the wood from the old sandbox at our last house to surround the girls fort with a new and larger sandbox. The Black and Decker AutoSense Drill would be a huge help with putting it together quickly and right!
That is a great looking sandbox! I don’t have a need for a sandbox anymore since the grandsons are past that stage. My sandbox is now a flower box!!
I love your ideas thought and maybe I could just build me another flower box!
WHERE DO I BEGIN?!?! First of all, Ross has had his current drill since the first Christmas we were together… (1998!!!) So, his is starting to be temperamental! We are buying a new home in Washington and it is a bank owned home… Needless to say, there are more than a few projects! The deck rails need reinforced, along with bridging the deck from the back of the house to the side by the garage, there is no play set, and we are leaving ours behind (donating it to the elementary school teacher whose son needs one!). We have also promised the boys a tree house, and my crazy husband has gotten “zip line” in his head! Then there’s the inside… not a single blind or curtain remains in the house!!!! HELP!!! There is NO WAY his current drill will hold out! These are just some of the projects that will require this tool… I need him efficient!!! (Mama’s got a big honey-do list!!)
This would make a great raised-bed garden plan, too… And the drill looks great! Thanks 🙂
I like that this drill can easily change between the drill and drive modes. We would use this drill to extend our deck.
Love this. We really want a sandpit in the garden but tight for space and need it to be London rain proof 🙂 May have to get grandpa to work his magic. Have pinned to my Play Time board.
Thanks for pinning, Alice! As I just suggested to another reader, a tarp may work to make it rain proof.
Awesome DIY, Carrie! I love this so much more than the plastic ones that you can buy. I bet your boys are having so much fun playing in it and on their new playground! A power drill is one tool that we do not have, but I used one at my sister’s house last time we were there visiting while I was helping her hang curtains. I have wanted one ever since! Very cool that this one prevents any stripping of the screw as that is usually one of my main problems. We have a wooden patio table out back that I picked up from an old neighbor that was tossing it, and I have been meaning to clean it up and reattach one of the broken legs. This would be perfect for that!
Great sandbox! I may be using those plans to create one of my own for my in-home family child care. My husband would be using his 10 year old corded drill that was passed down from his dad. I don’t know which feature is better, the fact that it is cordless or the auto sense technology. While we are both learning to DIY, it is a frustrating process without the right tools. He would probably use the drill first to make me new shelves or the sandbox 🙂
Cordless, autosense are the features that make it unique.
Hubby has been eyeing this drill, so definitely it has special features.
Hi Melinda, thanks for stopping by. We haven’t thought about covering the sandbox to keep it dry. If that’s a concern, I’d probably suggest a large square tarp that you could easily fold and set aside while the kids are playing. You could use rocks in the corners to hold it down during storms. If you can find a brown one it wouldn’t be too much of an eye sore in your backyard when it’s not in use. Hope that helps!
Thanks for sharing your sandbox idea. I promised my 4 year old son that he can help to build his sandbox after his upcoming birthday. Conversations with him during projects are a lot of fun. It is somewhat frustrating through when I let him use my cordless drill and he strips the screw heads. The Black and Decker auto-stop feature would be nice so he can assist without damaging the project.
I am a total novice when it comes to small power tools but am very interested in learning how to use this drill! The fact that it knows when the screw is in to the right depth seems like a great advantage especially for a beginner like me.
I would love to use this to help repurpose some old furniture I have lying around
I love the AutoSense! I am always driving screws to far into wood and this would help to prevent that! I am currently working on remodeling an old TV cabinet. Im turning it into a pretend kitchen center for my little grand daughter.
We are moving into a new “old” house next month and there is SO much that we can use this for! Building a deck, closet organizers, shelving, decorating… the possibilities r endless!
Oh, this would be perfect for all my little projects on this log house of mine! A shed needing to be finished, a new water shed to start, a play set and sandbox of course for my 18 month old; this drill sounds great.
love the auto sense. would love to use it on some raised garden beds!
Love the depth control feature on this drill! No more second guessing!
Autosense is brilliant! I currently have a “dinosaur” drill. Takes both hands for me to hold, due to its size and weight, and I often over drill trying not to drop it. I also love that this drill cordless, it would be great not having to drag around an extension cord!
We are planning to build our son a play structure complete with this sandbox of course. This drill would be great for this project and many more around our fixer-upper.
We are planning to build our son a play structure complete with this sandbox of course. This drill would be great for this project and many more around our fixer-upper. I love the auto sense technology no more stripped screws for me.
My Daughters Back Deck has Dry-rotted , and Warped So building A new Deck would be Much easier with the Auto-Sense Drill/Screw Driver , Allowing flush screwing every time without having to strip the screw head trying to drive the screw flush, then the quick burst to sink it would be a real time saver.
I want to build a new Pergola for my back yard. I think this Black & Decker auto sense drill would be the perfect match for my project!