Faux Cloisonne Made with Polymer Clay
THIS POST MAY CONTAIN AFFILIATE LINKS. PLEASE SEE OUR FULL DISCLOSURE POLICY FOR DETAILS.
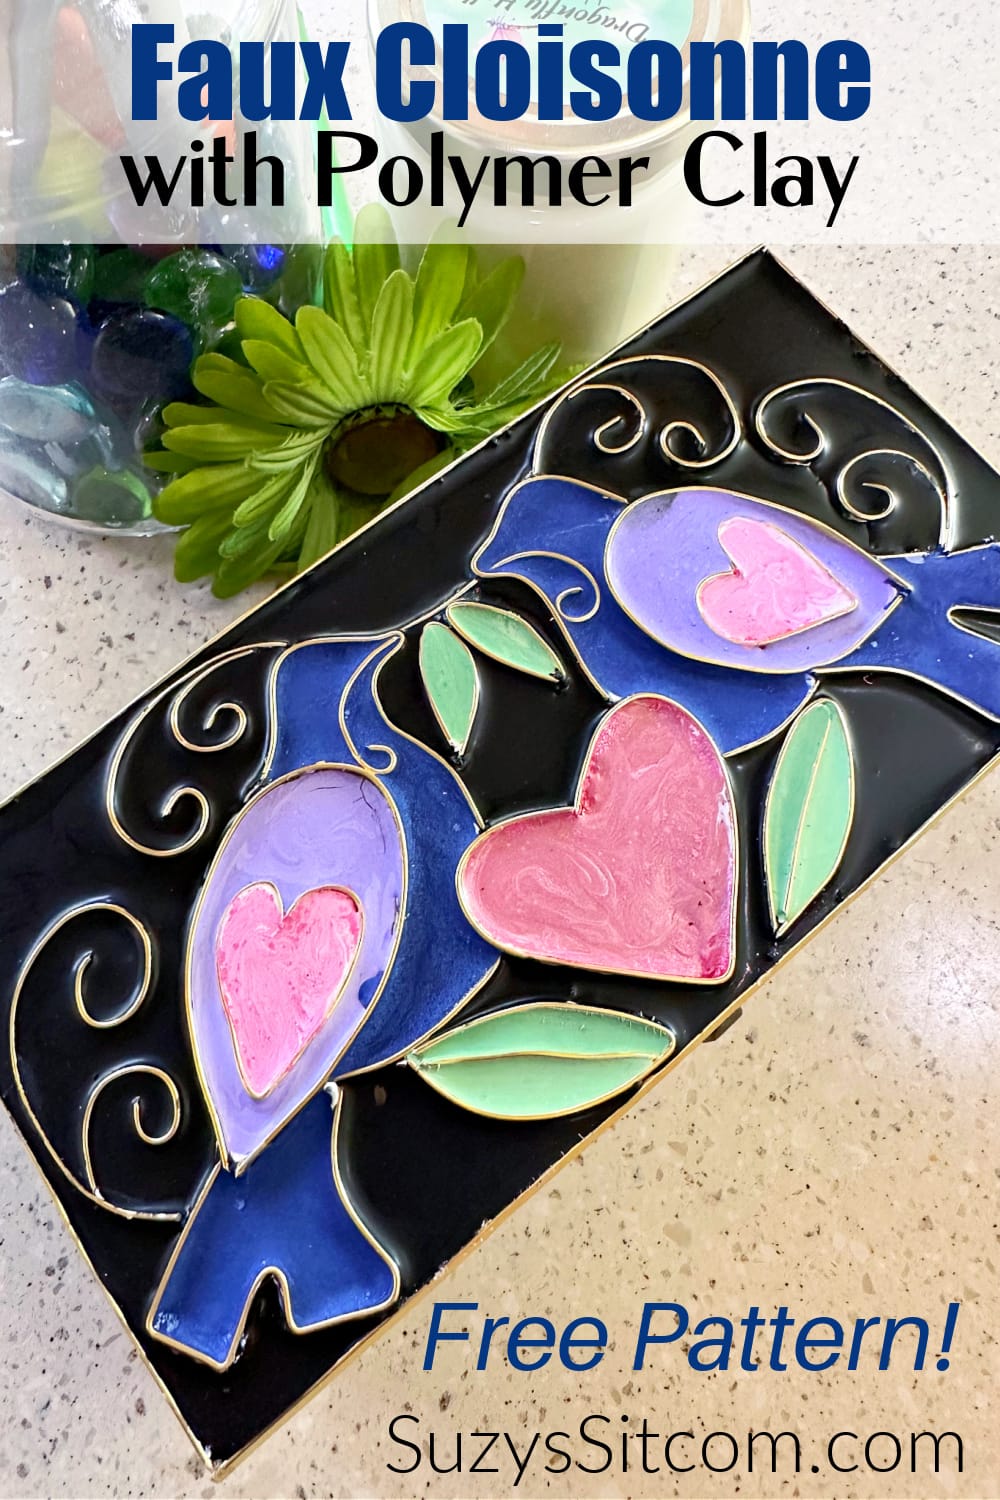
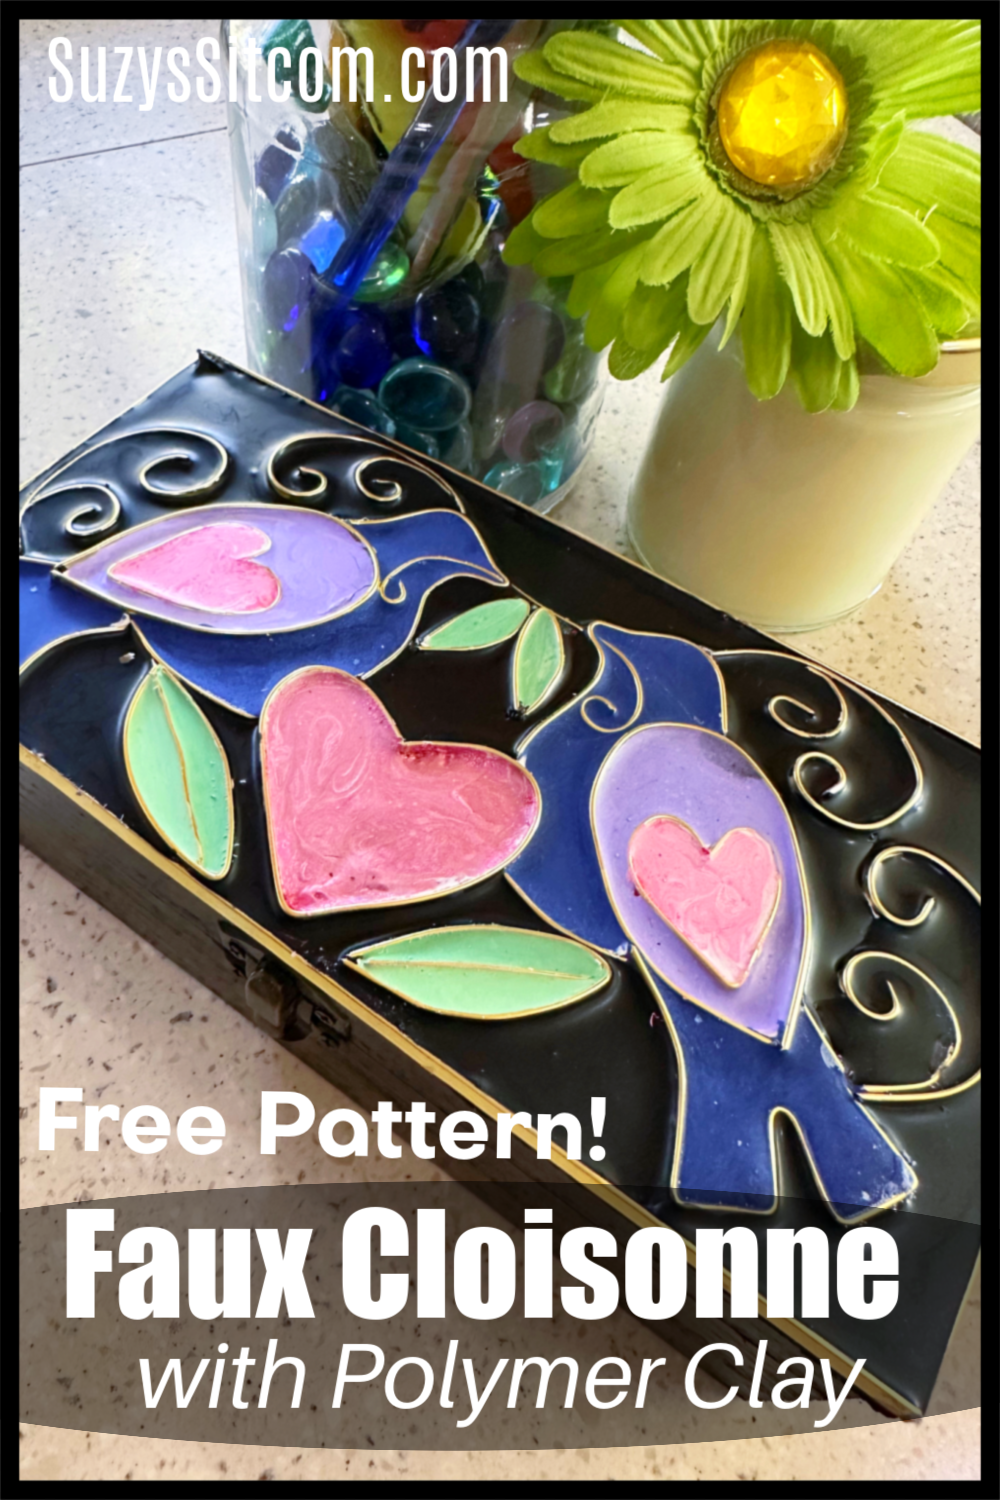
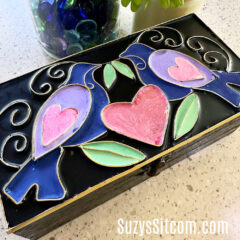
Create beautiful Faux Cloisonne with polymer clay and flat wire. Transform a simple wooden box into an amazing keepsake. Liquid polymer clay is the secret to this project along with the free Love Bird pattern!
Cloisonne (pronounced cloy-zon-ay, French for ”partition”) is an old technique that uses flat precious metal wires and colorful glass enamels to create brilliant artwork. The metal wires are bent to create a design and then finely ground glass enamel is fired into those partitions to create the final piece of art.
Sound difficult? Well certainly! But I have discovered a way to create the look of Cloisonne without all the difficult work. Faux Cloisonne with polymer clay and even a free pattern!
This is Suzy from SuzysSitcom, and I’d love to show you my technique to create Faux Cloisonne with polymer clay and flat wire. This project takes a bit of patience, but the end result is just amazing!
How to make faux cloisonne with Polymer clay
You can create any design that you like using this technique, but for your convenience, I’ve even included in this tutorial my free Love Birds Pattern!

What you need:
Want more ideas like this? Subscribe today to get our weekly Ideas in Your Inbox newsletter plus other exclusive gifts and offers — all for FREE!
- 8 oz Bar White Polymer Clay
- Approximately 15 ft. 3mm wide Flat Wire
- Unfinished Wood Box 8″ x 4″ x 2.3″
- Liquid Polymer Clay (Black)
- Liquid Polymer Clay (Pink, Green, Blue, Purple)
- E6000 Glue
- Black Acrylic Paint
- Clear Nail Polish
- Love Birds Pattern
Tools Needed:
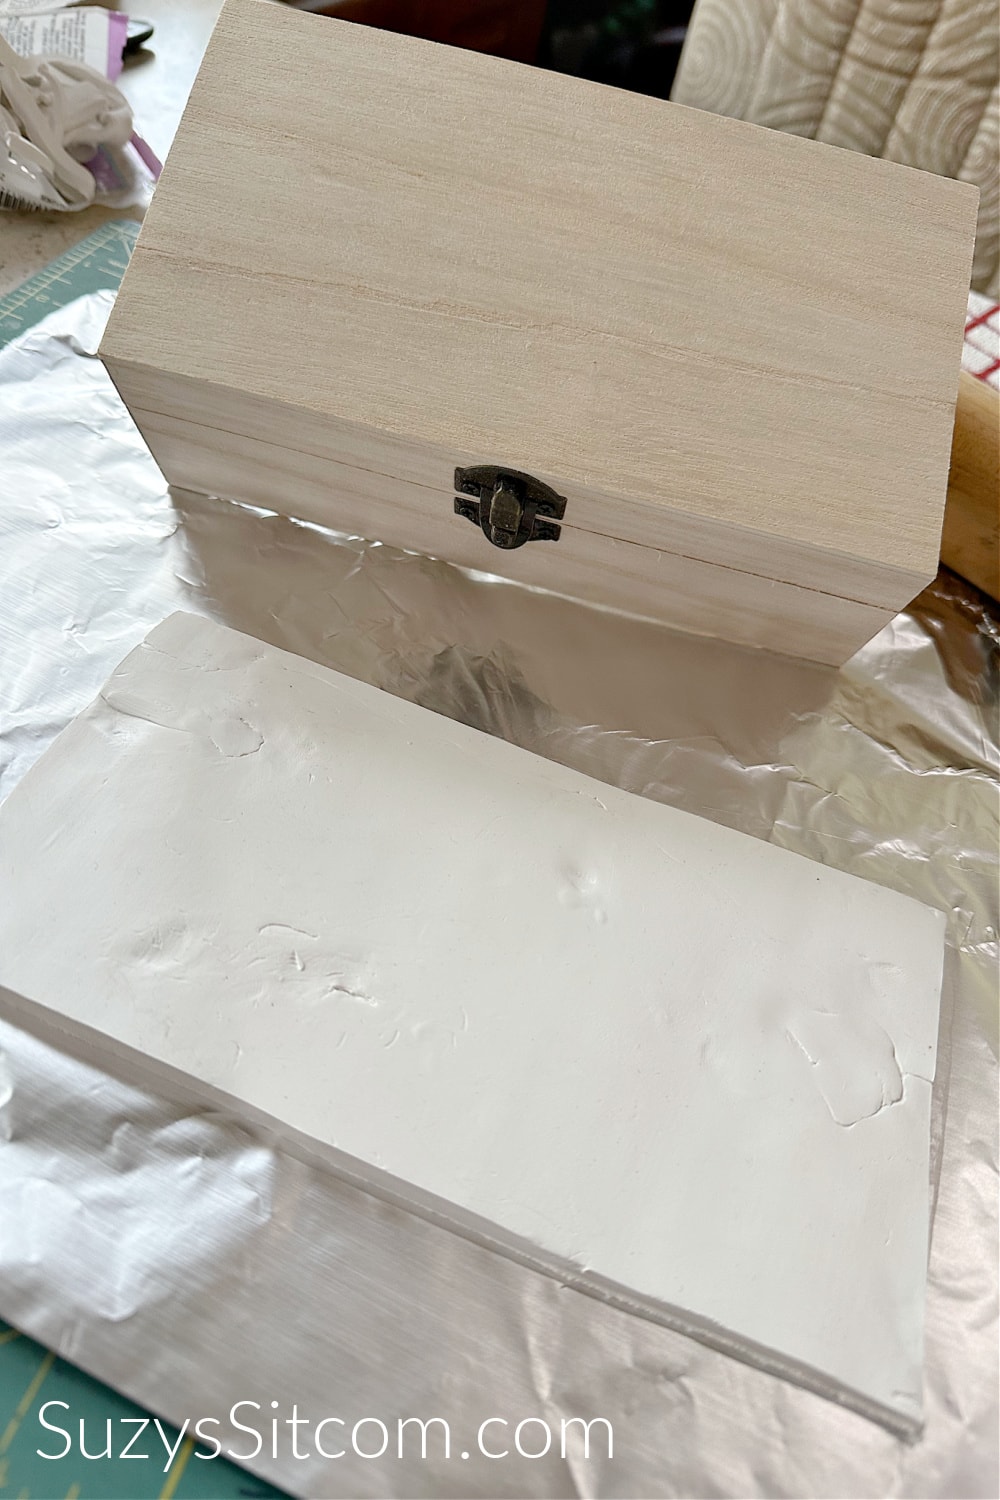
Roll out the white Polymer Clay
Using a glass or rolling pin, roll out the white polymer clay to about a 1/4″ thickness. Use a craft knife to cut the clay to the size of the box lid. In my case, it is cut 8″ x 4″.
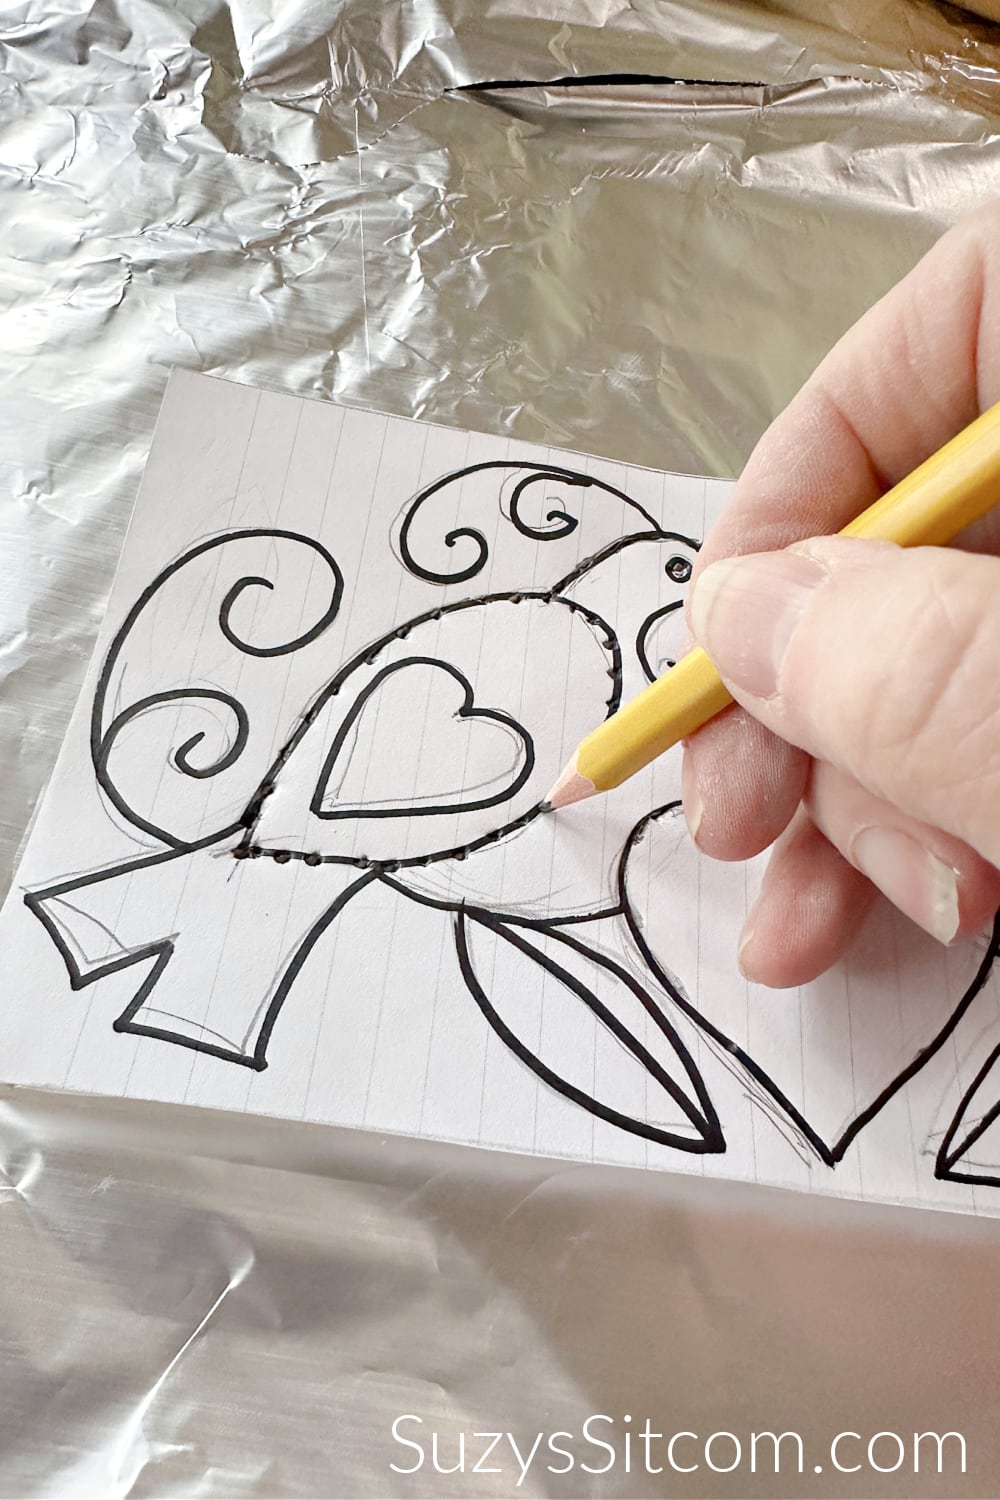
Add the design to the clay
Place the pattern over top of the sheet of clay and use a pencil to punch holes through the paper. These indents in the clay will help to align the wire pieces.
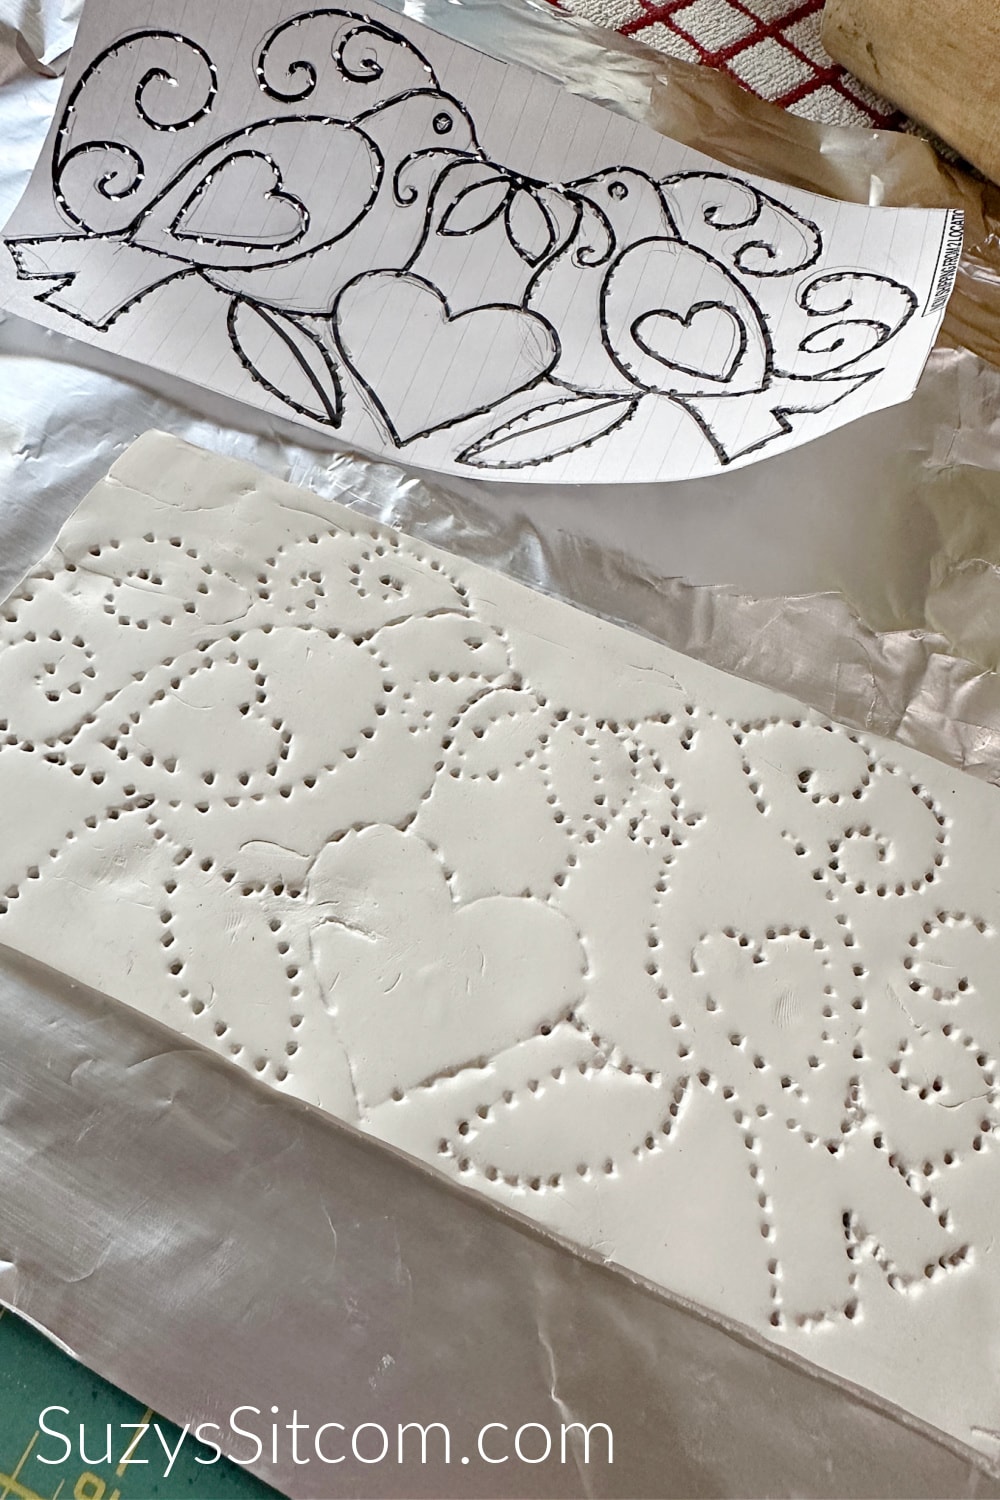
Once all the punches are in place, remove the pattern and set it aside. The pattern will be needed again for the next step.
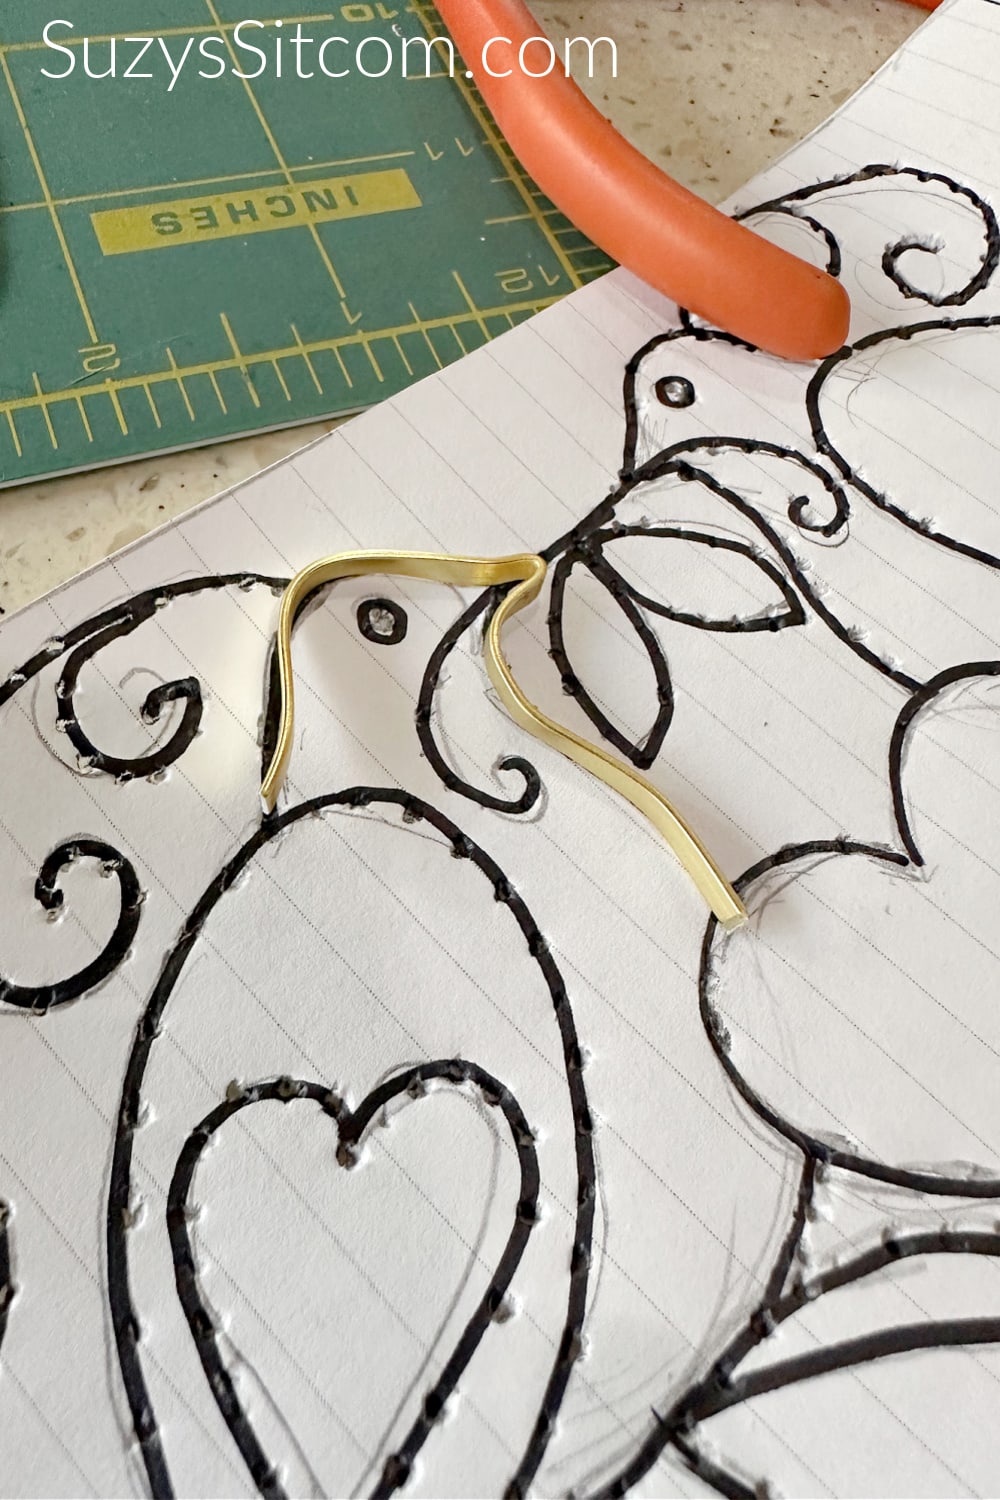
Cut the wire and bend to form
Using the wire cutters, cut the flat wire in pieces to match the pattern. This flat wire is easy to cut and bend, so no special tools are required. Use the needle nose pliers and your fingers to bend the wire and align it with the paper pattern. Be sure that it is a close match.
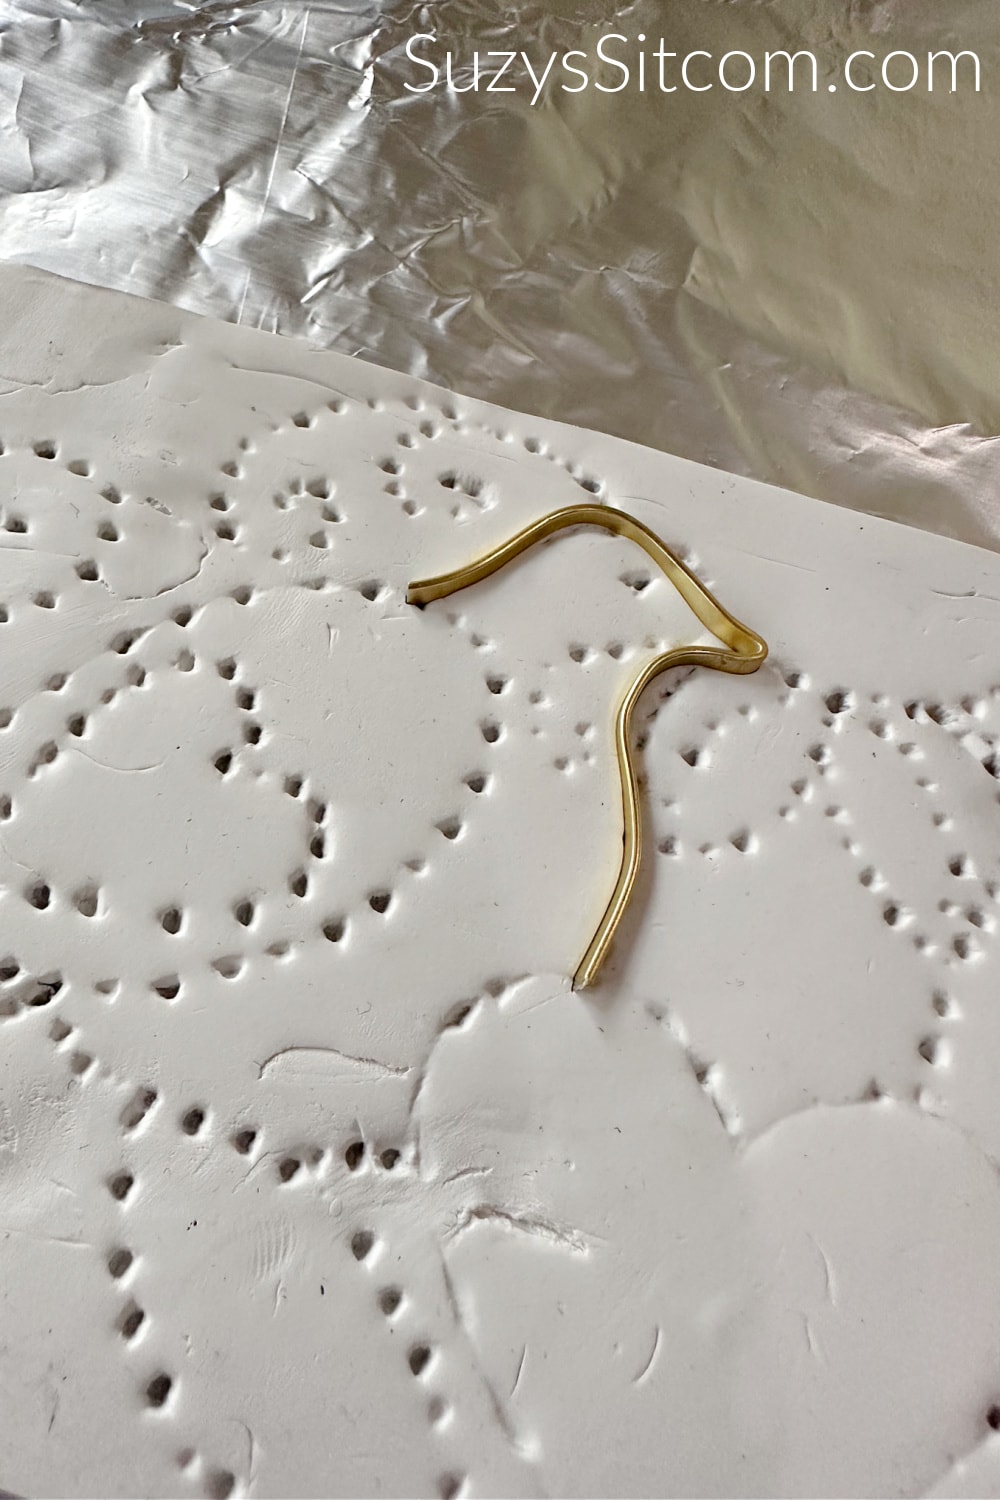
Once the metal wire is bent to your satisfaction, push it into the clay on it’s edge about halfway, leaving about 1 mm of wire above the clay.
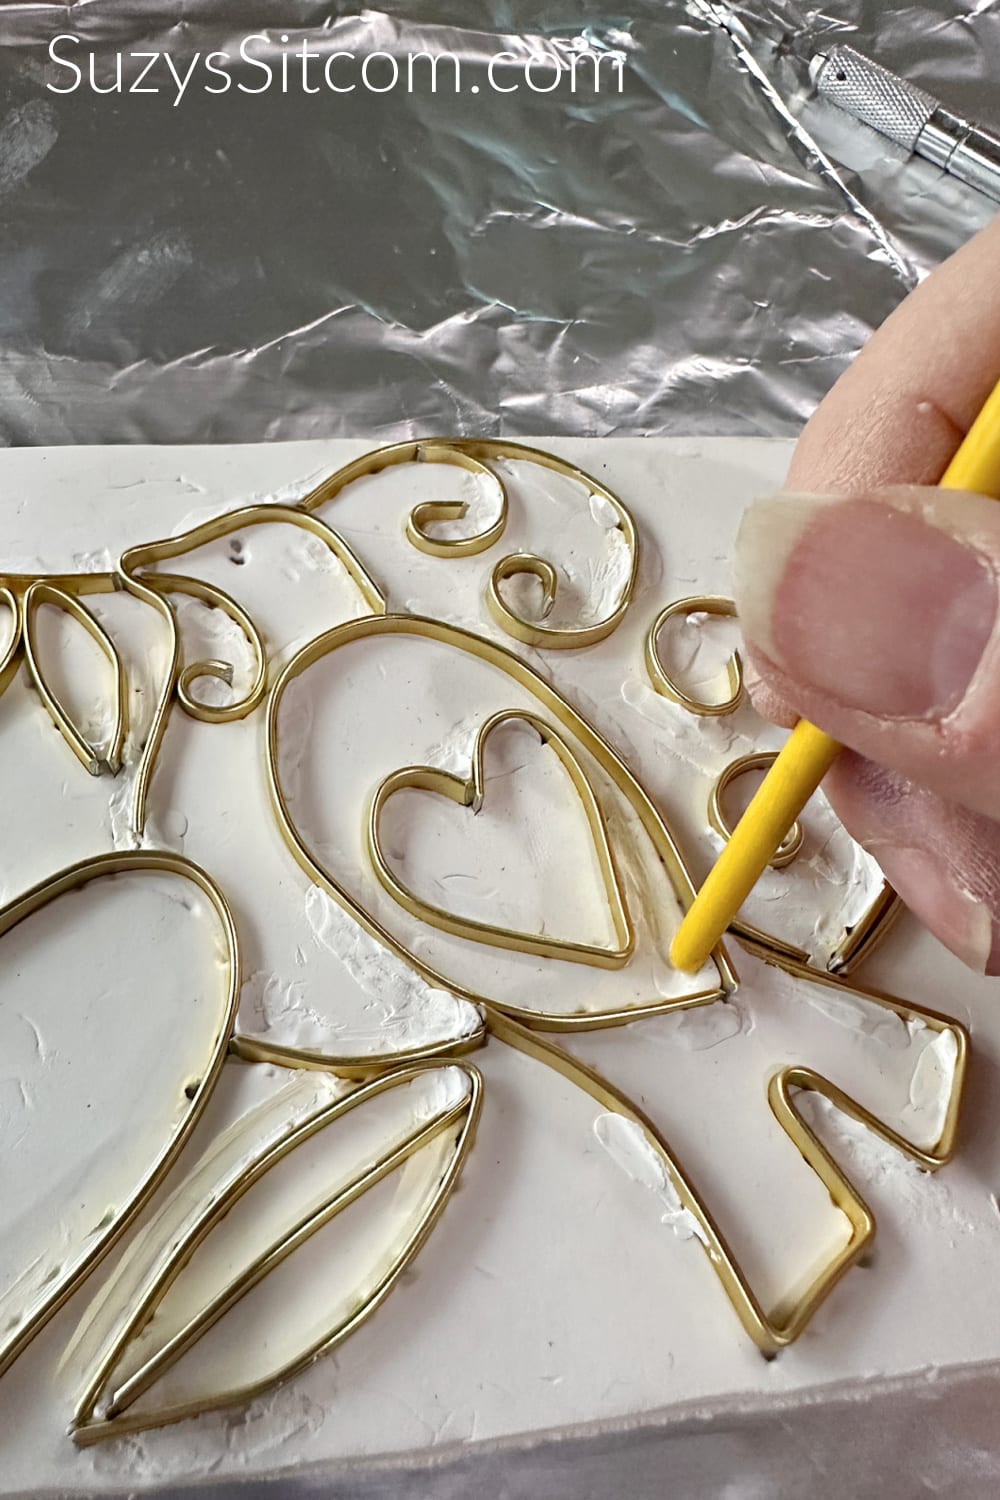
Fill any open areas with polymer clay
Any areas where the wires meet need a tiny touch of polymer clay. This will prevent the liquid colors of polymer clay from spreading into other areas. Try to add a touch of clay to any areas that might be open.
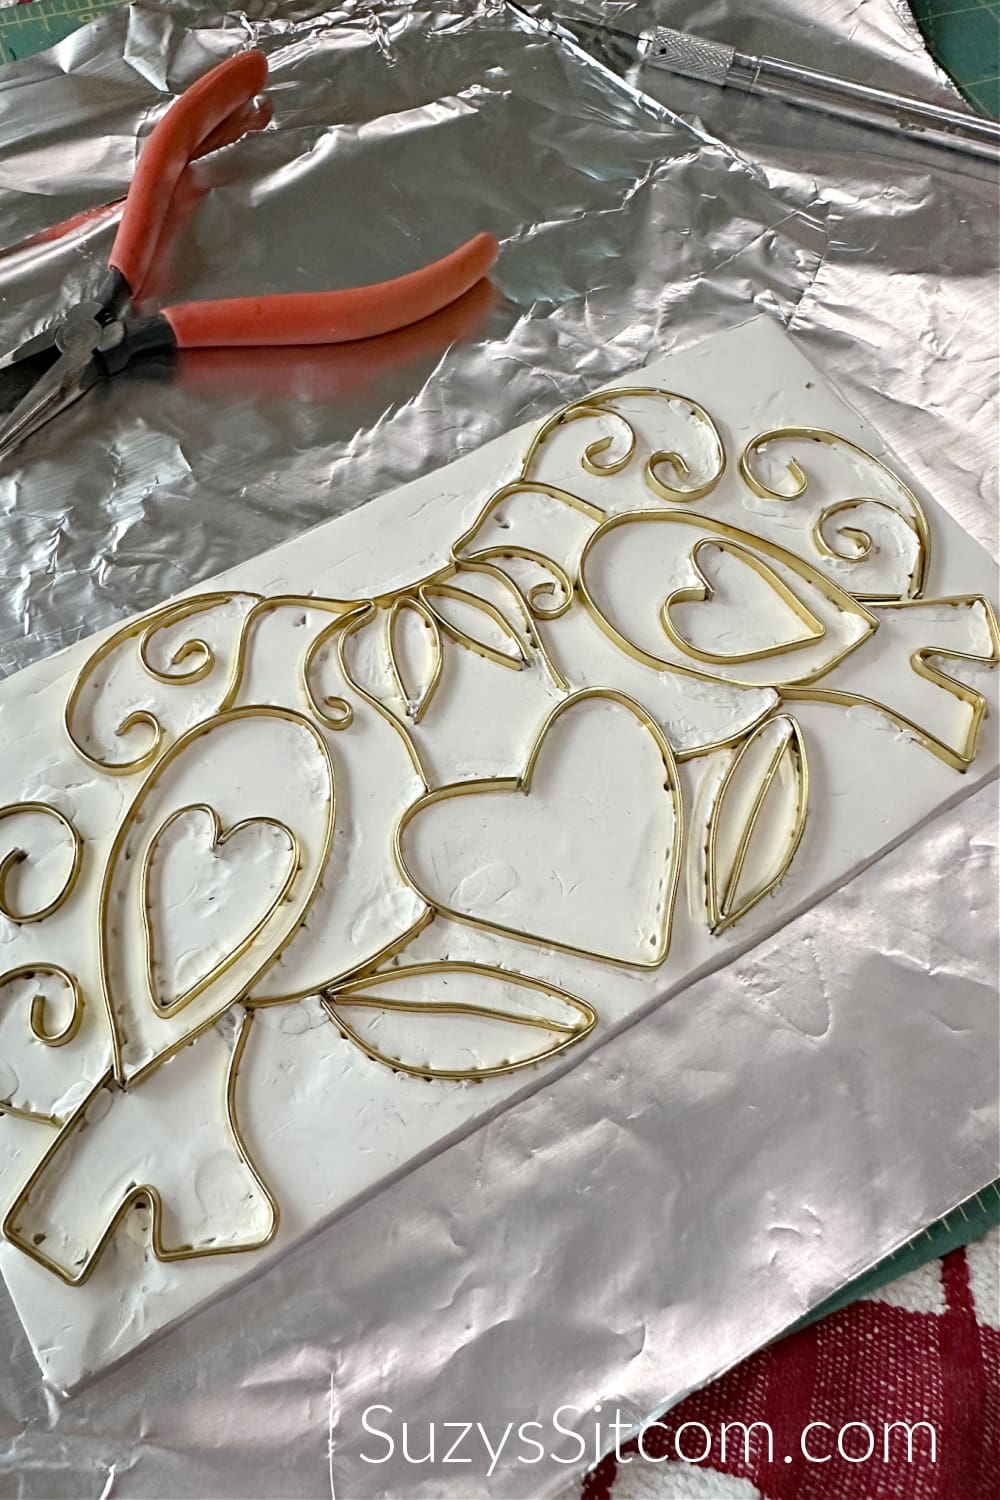
Baking the polymer clay
Place the finished wire piece into a 275 degree oven for about 20 minutes. Allow it to cool before going to the next step.
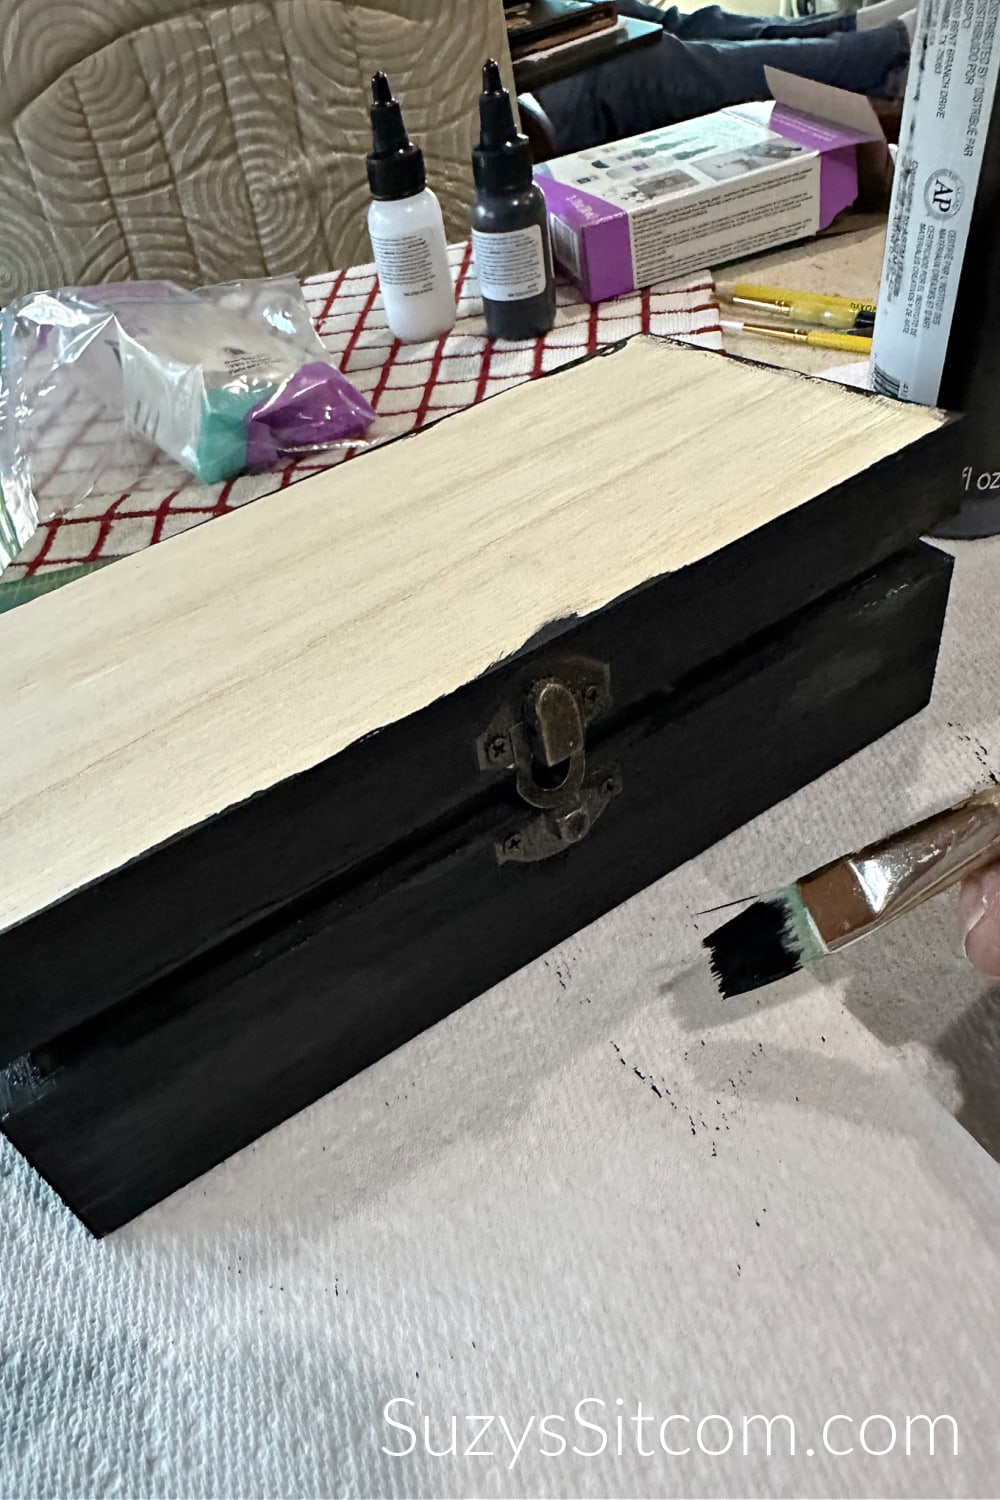
Paint the wood box
Paint the outside of the wood box with black acrylic paint. This will allow a nice contrast with the finished faux cloisonne.
Add wire to the outside edges
Use E6000 glue to add wire to the outside edges, being sure to have at least 1 mm of wire above the edge. Add touches of white clay to the edges if you see any open areas between the wire and the edge of the clay.
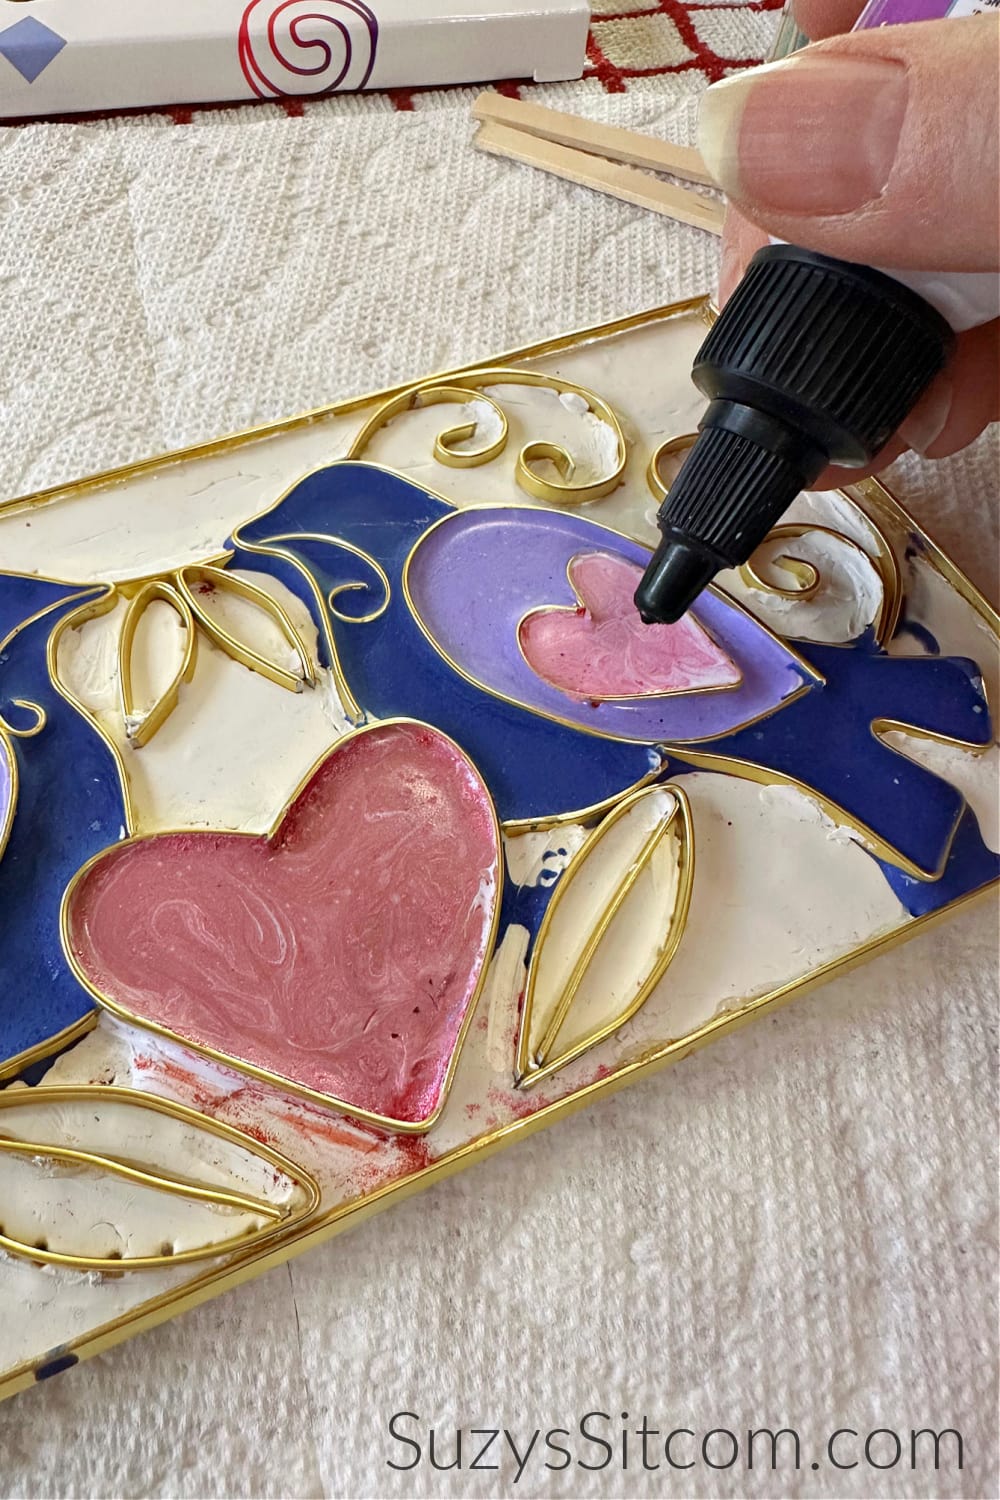
Add Colored Liquid Polymer Clay
Carefully add colored liquid polymer clay to the individual sections created by the flat wire. If you end up with any leaks in spite of careful placement of white clay (as you can see that I did above), simply place the piece back into the oven at 275 degrees for five minutes. This will harden the liquid clay and stop it from leaking. Do all colors first before adding in the black. (The black will cover any leaks or errors).
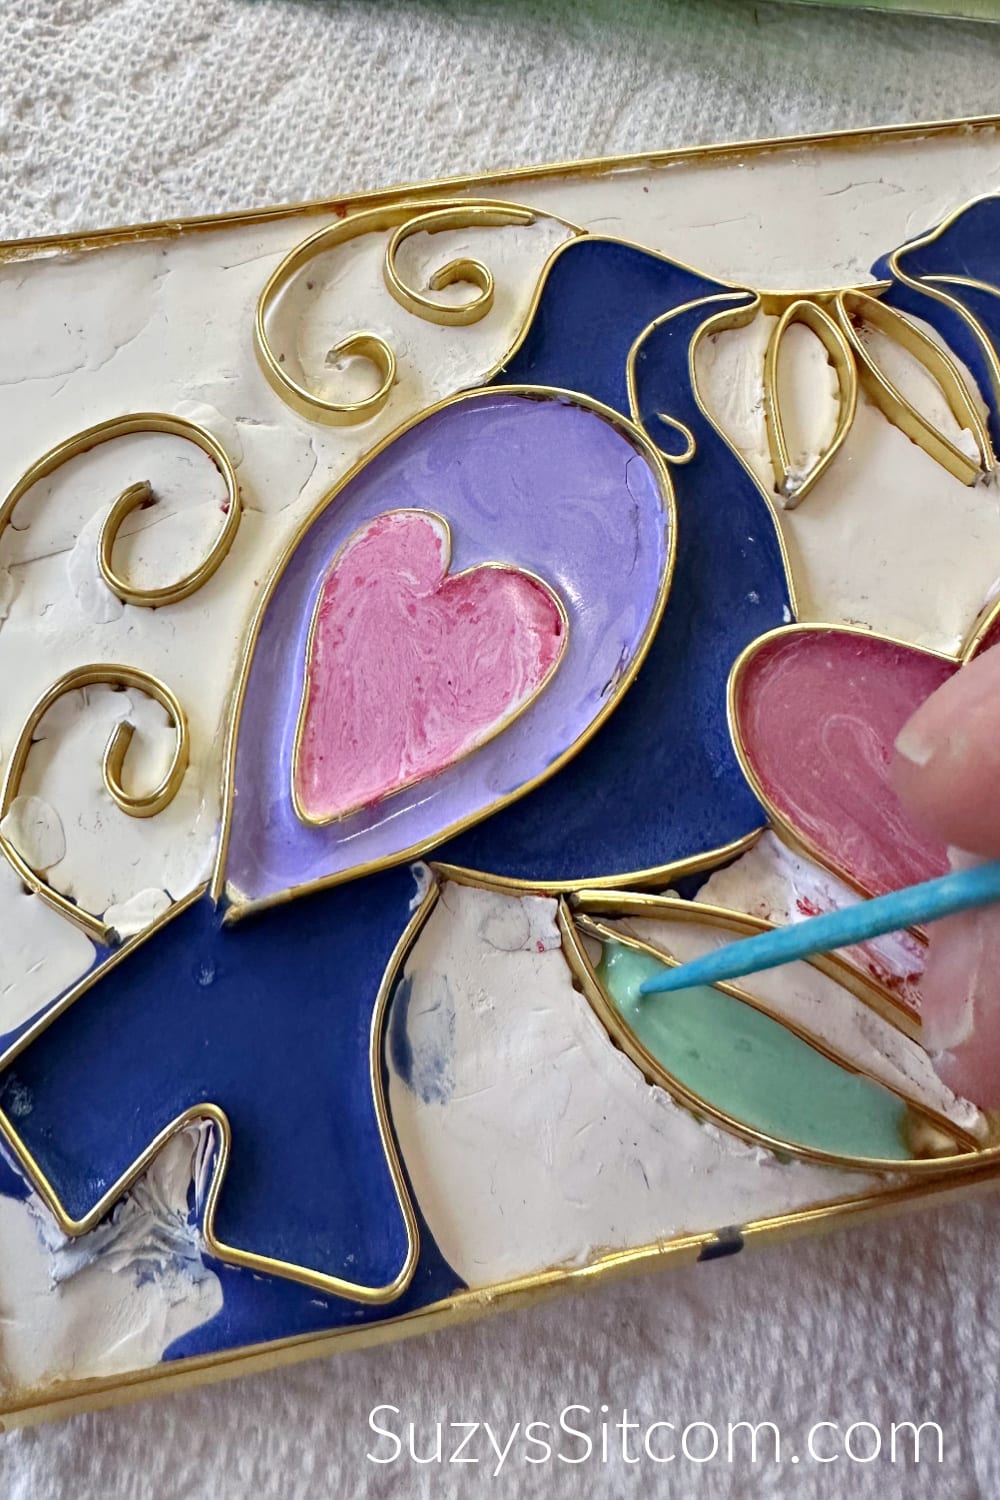
Use a toothpick to push the colored liquid polymer clay into the smaller areas. Once all the colored liquid clay has been added, bake at 275 degrees for five minutes to set.
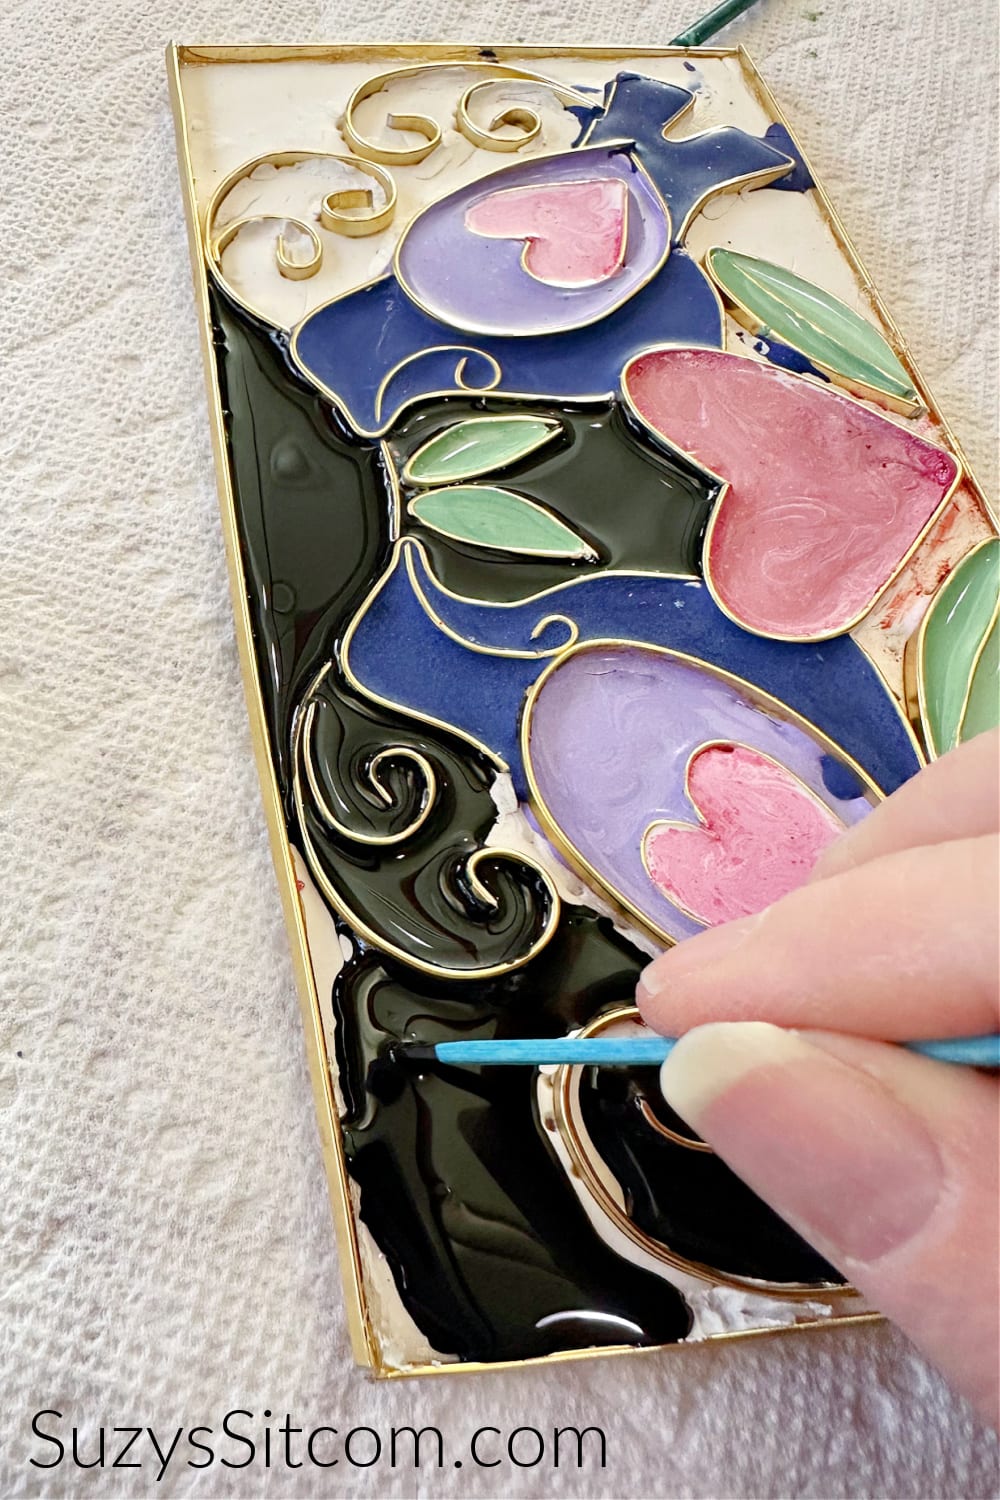
Add Black Liquid Polymer Clay
Carefully add the black liquid polymer clay to all of the background. Use a toothpick to push it into the smaller areas. Bake again at 275 degrees for five more minutes.
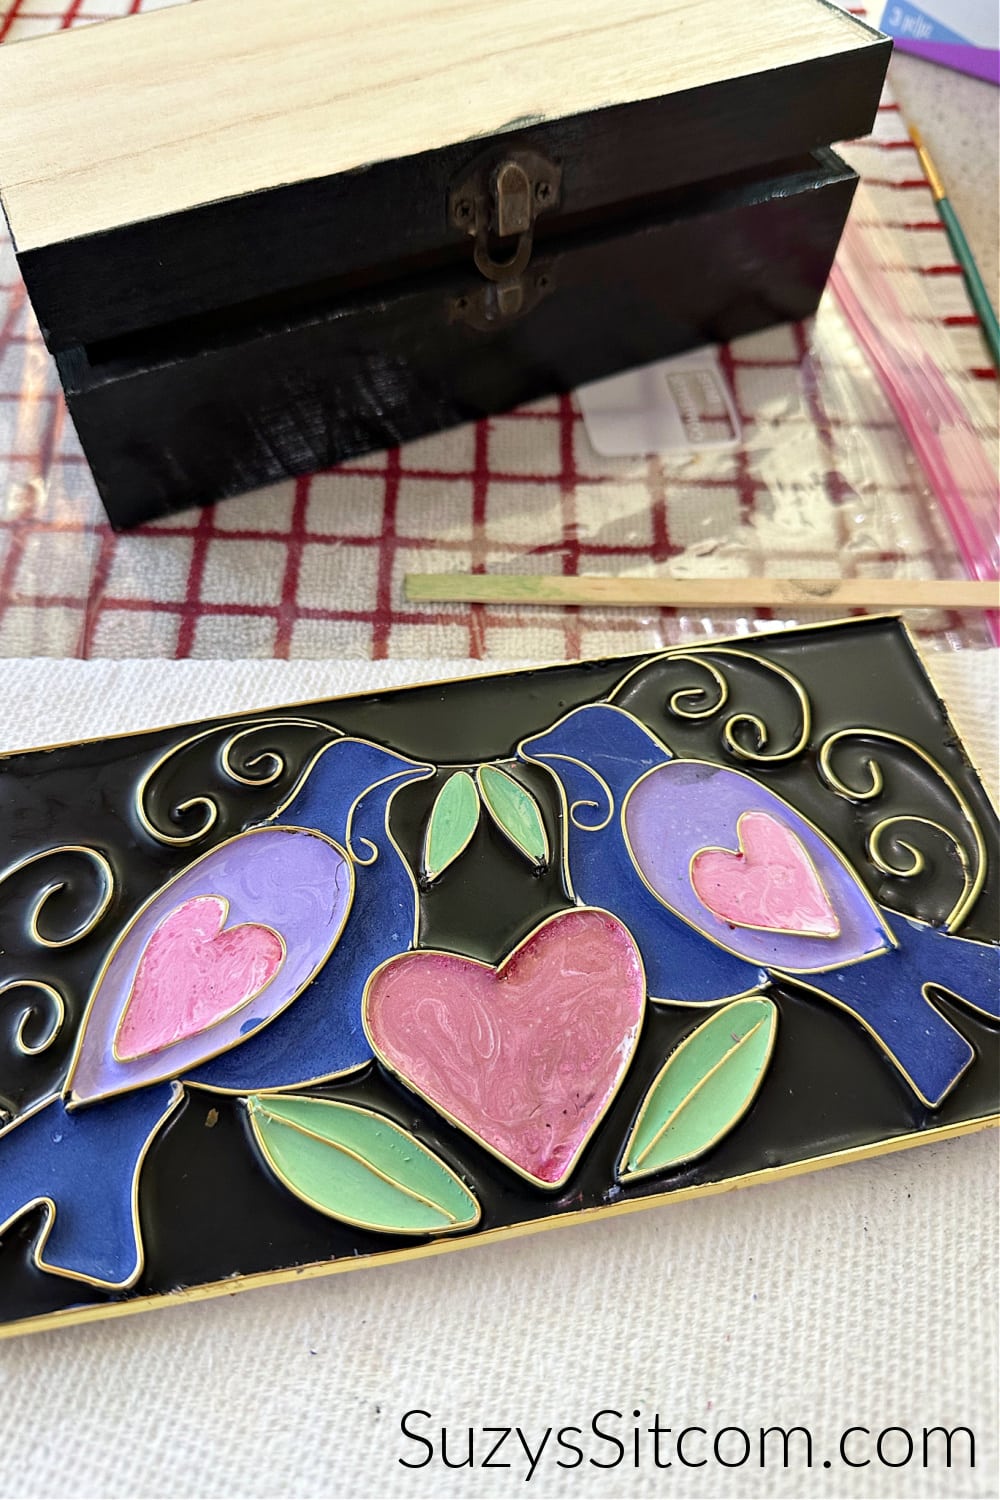
Once the piece has cooled, use your fingers to remove any dried clay from the wire pieces. Add a coat of clear nail polish to the sections of the colored and black clay.

Finishing
Use E6000 glue to attach the piece to the top of the wood box. Use black acrylic paint to paint the bottom edge of the white polymer clay (where the wire does not cover it on the sides).
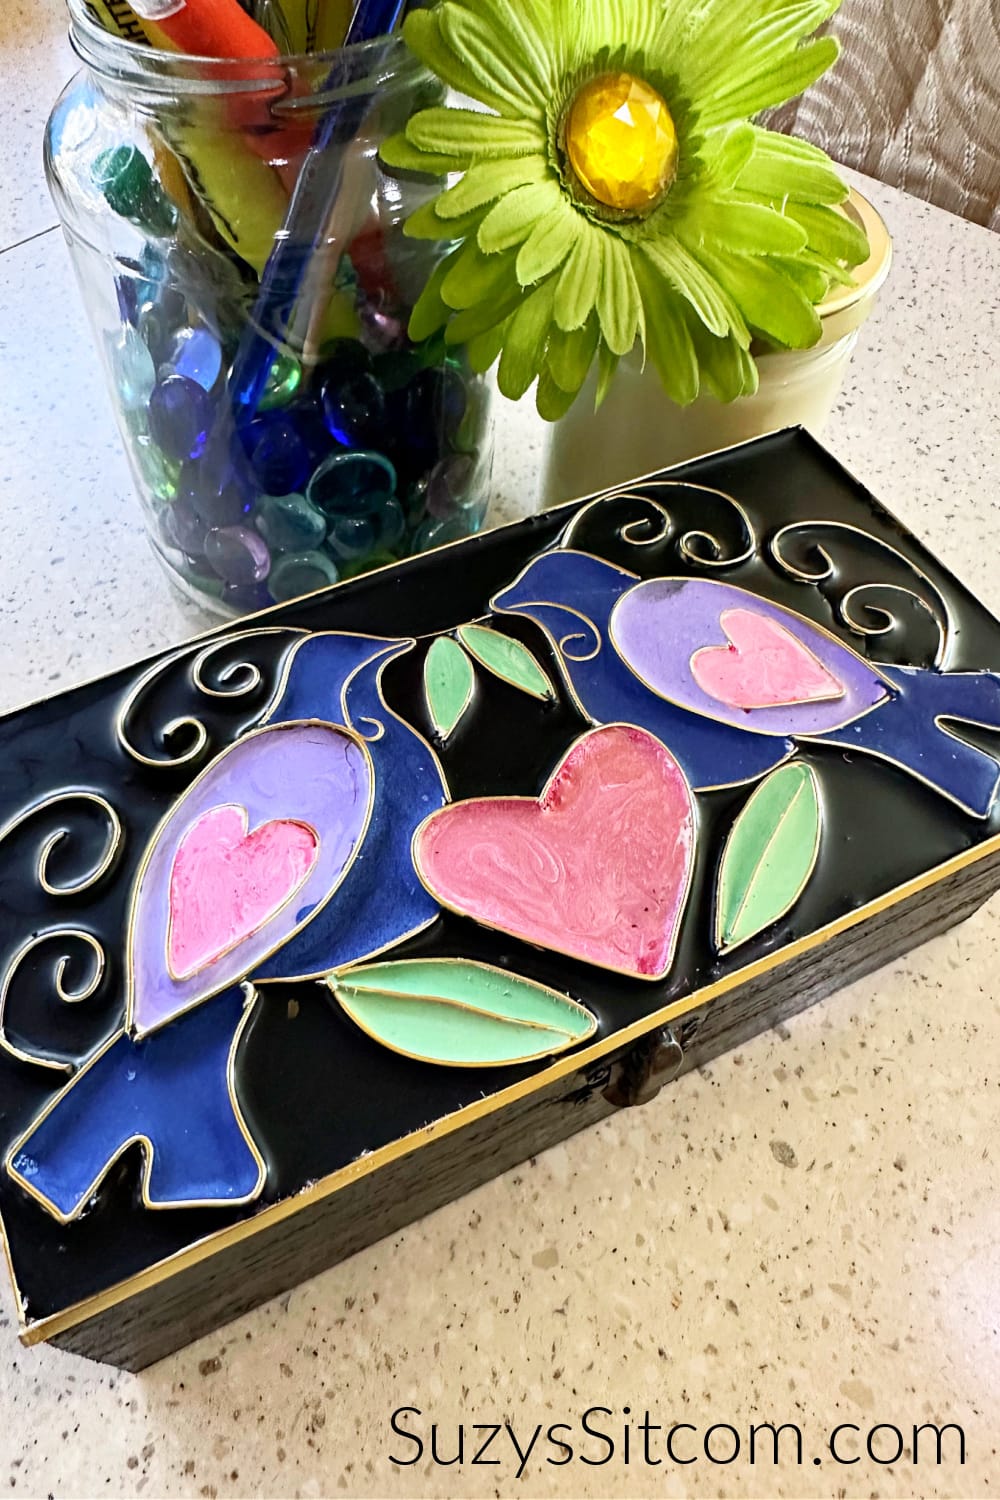
This finished project will be an amazing heirloom piece. A beautiful handmade gift or piece of home decor! And you made it yourself! Faux Cloisonne is just as beautiful as the real thing.
Faux Cloisonne made with Polymer Clay
Equipment
- 1 Wire Cutters
- 10 Toothpicks
- 1 Needle Nose Pliers
Supplies
- 8 oz White Polymer Clay
- 15 ft 3mm Flat Wire Gold or Silver
- 1 ea Unfinished wood box
- 1 bottle Black Liquid Polymer Clay
- 1 bottle Colored Liquid Polymer Clay any colors
- 1 ea E6000 Glue
- 1 ea Black Acrylic Paint
- 1 ea Clear Nail Polish
- 1 ea Love Bird Pattern
Instructions
- Roll out white polymer clay 1/4" thick and cut to size of box top.
- Transfer pattern to clay by punching hole into the pattern with pencil.
- Using the wire cutters, cut the flat wire in pieces to match the pattern. This flat wire is easy to cut and bend, so no special tools are required. Use the needle nose pliers and your fingers to bend the wire and align it with the paper pattern.
- Push the wire into the clay on its edge about halfway, leaving about 1 mm of wire above the clay.
- Any areas where the wires meet need a tiny touch of polymer clay. This will prevent the liquid colors of polymer clay from spreading into other areas.
- Place the finished wire piece into a 275 degree oven for about 20 minutes. Allow it to cool before going to the next step.
- Paint the outside of the wood box with black acrylic paint.
- Use E6000 glue to add wire to the outside edges, being sure to have at least 1 mm of wire above the edge.
- Carefully add colored liquid polymer clay to the individual sections created by the flat wire. If you end up with any leaks in spite of careful placement of white clay (as you can see that I did above), simply place the piece back into the oven at 275 degrees for five minutes. This will harden the liquid clay and stop it from leaking. Do all colors first before adding in the black.
- Use a toothpick to push the colored liquid polymer clay into the smaller areas. Once all the colored liquid clay has been added, bake at 275 degrees for five minutes to set.
- Carefully add the black liquid polymer clay to all of the background. Use a toothpick to push it into the smaller areas. Bake again at 275 degrees for five more minutes.
- Add a coat of clear nail polish to the sections of the colored and black clay.
- Use E6000 glue to attach the piece to the top of the wood box. Use black acrylic paint to paint the bottom edge of the white polymer clay (where the wire does not cover it on the sides).
Love the ideas you see here on Ideas for the Home by Kenarry®? Subscribe today to get our FREE DIY & Craft Planning Calendar, plus our weekly Ideas in Your Inbox newsletter filled with creative tips and exclusive offers!
Love faux techniques?
You can find lots more faux techniques on my website, SuzysSitcom.com! Here are just a few!
Make Faux Stained Glass with Paint and Glue

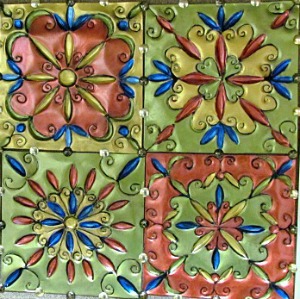
Make Faux Tin Tiles with Disposable Cookie Sheets
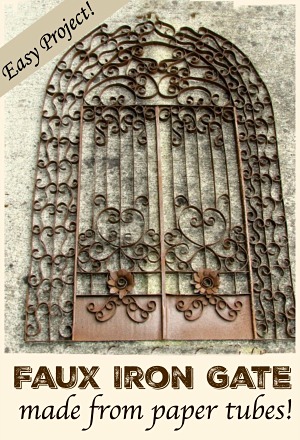
How to Make a Faux Iron Gate with Paper!
You may also enjoy these easy craft ideas on Ideas for the Home by Kenarry® –