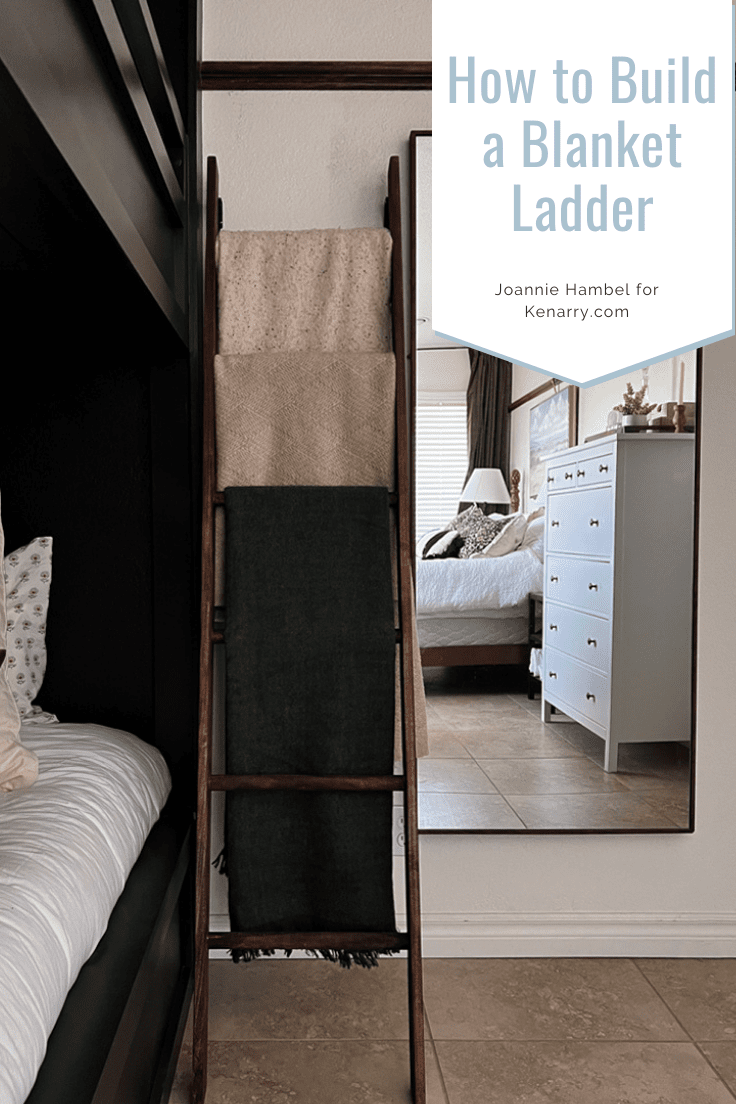
How to Build a Strong DIY Blanket Ladder
THIS POST MAY CONTAIN AFFILIATE LINKS. PLEASE SEE OUR FULL DISCLOSURE POLICY FOR DETAILS.
Joannie Hambel shares a diy blanket ladder plan to build a solid wood ladder that even an adult could climb on but is also pretty enough to use as a decorative blanket ladder.
Hi my Kenarry friends! I’m Joannie Hambel from Hambels Get Real, and like you, I love making crafts. When I am not over here guest blogging you can find me over at mine sharing tutorials on how to build cabinetry or add trim and character to your home. I love getting to know you and help when I can, simply comment here or contact me on our blog!
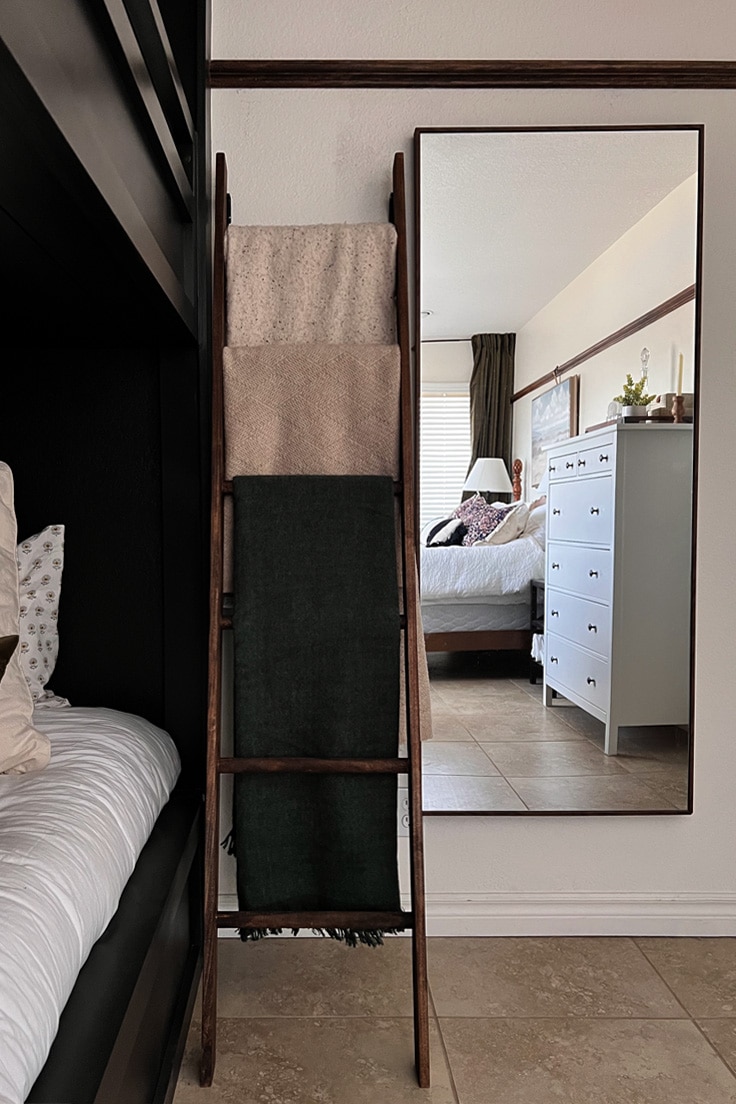
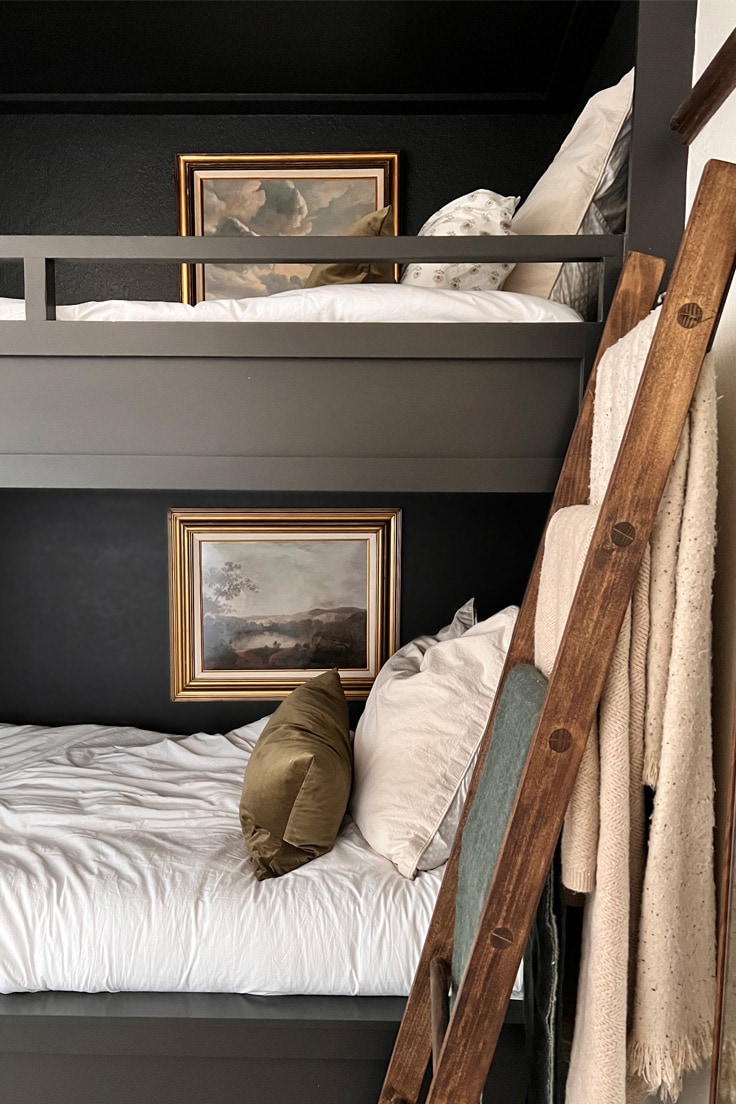
I needed a ladder to access the top bunk of our guest room built in bunk beds. Since the bunk beds aren’t always being used, I wanted the ladder to be decorative as well. With the cold weather upon us I have found way more throw blankets scattered around than usual. So the idea for a strong blanket ladder took shape. Now we can use it as a blanket display ladder as well.
I came up with this blanket ladder plan and now I get to share it with you!

How to Make A Wood Blanket Ladder
This wood blanket ladder is sturdy enough to support an adult!
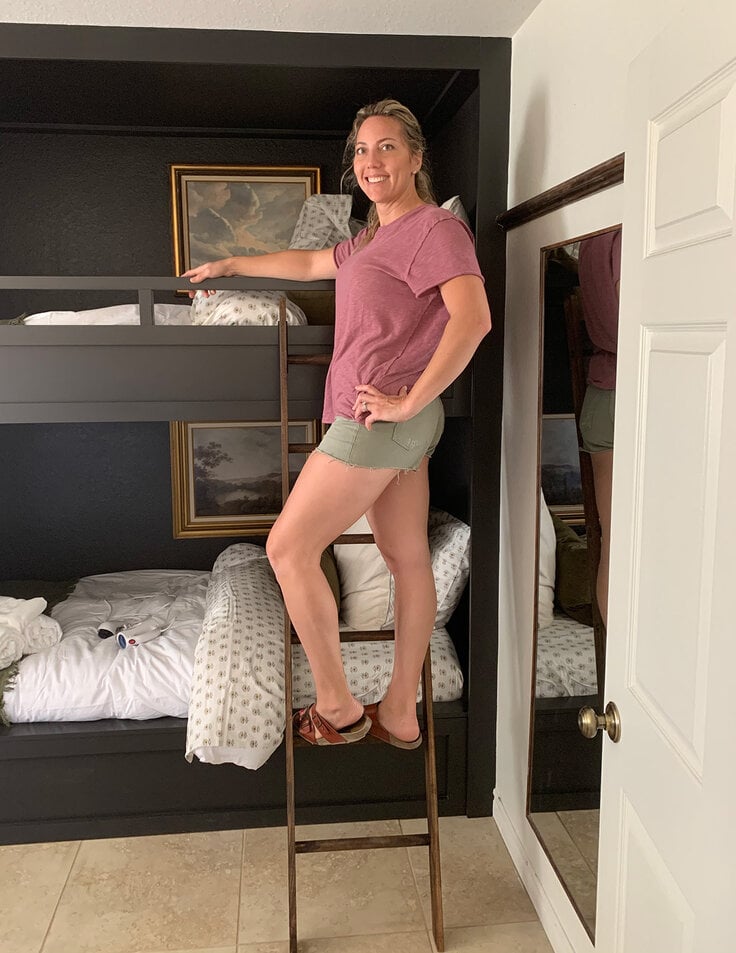
Every day this blanket ladder displays throw blankets in our guest room. When we have friends stay over the ladder also serves a dual purpose to help our little guests get on to the top bunk in our family guest room.
Do you need a plan to make a blanket ladder that you don’t have to worry about your kids climbing? This is it.
My diy blanket ladder is made from easy to find boards and wood dowels. You probably already have all of the tools you need. Let’s build this blanket ladder!
What you need to build the diy Blanket ladder:
Want more ideas like this? Subscribe today to get our weekly Ideas in Your Inbox newsletter plus other exclusive gifts and offers — all for FREE!
Tools for the blanket ladder:
- Drill or drill press with 1 1/8″ (1.125″) drill bit – you could use a forstner, spade or hole saw for your drill
- Two clamps
- Speed square
- Jig saw or band saw with wood blades
- Miter saw or miter box
- Pen or pencil for marking
- Rubber mallet
- Utility knife for scoring the shims
- Sander for finishing
DIY wood blanket ladder supplies:
- 2 – 6′ lengths of 1×4 poplar or other hard wood
- 2 – 1 1/8″ (1.125″) wood dowels 4′ long
- Wood Glue
- Wood shims
- 60, 150 and 220 grit sand paper
- Any stain or finishing products you plan to use
Diy Blanket Ladder Building Tips:
Anatomy of a ladder
A ladder is made of two sides called “rails” and horizontal pieces connecting the two rails together. Those horizontal pieces are called “rungs” and they’re what we use to climb up a ladder.
A ladder can stand upright or lean, leaning ladders are easier to climb. They are also great for leaning against a wall and displaying blankets. You could use a straight ladder, but your need to secure it against the wall to stay upright.
This plan helps you build a leaning ladder.
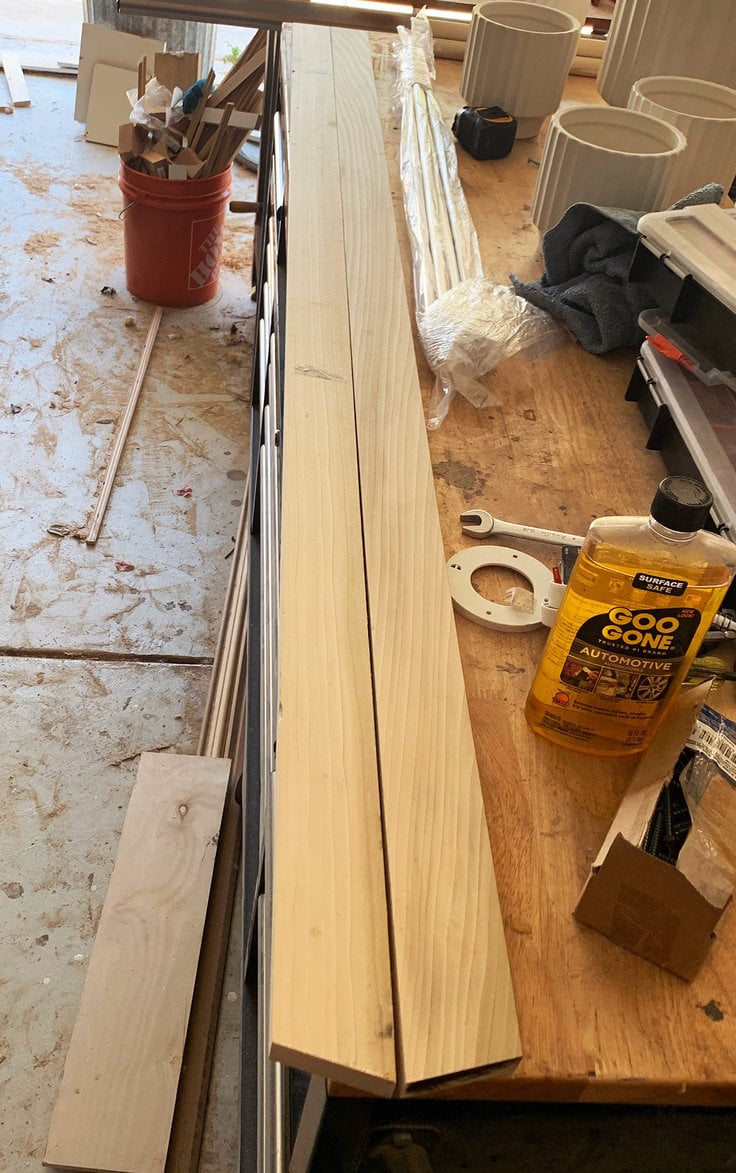
Cutting your ladder rails
Set your miter saw to 15 degrees and cut the bottoms of your rails – make sure both of them are the same length. Mine are 70″ long.
The 15 degree cut is what makes your ladder a leaning ladder.
Mark Your Ladder Rails
Place your rails side by side like the image above. Make sure that the tops line up perfectly and the pointed tips at the base are flush.
Place a measuring tape on the pointed tip of one of the rails, and measure up 10 1/4″ and make a mark. Work your way up the ladder, marking every 10 1/4″.
There should be 6 marks and 8″ of remnant at the top.
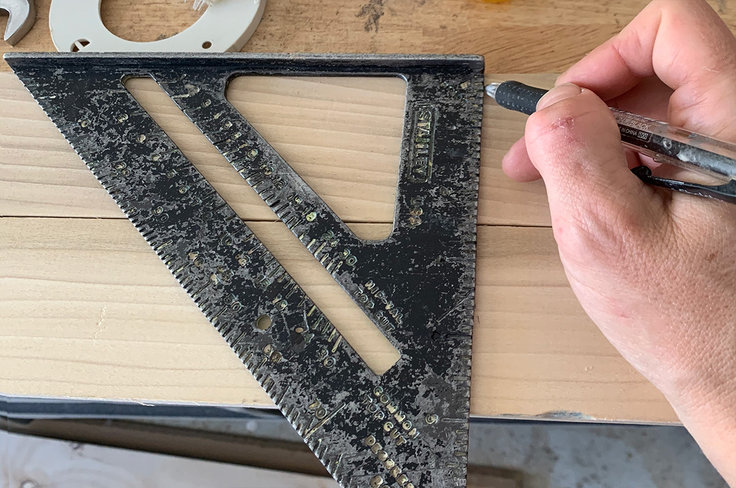
Double check that your rails didn’t move. Take your speed square, line it up to each of the marks and draw a straight line along both boards.
As you go, also mark the center of each board on those lines to save time for the next step.
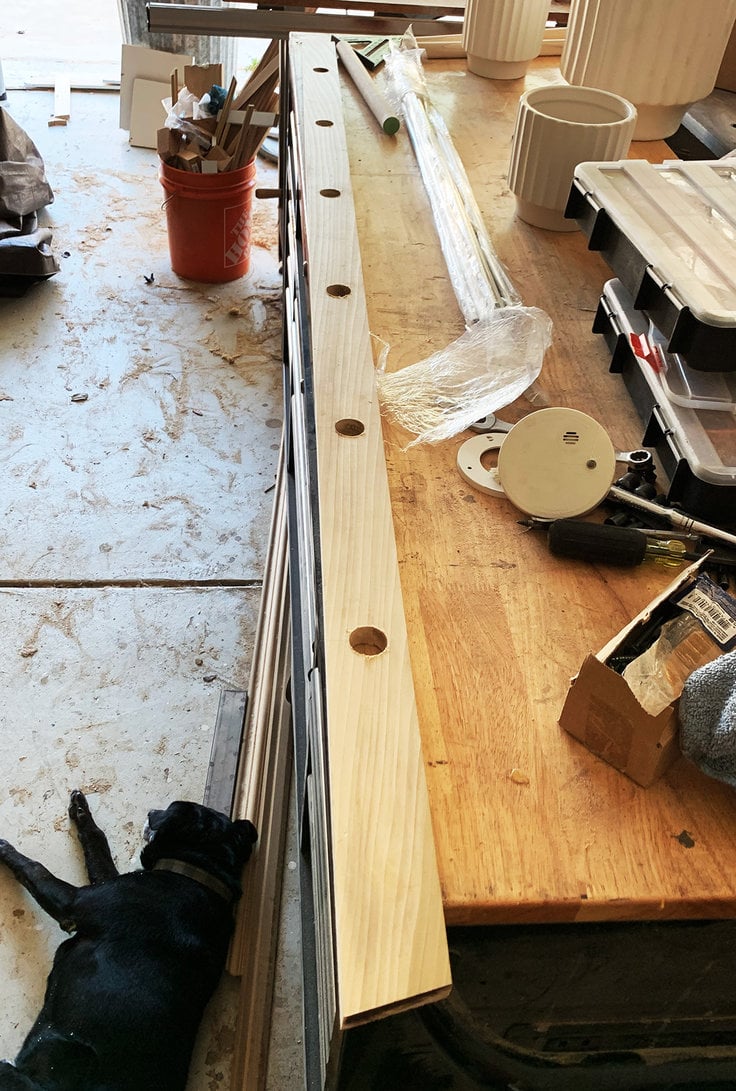
Drill for the ladder rungs
The ladder rungs in our plan are made from 1 1/8″ poplar dowels. Prepare your drill with a 1 1/8″ drill bit.
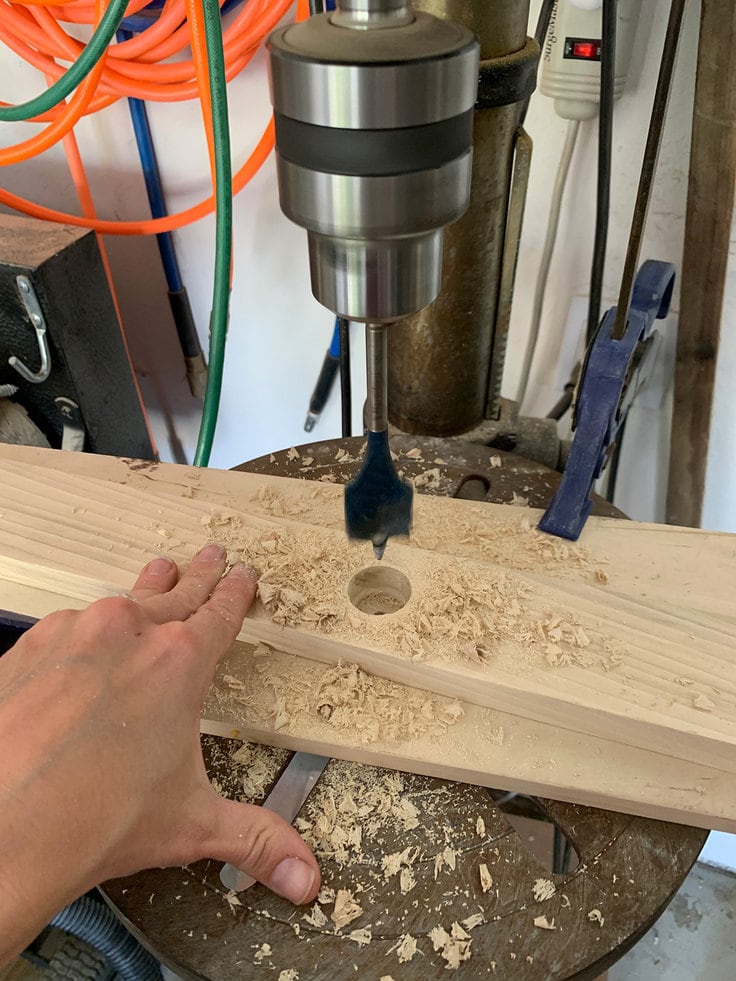
If you are not using a drill press, clamp your rail to a level surface, like a worktop or table. Use a piece of scrap wood beneath it so that when you drill through the rail you don’t drill through your worktop.
Work along the ladder rails drilling holes on each of the center points you marked. Use a steady hand or a drill press and drill all the way through the board on each mark. You are creating holes for the dowels to join the rails. These dowels become the ladder rungs.
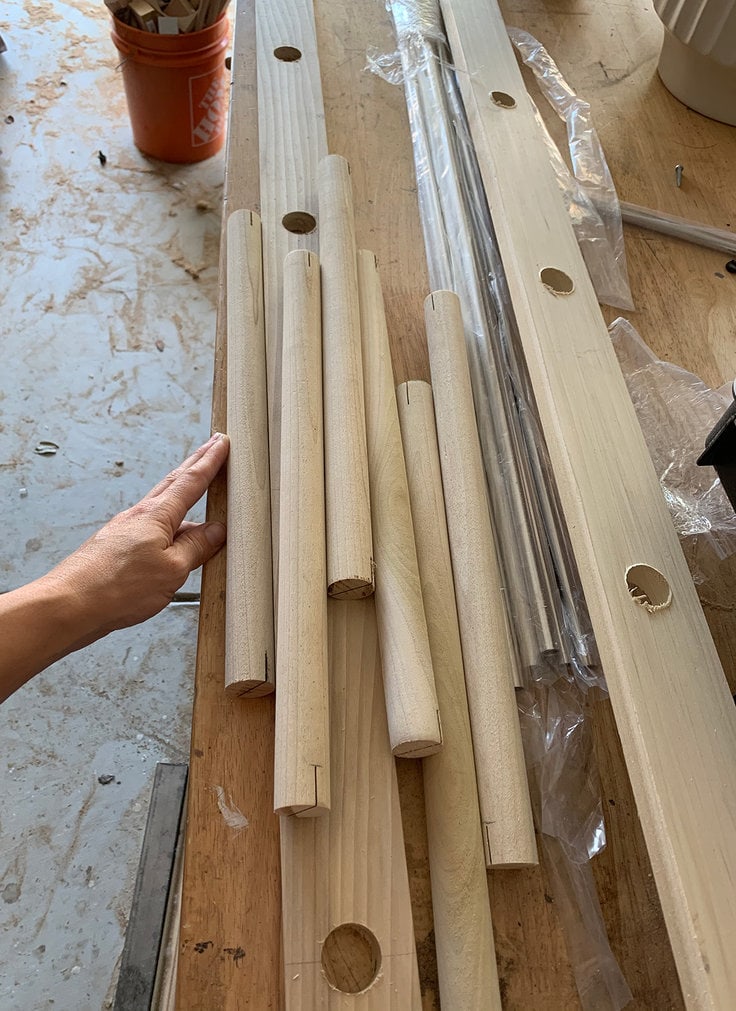
Prepare your ladder rungs
Cut your dowels to 15 7/8″ long. You should be able to get 3 rungs per dowel.
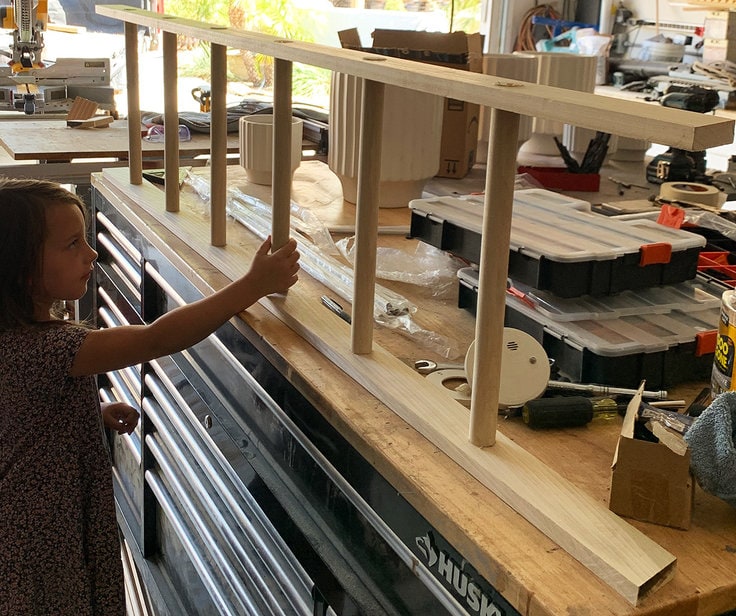
Dry assemble your ladder. My dowels still had a little bit of play when I slipped them into the holes. I wanted a very stout ladder, and to do that, I knew that adding a wedge into my dowels would create the tension and strength I needed.
If you do not have any play, go ahead and skip to assembly.
Cut reliefs in your rungs called kerfs
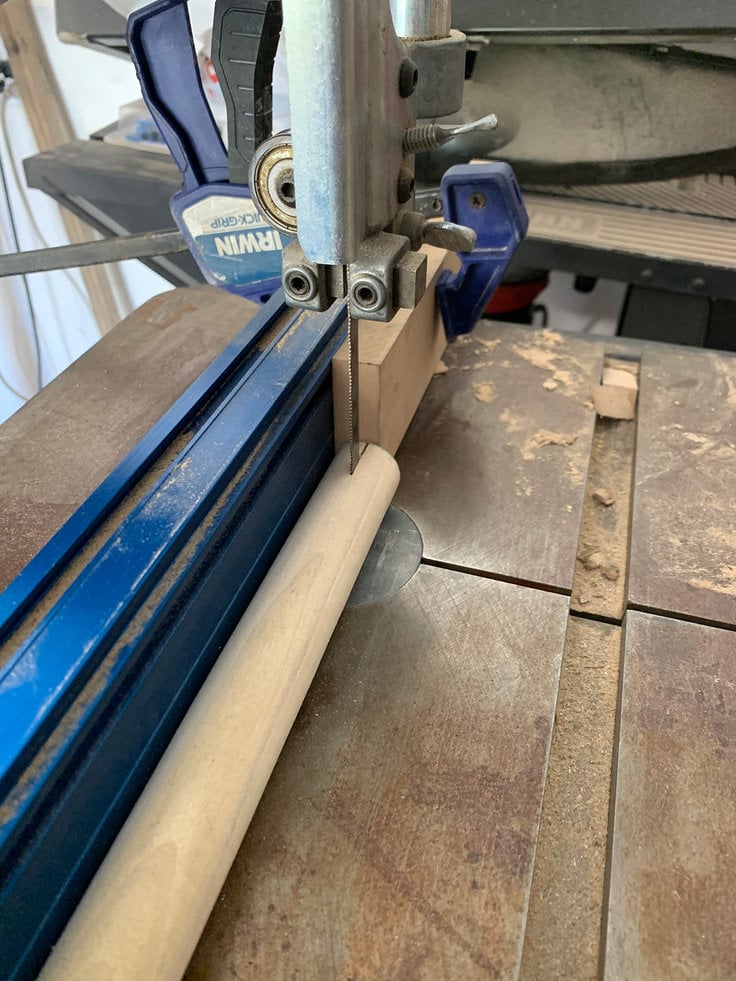
If you are using a band saw for this step
Set your fence so that the saw blade will cut centered on the rung. Set your saw stop at 1/2-5/8″.
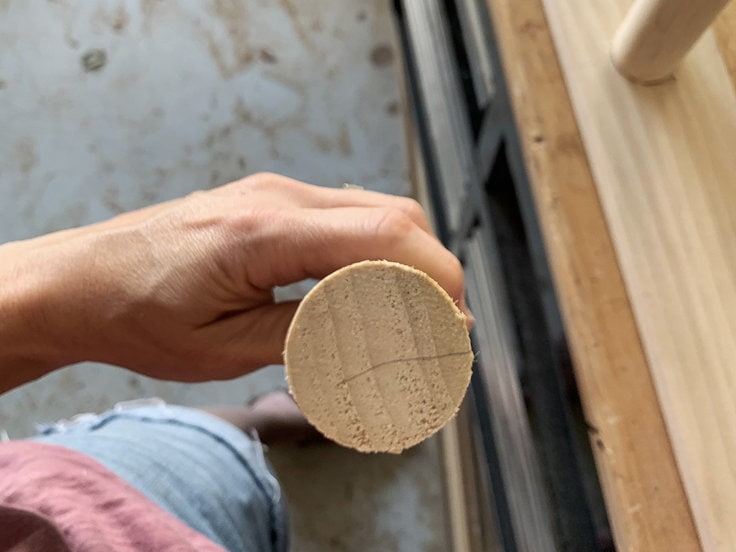
Align the ladder rungs so that the grain is perpendicular to the blade.
Cut each end of the rungs.
If you are using a jig saw for this step:
Clamp the cut dowels or rungs to your worktop with the edges hanging off of the worktop. The scrap wood protects the worktop. When clamping your rungs, align your grain parallel to the surface of your worktop.
Mark 5/8″ away from both ends of the rungs. Mark the center of each end as well.
Cut a relief cut or kerf through the center point on the end of each rung, stopping at the 5/8″ mark.
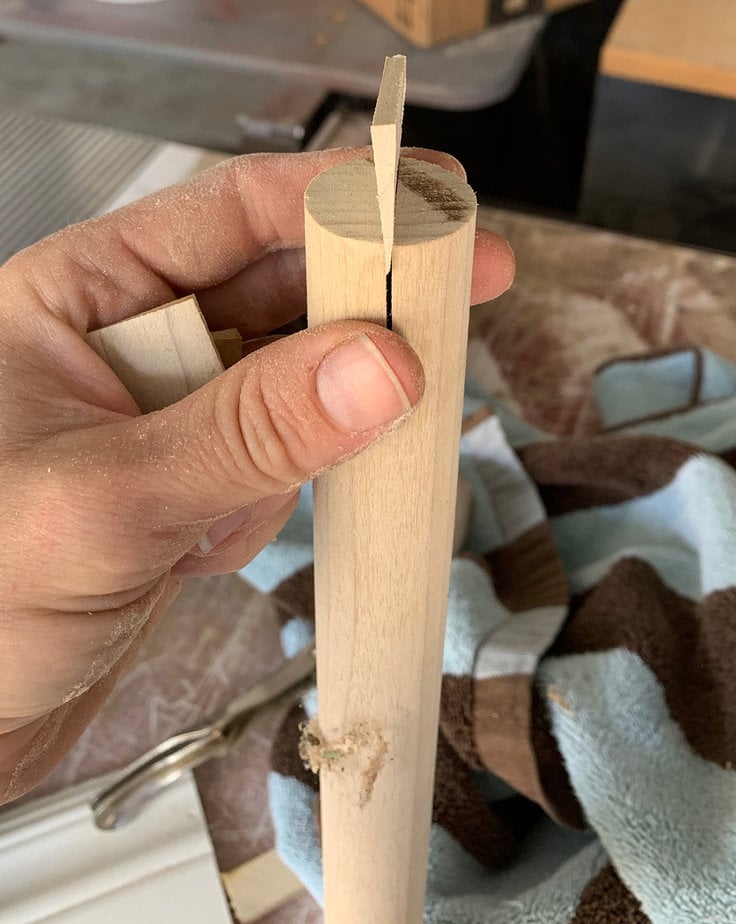
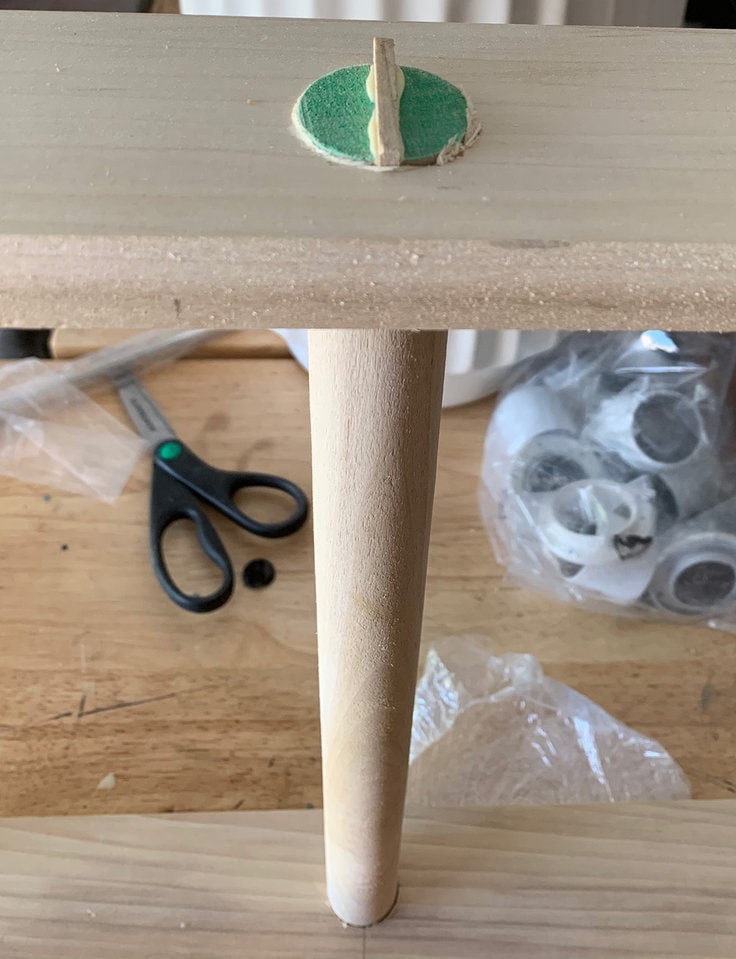
It’s easier to see how a shim works to wedge the end of the dowel outward. This outward movement creates an extremely strong joint that won’t budge.
Join your blanket ladder together
Place glue into one of the rail holes, insert one of the rungs.
Add glue along the end of a shim and press it into the end of the rung. Use a mallet and lightly tap on the shim to push it into the relief cut. This will wedge the dowel into the ladder.
Work quickly along the ladder assembling both rails to all of the rungs like this. Don’t let the glue dry before the next step.
Once everything is lightly joined, adjust all of the rungs so that the ends are flush with the edge or face of the rail – this will help square everything up.
Squaring up and securing the rungs of your ladder
While supporting the ladder, use the mallet and drive the wedges into the rungs until they feel tight and as far as they will go.
Score the shims and snap them off at the joined edge.
As the wedge gets pushed deeper into the relief joint, the dowel presses against the walls of the drilled hole and creates an extremely strong bond.
Once the wood glue cures, the rails and rungs joined permanently. The glue is so strong that if you tried to break the ladder, the wood would break surrounding the glued joint before breaking on the glued joint.

Final steps for your DIY blanket ladder
Once the glue is dry, usually overnight or several hours. Sand the rung ends smooth, so that the shims and ends are flush with the rail edges. I use 60 grit to sand the shims down. Once they are flush with the rungs and rails, I move up in grit until I get to 220.
Once you finish sanding with 220 you can now stain and seal the ladder.
I added metal brackets at the top of the ladder so that it can hang on the edge of the bunk beds I built in our guest room. However, this isn’t necessary if your ladder is completely decorative.
I hope you enjoyed this DIY blanket ladder tutorial!

How to Build a Strong Blanket Ladder
Equipment
- 2 Clamps
- 1 Drill or drill press
- 1 1 1/8" drill bit forstner, spade, regular drill bit, hole saw
- 1 Sander
- 1 Miter saw or miter box
- 1 Jig saw or band saw
- 1 Rubber mallet or hammer
- 1 Speed square
- 1 Measuring tape
- 1 Pencil or pen
Supplies
- 2 boards 6' long 1×4 poplar wood choose appearance boards that are straight
- 2 dowels 48" long x 1 1/8" diameter poplar dowels
- 1 pack wood shims
- 1 bottle Wood glue
- 1 disc 60, 120/150, 220 sand paper
Instructions
- Cut your ladder rails:Set your miter saw to 15 degrees and cut the bottoms of your rails – make sure both of them are the same length. Mine are 70" long.The 15 degree cut is what makes your ladder a leaning ladder.
- Mark your ladder rails:Place your rails side by side like the image above. Make sure that the tops line up perfectly and the pointed tips at the base are flush.Place a measuring tape on the pointed tip of one of the rails, and measure up 10 1/4" and make a mark. Work your way up the ladder, marking every 10 1/4".There should be 6 marks and 8" of remnant at the top.Double check that your rails didn't move. Take your speed square, line it up to each of the marks and draw a straight line along both boards. As you go, also mark the center of each board on those lines to save time for the next step.
- Drill holes for your ladder rungs:The ladder rungs in our plan are made from 1 1/8" poplar dowels. Prepare your drill with a 1 1/8" drill bit.If you are not using a drill press, clamp your rail to a level surface, like a worktop or table. Use a piece of scrap wood beneath it so that when you drill through the rail you don't drill through your worktop.Work along the ladder rails drilling holes on each of the center points you marked. Use a steady hand or a drill press and drill all the way through the board on each mark. You are creating holes for the dowels to join the rails. These dowels become the ladder rungs.You don't need a drill press to make accurate holes, but it does make it go faster
- Prepare your dowels:Cut your dowels to 15 7/8" long. You should be able to get 3 rungs per dowel.Dry assemble your ladder. My dowels still had a little bit of play when I slipped them in to the holes. I wanted a very stout ladder and to do that I knew that adding a wedge into my dowels would create the tension and strength I needed.If you do not have any play, go ahead and skip to assembly.
- If you are using a band saw for relief cuts:Set your fence so that the saw blade will cut centered on the rung. Set your saw stop at 1/2-5/8".Align the ladder rungs so that the grain is perpendicular to the blade.Cut each end of the rungs.Clamp the cut dowels or rungs to your worktop with the edges hanging off of the worktop. The scrap wood protects the worktop. When clamping your rungs, align your grain parallel to the surface of your worktop.Mark 5/8" away from both ends of the rungs. Mark the center of each end as well.Cut a relief cut or kerf through the center point on the end of each rung, stopping at the 5/8" mark.You can easily see the grain and the mark I made perpendicular to the grain. It's very important you kerf perpendicular to the grain.
- If you are using a jig saw for relief cuts:Clamp the cut dowels or rungs to your worktop with the edges hanging off of the worktop. The scrap wood protects the worktop. When clamping your rungs, align your grain parallel to the surface of your worktop.Mark 5/8" away from both ends of the rungs. Mark the center of each end as well. Cut a relief cut or kerf through the center point on the end of each rung, stopping at the 5/8" mark.
- Join the rungs to the rails:Place glue into one of the rail holes, insert one of the rungs.Add glue along the end of a shim and press it into the end of the rung. Use a mallet and lightly tap on the shim to push it into the relief cut. This will wedge the dowel into the ladder.Work quickly along the ladder assembling both rails to all of the rungs like this. Don't let the glue dry before the next step.Once everything is lightly joined, adjust all of the rungs so that the ends are flush with the edge or face of the rail – this will help square everything up.Quickly glue and assemble the ladder, lightly tapping the shims in to place.
- Square up your blanket ladder:While supporting the ladder, use the mallet and drive the wedges into the rungs until they feel tight and as far as they will go.Score the shims and snap them off at the joined edge.As the wedge gets pushed deeper into the relief joint, the dowel presses against the walls of the drilled hole and creates an extremely strong bond.
- Finishing your blanket ladder:Once the glue is dry, usually overnight or several hours. Sand the rung ends smooth, so that the shims and ends are flush with the rail edges. I use 60 grit to sand the shims down. Once they are flush with the rungs and rails, I move up in grit until I get to 220.Once you finish sanding with 220 you can now stain and seal the ladder.
Love the ideas you see here on Ideas for the Home by Kenarry®? Subscribe today to get our FREE DIY & Craft Planning Calendar, plus our weekly Ideas in Your Inbox newsletter filled with creative tips and exclusive offers!
What’s Next?
If you enjoyed learning how to make a blanket ladder, here are some more DIY ideas you should make next.
How to build a transitional console table

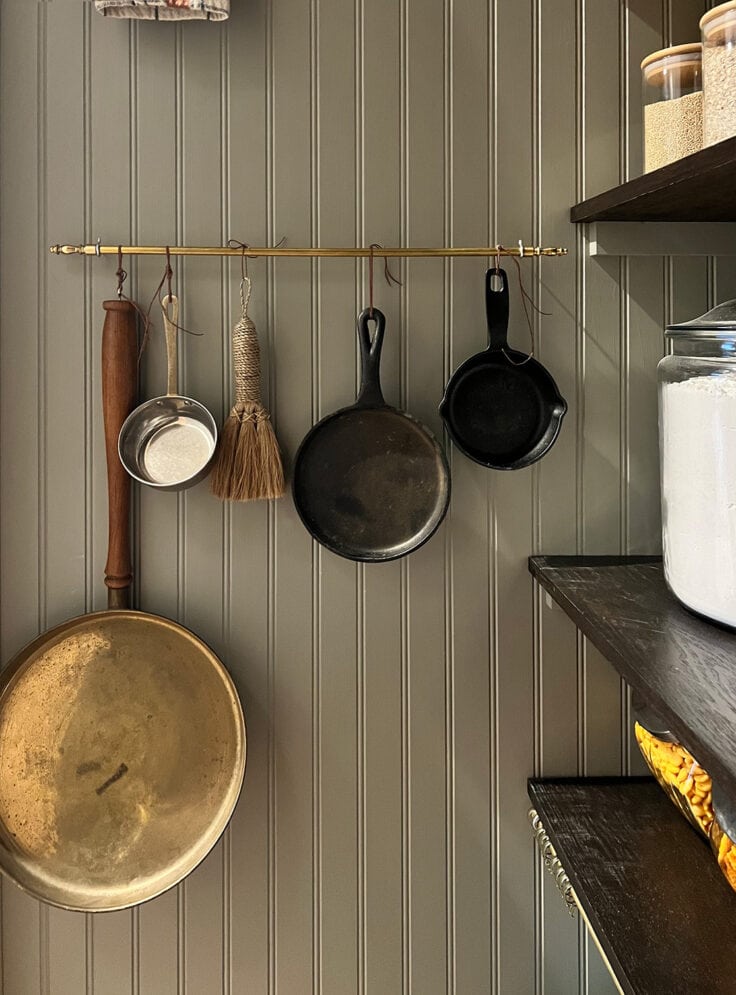
How to make a vintage style unlacquered brass rod dupe for under $20
DIY: 16′ Faux Wood Beam Cheap, Fast and Authentic for under $50

You may also enjoy these building and home decor ideas on Ideas for the Home by Kenarry® –