How To Make Fall Pressed Flower Candles
THIS POST MAY CONTAIN AFFILIATE LINKS. PLEASE SEE OUR FULL DISCLOSURE POLICY FOR DETAILS.
Create a beautiful fall-themed pressed flower candle for a lovely addition to your Fall decor! This fun craft is surprisingly easy to do and can be as unique as you would like. Basic candle-making instructions, along with pressed floral suggestions, are included in this fun tutorial.
Fall is right around the corner! Make some beautiful fall-themed candles with pressed flowers and leaves. This project is quick and easy to do, resulting in some amazing candles. Never made your own candles? I’ll show you a quick way to make your own!
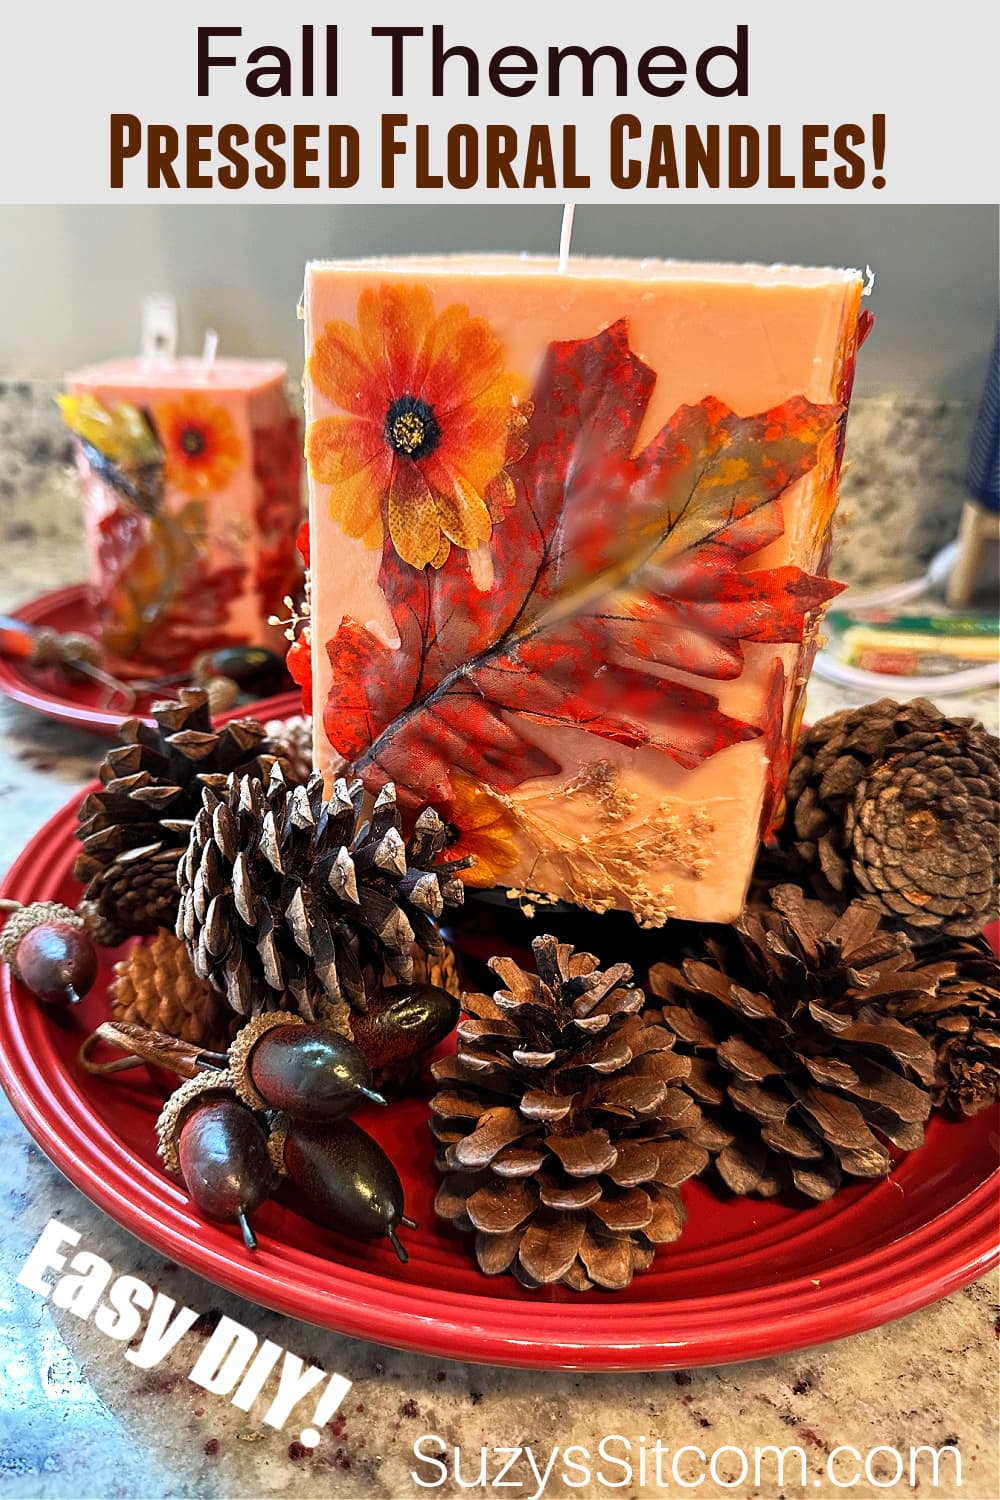
This is Suzy from SuzysSitcom and I’d love to show you my latest project. Fall is my favorite season, so I’m always looking for ideas for fresh fall decorations in my home. I love the idea of adding pressed flowers to candles and thought I would add a few pressed fall leaves for variety.
I learned a few things on this project. Things like: how to mix colors properly for your finished candles and how best to melt the pressed flowers into the candle. It was a bit of trial by error, but the end result was what I was looking for. So, let me show you how!
How to Make Fall Themed Floral Candles
I used soy candle wax for this project, but any type of candle wax will work. Also, you can easily add a scent to your candles such as cinnamon. Be sure to check your local craft shop for a huge variety of scents that you can add to your candles if you choose to.
What you need:
Want more ideas like this? Subscribe today to get our weekly Ideas in Your Inbox newsletter plus other exclusive gifts and offers — all for FREE!
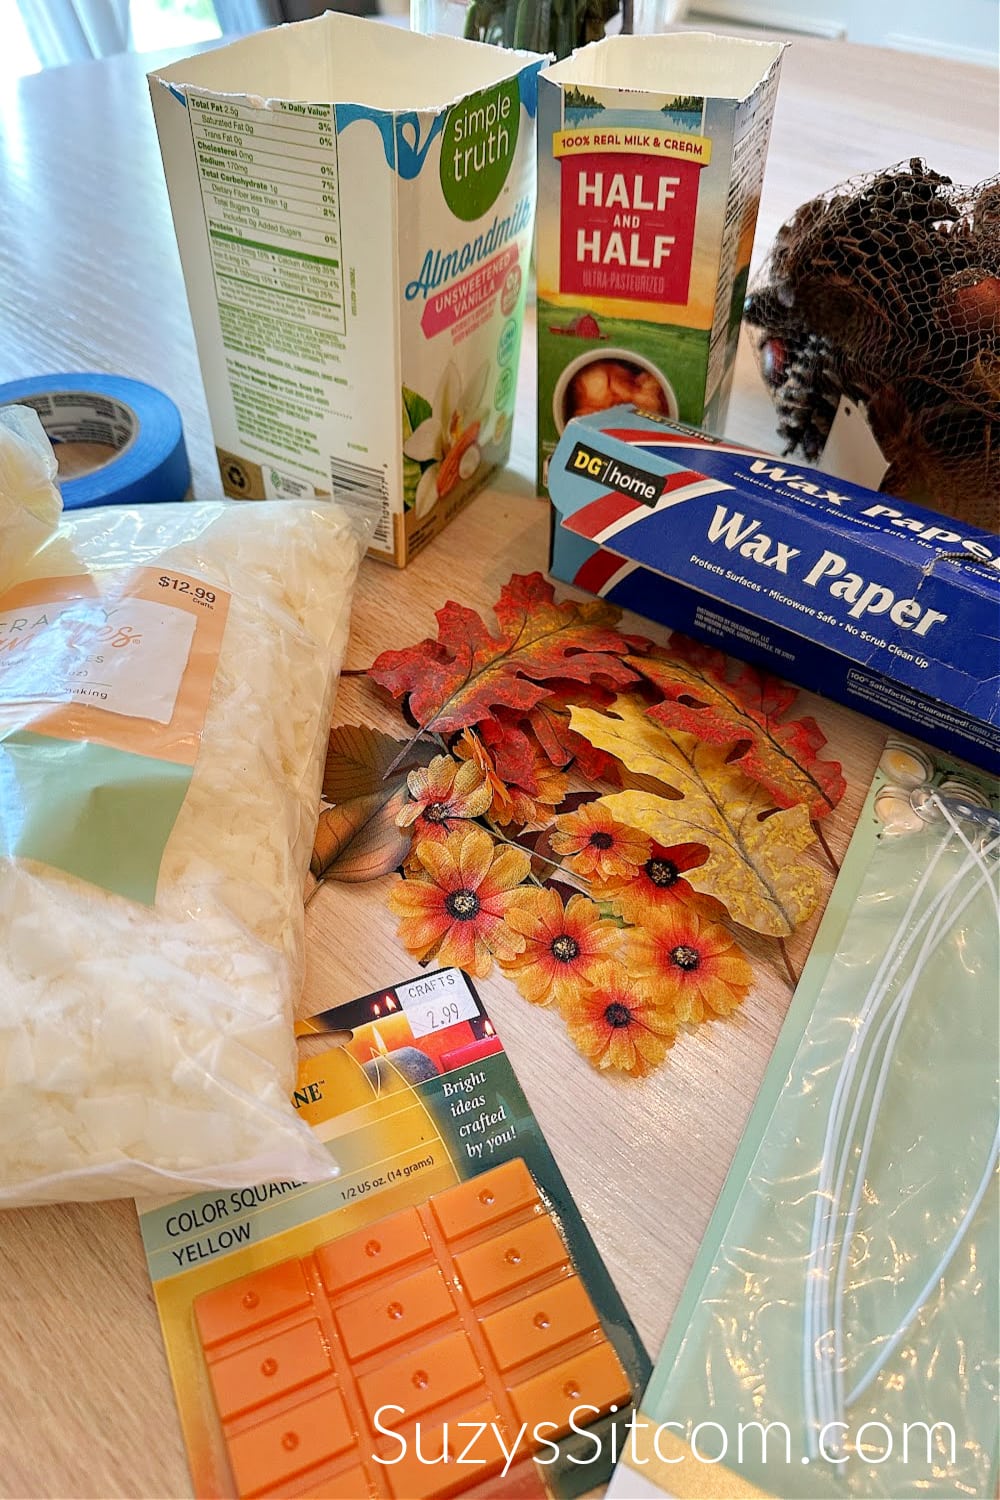
- Soy Wax Flakes (I used 4 lb. to create two large candles)
- Cotton Wicks for Candle making (10″ tall)
- Pressed flowers and leaves (Press your own, or choose from the huge selection on line!)
- Candle making dye for color (or use crayons!)
- Empty cardboard milk cartons for molds
- Wax paper
- Double Boiler (or make your own with two pans as shown below)
- Hair dryer
Tips for Making Pressed Flower Candles:
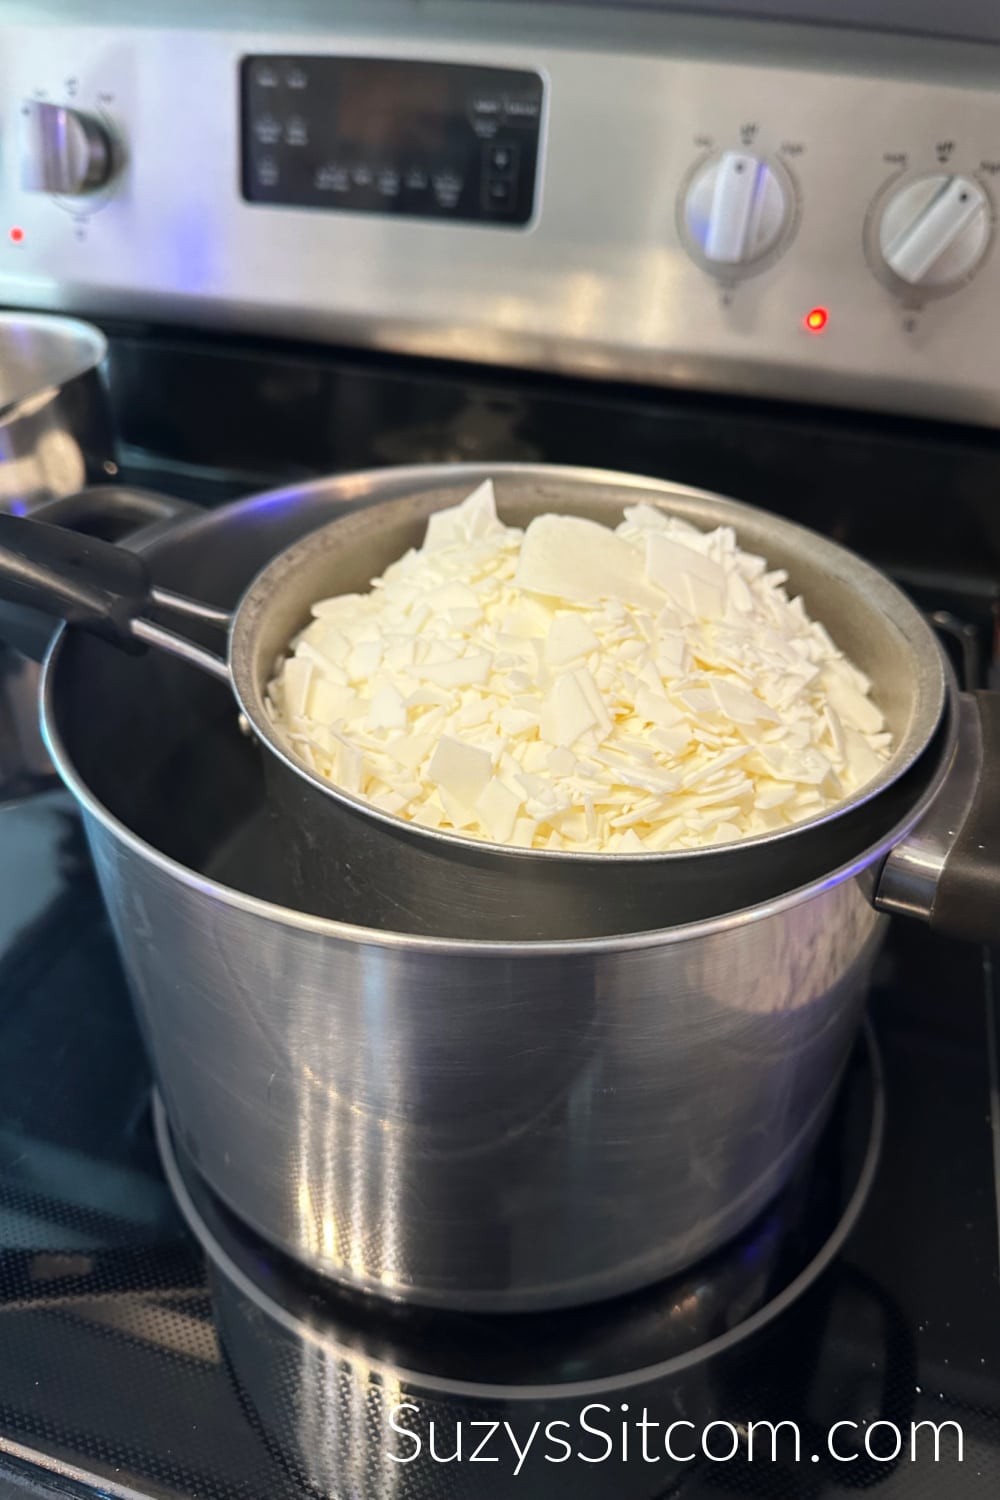
Melting the Candle Wax
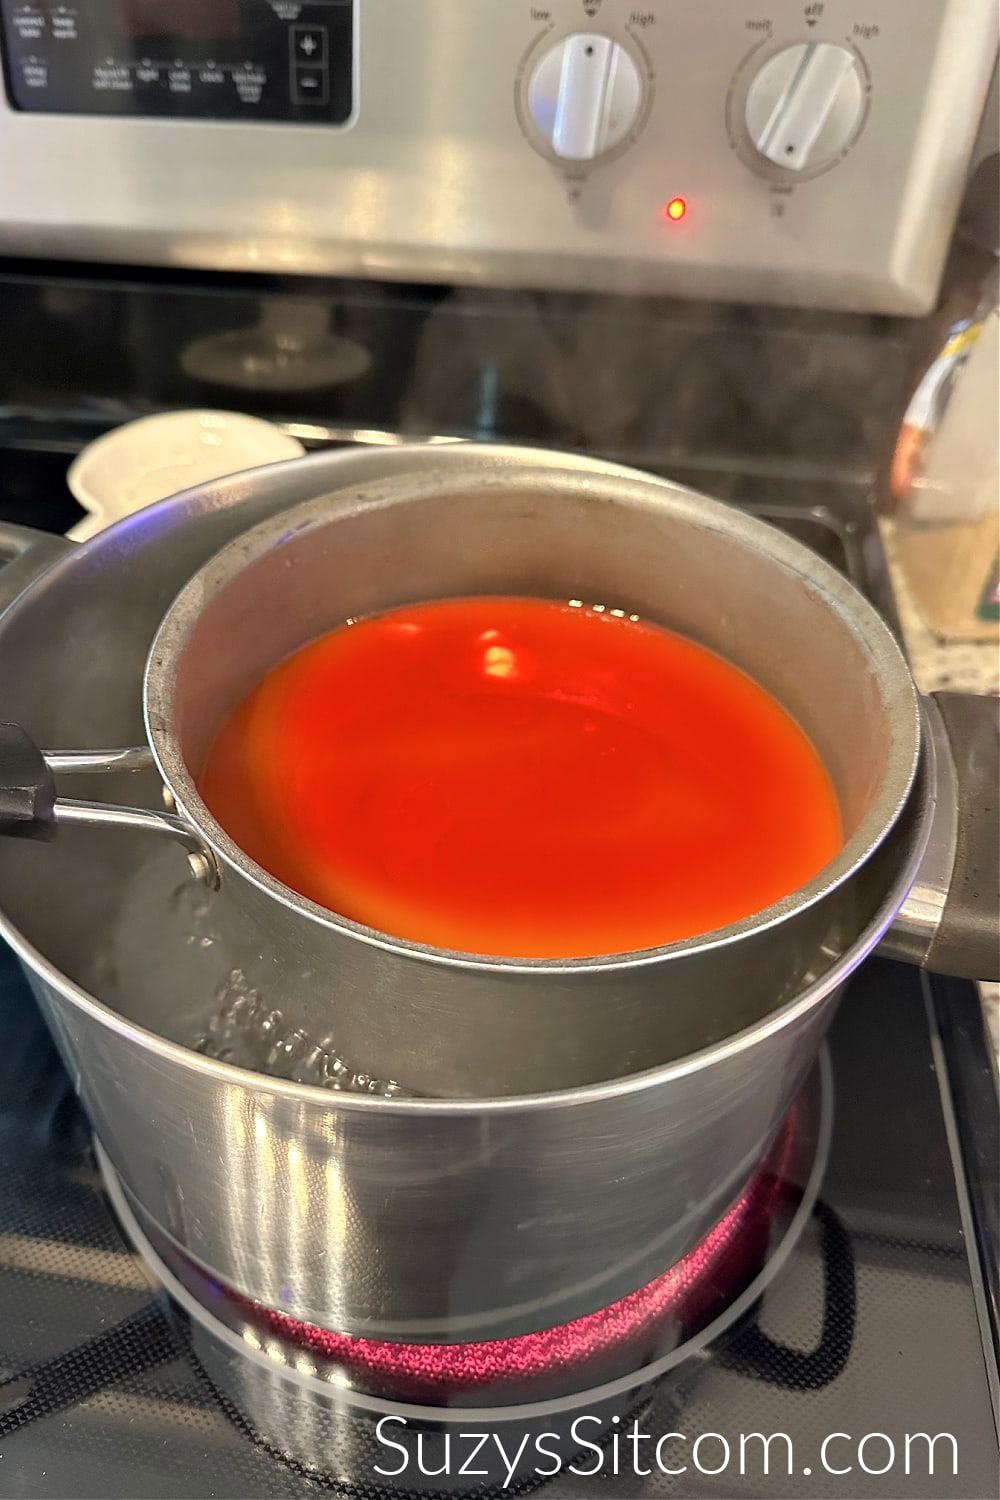
In order to properly and safely melt candle wax, you would need a double boiler. I created my own by adding water to a large pot and placing a small pot inside as shown above. Place the soy wax chips into the smaller pot and start to the water to a low boil. Once it begins to boil, lower the heat.
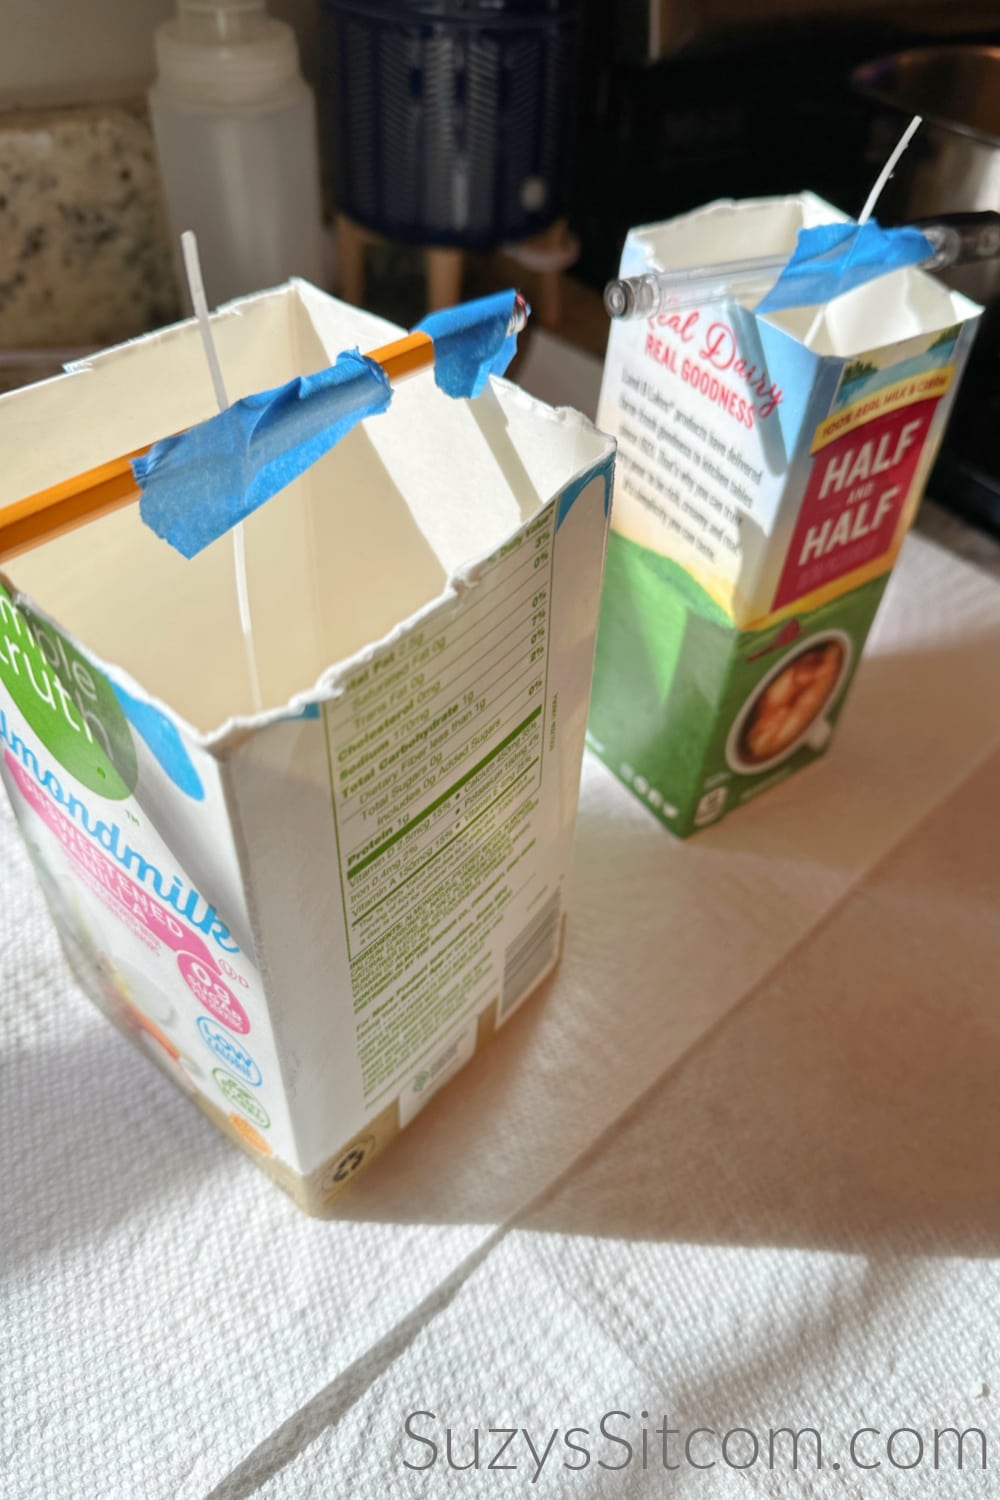
Preparing the Molds for Candle Making
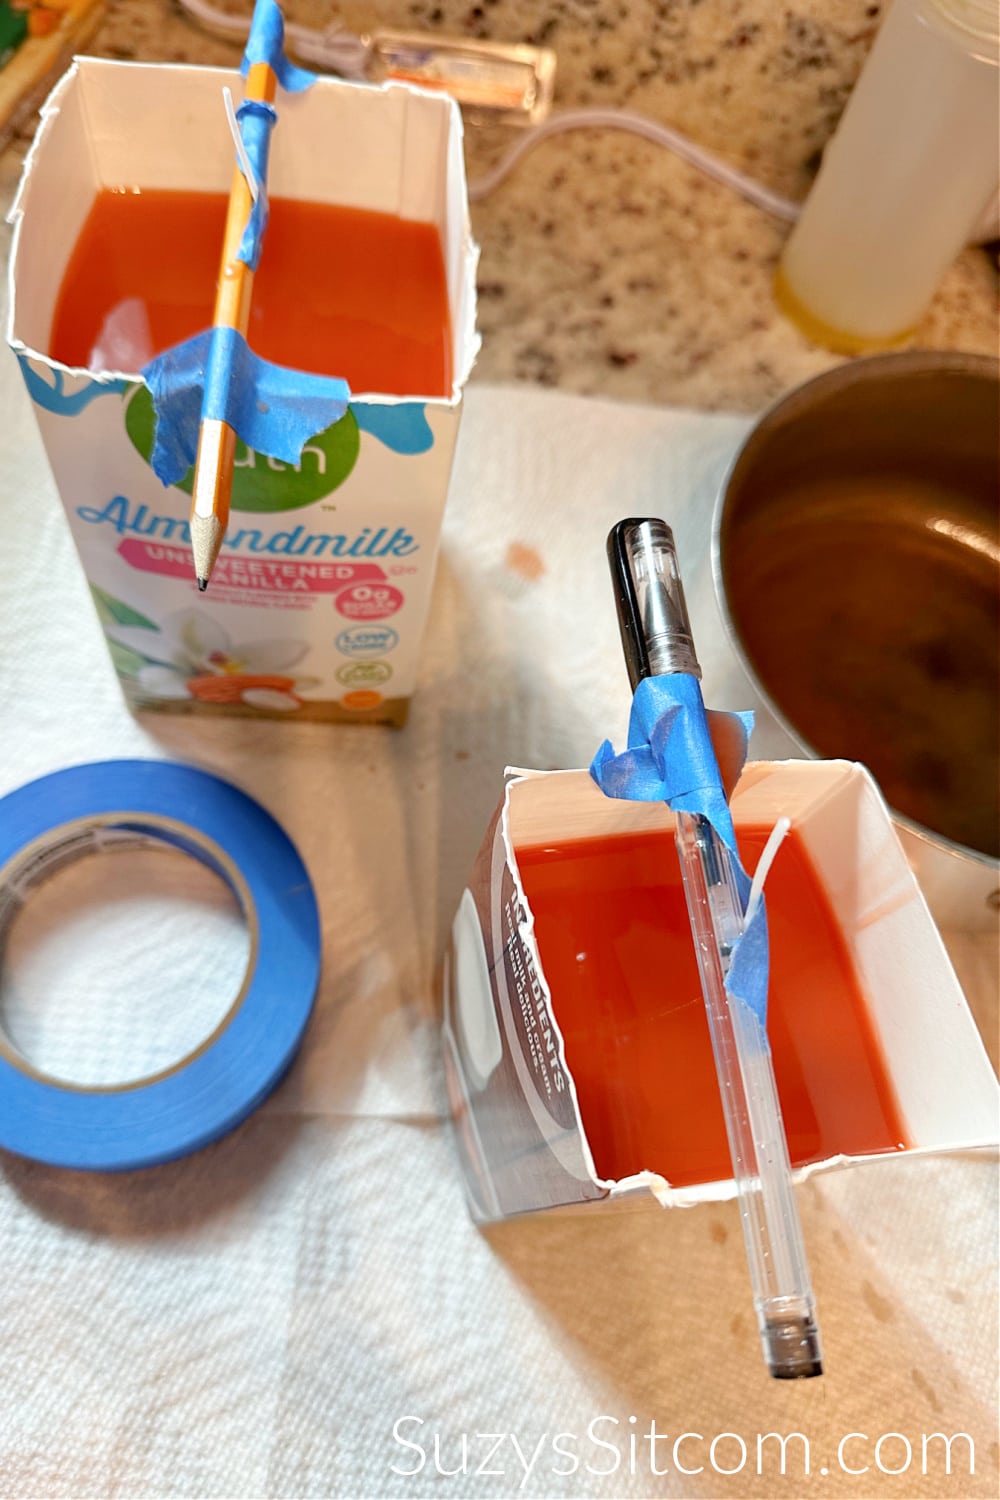
There are lots of different commercial candle making molds out there, and certainly, you could go with that. For this project, I wanted just a simple rectangular candle. I rinsed out a couple empty milk cartons and cut off the tops. Milk cartons work well as candle molds because they are coated with wax on the inside, making unmolding simple. Just keep in mind that they are just one time use.
Drop a little melted wax into the bottom of each mold and place a candle wick in the center. Use a pencil and a bit of tape to hold the wicks in place for the pour.
Adding color to the wax
I wanted my candles to be a nice cinnamon/orange color to contrast with the pressed leaves and flowers. I added some yellow candle wax color that I found and then a bit of orange and brown crayons. The color above is what I was going for.
It turns out that when wax drys, it is a much lighter color. Keep that in mind when you are working with melted wax. Go for a much darker color than what you want your end result to be.
It is also at this point that you would add any scent to your wax if you choose to.
Pour the Melted Wax
Once the wax has completely melted, carefully pour it into the molds. Be sure that your molds are sitting on a protected countertop and pour slowly so as not to burn yourself.
Allow the candles to cool for at least 3 hours before trying to unmold them.
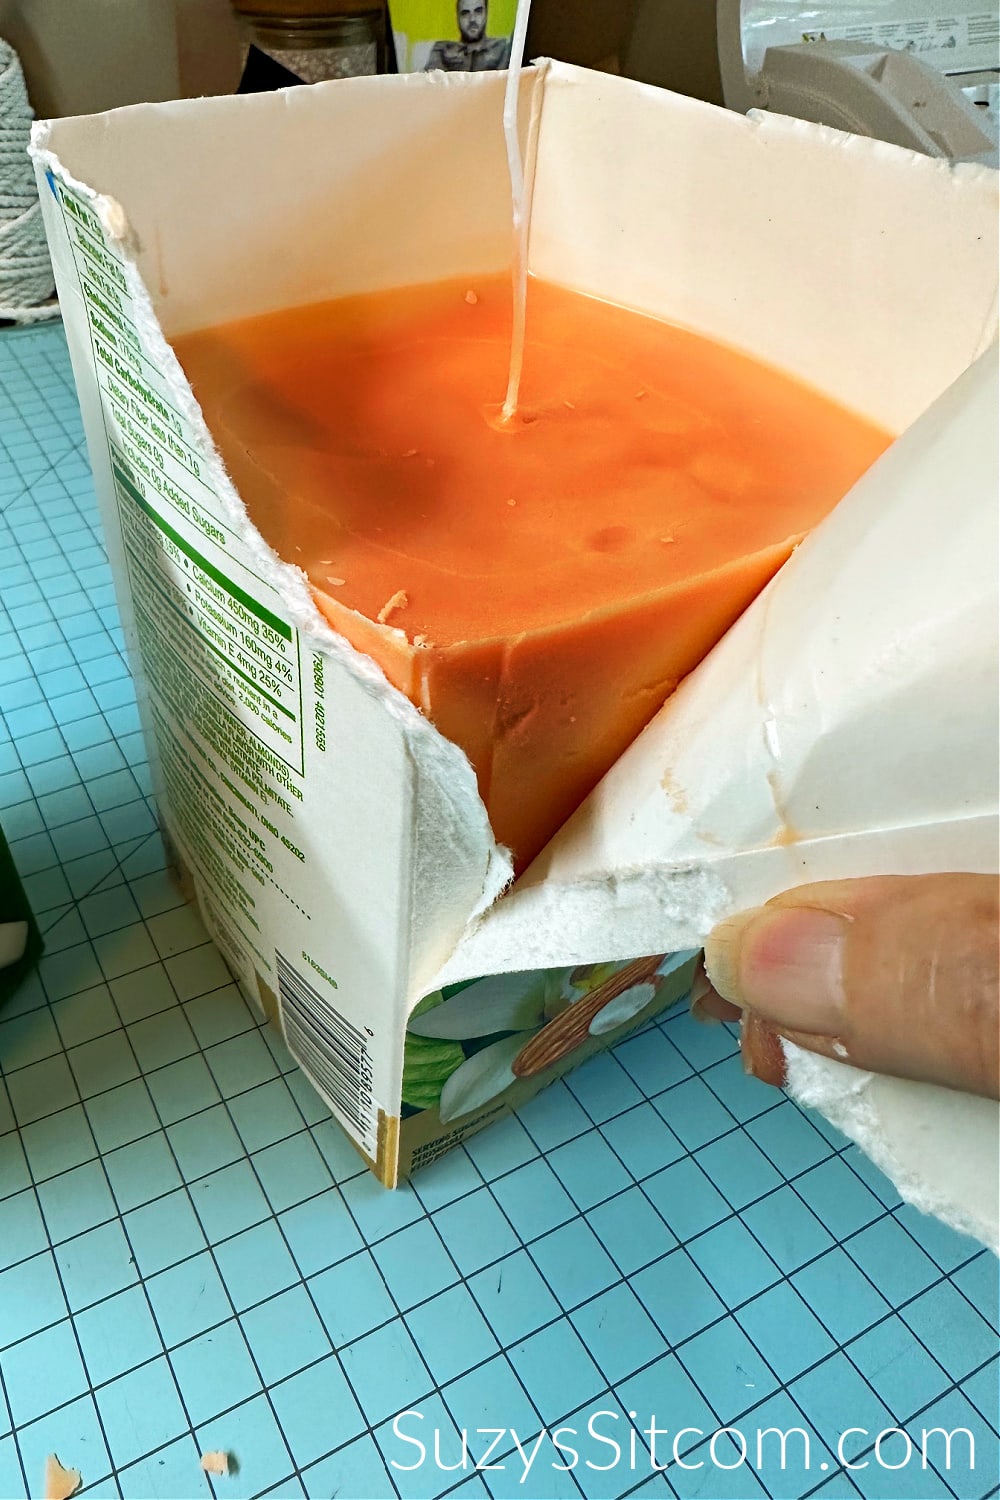
Remove the Candles from the Molds
Once the candles are entirely cool, you can easily remove them from your cardboard molds. Simply tear the cardboard off of the sides of the candle and lift the candle out.

Melting Pressed Flowers into the candle
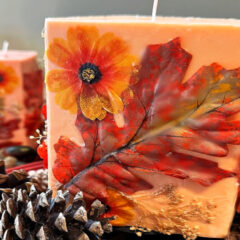
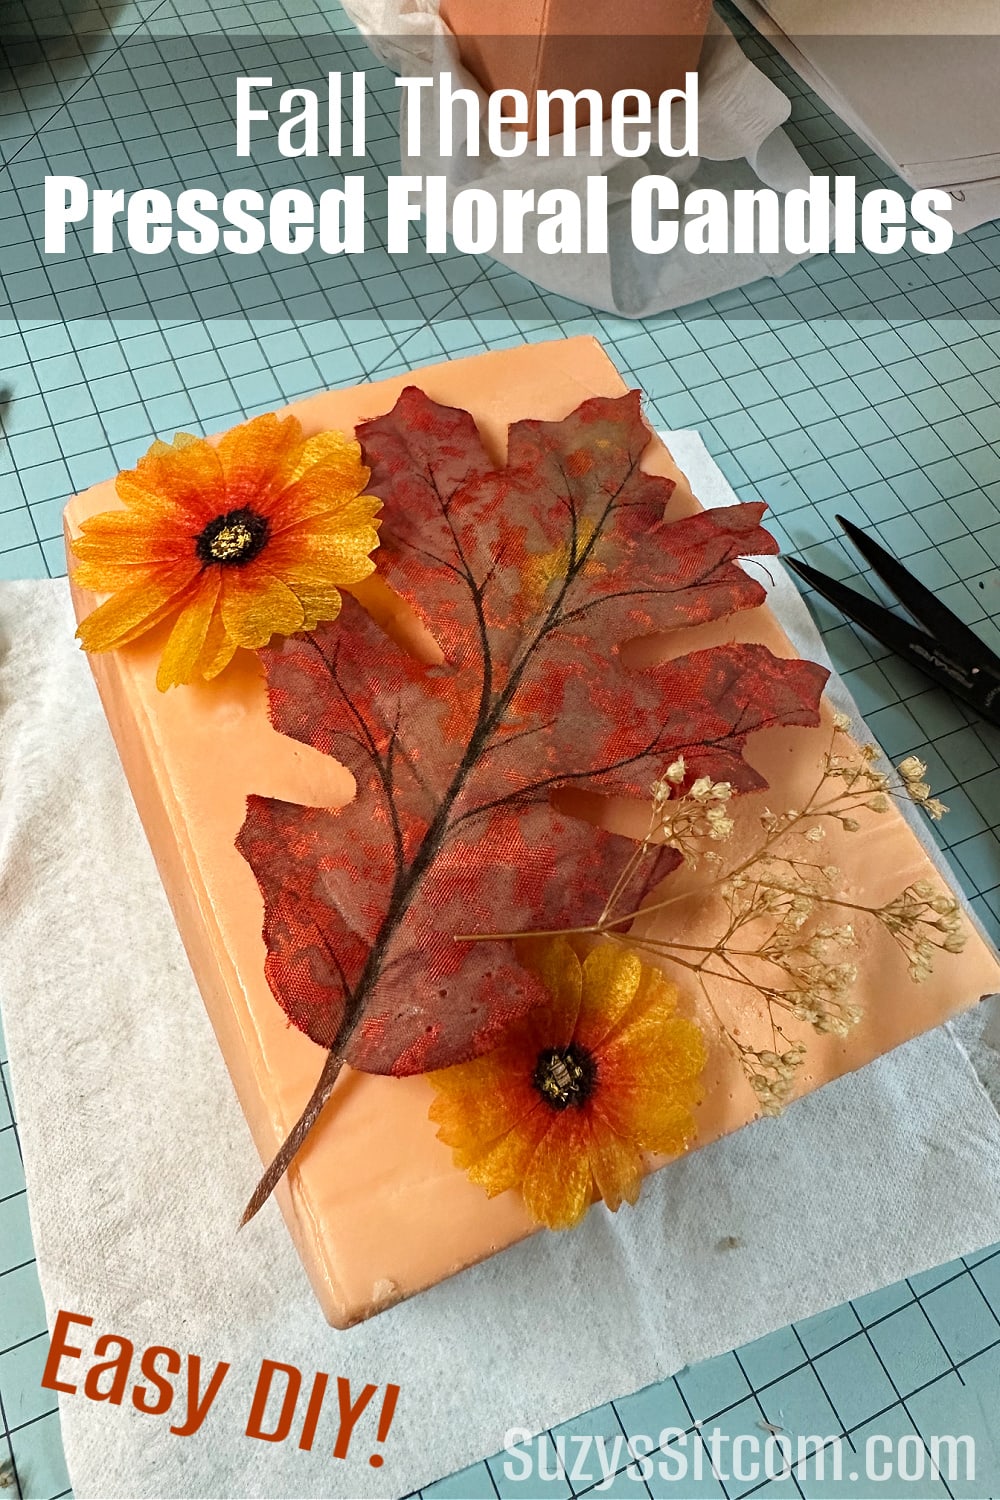
Arrange your pressed leaves and flowers on one side of the candle. Cut off any extra that may overlap in order to get a good fit.
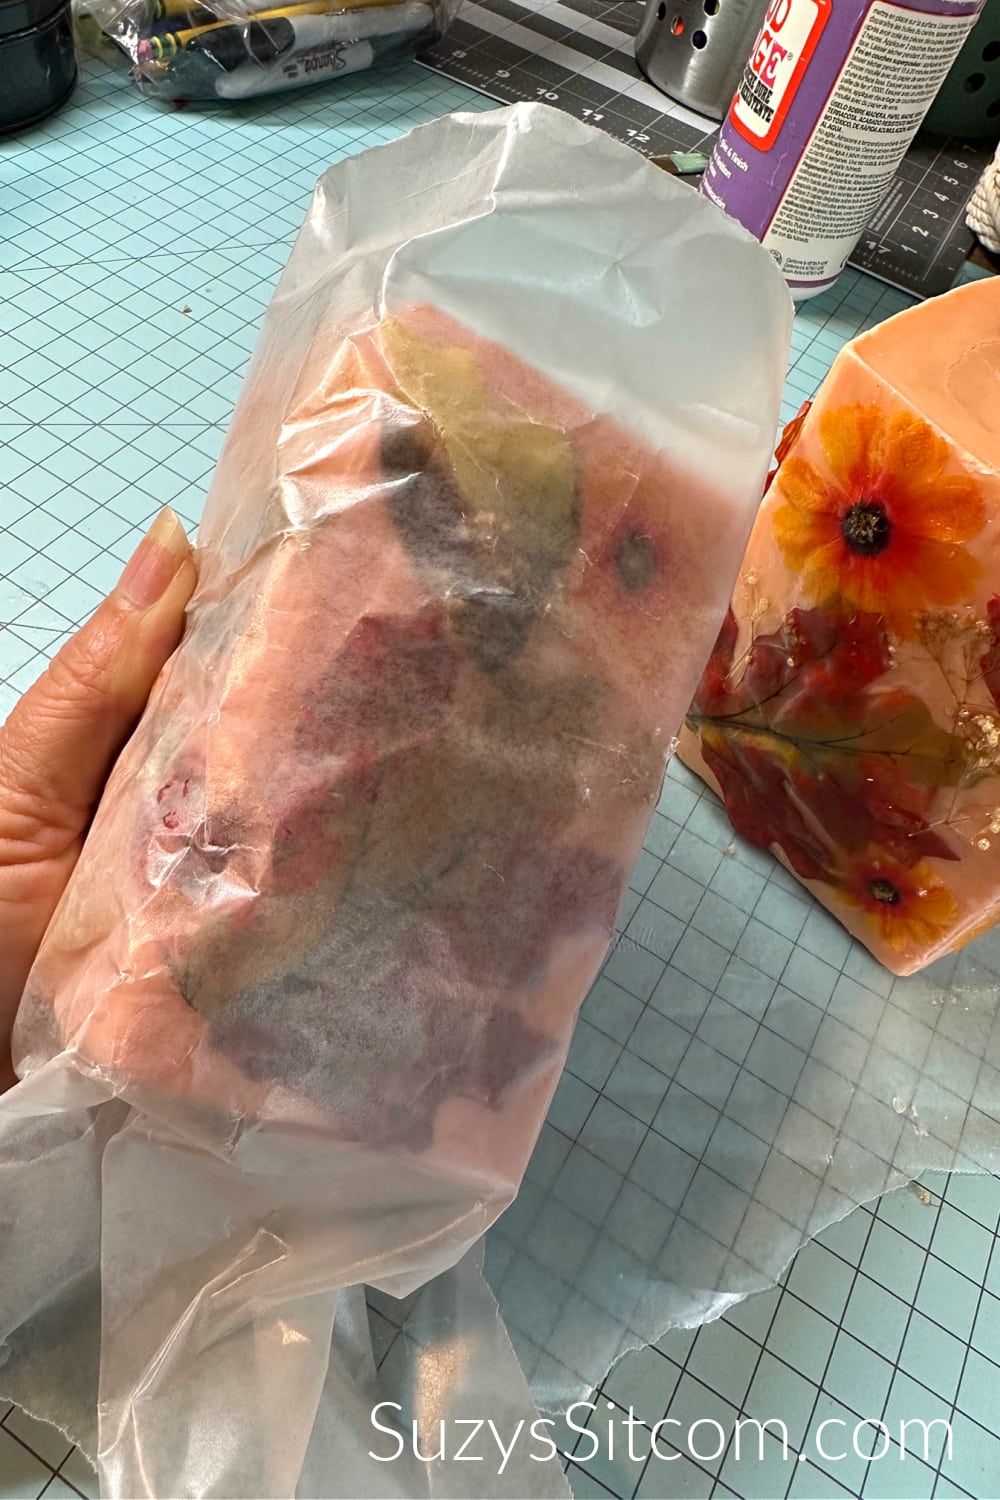
Cut a piece of wax paper that will easily wrap around the candle so that you can hold it tight on the back side of candle. Pull it tight and use a hair dryer to heat the side of the candle with the pressed leaves and flowers on it. Heat until the leaves and flowers have melted into the front of the candle.
Repeat for the other sides.
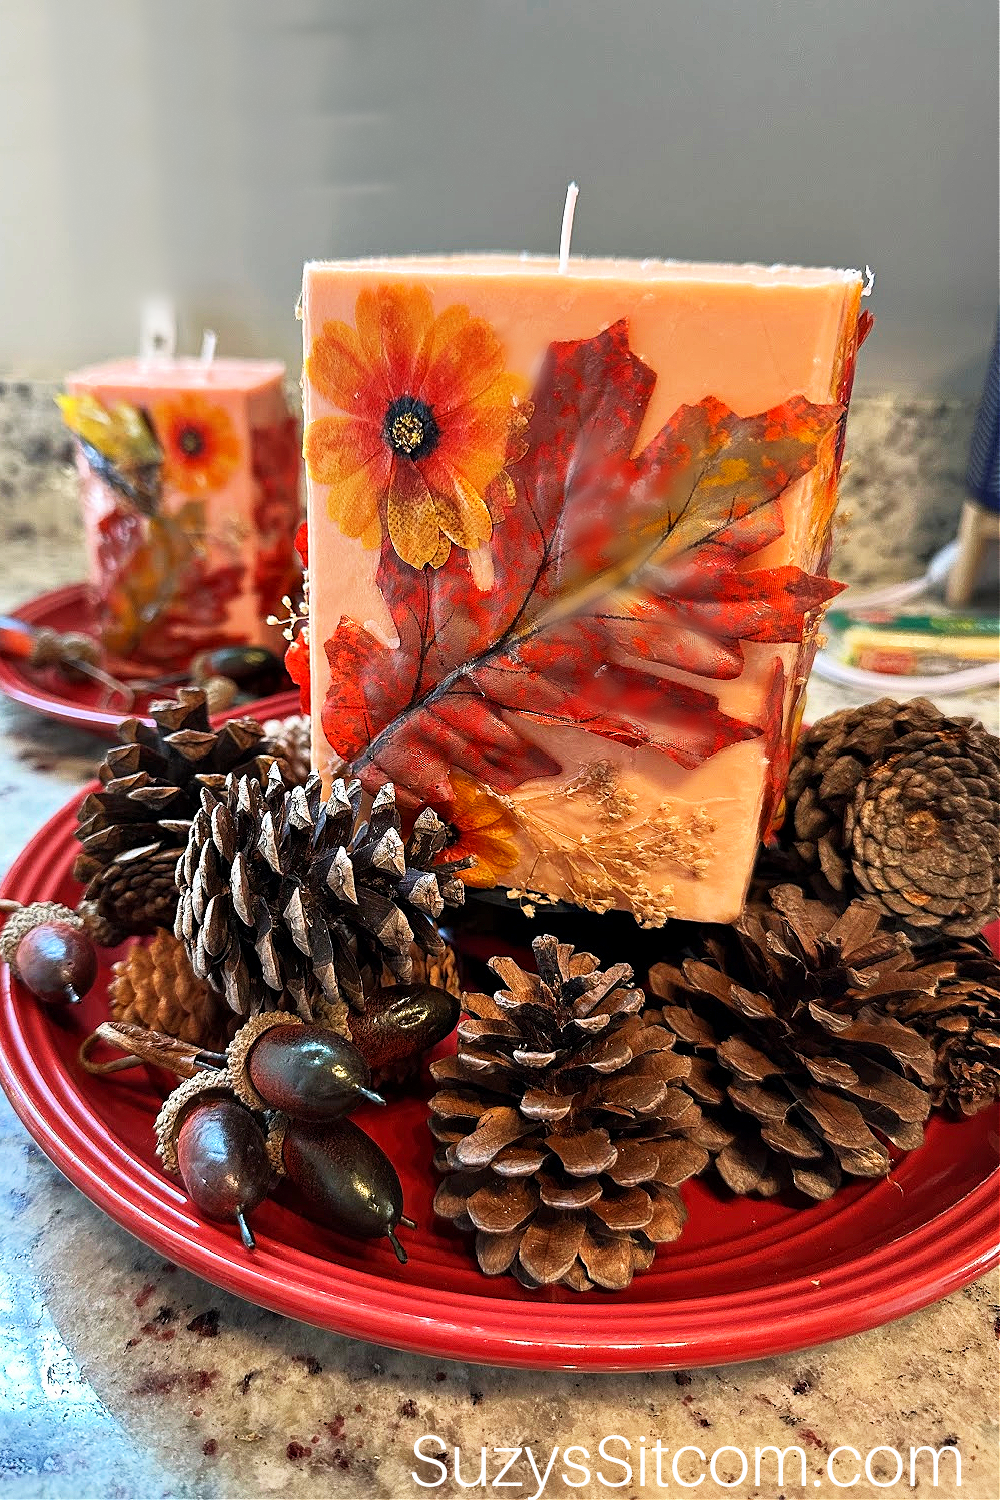
Experiment with any pressed dried flowers! You can create beautiful unique centerpieces that are perfect for Fall decor!
These also make great hand made gifts!
How to Make Fall Pressed Flower Candles
Equipment
- 2 Empty cardboard milk cartons
- 1 Wax paper
- 1 Double Boiler
- 1 Hair Dryer
Supplies
- 4 lb Soy wax flakes
- 2 ea Cotton wicks for candle making 10" tall
- 1 set Pressed flowers and leaves
- 1 set Candle making dye Crayons are also an option
Instructions
- Melt candle wax in a double boiler.
- Prepare molds for the candles by adding wicks. Drop a little melted wax into the bottom of each mold and place a candle wick in the center. Use a pencil and a bit of tape to hold the wicks in place for the pour.
- Add color to the wax
- Pour melted wax into the molds and allow to cool for at least 3 hours before unmolding.
- Remove the candles from the molds
- Arrange pressed flowers and leaves on the side of the candle
- Cut a piece of wax paper that will easily wrap around the candle so that you can hold it tight on the back side of candle. Pull it tight and use a hair dryer to heat the side of the candle with the pressed leaves and flowers on it. Heat until the leaves and flowers have melted into the front of the candle.
- Repeat on other sides of candle.
Love the ideas you see here on Ideas for the Home by Kenarry®? Subscribe today to get our FREE DIY & Craft Planning Calendar, plus our weekly Ideas in Your Inbox newsletter filled with creative tips and exclusive offers!
Love Fall Craft ideas?
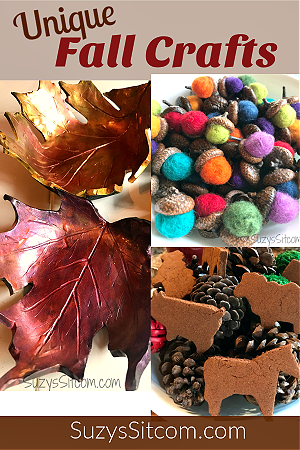
If you enjoyed this project, you might enjoy some of my other Fall themed DIY projects from SuzysSitcom!
7 Unique Fall Craft Ideas from SuzysSitcom!
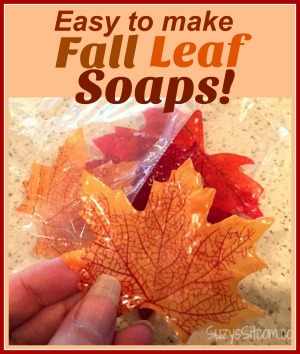
Make Single Use Fall Leaf Soaps!
Scented Tealights made with Oranges!

You may also enjoy these fall ideas on Ideas for the Home by Kenarry® –