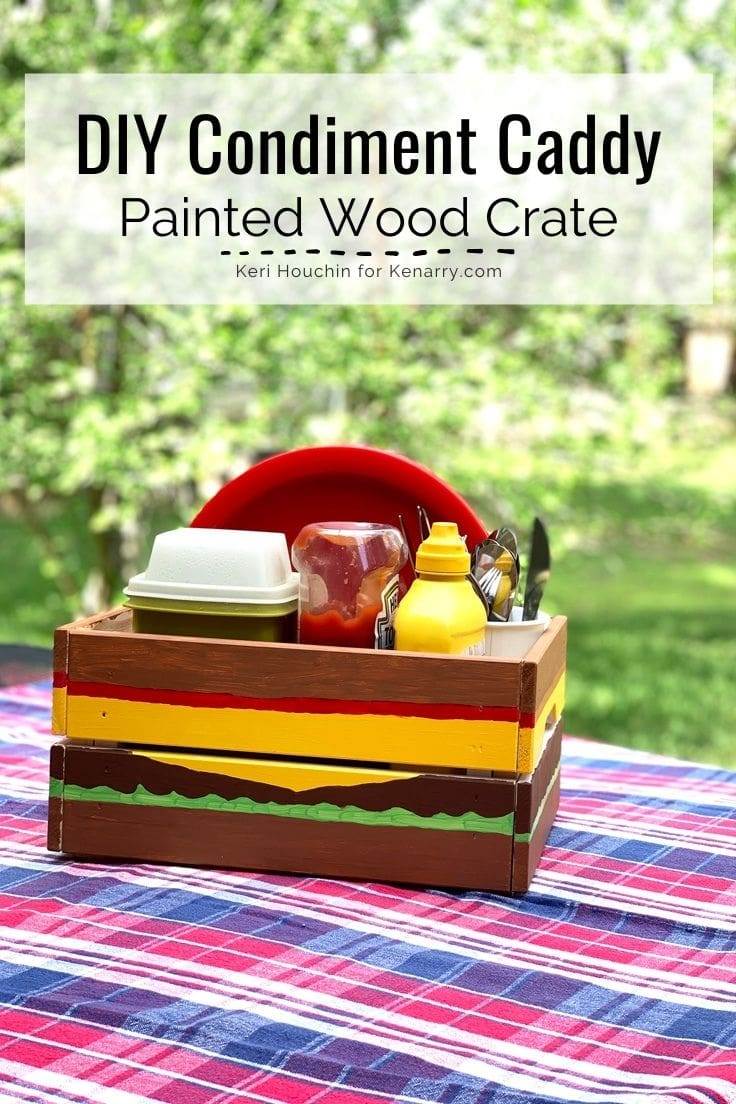
DIY Condiment Caddy Painted Wood Crate
THIS POST MAY CONTAIN AFFILIATE LINKS. PLEASE SEE OUR FULL DISCLOSURE POLICY FOR DETAILS.
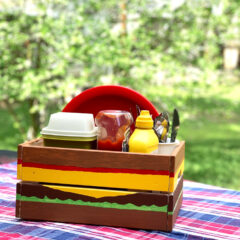
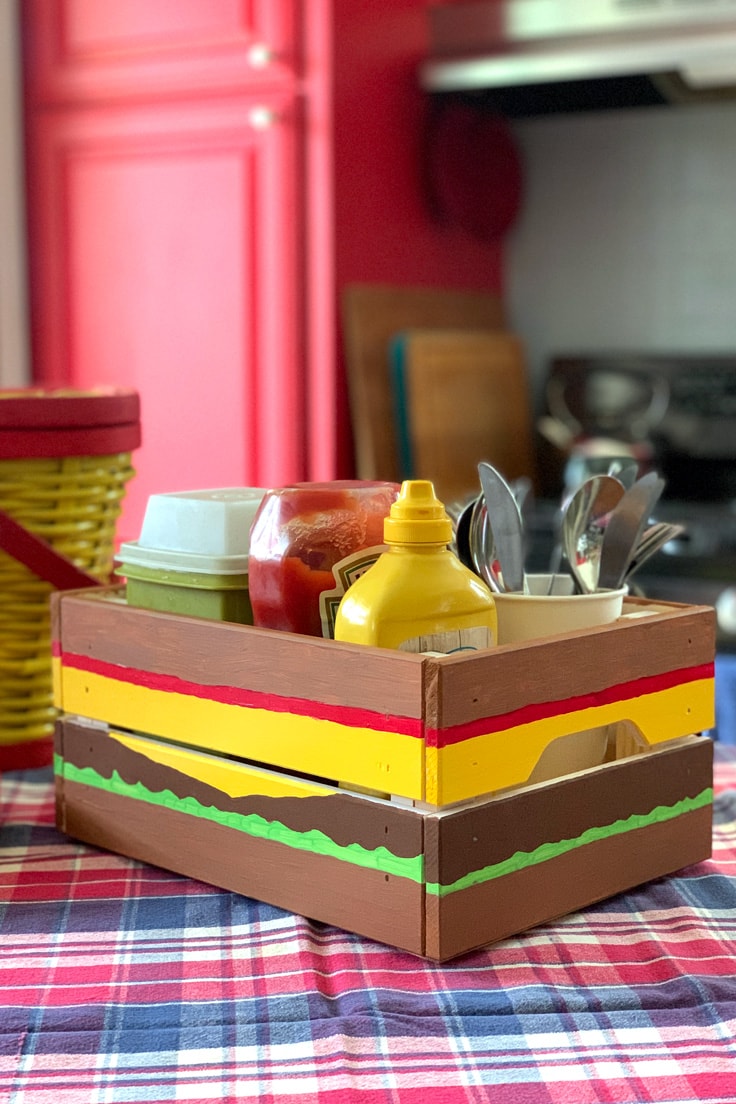
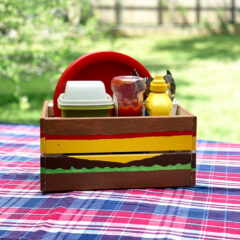
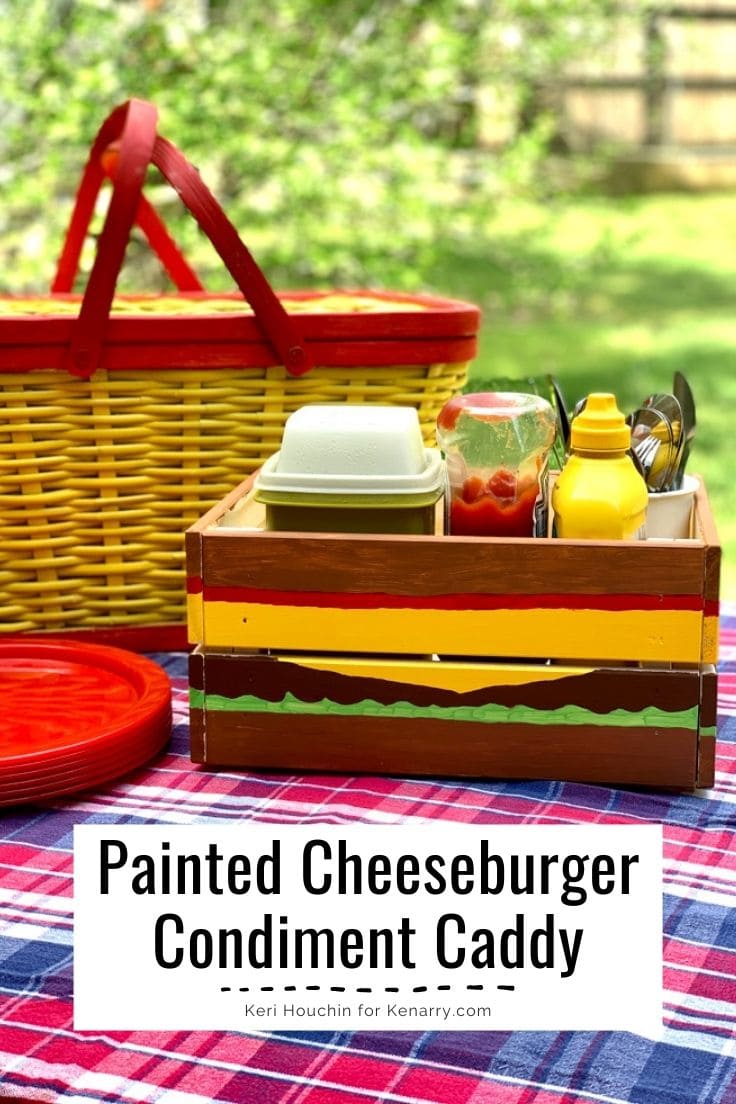
This DIY condiment caddy is so cute! This painted wood crate looks like a burger and is perfect for organizing essentials for a cookout.
For a simple summer craft that’s pretty and useful, you can’t go wrong with a painted wood crate. I’m Keri from One Mama’s Daily Drama and this month I’m sharing an Ikea Knagglig hack to make a condiment caddy for all your summer cookouts.
As you plan your parties, let us help! Get your Summer Barbecue Planner so you can stay organized and you won’t forget a single thing.
This craft project has it all! It’s an Ikea hack, it’s a wood crate painting project, and it’s a piece of art that you can use.
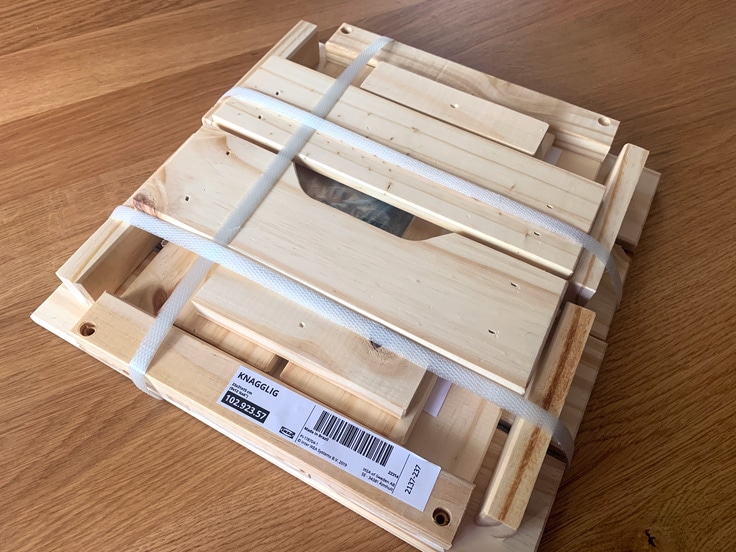
I was stopping by Ikea for the zillionth time to pick up the last pieces for a home remodeling project when I saw a stack of Knagglig wood crates on a display near the checkout.
I’m sure they put them there just so crafty nerds like me would see them on the way by and think “well that’s less than ten bucks and there must be something I can do with it!”
Well played, Ikea.
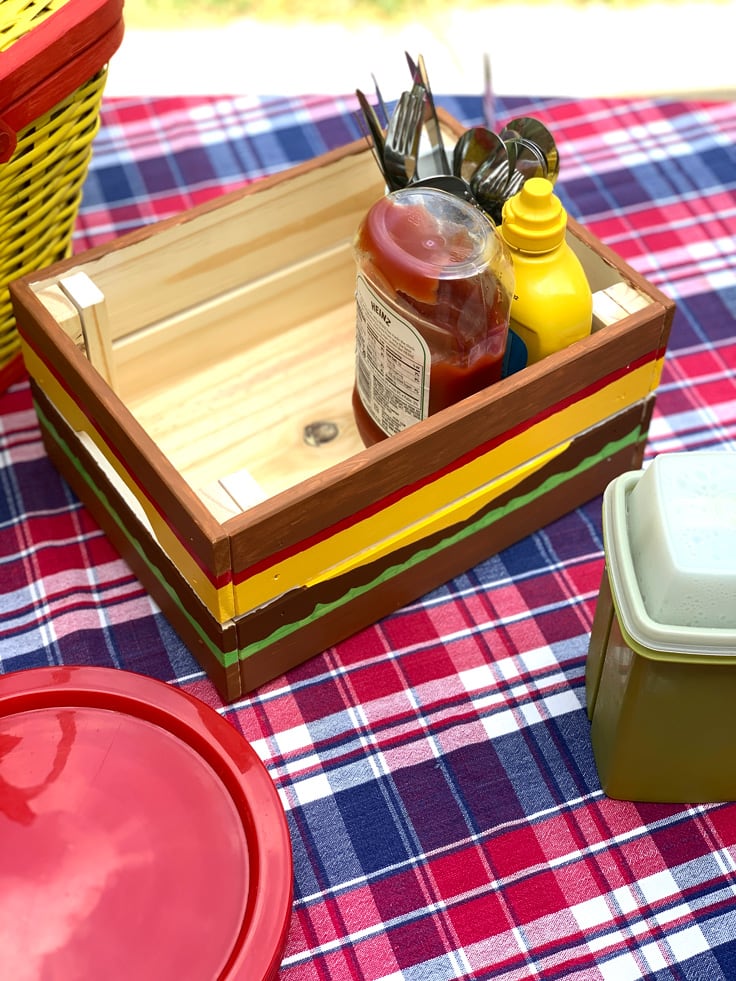
I knew I wanted to paint this wood crate and then I realized the most useful thing I could make was a condiment caddy. All I need to do is load it up with the essentials for our next cookout and I’ve got a simple way to cart around everything we need.
This Ikea wooden crate is just the right size and since it comes unassembled, it’s easy to paint before putting together too. If you don’t have an Ikea nearby or want a different size, I’ve put together a list of places to shop below too.
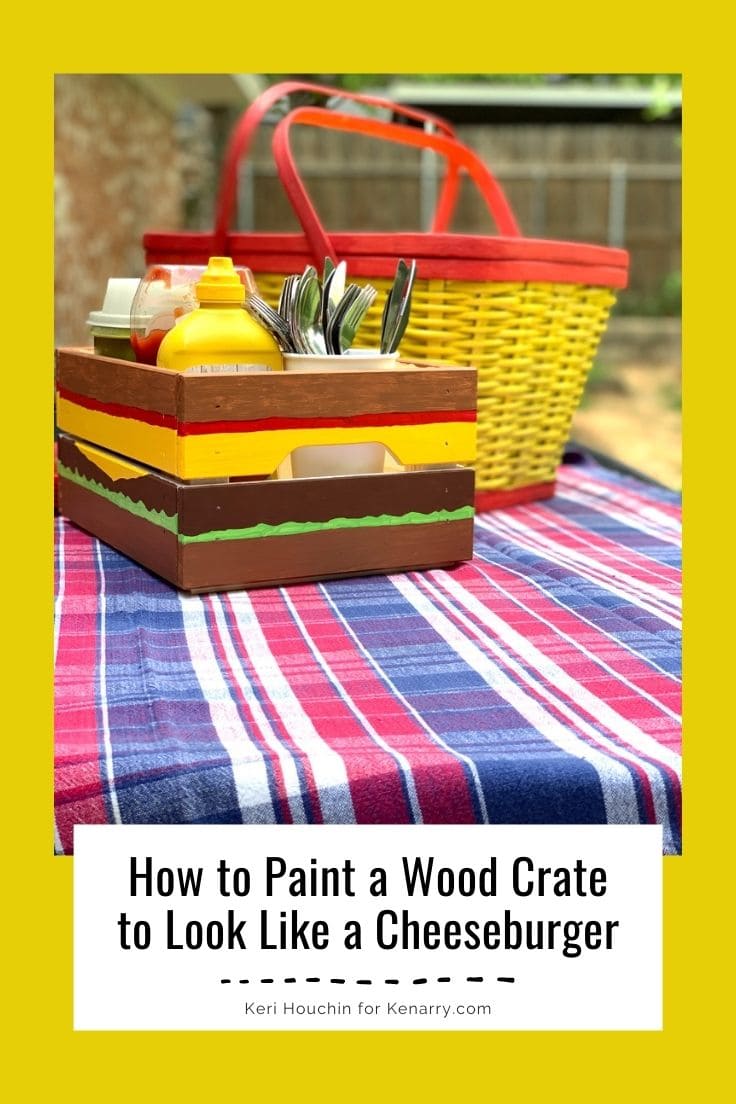
And once summer is over, this little box can sit on a shelf in my kitchen. It could hold extra napkins or leftover plasticware. It looks super cute with the painted picnic basket I made last year!
If you don’t want to use this for holding the mustard, it would be cute as a desk organizer or storage container for art supplies too. The great thing about these little crates is that they’re really good for storing lots of different things.
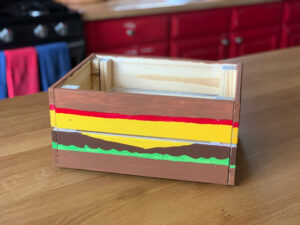
Picnic and cookout season is here, so I painted this to look like a hamburger (or at least a hamburger emoji!). Even if you don’t think you’re a painter, this is an easy project because it’s mostly stripes and wiggly lines.
How to Make a Condiment Caddy
As much as I adore this cute little burger, you could paint yours to look like an ice cream sandwich, try simple stripes to match your patio furniture, or go monochromatic with geometric designs.
What you need:
Want more ideas like this? Subscribe today to get our weekly Ideas in Your Inbox newsletter plus other exclusive gifts and offers — all for FREE!
Craft Tools Needed:
- Sandpaper
- Small paintbrushes
- Screwdriver (for assembly)
Supplies or Ingredients Needed:
These are the ingredients you’ll need. All the exact amounts are in the printable card at the bottom of this post.
- Small wood crate
- Spray paint primer – My favorite is Rustoleum 2x Ultra Cover Paint + Primer.
- Deco Art Patio Paint in red, yellow, green, dark brown, and orange*
* You can use light brown if you have it. I didn’t have light brown, so I mixed half dark brown and half orange.
Where to Buy Small Wooden Crates
I used the Knagglig pine box from Ikea. This is the smaller one that measures 9×12.25×6-inches. Here are a few other good places to find the perfect one for your project:
Condiment Caddy Painting Tips:
What kind of paint do you use on a wood crate?
Just about any type of paint will work on wood, including acrylic or latex paint. My go-to paint for craft projects is Deco Art Patio Paint. I really like the vibrant colors and they’re durable for outdoor use.
Do you need to prime unfinished wood before painting?
Most wood crates and other unfinished wood for craft projects are pine or bass. They can absorb a lot of paint, so priming is a good way to make sure you don’t use more than necessary. A quick coat of a white primer is perfect.
What happens if you don’t sand before painting wood?
Sanding removes any rough edges or unevenness. If you skip this step, there’s a chance that you’ll find a spot that snags or looks a bit messy when it’s dry. No need to spend a long time sanding every bit smooth – a quick brush across the whole thing is probably enough.
How long does craft paint need to dry?
For the best dry time, check the package instructions on the paint you are using. In general, it will probably be dry to the touch in 30 minutes to an hour, and fully cured in 24 hours.
Do you need to seal wood after painting?
The outdoor paint I used is waterproof, so sealing isn’t necessary. If you’re using indoor craft paint, it probably isn’t waterproof. A clear coat of sealer will help your paint look good longer.
DIY Condiment Caddy
Equipment
- 1 piece of sandpaper
- 4 small paintbrushes
- 1 philips screwdriver (for assembly)
Supplies
- 1 small wood crate
- 1 can spray paint primer
- 5 bottles Deco Art Patio Paint red, yellow, green, dark brown, and orange (or light brown)
Instructions
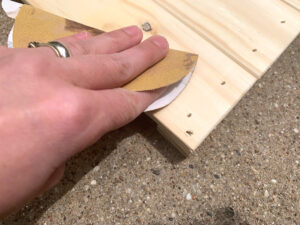
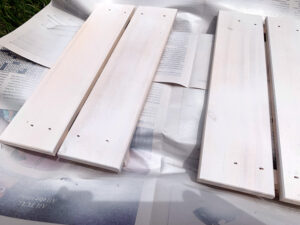
- Sand all the wood crate pieces.Start by opening the package and looking through the assembly instructions. It’s pretty simple, but always a good idea to read them first and make sure nothing is missing. Then go over all the wood pieces with a quick brush of sandpaper to smooth any rough edges or uneven spots.

- Prime the pieces for painting.Lay out the 4 side pieces with the outsides facing up. Spray a few thin coats of primer over them. Let them dry about 30 minutes.
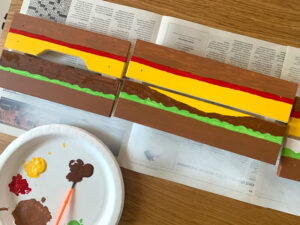
- Paint the sides of the crate.Line the side panels up and use the small paintbrushes to add the burger colors one at a time. You can lightly sketch where you want the lines to go, but I just eyeballed mine. The bun should take up about half of the top and bottom slats. Ketchup and cheese are the other half of the top slat. The cheese dips down over the bottom slat, then the lettuce is about the same 1/4 slat size as the ketchup. Paint the beef patty last. Let the pieces dry completely. Mine took about an hour until it felt dry, but I let it sit 24 hours before putting it together and filling it with things.
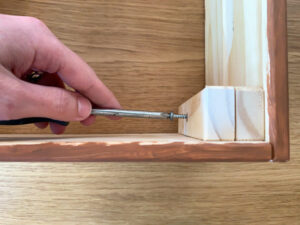
- Assemble the painted wooden crate.Use a screwdriver and the Ikea instructions to assemble the box.
- Fill the condiment caddy.When it’s cookout time, load up your caddy with ketchup, mustard, pickles, plates, and utensils for serving.
Love the ideas you see here on Ideas for the Home by Kenarry®? Subscribe today to get our FREE DIY & Craft Planning Calendar, plus our weekly Ideas in Your Inbox newsletter filled with creative tips and exclusive offers!
What’s Next?
If you enjoyed making this condiment caddy then you’ll enjoy these summer ideas too.
20 Colorful Summer Craft Ideas for Kids
DIY Silverware Holder for Cookouts
You may also enjoy these craft ideas on Ideas for the Home by Kenarry® –