How to Make Wood Gift Tags
THIS POST MAY CONTAIN AFFILIATE LINKS. PLEASE SEE OUR FULL DISCLOSURE POLICY FOR DETAILS.
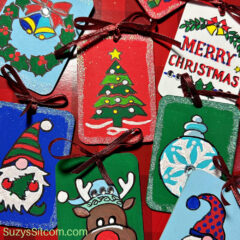
Creating hand-painted wood gift tags is a fun way to personalize your gifts. These cute wooden present tags are easy to make and not only add color and whimsey to your gifts but can also be used later as Christmas ornaments!
I recently found a set of stencils that just called out for a new project. They are 3″ stencils and are just perfect for making cute wooden gift tags. These wooden gift tags are easy to make, especially with the use of the stencils and you can add as many extras as you like to make them your own.
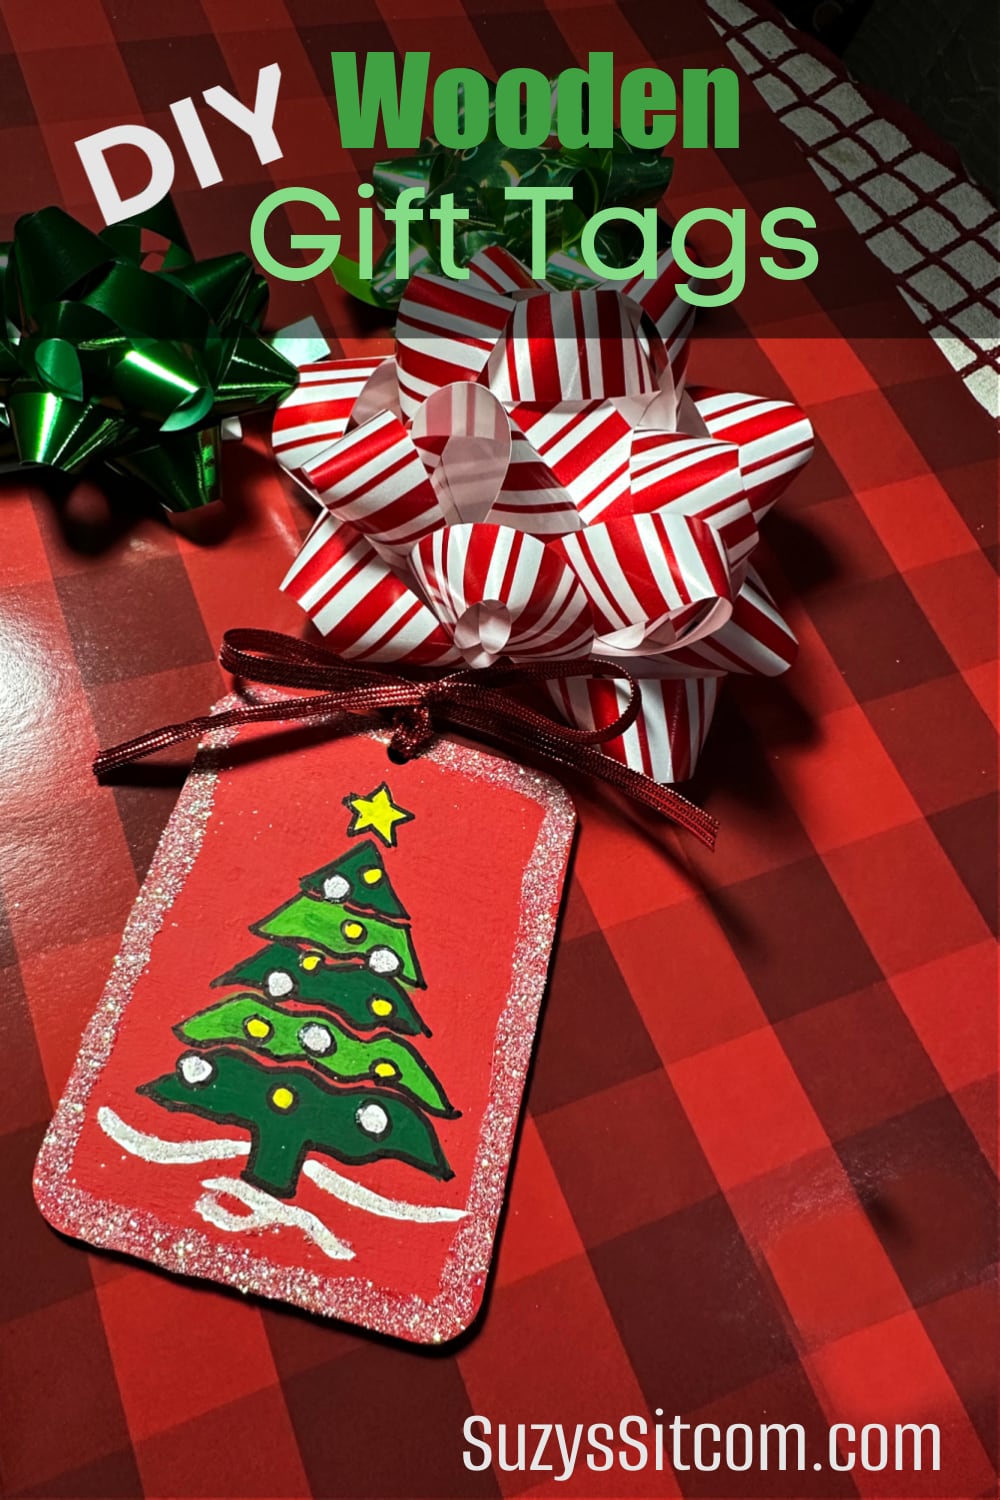
One of the great things about these hand-painted gift tags is that they can be used as Christmas ornaments, too! Be sure to add a date to the back and they will be future holiday heirlooms!
This is Suzy from SuzysSitcom and I am currently situated near the rim of the Grand Canyon. My husband and I live full-time in our RV and have chosen to winter and work in this beautiful National Park. That puts us about 2000 miles away from family, so where holiday gifts are concerned, I wanted to do something special. Hand-painted wooden gift tags seemed to be the way to go.
How to Make Wood Gift Tags
While creating these wooden gift tags, I searched through my craft supplies and found glitter, gemstones, and ribbons. You can use anything you would like to add your personal touches.

What you need:
Want more ideas like this? Subscribe today to get our weekly Ideas in Your Inbox newsletter plus other exclusive gifts and offers — all for FREE!
- 3″ Stencil Set
- 2.5″ x 3.5″ Unfinished Wooden Gift Tags
- Acrylic Paint
- Sharpie Marker
- Glitter
- Tacky Glue
- Gemstones
- Thin Ribbon
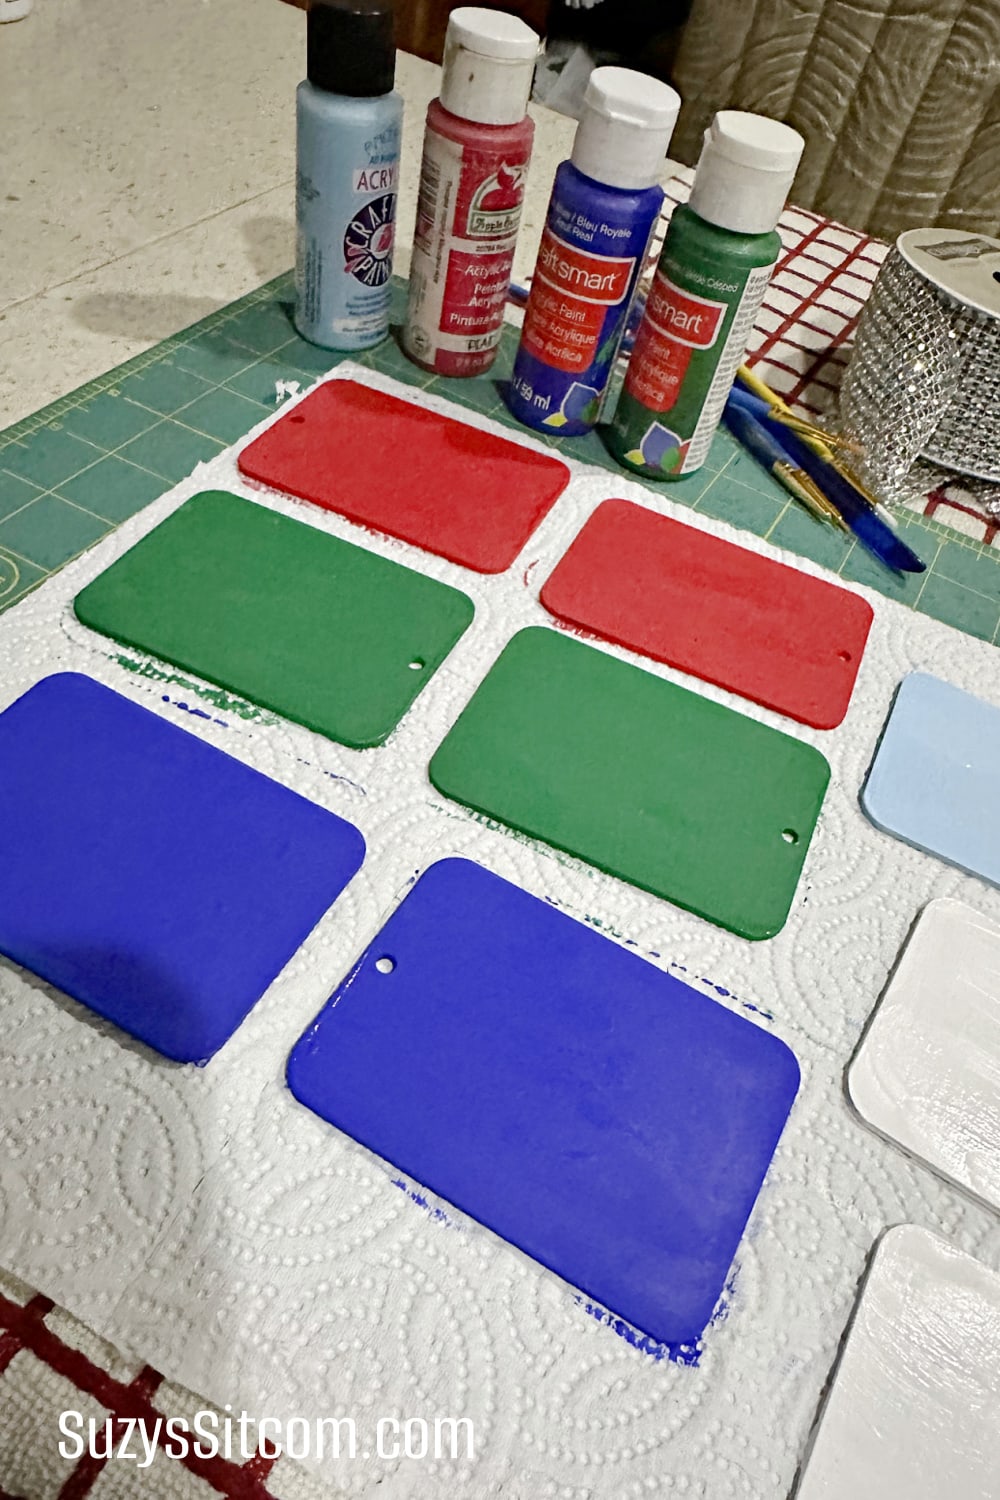
Paint the Base coat on the Gift Tags
Use the acrylic paint to paint two coats of color the wooden gift tags. Choose any colors that you love. I went with green, red, white, blue and light blue. Once the front side of the tags are dry, flip them over and paint two coats onto the back side.
Now you are ready for the fun part!

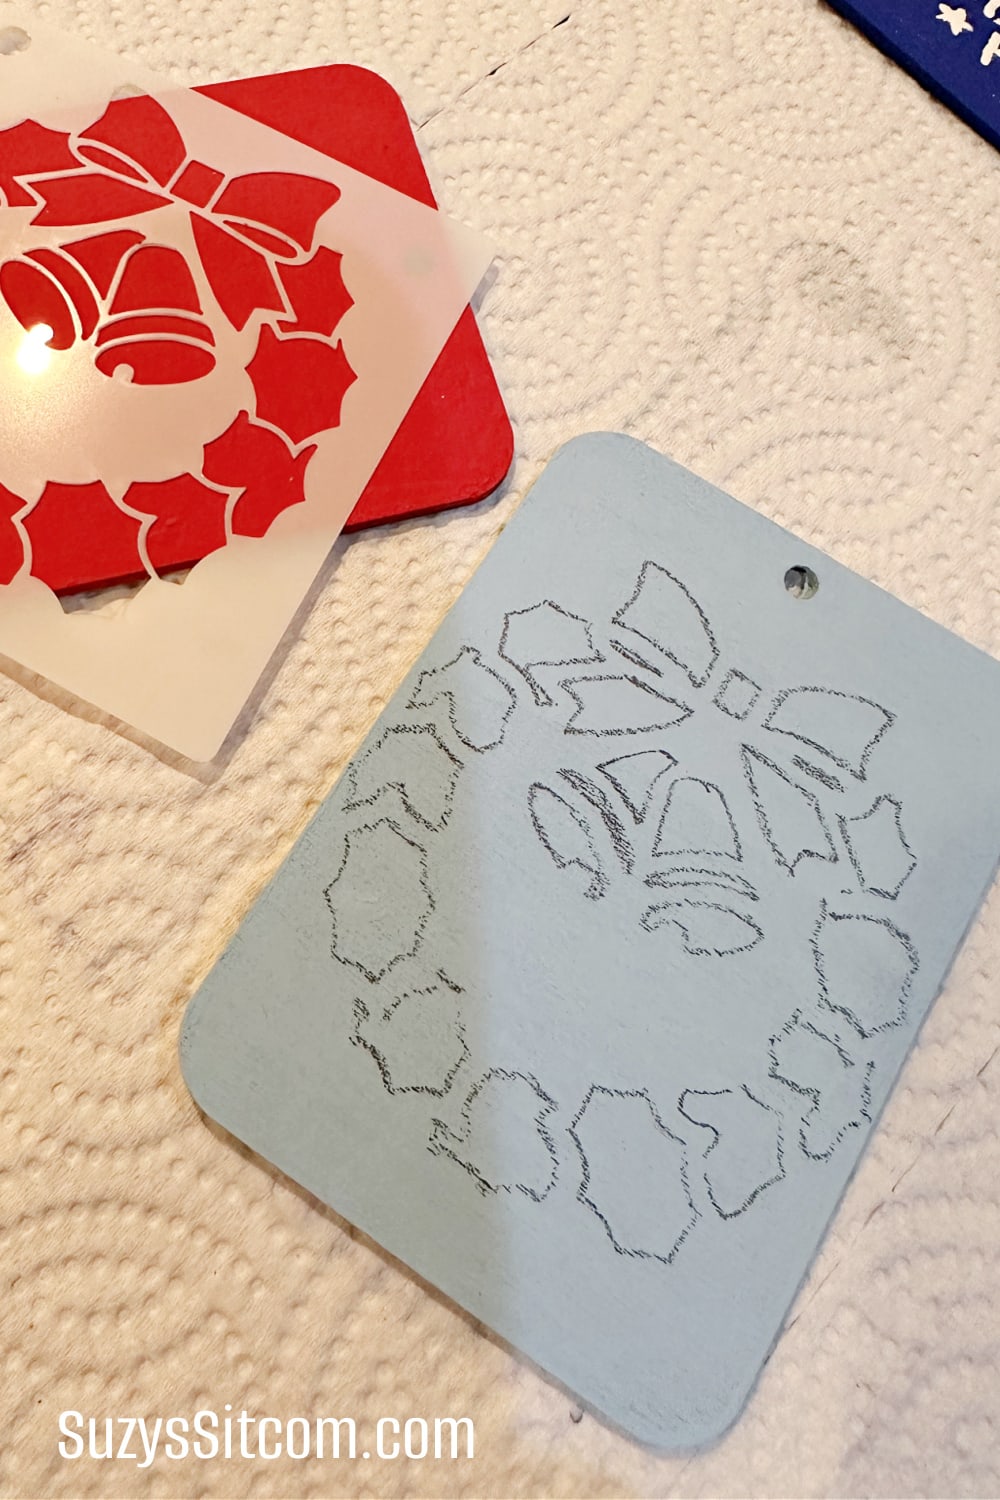
Choose your Stencil
The selection of stencils that I used includes 80 different stencils, so choosing my stencil became a big challenge. Choose the stencil that you think will go best with the color background of that gift tag.

Choose your Pencil
Use a pencil with a sharp tip to trace the pattern onto the wooden gift tag. NOTE: if you choose an adhesive-backed stencil, you can simply use a brush to stencil the paint onto the gift tag. In this case, the stencils are not adhesive-backed and I chose to trace and then hand paint.
Paint in the details
This is the traced design before I hand-painted it. Choose the colors of acrylics that you would like and use a small paintbrush to paint in the details.
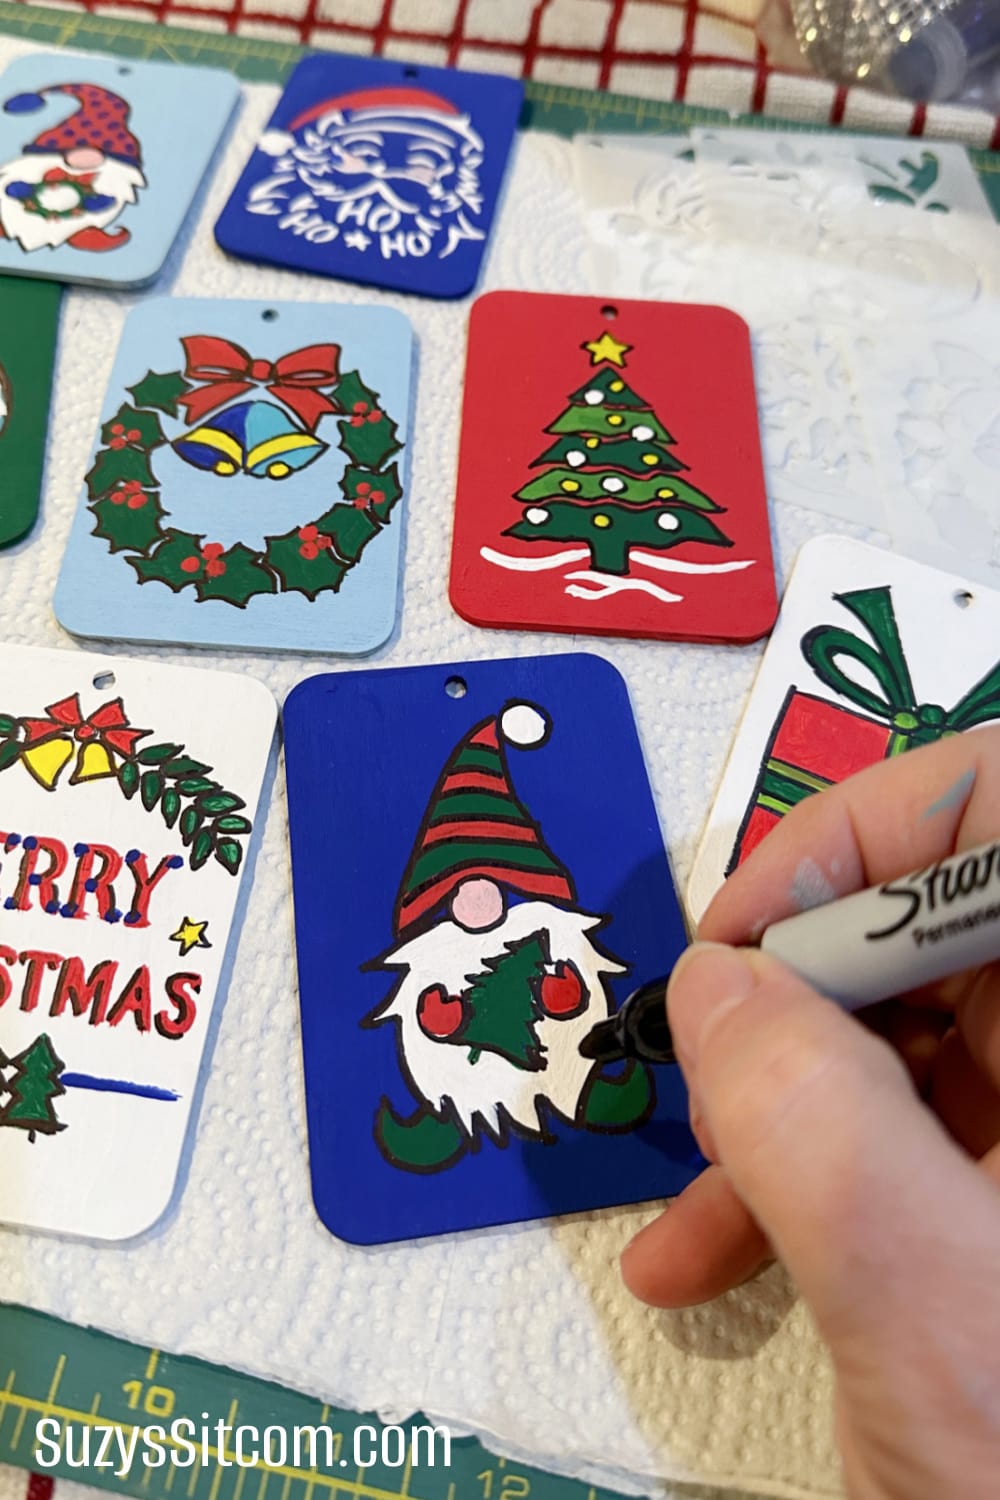
Outline with a Permanent Marker
Once the acrylic paint is fully dry, use a permanent marker to outline the details of the painted gift tags. This gives the design a crisper edge.
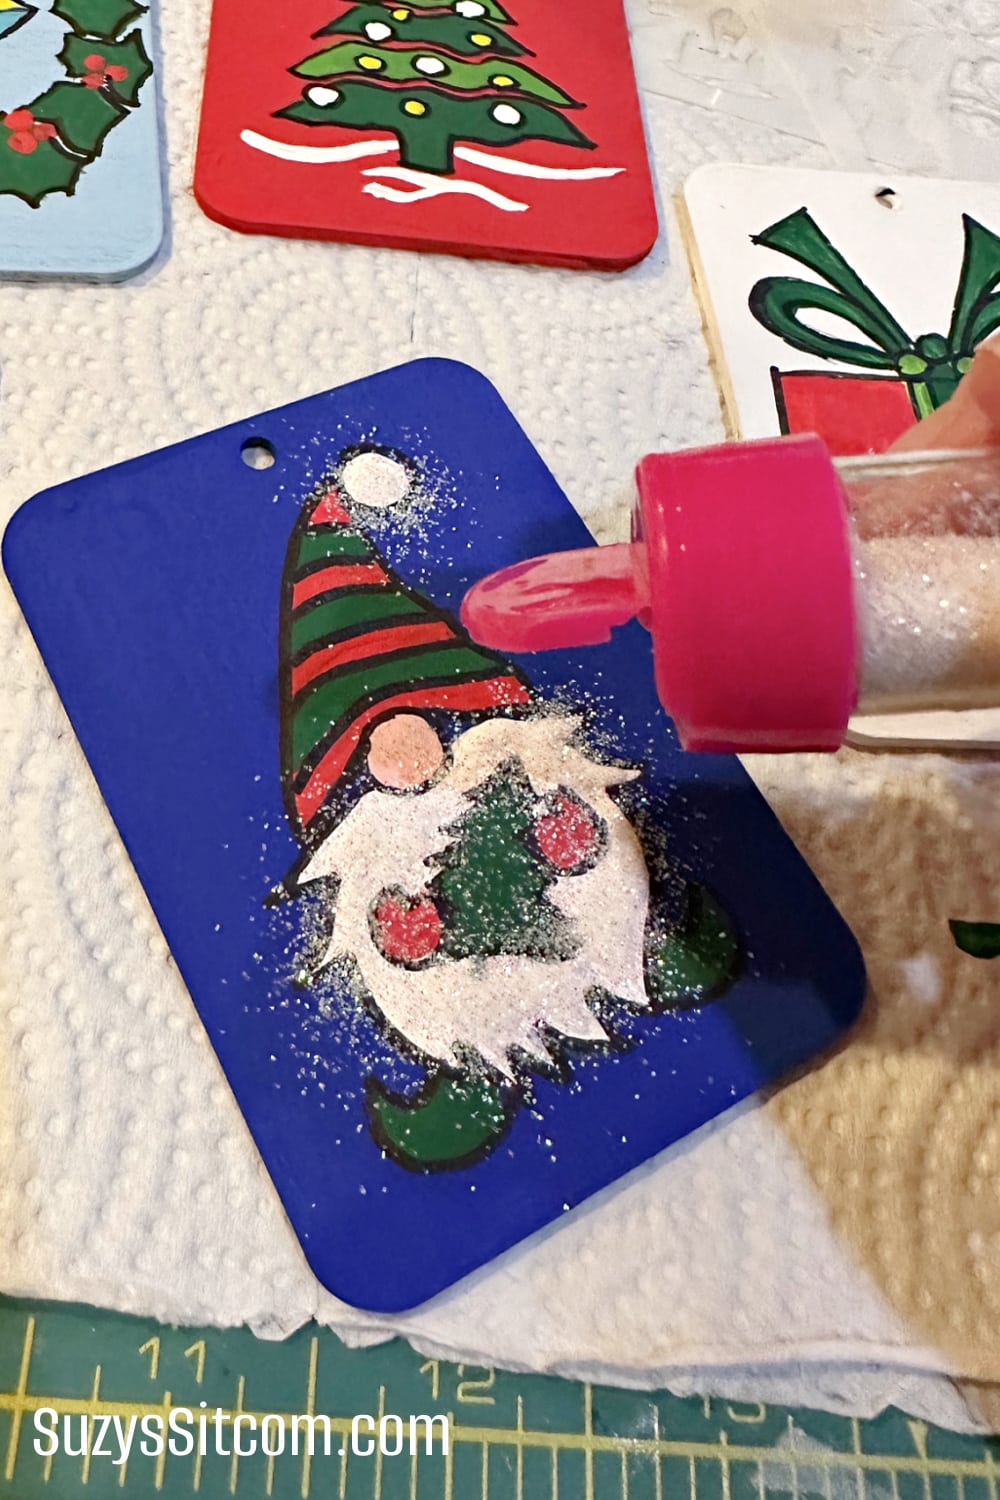
Add Extra Details
Add glitter and gemstones to each wooden gift tag. Use a toothpick to place some tacky glue onto the areas where you would like to add glitter or gemstones. Shake the glitter in place and then tap off any extra.
I added glitter around the edges of some of the wood gift tags, too!
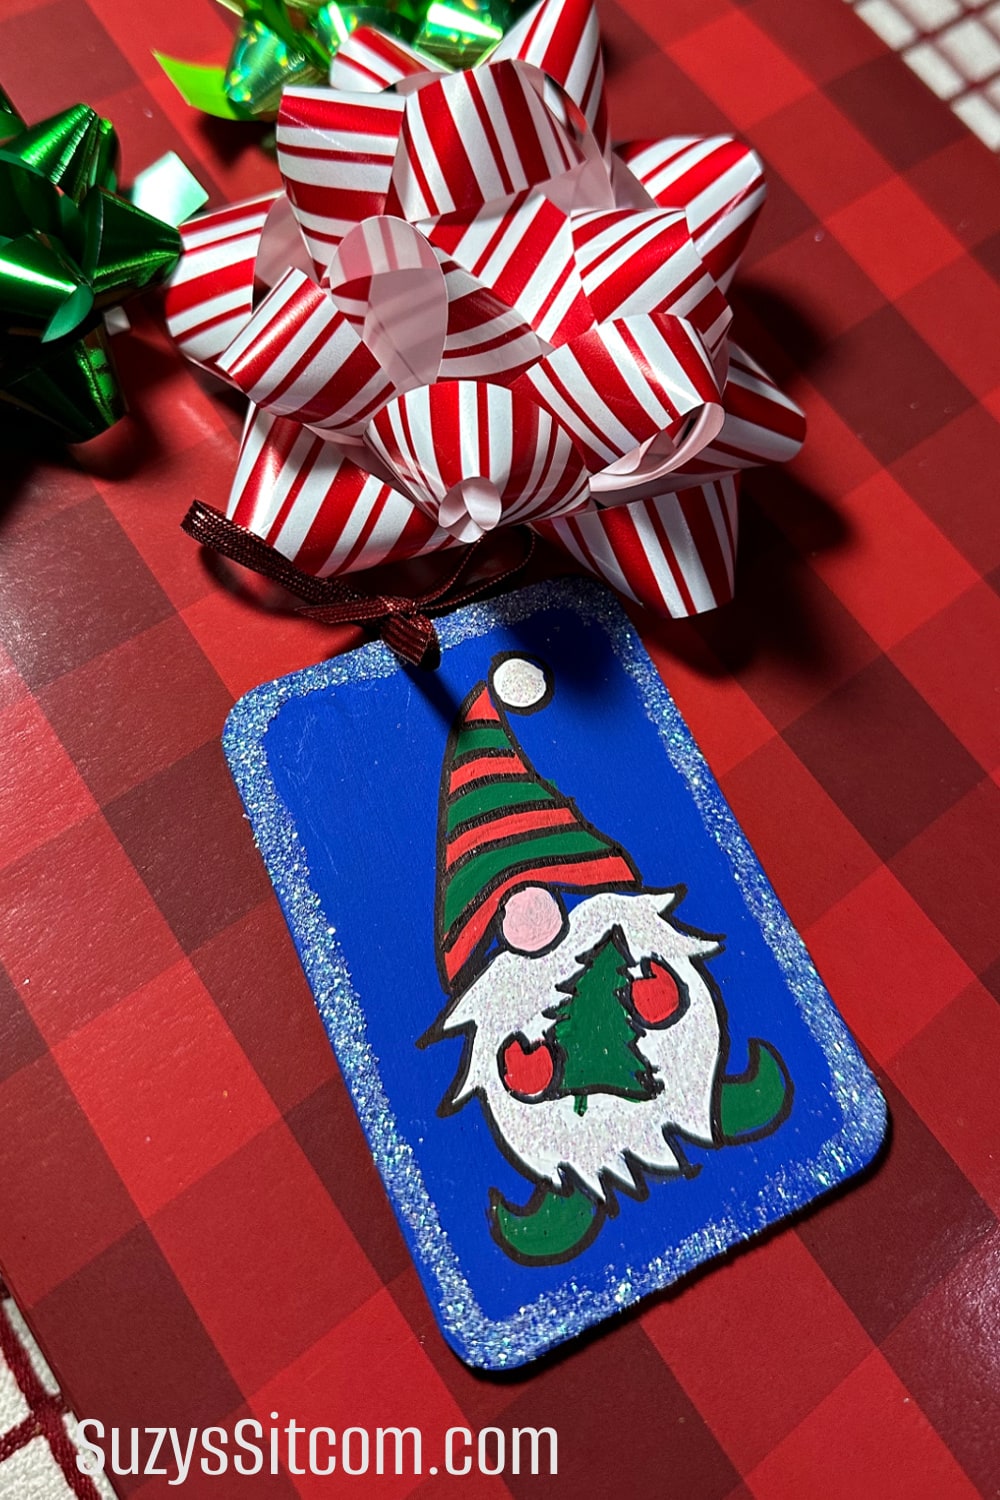
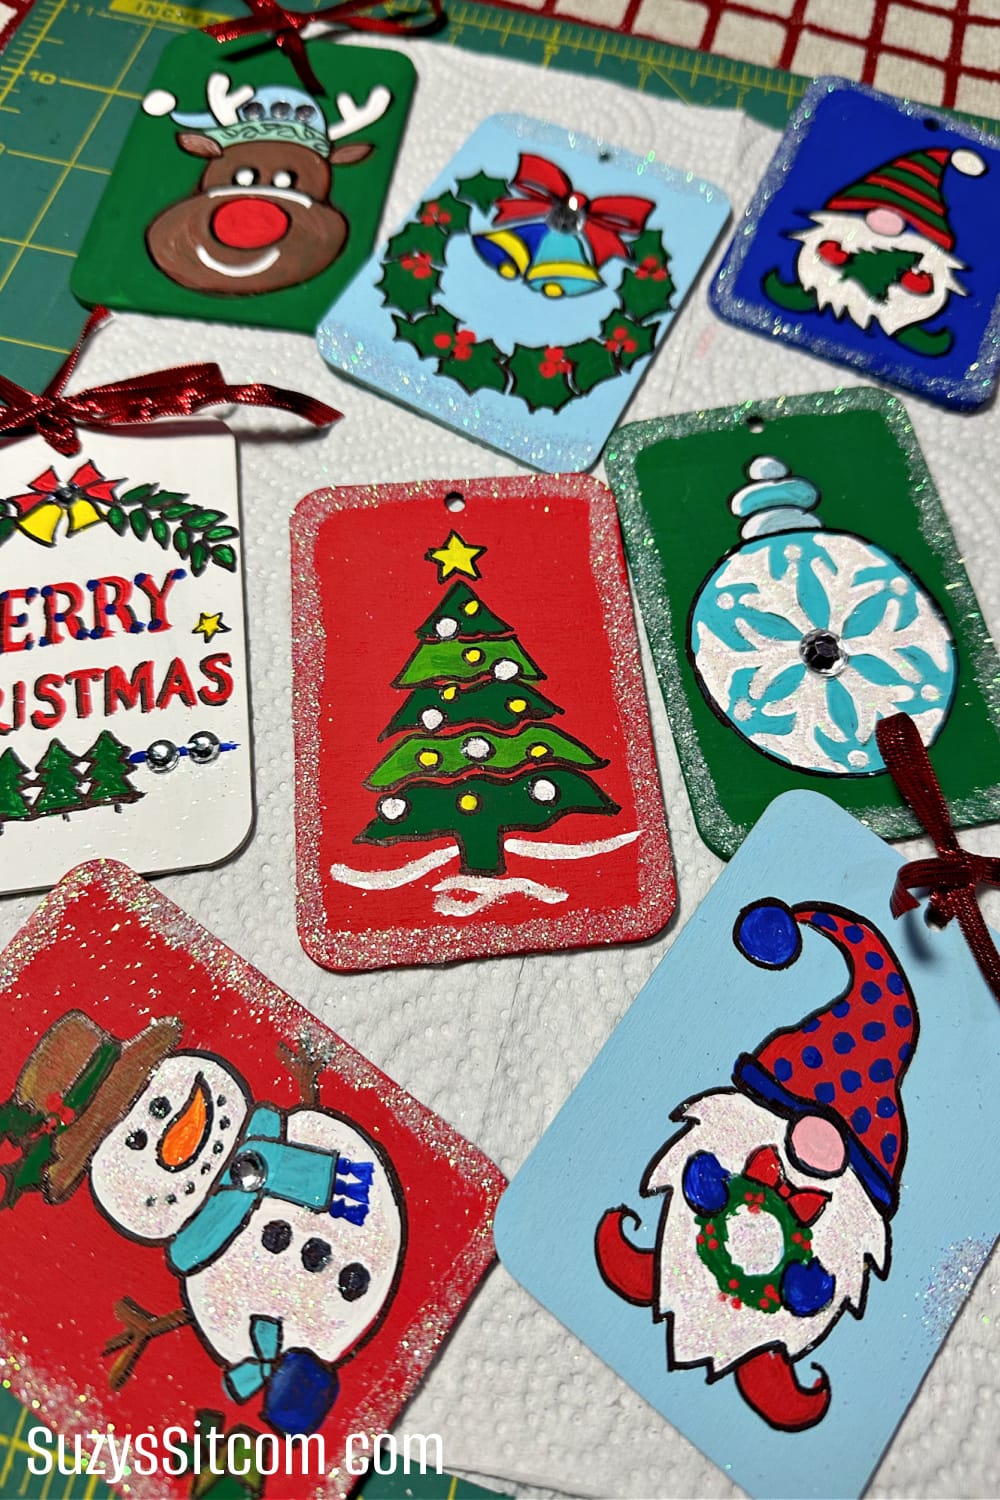
Add a ribbon to the gift tags and attach it to each gift. Each little wooden gift tag has its own personality. Perfect for giving! I added the name of the recipient and the date to the back of each gift tag. They will make great ornaments in the future!
Create a bunch of whimsical wooden gift tags! Fun to make in an evening or two and a great way to add a personal touch to each gift you give this year.
How to Make Wooden Gift Tags
Supplies
- 1 set 3" Stencils
- 1 set 3.5" x 2.5" Unfinished Wooden Gift Tags
- 1 set Acrylic Paints
- 1 ea glitter
- 1 ea Permanent Marker
- 1 set Gemstones
- 1 ea Tacky Glue
- 1 ea Thin Ribbon
Instructions
- Paint a base coat of paint onto each of the wooden gift tags. You will need to do two coats of paint on each side. Allow to dry thoroughly before going to next step.
- Choose a stencil and using a sharp pencil, trace the design onto the wooden gift tag.
- Use acrylic paints in your choice of colors to fill in the design on the wooden gift tag.
- Allow the paint to dry thoroughly, and then use a permanent marker to draw around the finished design.
- Use tacky glue, glitter and gemstones to add details to each wooden gift tag.
- Once the gift tag is dry, add a ribbon to each gift tag.
Love the ideas you see here on Ideas for the Home by Kenarry®? Subscribe today to get our FREE DIY & Craft Planning Calendar, plus our weekly Ideas in Your Inbox newsletter filled with creative tips and exclusive offers!
Love Holiday Projects?
Here are some more fun projects for the holidays exclusively from my website, SuzysSitcom!

How to make Wrapped Ornaments with Paper


You may also enjoy these Christmas ideas on Ideas for the Home by Kenarry® –