DIY Cord Organizer for Under Your Desk
THIS POST MAY CONTAIN AFFILIATE LINKS. PLEASE SEE OUR FULL DISCLOSURE POLICY FOR DETAILS.
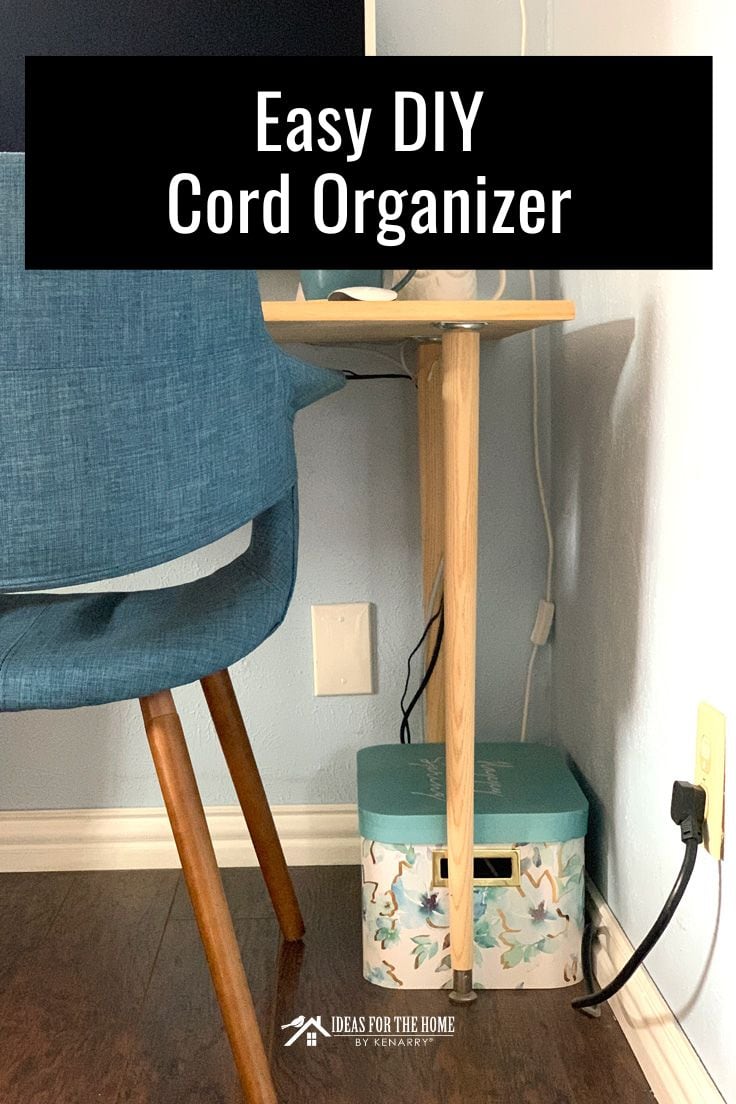
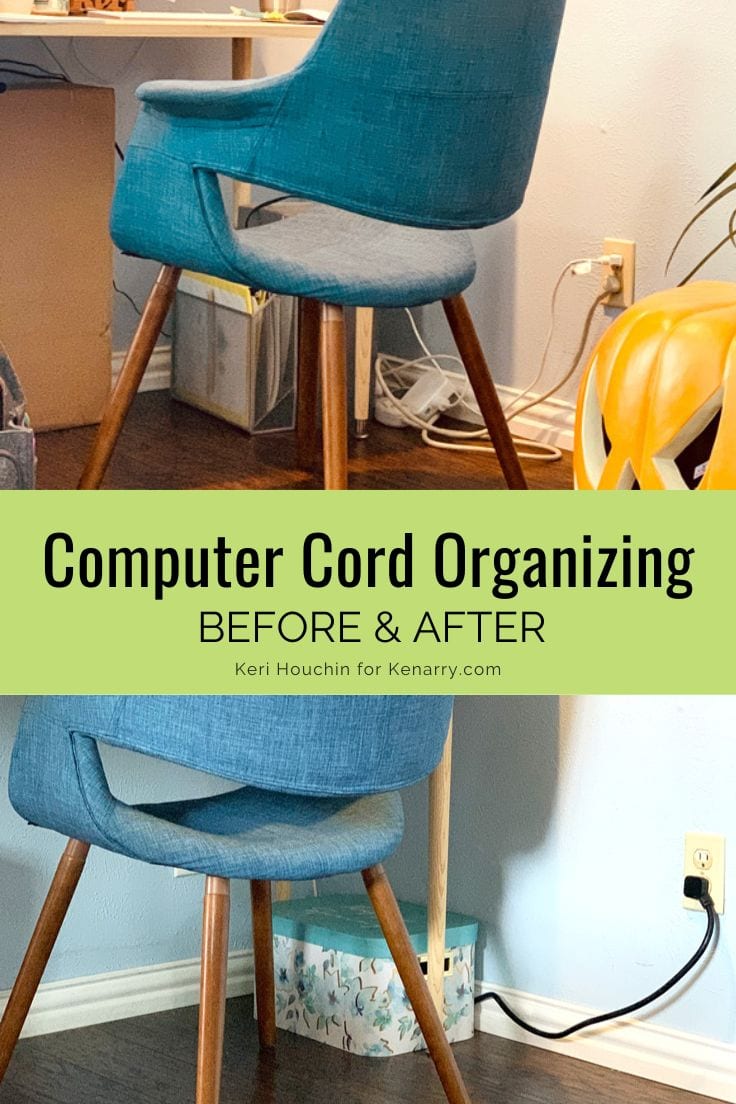
Organize your home office and hide the cord clutter with an easy DIY cord organizer using a decorative box.
I’m Keri from One Mama’s Daily Drama and this week I want to share a craft that’s really practical. If you’re struggling with messy cords under your desk, this DIY cord organizer is an easy solution that looks great.
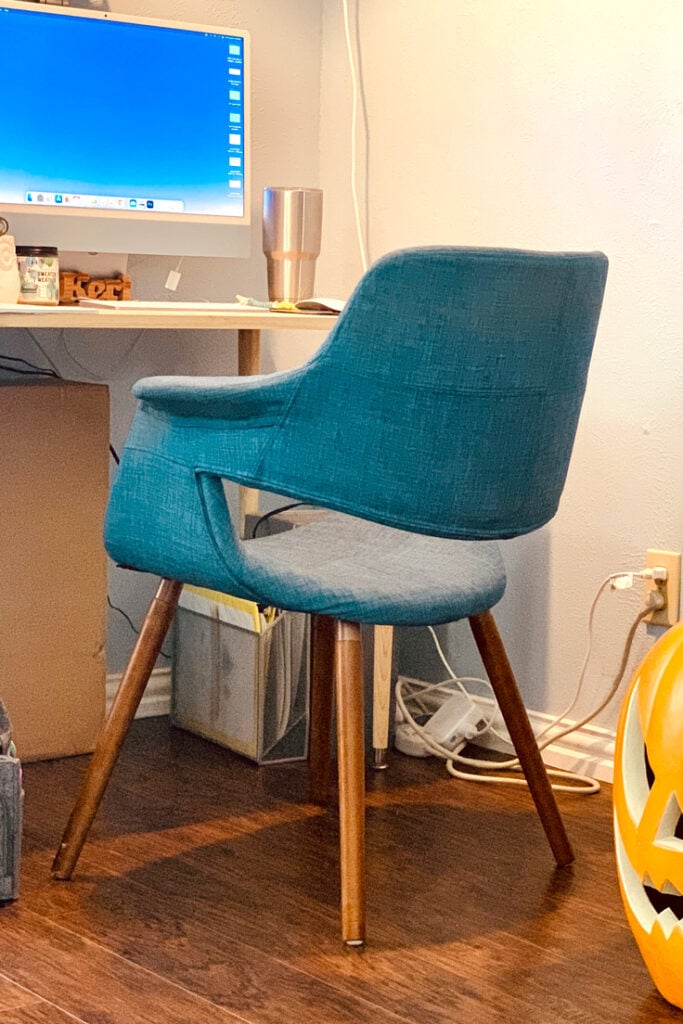
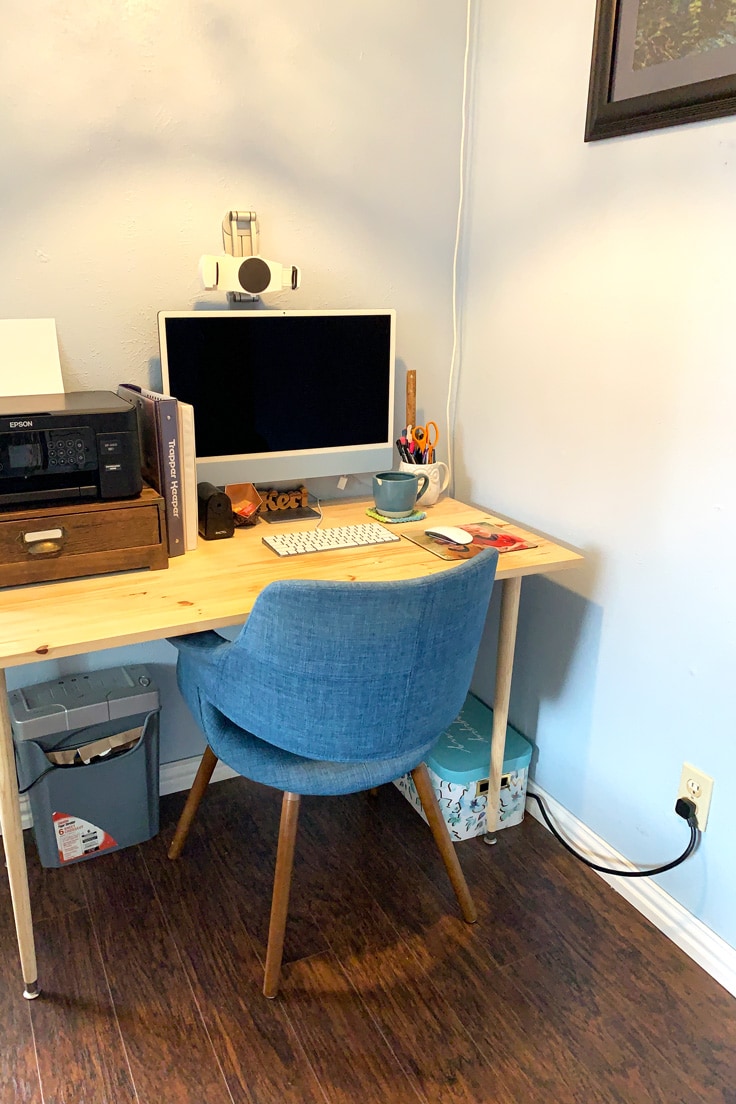
I’ve seen a few tutorials for ways to hide cord clutter completely, but I’m not too worried about that. After all, I work here and everyone knows my computer has a few cords. What I did want was a space that looked tidy and organized.
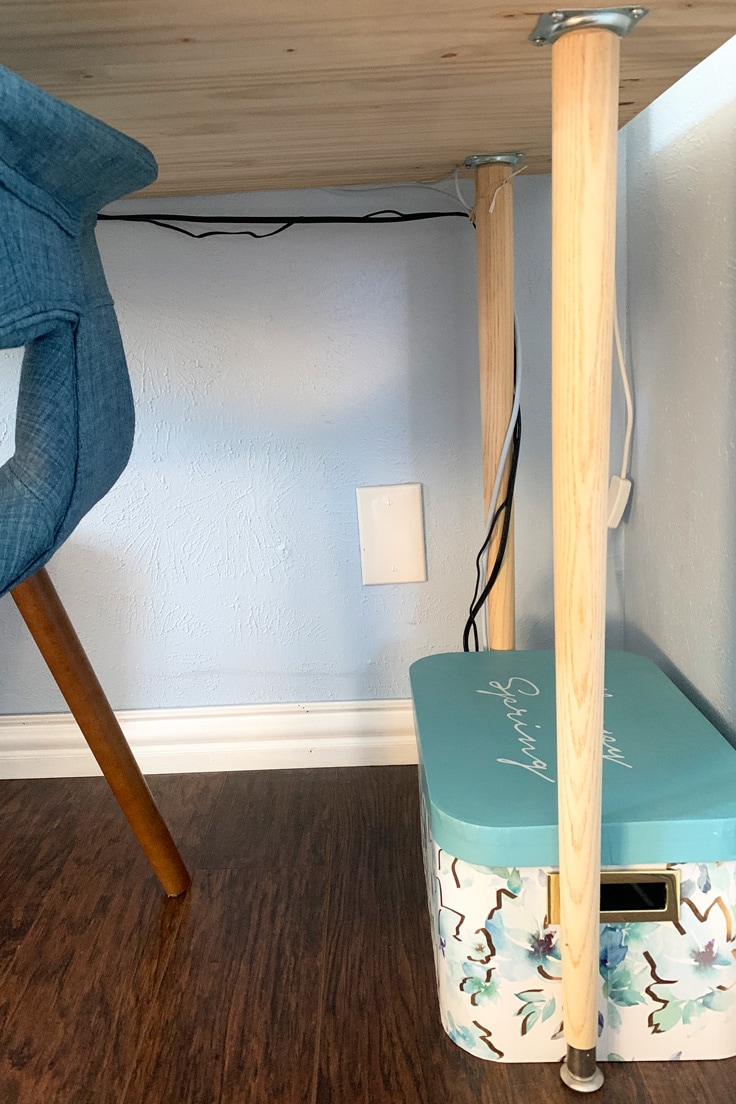
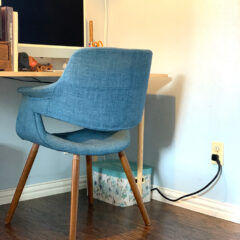
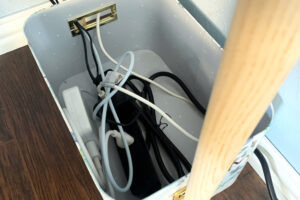
I found a pretty decorative box at Michaels that was perfect for a DIY cord organizer. It fits just between the legs of my desk and is close enough to my wall color that it blends in nicely.
I was hoping that with the handles on either end, I could run all the little cords in the back and the surge protector out the front. It didn’t quite work that way because surge protector prongs are huge, but I think you’ll find that the end result of this project is just as nice.
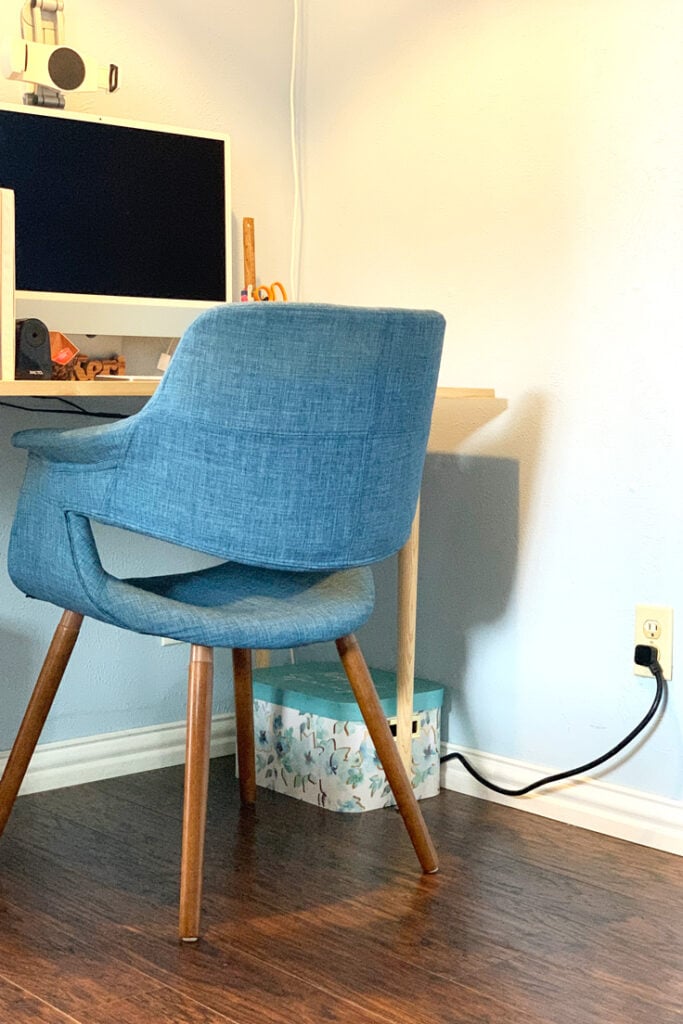
Why use a cord organizer? I like how it reduces the visual clutter of my workspace. It also keeps the cords from attracting so much dust, which is always a problem around electronics. As a bonus, it’s much easier to vacuum under my desk when I don’t have to worry about cords!
How to Make a DIY Cord Organizer
This project is simple, but you’ll probably need to customize it to fit your own workspace.
What you need:
Want more ideas like this? Subscribe today to get our weekly Ideas in Your Inbox newsletter plus other exclusive gifts and offers — all for FREE!
DIY Tools Needed:
Supplies Needed:
These are the ingredients you’ll need. All the exact amounts are in the printable card at the bottom of this post.
DIY Cord Organizer Tips:
How do you deal with too many cords?
Make sure you don’t have any cords you don’t need. Follow along each cord to make sure it goes to a device you’re using. If you have more than a handful, it may be best to move something (like a phone charger that can be plugged in anywhere) to a different location.
How do you roll up cords neatly?
Having a long cord makes it easy to reach an outlet from anywhere in the room, but long cords and cables can also get tangled. Take any excess and roll it into a circle and secure it with a twist tie.
How do you make a cord organizer for free?
You can make a DIY cord organizer using any clean, empty cardboard box. Repurpose a shoebox or shipping box and make it pretty by covering the outside in decorative paper, paint, or even fabric.
Are lots of cords a fire hazard?
The cords for your computer, printer, and other desk accessories are low voltage and shouldn’t be getting hot. If they are, it might be time to replace them. According to the CPSC, extension cords can overheat and cause fires if they are damaged or overloaded with too many devices. Use a surge protector in your office, not an extension cord or power strip, and follow these safety tips.
For this project specifically, do not crowd cords in the box or stack anything around the box that blocks airflow.

DIY Cord Organizer
Equipment
- 1 Pencil
- 1 X-acto knife
Supplies
- 1 surge protector
- 1 decorative cardboard box
- 1-5 rubber bands
- 1-5 twist ties
Instructions
- Choose a pretty box and surge protector.Start by choosing a cardboard box to hide your cord clutter. Make sure it is large enough to hold the surge protector, but small enough to fit under your desk.

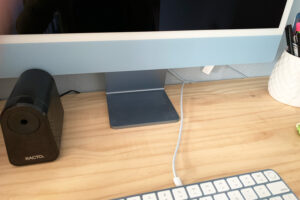
- Straighten desk cords.Turn off everything and unplug cords. Untangle any that need it and run them as neatly as possible along the back of your desk and down the side.
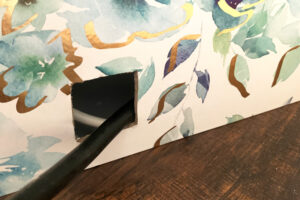
- Measure and cut box opening.Place the surge protector in the box, making sure it will reach the outlet where it will plug in. Use a pencil to mark where the surge protector cord will go out the side of the box, then cut it with an X-acto knife. Cut a second hole for all the small cords to enter the back of the box if necessary.
- Plug in cords.Run each cord through the opening at the back of the box and plug them into the surge protector. Plug in the surge protector at the nearest outlet.
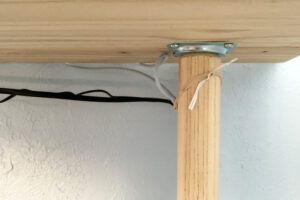
- Secure cords to hide.Use rubber bands and/or twist ties to secure the cords along the desk leg. Place the lid on the box.

Love the ideas you see here on Ideas for the Home by Kenarry®? Subscribe today to get our FREE DIY & Craft Planning Calendar, plus our weekly Ideas in Your Inbox newsletter filled with creative tips and exclusive offers!
What’s Next?
If you enjoyed this DIY cord organizer then you’ll enjoy these desk organizing ideas too.
How to Organize Photos on Your Computer

Desktop Organizer Wallpaper Calendar
You may also enjoy these organizing ideas on Ideas for the Home by Kenarry® –