Make Your Own Merry and Bright Holiday Porch Christmas Sign
THIS POST MAY CONTAIN AFFILIATE LINKS. PLEASE SEE OUR FULL DISCLOSURE POLICY FOR DETAILS.
Download the FREE Merry and Bright cut file to make your own Merry and Bright holiday porch sign.
Hi my Kenarry friends; I’m Joannie Hambel from Hambels Get Real, and like you, I love making crafts. Today I will share how to make an easy holiday porch sign. With some basic woodworking tools and an electronic cutting device – like a Cricut or Silhouette, you can make one too.

I’m so excited to get to team up with Ideas for the Home and share it with you. When I’m not guest blogging here, you can find me over at Hambel’s Get Real where I share diy tutorials and tips to add character to your home.

I have wanted one of these holiday porch signs for a few years but haven’t had a chance to make one. Every time I saw one in the store, though, I knew I could make my own that was bigger and better. Now I have, and you can too!
How to Make Merry and Bright holiday Porch Sign
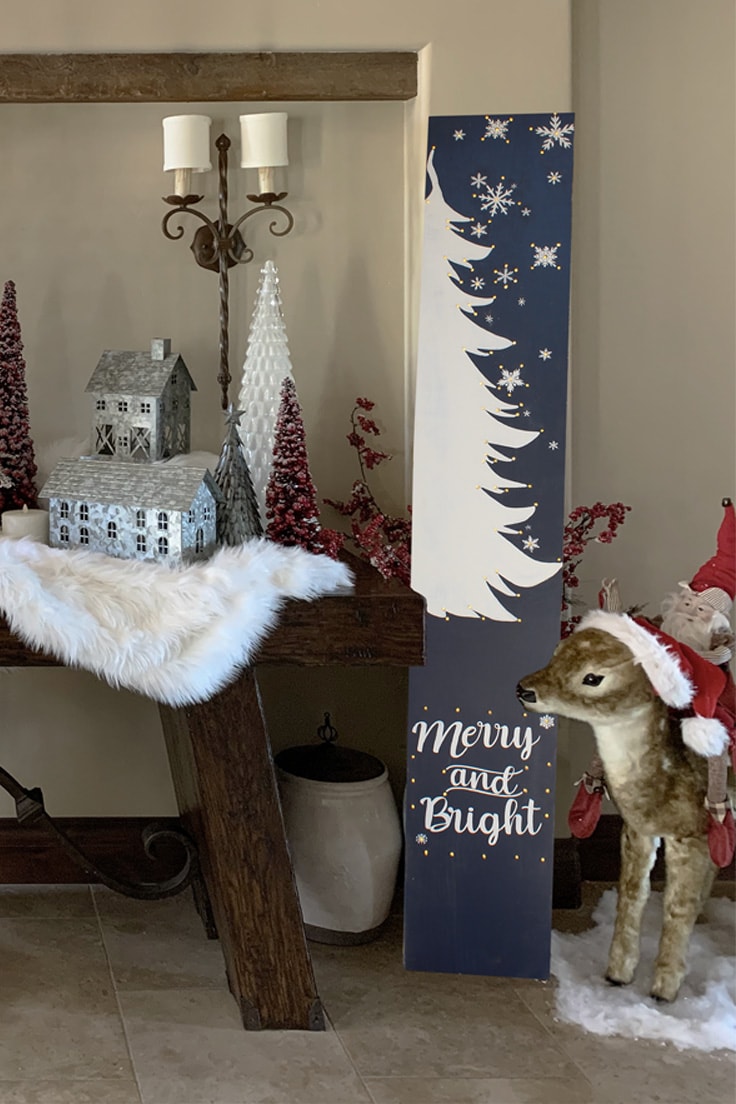
At 66″ tall, this holiday porch sign makes a perfect addition to your holiday entry decor. Christmas lights poke through the snowflakes and tree printed on the sign. The words “Merry and Bright” make the perfect greeting for anyone coming to your door during this holiday season.
What you need to make your own holiday porch sign:
Want more ideas like this? Subscribe today to get our weekly Ideas in Your Inbox newsletter plus other exclusive gifts and offers — all for FREE!
Tools for your Merry and bright porch sign:
- Drill – mine is a Makita drill, but you can use whatever drill you have at home
- Drill bits
- Computer and Cricut or Silhouette cutting device
- 12×24 cutting mat
- Paint brush or roller
Supplies for your merry and bright porch sign:
- 1×12 Board
- Provincial or Special Walnut Stain
- White Latex Paint
- Navy Blue Latex Paint
- Removable Adhesive Vinyl
- Transfer tape
- Christmas tree lights
- Sand paper
- Duct tape
- Free Design Cut File (for personal use only) – see instructions below for how to get the file!
Get the Free Merry and Bright Design Cut File (SVG)
To get the FREE Merry and Bright Design Cut File (SVG) for your personal use only, please sign up below to have it sent directly to your inbox:
Your privacy is important to us. We promise not to spam you or share your information. You can opt-out at any time. See our privacy policy for more information.
All printables from Ideas for the Home by Kenarry® are for your own PERSONAL USE ONLY.
After you’ve signed up, watch for an e-mail to confirm your e-mail address and download the free digital printable. Plus you’ll have the opportunity to get the weekly Kenarry Ideas In Your Inbox newsletter, as well as product discounts, special offers and other content that is EXCLUSIVE for Kenarry subscribers only.
You can also join our Idea Insider VIP Club to get unlimited access to the full vault of unique and beautiful printables we offer to make gift giving, holidays and everyday life more special. A lifetime membership in our Idea Insider VIP Club is a great way to save time and money with easy access to hundreds of printable cards, tags, wall art and more right at your fingertips.
How to make your merry and bright holiday porch sign:
Prepare The wood Board for your sign
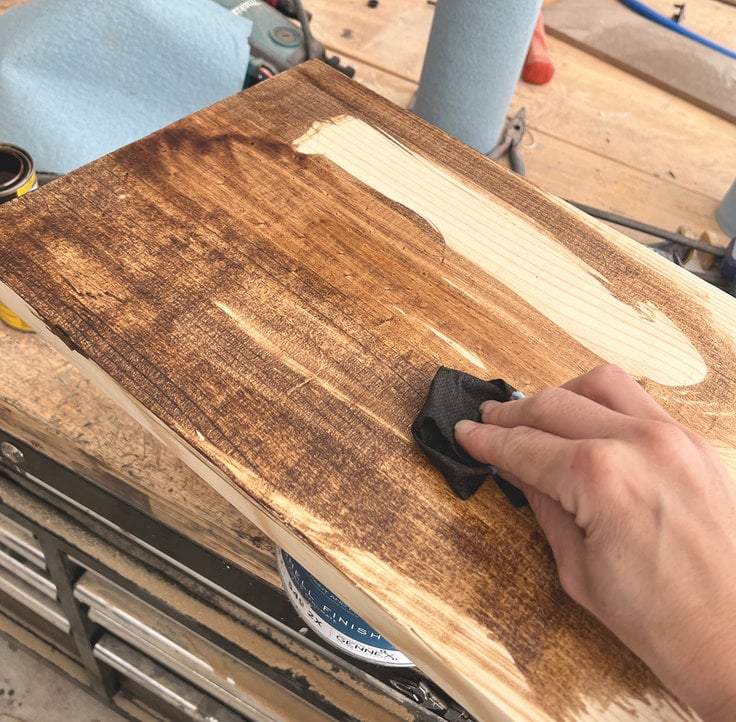
This isn’t 100% necessary, but I wanted my sign to look rustic and weathered. To do this I needed to create layers of finish as though the wood was used before.
I coated the board with Minwax Provincial stain and then removed the excess with a rag.
Once that was dry, I lightly sanded it with 120 grit sandpaper.
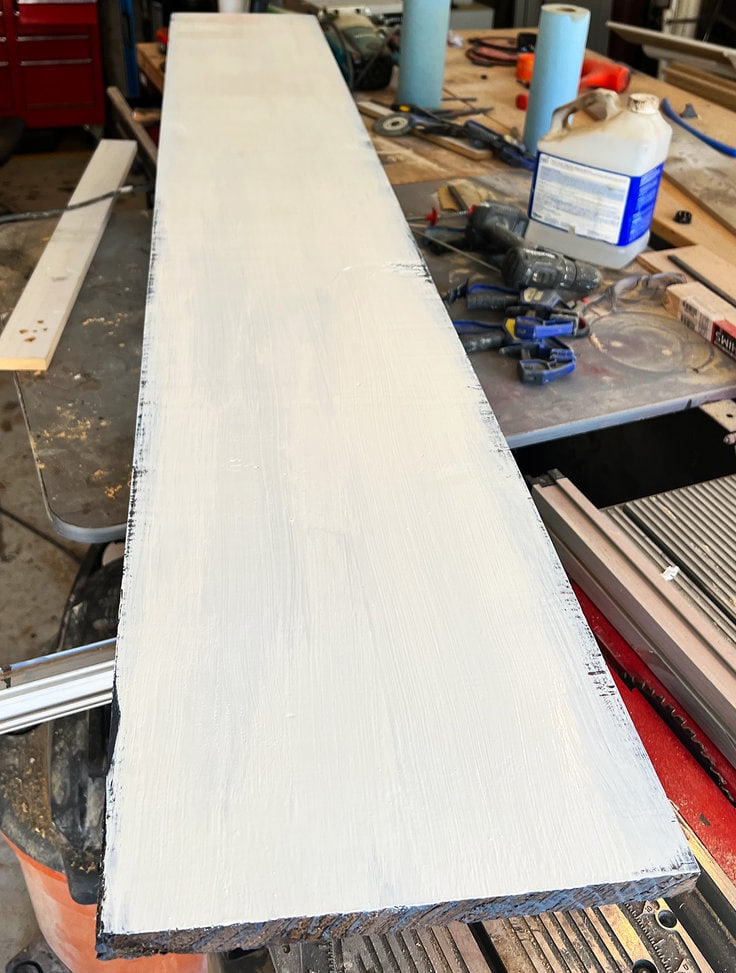
Then, I painted the front of the board white. While the board dried I cut my Merry and Bright Porch Sign svg file.

Download the free Cut file to make your holiday porch sign
Download and unzip the Merry and Bright Holiday Porch sign file (see instructions above for how to get yours for FREE!). You will have three separate files to cut. If you have a Cricut, all three files can be added to your canvas and the design software will send each section to a separate cutting mat. The porch sign files are labeled for easy reference: top, middle and bottom.
Cut the Merry and Bright Holiday Porch Sign Design
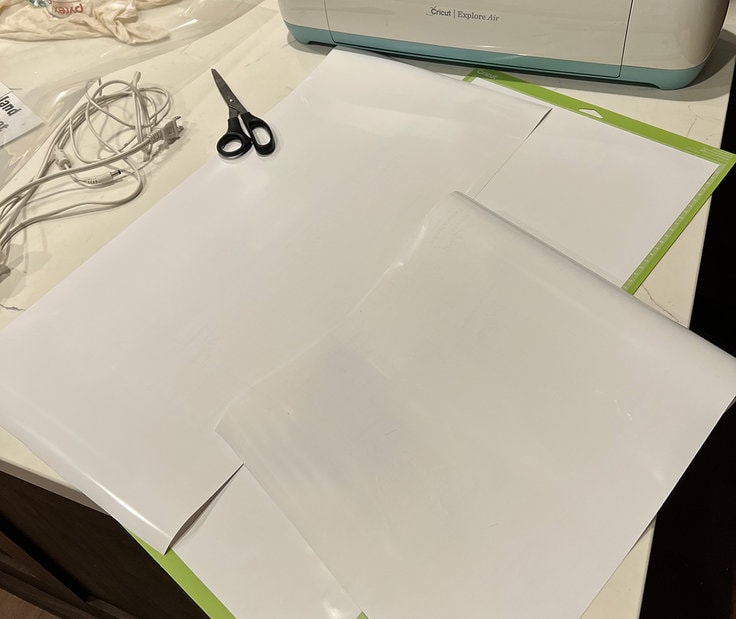
Prepare your vinyl by cutting 2 – 12″ x 24″ and 1 – 12″ x 12″ pieces and place them on your cutting mat.
Upload the svg files in to your design software that works with your Cricut/Silhouette. Add the top, middle and bottom designs onto a single canvas. Weld each individual section together. This isn’t as important for the top two sections as it is for the wording on the third section.
Send the Merry and Bright holiday porch sign design to the electronic cutter and cut out the design.
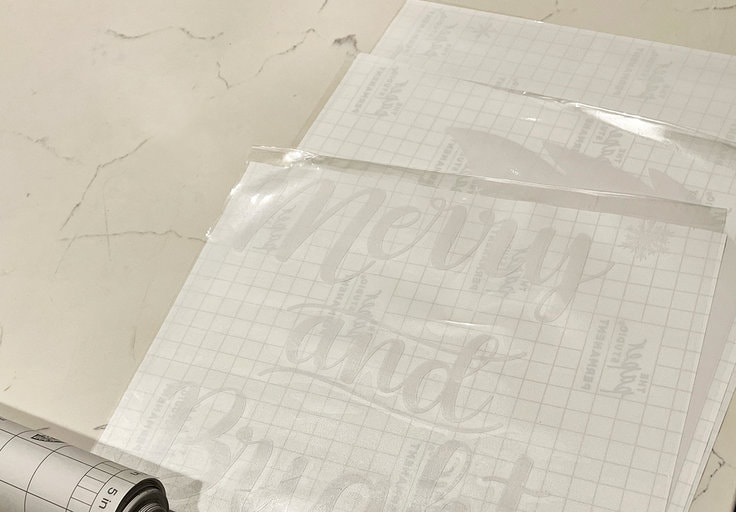
Weed your vinyl cut outs.
Transfer The Vinyl onto the Wood Board
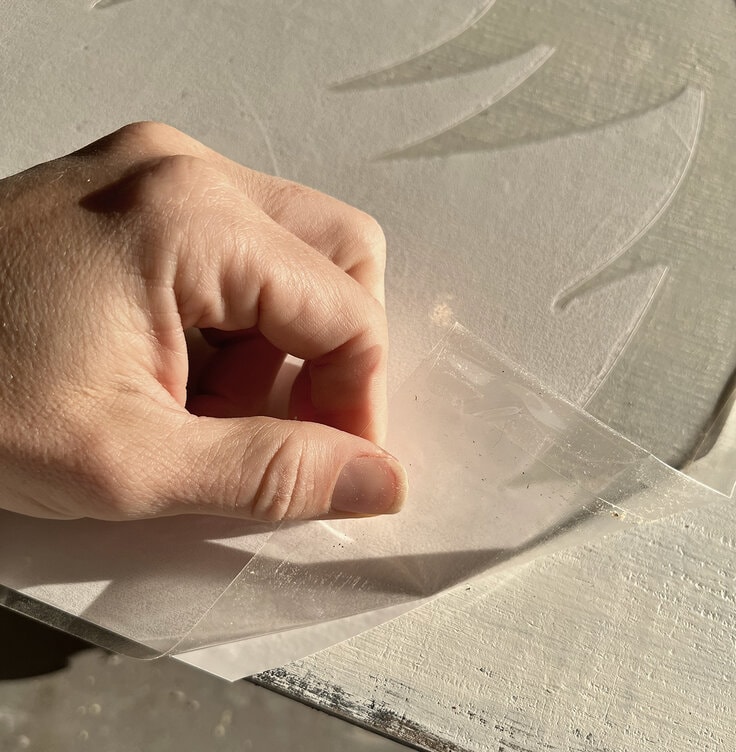
Place transfer tape over your cut designs.
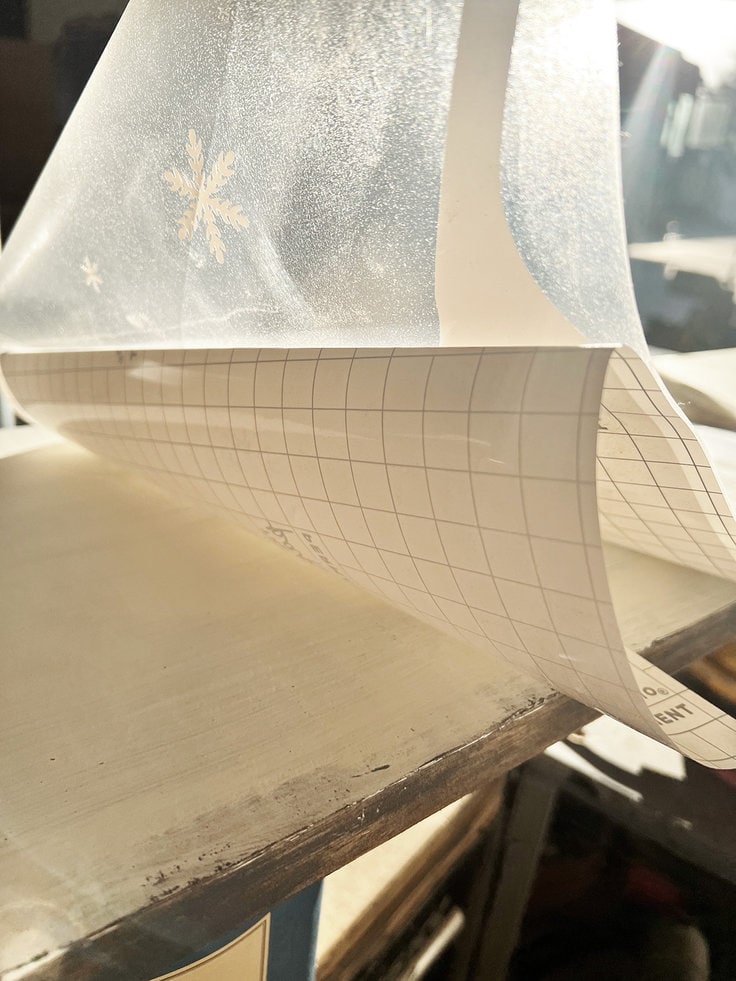
Transfer the holiday porch sign cut files onto your board, working from the top down.
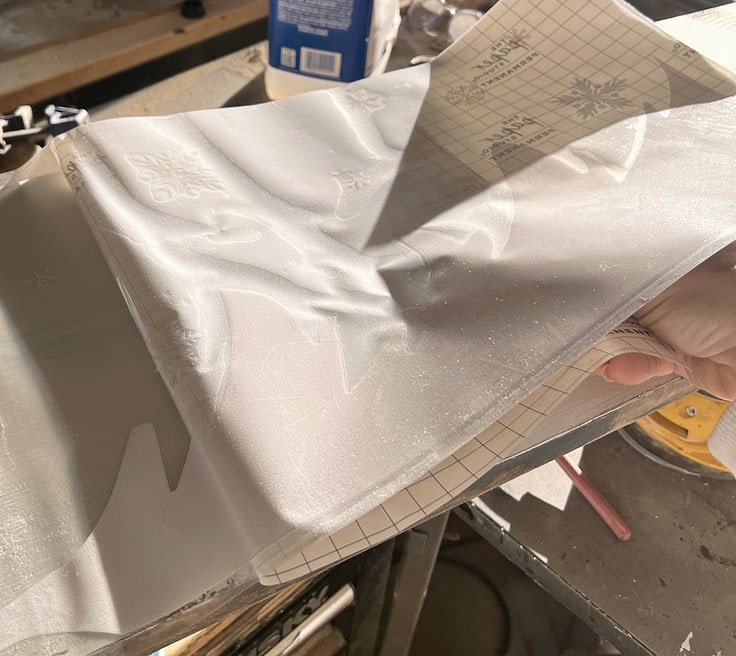
Once the design is transferred, press the design’s edges onto the board with your hand.
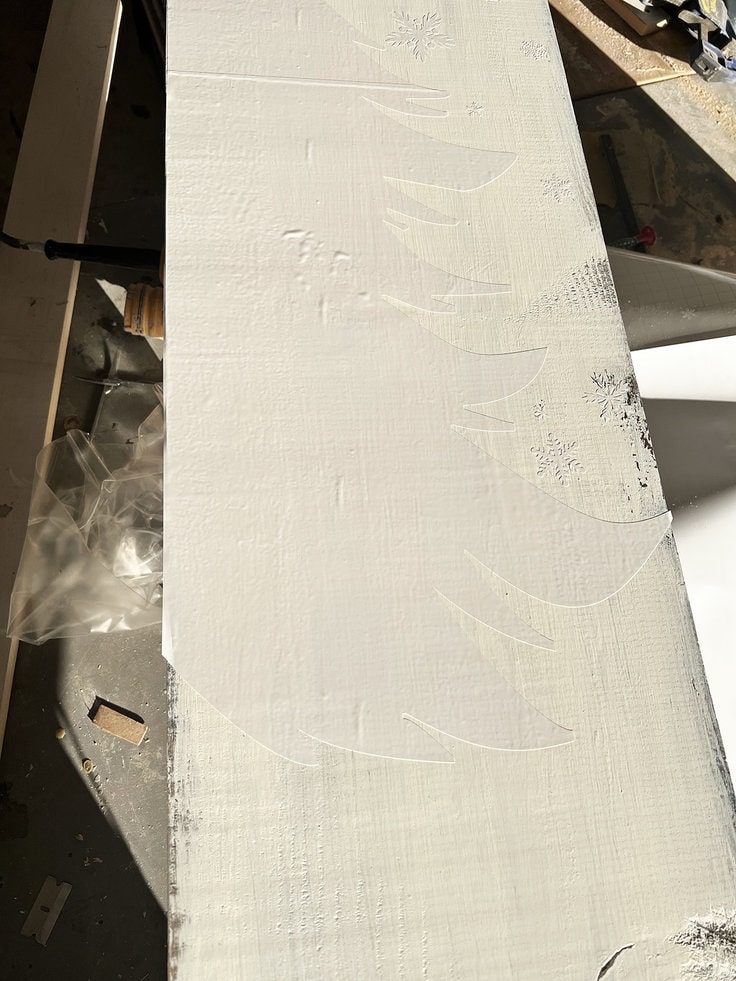
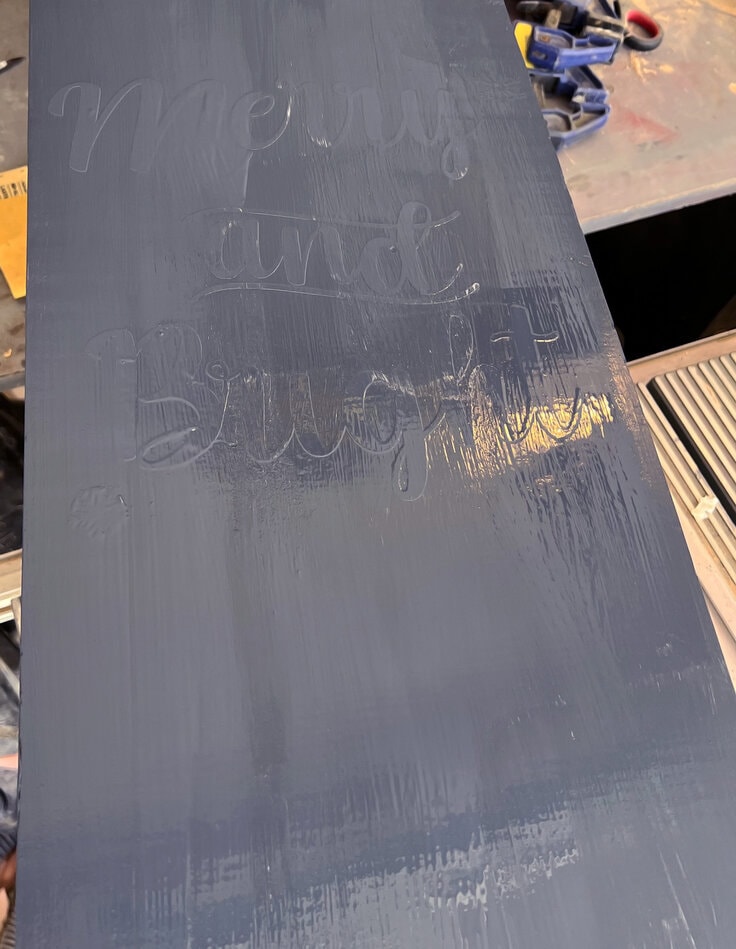
Paint the holiday porch sign
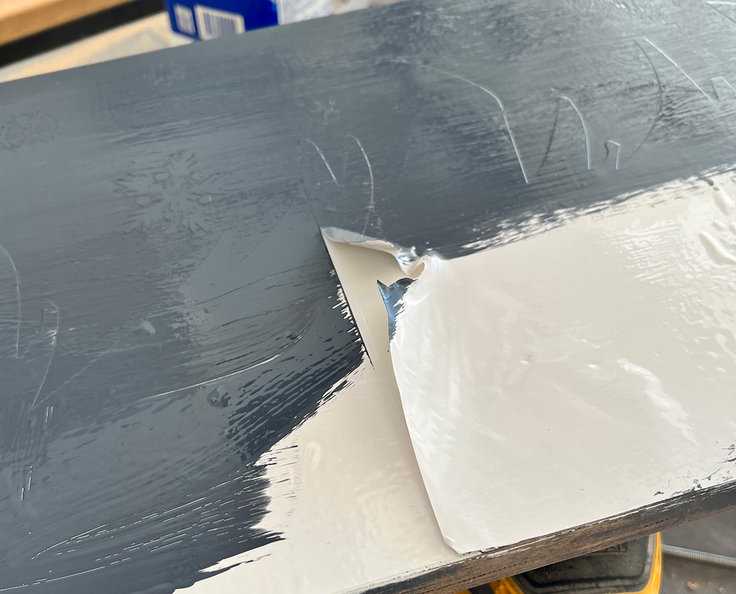
Paint over all the white with navy blue paint. While the navy blue paint is still wet, remove the larger vinyl pieces. If at any point the edges start to pull off more paint then just the design, the paint has set and it’s too flexible to remove any more of the design.
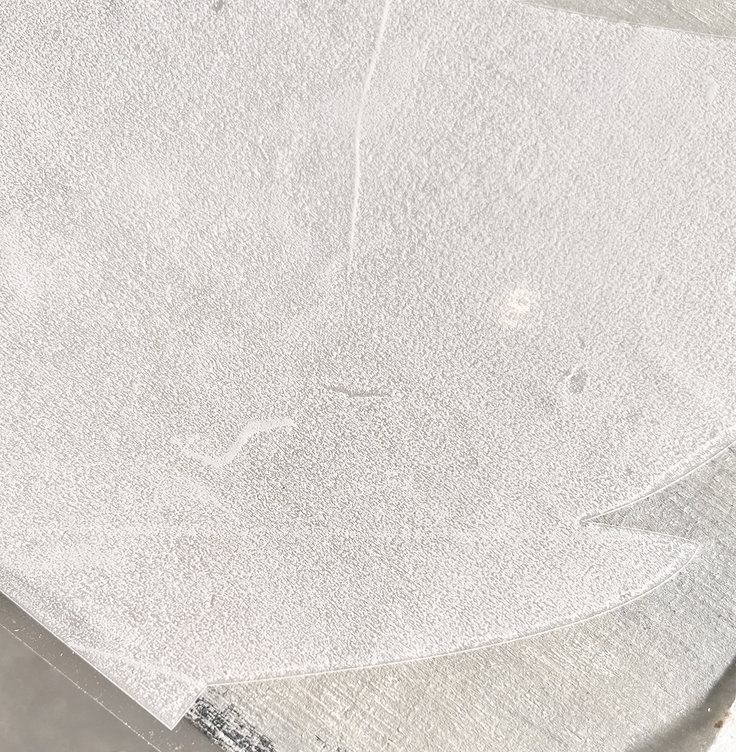
Then here’s the hard part, do not touch the sign again for at least three days. Let the navy paint completely harden. The small snowflakes can be hard to remove but after three or four days they peel away very nicely.
If it is colder where you live you will have a longer open time with the wet paint.
Attach your Merry and Bright christmas tree lights
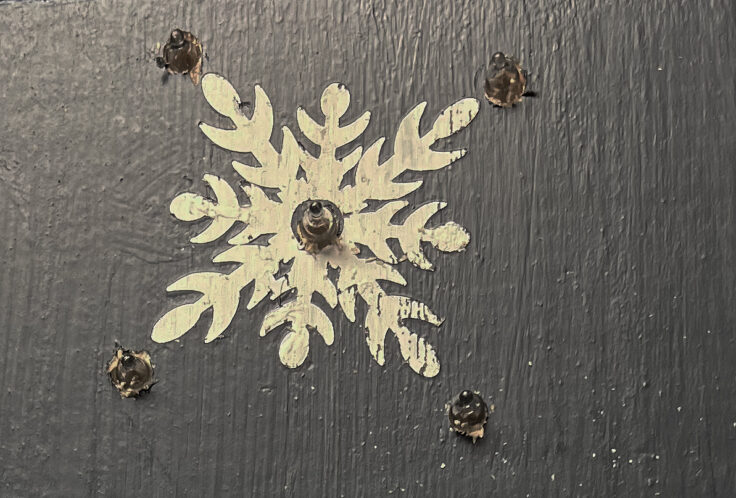
Drill holes into the wood board design where ever you would like lights to be. I drilled mine through the tree branches and the snowflakes.
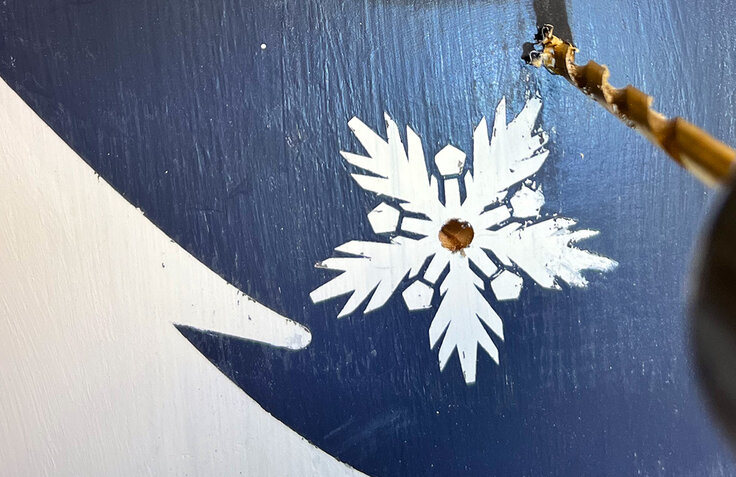
Turn the board over and using the larger drill bit, drill 1/4″ into the backside of each hole with the larger drill bit.
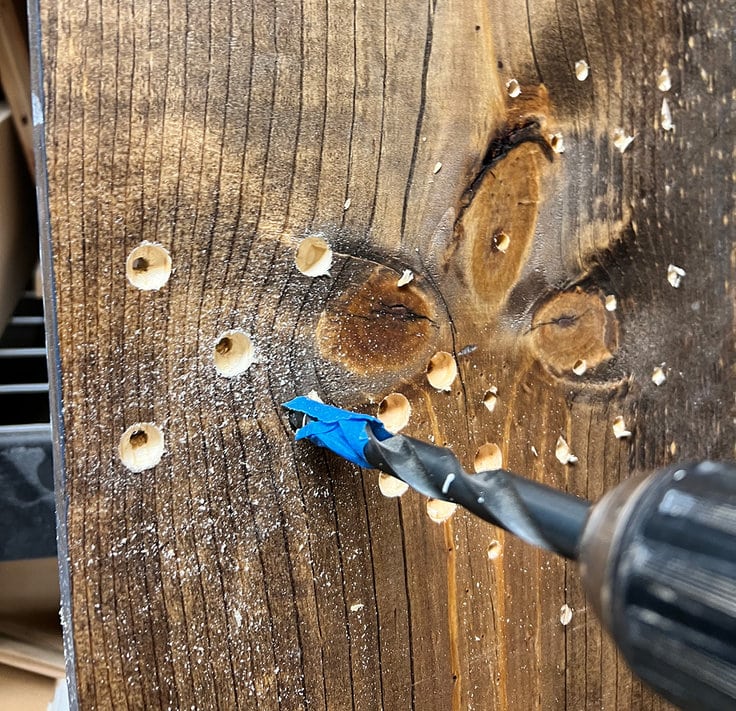
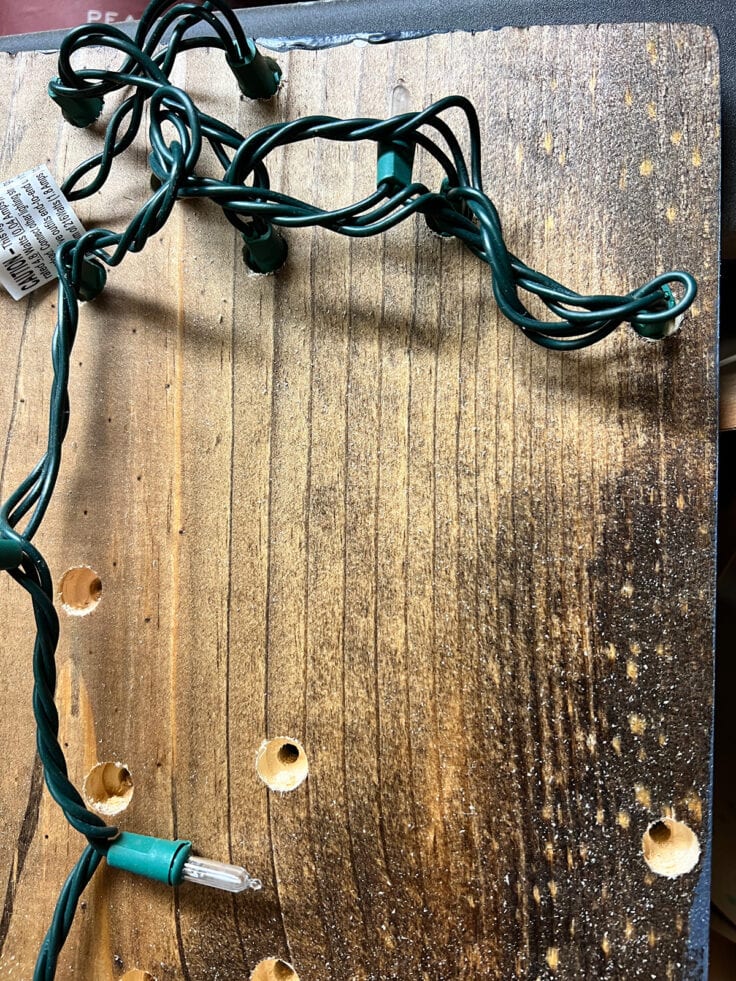
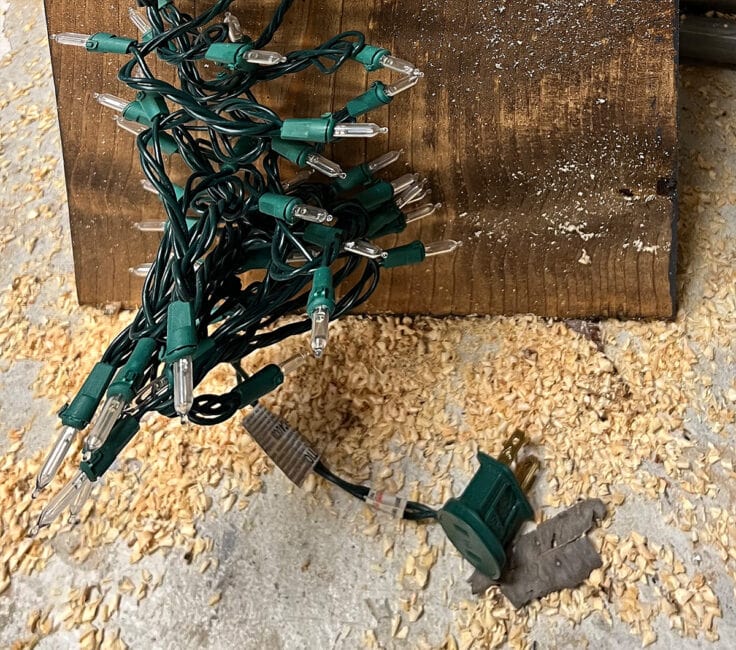
Once your holes are drilled, push your Christmas tree lights through the holes, working from top to bottom and ending with the plug at the bottom of the sign.
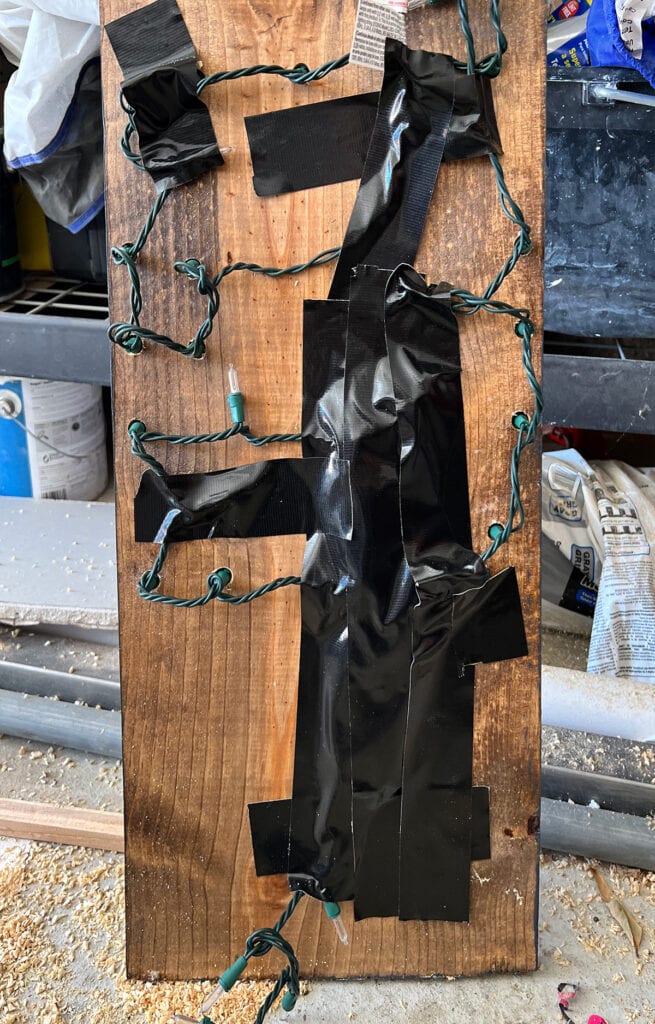
Adhere the bottom string of the lights to your sign with duct tape. This will give a nice finished look to the light string.
Plug your sign in and admire how beautiful it is.
Alternatives for those who do not have a cutting device
Don’t let not owning a Cricut or Silhouette keep you from making a Holiday Merry and Bright porch sign. In the download is also a pdf version of each cut file as well as the full assembled file.
You can print the Merry and Bright Holiday porch sign files out. Then create stencils to trace the design on to your board using graphite transfer paper or an X-acto blade. Or, cut the designs out, and adhere the paper right onto the board with some Modge Podge.


How to Make a Holiday Merry and Bright Porch Sign
Equipment
- 1 Drill
- 1 13/64" drill bit for wood
- 1 15/32" drill bit for wood
- 1 Paint brush or foam roller
- 1 Rag
- 1 12×24 cutting mat If you have 2 12×24 and 1 12×12 you can set all of your cutting mats up at once
- 1 Electronic Cutting Device Cricut or Silhouette
Supplies
- 60 inch Adhesive vinyl 12" x 60" Any color Reposition-able/Removable vinyl
- 8 oz Stain Provincial or Special Walnut; enough to coat your board on all four side. I used about 2 tablespoons
- 8 oz Navy Paint Sample pint from the store will work great
- 1 pint White paint Sample pint from the store will work great
- 1 piece 120 or 150 grit sand paper Sanding between paint coats. Optional to distress the edges of the board
- 1-2 strings Christmas tree lights clear – soft white light or warm white light
- 1x12x66" board Wood board 1×12 (true dimensions are .75" x 11.5" x 66") I used white wood but any inexpensive wood will do. Make sure your board is straight. My board came 72" long and I ended up keeping it this length. I added space to the design at the top and bottom. The zipped folder has additional snowflakes to fill in any extra spaces if necessary.
- 1 roll Transfer tape At least 11.5" wide x 60" long
- 1 roll Duct tape Brown or black
Instructions
- Prepare The Merry and Bright Holiday Porch Sign
- Have your board cut to 66" long if it isn't already. My store had boards 72" long. You can ask someone at the store to cut the board if you don't have a saw at home. Or you can keep it 72" if you want a taller board.
- Stain your board using a rag by rubbing it on, letting it sit for a couple of minutes, then removing the excess stain. Let the stain dry. Generally 2 hours.
- When the stain is dry, paint the front of the board white. You can use a brush or a roller. Let the board dry.
- Download and unzip the cut files. There will be three separate files labeled top, middle and bottom. The top two will need to be cut on 12×24" pieces of vinyl. The bottom 12×12".Cut two pieces of 12"x24" vinyl. Cut one piece of 12×12" vinyl.
- Upload the design files into your design software. Place all three layouts onto one canvas. Weld the third section together so that the letters cut out correctly. Join the Top section to itself, and same for the Middle section so that the design software doesn't separate the snowflakes from the design when cutting, but instead cuts each section of the design together.
- Cut your Merry and Bright Holiday Porch Sign File according to your machine's directions for vinyl material.
- Weed your vinyl and place transfer tape over the designs.
- Transfer your design onto your board pressing all the edges down as you go. Work from the top down: the design is based off of starting at the top and lining to the left side of the board.
- Paint over the front of the board with navy blue paint, covering as much of the white as you can and dry brushing the edges with navy blue paint.
- Remove the vinyl from the board. It is easier to remove when the paint is dry. Wait at least three days before attempting to remove the vinyl from the board. If you have weeding tools use those. I have a metal dental tooth pick and it worked great. You can also use a large needle.
- If needed, lightly sand the board to add distressing. Touch up paint if necessary, but the distressing is part of the charm.
- Add the Christmas Lights to your Merry and Bright Porch Sign
- Using a 13/64" drill bit, drill holes in your sign. I placed mine in the tree branches and centers of the snowflakes.
- Flip your board over and drill 1/4" down into the center of each hole with the 15/32" drill bit. Marking the drill bit with a piece of tape 1/4" in from the end can help you not drill too deeply.
- Take your Christmas tree light string and press the lights through each of the holes, working top to bottom. Make sure the plug will be at the bottom of your sign.
- Secure the end of your light string to your board with duct tape. you can also place tape on either side of each light if you like.
- Optional: You can seal the board with polyurethane. This will also protect it from the elements and make it last longer.
Love the ideas you see here on Ideas for the Home by Kenarry®? Subscribe today to get our FREE DIY & Craft Planning Calendar, plus our weekly Ideas in Your Inbox newsletter filled with creative tips and exclusive offers!
What’s Next?
If you enjoyed learning how to make your own Merry and Bright Holiday porch sign then you’ll enjoy these fun vinyl transfer and printable crafts too.
Make your own vinyl polka dot wall decals

How to Build a Frame and Stretch Canvas

You may also enjoy these Christmas Holiday Season Decor ideas for your porch and home on Ideas for the Home by Kenarry® –